Table of Contents
Advertisement
Advertisement
Table of Contents

Related Manuals for MAGIMIX LE MINI PLUS


Summary of Contents for MAGIMIX LE MINI PLUS
- Page 1 Le Mini Plus Le Mini Plus Le Mini Plus...
-
Page 2: Table Of Contents
Fitting the bowl Fitting the accessories Removing the bowls and accessories Using the citrus press Cleaning How to work the MAGIMIX Fundamental rules How to use the bowls: examples How to use the discs: examples How to read the recipes... -
Page 3: Important Safeguards
IMPORTANT SAFEGUARDS When using electrical appliances, basic safety precautions should always be followed including the following: Read all instructions. To protect against risk of electrical shock do not immerse the food processor in water or any other liquid. Close supervision is necessary when any appliance is used by or near children. Unplug from outlet when not in use, before putting on or taking off parts, and before cleaning. - Page 4 IMPORTANT SAFEGUARDS • Check that the voltage of your household current corresponds to that shown on the identification plate. • Your appliance must always be plugged into a grounded socket. • This machine must never be left running unattended, even though you do not need to keep your finger pressed on any of the buttons.
-
Page 5: Description
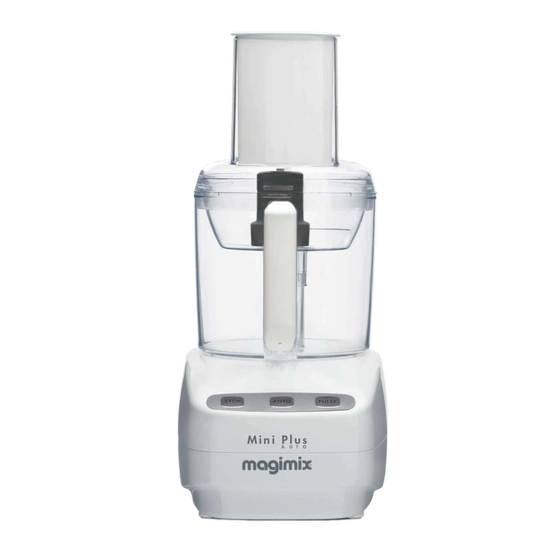
DESCRIPTION Pusher Feed tube Locking mechanism Mini Bowl Bowl Handle Motor shaft Control panel Motor unit WARNING BEFORE USING YOUR APPLIANCE • Please ensure that the voltage indicated on the base of the machine corresponds with the mains voltage in your home. •... -
Page 6: Standard Accessories
STANDARD ACCESSORIES Stainless steel Reversible stainless steel double-bladed knife. slicing / grating disc and disc support. 4-mm grating disc Egg whisk / Spatula and disc support. Mini Bowl with stainless steel Citrus press with anti-splash arm and 2 double-bladed knife. cones for small and large fruit (1 cone fits inside the other) -
Page 7: Fitting The Bowl
FITTING THE BOWL 1. Place the bowl on the motor unit with the 2. Turn the bowl anti-clockwise as far as it will go making sure it firmly locks into handle to the left hand side. position. The handle will now be at the centre of the motor unit. -
Page 8: Fitting The Accessories
FITTING THE ACCESSORIES Stainless steel blade: place the blade Discs: place the selected disc on the directly in the bowl, over the motor shaft. support, turning it gently in an anti- Put the lid on, and lock into position. clockwise direction. To slice: place the disc with its slicing To grate: Place the disc with its grating edge facing upwards. - Page 9 FITTING THE ACCESSORIES Egg whisk: place the egg whisk directly 1. Mini Bowl: fit over the central spindle in the bowl on the motor shaft. inside the large bowl. Put the lid, on and lock it into position. 2. The small metal blade also fits onto the 3.
-
Page 10: Removing The Bowls And Accessories
REMOVING THE BOWLS AND ACCESSORIES 1. Stop the motor and remove the lid by 2. You can then lift out the Mini Bowl, turning it clockwise. keeping the Mini-blade inside. 3. Carefully remove the Mini-blade, before 4. Carefully remove the blade, holding the putting the Mini Bowl down. -
Page 11: Using The Citrus Press
USING THE CITRUS PRESS 2. The citrus press fits on top of the bowl 1. Place the hinged end of the anti-splash arm on the rim of the filter basket (to the and, like the lid, has a locking pin. Turn right of the locking device), then press the filter basket anti-clockwise until firmly on the base of the clip at the bottom... -
Page 12: Cleaning
CLEANING Use a soft sponge with hot water To clean the bases of the stainless steel and washing-up liquid to clean the blade and the egg whisk, use the short attachments. If using a dishwasher, select side of the spatula. a short, low temperature programme. -
Page 13: How To Work The Magimix
HOW TO WORK THE MAGIMIX WARNING • The machine is fitted with a double safety mechanism. If the bowl and lid are not correctly loc- ked into position the machine will not start. • If you cannot twist the lid to close it, it means that the bowl is not in the correct position. Remove the lid and, making sure the bowl is fitted correctly onto the base, turn it anti- clockwise as far as it will go. -
Page 14: Fundamental Rules
FUNDAMENTAL RULES Never put any utensils or objects down Never use your hand to push the food the feed tube. down the feed tube. Maxi Never attempt to chop bones (even small Liquids: Never fill the bowl more ones). The machine is not intended for this than one-third full. - Page 15 FUNDAMENTAL RULES The bowls have been designed to When using the Main Bowl or the withstand hot liquids. Mini Bowl you can add either liquids or other ingredients through the feed tube. The lid must be released before trying to Never exert too much pressure on the pusher when using the discs, otherwise remove the bowl.
- Page 16 FUNDAMENTAL RULES Use the spatula to scrape out the bottom Hold the blade when tipping out the and the sides of the bowl. contents of the bowl. WARNING Mini Bowl • The "smooth" edge of the blade may become blunt if it frequently comes into contact with certain herbs and hard food such as hazelnuts.
-
Page 17: How To Use The Bowls: Examples
HOW TO USE THE BOWLS: EXAMPLES Shortcrust Pastry Chopped herbs Pureed fruit Mayonnaise Chopped meat Chopped fish Chopped onions, shallots or garlic Crushed ice... -
Page 18: How To Use The Discs: Examples
HOW TO USE THE DISCS: EXAMPLES Cabbage Leeks Potatoes Cheese Cucumbers Tomatoes Carrots Apples... -
Page 19: How To Read The Recipes
HOW TO READ THE RECIPES In order to make them accessible to everyone, our selection of recipes are easy to follow and cheap to make. They do not require any particular skills. To help you use your Mini Plus, you will find the following indications alongside each recipe: •...
Need help?
Do you have a question about the LE MINI PLUS and is the answer not in the manual?
Questions and answers