
Related Manuals for EdilKamin WINDO 120


Summary of Contents for EdilKamin WINDO 120
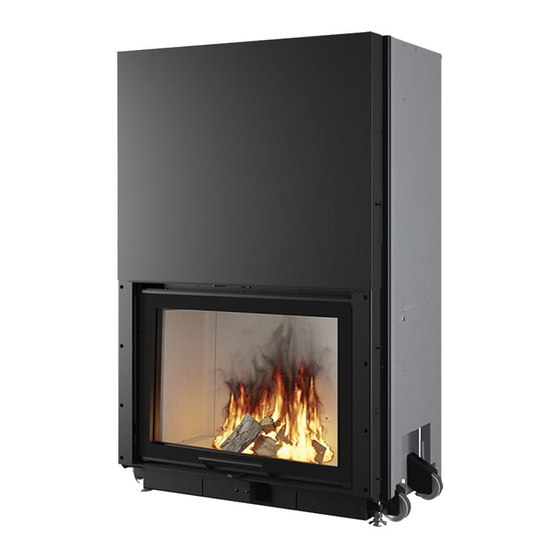
- Page 1 WINDO 70 WINDO 90 WINDO 100 WOOD FIREPLACE WINDO120 Installation, use and maintenance...
-
Page 2: Table Of Contents
2:2004+AC:2006+AC:2007 Wood Fireplace trademark EDILKAMIN, called WINDO 70 Dop 182 WINDO 90 Dop 187 WINDO 100 Dop 189 WINDO120 Dop 190 Not all versions are available for all countries. The liability of Edilkamin is limited to the product supply only. - Page 3 If you lose it, you can request a copy or download it installer. from www.edilkamin.com The warranty conditions are given in the warranty After unpacking the product, check the condition and certificate accompanying the product.
-
Page 4: Safety Information
• fixing up and irreversible changes to the colour of the paint on the metal parts. Edilkamin or the retai- ler cannot be held liable. • cleaning the hot fireplace. DO NOT EXTRACT HOT. -
Page 5: Introducing The Range
INTRODUCING THE RANGE The Windo range shown in this manual is made up of several models Windo 70 N - Windo 90 N - Windo 100 N - Windo 120 N models can be ventilated with 3 distinct accessories (ask the dealer) -
Page 6: General Information (Technical Data, Dimensions )
WINDO 100 WINDO 120 Nominal power Temperature of fumes on exit from °C the discharge pipe Minimum draught Fume flow capacity 17,7 18,9 Intermittent mode combustion device EDILKAMIN s.p.a. reserves the right to change the products at its discretion without notice. - Page 7 DIMENSIONS WINDO 70/ WINDO 90 dimensions cm glass dimensions 70x51 (Windo70*) glass dimensions 90x67 (Windo 90) 70* /90 93*/113 Ø 18 cm smoke outlet Ø 14 cm: without kit Air difffuser Ø 10 cm : with kit Air difffuser...
- Page 8 DIMENSIONS WINDO 100/ WINDO 120 dimensions cm glass dimensions 100x51 (Windo 100*) glass dimensions 120x51 (Windo 120) 100* /120 123* / 143 58,7 58,7 Ø 18 cm smoke outlet Ø 14 cm: without kit Air difffuser Ø 10 cm : with kit Air difffuser...
-
Page 9: Installation
INSTALLATION PREPARATION AND UNPACKING The materials composing the packaging are not toxic or harmful, therefore no particular disposal processes are The materials composing the packaging are not toxic or harmful, therefore no particular disposal processes are required. required. Storage, disposal and any recycling is the responsibility of the end user in compliance with the laws in force on the Storage, disposal and any recycling is the responsibility of the end user in compliance with the laws in force on the matter. - Page 10 INSTALLATION HANDLING OF THE PRODUCT SHIFTING OF THE PRODUCT WITH WHEELS NEAR THE INSTALLATION POSITION The fireplace is equipped with FOUR wheels (B) PICK-UP POINTS FOR HANDLING Screw on the feet to use the wheels. The monobloc is equipped with four rings to facilitate its transport.
- Page 11 The packaging comprises a single item containing the following: Description Number in Quantity the figure below Fireplace Side and rear refractory elements for Windo 70 / Windo 90-100-120 Anti-corrosion discs *R2 unions (3)* for ducting in the version without ventilation kit Ø 140 mm Handle for hatch lifting...
- Page 12 INSTALLATION “LOOSEN THE LOCKING SCREWS ON THE SIDES IN ORDER TO LIFT THE DOOR LOOSEN THE SCREWS ONLY AFTER THE PRODUCT HAS BEEN POSITIONED DO NOT SHIFT THE PRODUCT WITHOUT THE LOCKING SCREWS” locking screws...
- Page 13 INSTALLATION INTERNAL REFRACTORY ELEMENTS The product is delivered only with the fire beds installed. the deflector (E) is not mounted. Assembly sequence for REFRACTORY ELEMENTS 1) Position the LH SIDE element 2) Position the BOTTOM element 3) Position the RH SIDE element 4) Position the deflector (E) Fit the sides first and then the bottom on windo 120 ADJUSTABLE SHUTTER...
- Page 14 INSTALLATION SELF-CLOSING DOOR SELF-CLOSING DOOR The fireplace is delivered with the door balanced, that is, it does not drop automatically once raised. The fireplace is delivered with the door balanced, that is, it does not drop automatically once raised. To make the door self-closing, one or more plates (P) must be applied to the inner frame for the door. To make the door self-closing, one or more plates (P) must be applied to the inner frame for the door.
- Page 15 INSTALLATION INTRODUCTION ON INSTALLATION INTRODUCTION ON INSTALLATION Checking the suitability of the installation Remember that: Remember that: premises • • the product must be installed by qualified staff the product must be installed by qualified staff • The volume of the room must be over 40 m who can issue a Declaration of Conformity who can issue a Declaration of Conformity •...
- Page 16 The product must be installed in accordance with the following safety instructions (dimension mm): Windo 70 Windo 90 Rear = 200 Rear = 200...
- Page 17 INSTALLATION CHIMNEY SYSTEM CHIMNEY SYSTEM (Smoke channel, chimney flue and chimney (Smoke channel, chimney flue and chimney stack) stack) This chapter is drafted according to the European Standards EN 13384, EN 1443, EN 1856, EN 1457. The installation technicians must take into consideration these and any other local standards.
- Page 18 INSTALLATION THE SMOKE CHANNEL THE SMOKE CHANNEL EXTERNAL AIR INTAKE • if in metal must have a CE marking (EN 1856-2) or To re-integrate burnt oxygen during product fun- similar national law; ctioning, you need to have an installation premises •...
- Page 19 INSTALLATION EXTERNAL AIR INTAKE To re-integrate burnt oxygen during product fun- ctioning, you need to have an installation premises suitable for the external air intake. In accordance with local regulations, the air intake can be mounted outside or in suitable rooms not subject to depression.
- Page 20 INSTALLATION: NATURAL CONVECTION WINDO N without ventilation kit WINDO N without ventilation kit The ambient air enters the structure through openings The ambient air enters the structure through openings along the lower section of the fifi replace casing (1) along the lower section of the fifi replace casing (1) The openings on the fifi replace casing are initially The openings on the fifi replace casing are initially closed and must be opened by removing the pre-cut...
- Page 21 INSTALLATION FOR VENTILATED MODELS, ALWAYS CONNECT THE PRODUCT SAFELY TO AN EARTH CONTACT, IN ACCORDANCE WITH THE REGULATIONS IN FORCE. Further details are provided in the assembly instructions supplied with the kit itself. Circulation with Kit Air Diffuser The vents are not included in the Air Kit Diffuser and you can choose the one of the four models available and described which best suits your needs at the retailer.
- Page 22 INSTALLATION - VENTILATED AIR VENTS - SIDE VENTILATION KIT with regulator and remote control Contents: air box, fan, electronic regulator, 2-way fitting, 2 R2 flanges (compatible pipe for outdoor air intake: Ø 14 code 76790). Automatic operation, manual start, temperature probe and remote control...
- Page 23 INSTALLATION Verify that the product works properly before Verify that the product works properly before Facings, gather hood and vents Facings, gather hood and vents applying the cladding. applying the cladding. Face the product only after having completed the Face the product only after having completed the following steps: following steps: In particular, check the following:...
- Page 24 (1) • n° 6 screws (2) To assemble it: • secure the brackets to the fireplace structure; • tighten the screws Internal dimension: Windo 70: cm 72x55h Windo 90: cm 92x71h Windo 100: cm 102x55h Windo 120: cm 122x55h...
-
Page 25: Instructions For Use
The door locking ADJUSTER LEVER is located on the top part. With the handle, the Edilkamin system allows the user to choose whether to use the fixed handle or the With the handle, the Edilkamin system allows the user to choose whether to use the fixed handle or the detachable handle.”... - Page 26 INSTRUCTIONS FOR USE AIR CONTROL AIR CONTROL Shifting the air limiter lever allows for regulating the amount of combustion air entering the combustion chamber and Shifting the air limiter lever allows for regulating the amount of combustion air entering the combustion chamber and post combustion post combustion Description...
- Page 27 With the almost completely consumed to embers. With the paint on the metal parts for which Edilkamin or the glove supplied, slowly open (to avoid formation of glove supplied, slowly open (to avoid formation of retailer cannot be held liable.
- Page 28 ODOURS On first ignition, there may be a slight smell of paint, Edilkamin or the retailer cannot be held liable for which will disappear in a short time. damage caused as described above...
-
Page 29: Maintenance
MAINTENANCE CLEANING THE GLASS CLEANING THE GLASS Cleaning the external parts The covering must be clean without using aggressive Open the product with the bottom-hung Open the product with the bottom-hung detergents. Do not wet with cold water when the door, as shown previously (unlock the door, as shown previously (unlock the covering is hot because the thermal shock could... -
Page 30: In The Event Of Problems
IN THE EVENT OF PROBLEMS IN THE EVENT OF PROBLEMS 1) In case of smoke leaking from the fireplace hearth, check if: Installation is correct (smoke channel, chimney flue, stack, air intake). The wood used is dry.the door was opened too quickly 2) In the event of uncontrolled combustion, check if: The seals of the fireplace are intact:... - Page 32 *942109-GB* w w w . e d i l k a m i n . c o m cod 942109-GB 07.20/A...
Need help?
Do you have a question about the WINDO 120 and is the answer not in the manual?
Questions and answers