Table of Contents
Advertisement
Quick Links
BATTCAR INSTALLATION MANUAL
Installation manual - Intended for specialized personnel or expert users
Please read these instructions carefully before installing, servicing, or operating the equipment.
This manual may be modified without notice. See: www.harken.com/manuals for updated versions.
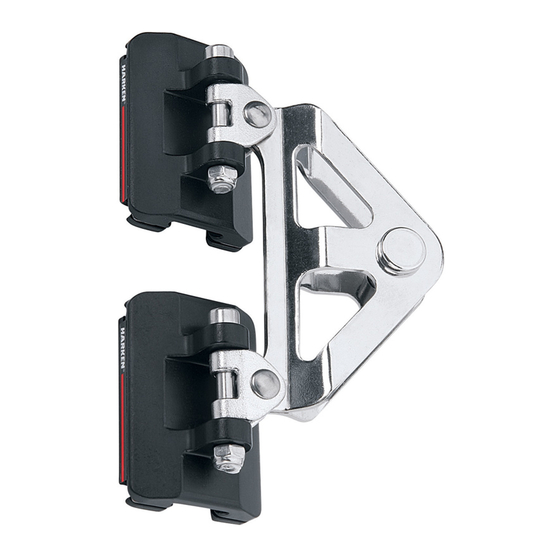
System AA
Preassembly (drill & tap)
Installation (drill & tap)
Operation (slug mount/drill & tap)
Load cars on track without sail
Maintenance (slug mount/drill & tap)
Troubleshooting - installation/operation
PLEASE SAVE THESE INSTRUCTIONS
4247 10/14
2
3
4
4
4
4 - 5
6
7
8 - 10
10
4, 11
11
11
11 - 12
13
14
14
15
16
16
16
16
17
17
17
18
18
Advertisement
Table of Contents

Related Manuals for Harken 3815


Summary of Contents for Harken 3815
-
Page 1: Table Of Contents
Distance between atachment points/reef points Attaching sail to intermediate cars Troubleshooting – installation/operation Please read these instructions carefully before installing, servicing, or operating the equipment. This manual may be modified without notice. See: www.harken.com/manuals for updated versions. PLEASE SAVE THESE INSTRUCTIONS... -
Page 2: Introduction
Purpose Harken Battcars are designed to reduce the size of or completely drop the mainsail on a sailboat so wind has little effect on the sail. Use of this product for other than normal sailboat applications is not covered by the limited warranty. -
Page 3: Preassembly (Slug Mount/Drill & Tap)
Preassembly – CB System (Slug Mount/Drill & Tap) Parts Batten cars without receptacle Spare car 3813 screw/nut 3816 Screwpin endstop kit Track mounting kit Screwpin endstop kit 3821, 3822, 3823 3818, 3819, 3820 3837 (mounting slug method) (mounting slug method) (drill &... -
Page 4: Tools
See page 12 - 13. 1. Mainsail Headboard A. Drill new halyard location B. Drill Attachment to accept clevis pin for 3813 headboard car coupler. 2. Batten receptacle on sail to accept 10 mm threaded stud. Note: Harken does not supply receptacle. - Page 5 Pre-Assembly (Slug Mount) Top Track Length Round track length to nearest 1" (25 mm). Note: Chart is based on using 3817 track–length 2.05m (6'8 7/8") and 3821, 3822, or 3823 Endstop Kits–length 152.4 mm (6"). Total track length (as defined on page 3) Top track length 20'10"...
-
Page 6: Cutting Top Track To Length (Slug Mount Only)
Preassembly – CB System (Slug Mount) Cut Top Track to Length 1. Cut special length top track from 2.05 m (6'8 3/4") track. 2. Deburr cut. Slightly round track corners that will slide against mast. 3. Drill 4.5 m (3/16") top stop hole in cut end of track. Use existing hole if top track is 30 mm (1 3/16"). -
Page 7: Check Fit Of Mounting Slugs/Cars (Sug Mount Only)
Preassembly – CB System (Slug Mount) Check Fit of Mounting Slugs/Cars 67 mm (2 5/8") connector slug must fit feeder opening. File opening to make longer. Use halyard with retrieval line to hoist 67 mm (2 5/8") connector slug up mast to check for burrs in groove. Mast prebend: May require straightening before installation. - Page 8 Installation – CB System (Slug Mount) Install Track 1. Slip top track slugs into mast groove. Use 19 mm (3/4") mounting slug for top stop. Note: If top track is 30 mm (1 3/16"), use 67 mm (2 5/8") connector slug for top stop.
-
Page 9: Installation (Slug Mount)
Installation – CB System (Slug Mount) Install Track 4. Slide slugs into place with putty knife. Loosely install 4 mm x 20 mm screws. Tip: Use putty knife to see if screws are loose enough to slide in groove. Remember: Tracks may stick when reaching a spliced area on mast. 5. -
Page 10: 11. Install Screwpin Endstop Kit
Installation – CB System (Slug Mount) Install Track 7. Hold full-length track piece up to mast. Loosely install top screw. Use putty knife to slide additional slugs and connector slug into place. Loosely install all nineteen 4 mm x 20 mm screws. 8. -
Page 11: Parts
Track and Accessories Part No. Description Includes Purchase from Harken Screwpin endstop (a) 1 x 152 mm (6") end track with screwpin stop; (b) 1 x 2711 splice link; 3837 (c) 1 x H-28411C endstop (d) 1 x tube blue Loctite ®... - Page 12 Installation – CB System (Drill & Tap) Install Track 2. Drill track hole, holding drill perpendicular to mast face. Tap threads and install screws using blue Loctite ® Loctite is a trademark of Henkel 3. Align track at joints. Use 2711 splice links and round rods or dowels on outside of track to align during installation.
- Page 13 Luff cars use low-load black Delrin balls. ® ® Car Length Bearings Ball Ø Part Number Part Color Material Car Type per Car Balls/Set 3813 Headboard Cars 5 3/16 Brown Torlon 2708 3/16 ® 3814 Slider Intermediate Car 1 3/4 — — — —...
-
Page 14: Load Cars On Track With Sail
Operation – CB System (Slug Mount/Drill & Tap) Load Cars on Track Load Cars with Sail Line up car on guide portion of loader. Press car towards mast and carefully roll car onto track. Begin with upper cars and work down. Lost Balls Consult chart for ball type: Torlon or Delrin... -
Page 15: Load Sail On Cars
Operation – CB System (Slug Mount/Drill & Tap) Load Sail on Cars 1. Beginning with lower cars, use 4 mm hex wrench and 8 mm wrench or nut driver to attach sail to cars. Tighten locknut until bottom tip of fastener is flush with nut. -
Page 16: Car Maintenance/Cleaning
Maintenance – CB System (Slug Mount/Drill & Tap) Sail Removal/Lazy Jacks/Operating Precautions Car Maintenance/Cleaning Clean beginning of season, or if cars bind. Squirt detergent and water into ball bearings. Circulate by moving cars up and down. Let stand. To remove detergent, spray water into ball bearings and circulate. Clean tracks with detergent and water. -
Page 17: Sailmaker's Instructions (Slug Mount/Drill & Tap)
— 3816* *Batten receptacle not included Installing 3813 Headboard Coupler Car Assembly 3813 headboard coupler attaches to standard headboards—some headboard modification required. Maximum thickness of headboard plates and sail: 9/16" (14 mm) Halyard Attachment Hole Coupler Attachment Hole Use aft hole if headboard has two. -
Page 18: Distance Between Atachment Points/Reef Points
Battens and intermediate cars placed at sailmaker's discretion. Maximum distance between attachment points is 1.2 m to 1.35 m (4' to 4'6"). Distance may be slightly greater. Contact Harken to discuss sail reshaping to eliminate luff flutter. Note: Adding battens may reduce stack height by eliminating luff cars. - Page 19 Harken equipment is designed for minimal maintenance, but some maintenance is required for optimum and safest possible operation and to comply with the Harken limited warranty. In general, the most important aspect of maintenance is to keep your equipment clean by frequently flushing with fresh water.
- Page 20 Main Office and Harken Brandstore: Västmannagatan 81B SE-113 26 Stockholm Sweden Telephone: (46) 0303 61875 • Fax: (46) 0303 61876 Mailing address: Harken Sweden AB, Box 64, SE -440 30 Marstrand Web: harken.se • Email: harken@harken.se Harken UK, Ltd. Bearing House, Ampress Lane, Lymington, Hampshire S041 8LW, England Telephone: (44) 01590-689122 •...
- Page 21 Preassembly – CB System (Slug Mount/Drill & Tap) Parts Batten cars without receptacle Spare car 3813 screw/nut 3816 Screwpin endstop kit Track mounting kit Screwpin endstop kit 3821, 3822, 3823 3818, 3819, 3820 3837 (mounting slug method) (mounting slug method) (drill &...
Need help?
Do you have a question about the 3815 and is the answer not in the manual?
Questions and answers