Table of Contents
Advertisement
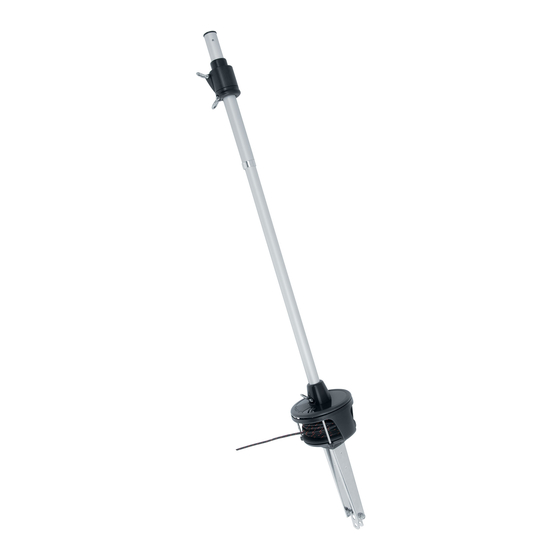
ESP JIB REEFING & FURLING
Installation Manual - Intended for specialized personnel or expert users
Please read these instructions carefully before installing, servicing, or operating the equipment.
This manual may be modified without notice. See: www.harken.com/manuals for updated versions.
Unit 0, 1
Preassembly
PLEASE SAVE THESE INSTRUCTIONS
5002 05/14
2 - 3
3
4 - 6
6
7 - 8
9
10
11 - 12
13 - 17
17
17 - 18
19 - 21
22
23 - 24
24
25
26
27
28 - 29
29
30
31
31
32
32
32
33
Advertisement
Table of Contents

Subscribe to Our Youtube Channel
Related Manuals for Harken Unit 1 ESP


Summary of Contents for Harken Unit 1 ESP
-
Page 1: Table Of Contents
Maintenance Clean/Inspect Storage Troubleshoot Product Registration Online Warranty/Product Registration Appendix Dimensions/Sailmaker's Instructions Please read these instructions carefully before installing, servicing, or operating the equipment. This manual may be modified without notice. See: www.harken.com/manuals for updated versions. PLEASE SAVE THESE INSTRUCTIONS... -
Page 2: Unit
The user must have appropriate training in order to use this product. Harken accepts no responsibility for damage or harm caused by not observing the safety requirements and instructions in this manual. See limited warranty, general warnings, and instructions in www.harken.com/manuals. -
Page 3: Specifications
Preassembly Specifications Online Product Registration www.harken.com/FurlingWarranty Upper measurement " point is to adjuster (271 mm) tube bushing 6. 7321.22 Medium Leg Kit Max Turnbuckle Length 1) Leg Kit with Toggle Assembly a. Leg Kit Collar Screw b. Collar c. Short, Medium or Long Leg d. -
Page 4: Parts List
Parts List Drum Box Leg Kit Relative Sizes Short Medium Long Short Leg Kit Halyard Swivel DO NOT USE with turnbuckle Adjuster Tube Clamp Screws Medium or Long Leg Kit Required for installation with turnbuckle Drum Assembly Blue Loctite ® Bow Shackles Drum Box Unit 0... - Page 5 Parts List Foil Set Trim cap Trim cap screws Adjuster 2 m Foils Top foil tube Foil screws Plastic connector wedges Connectors Feeder Connector bushings Red Loctite ® Foil Set Unit 0 Unit 1 Description Part Part Included Trim cap H-58490 H-55976 Trim cap screws...
-
Page 6: Tools
• Extra foil and connector if required. See pages 7 - 8. or damaged may break sud- • Harken Short Leg Kit with toggle. Do not use with turnbuckle. denly, causing an accident. • Harken Medium or Long Leg Kit with toggle. Required for turnbuckle. -
Page 7: Top Foil
Preassembly Top Foil Length Measure A and add to this chart Make sure upper and length chart below Alternate measurement points Measurement Inches of A and pin-to-pin Point are the same. 1.0* 24.0 TOP FOIL LENGTH WORKSHEET Total A+B+E+F+G Pin-to-Pin Length Subtract ABEFG *Add 1"... -
Page 8: Top Foil
Preassembly Top Foil Length Make sure upper Measure A and add to this chart Alternate measurement points and length chart below Measurement of A and pin-to-pin Point Inches are the same. 1.1* 23.6 TOP FOIL LENGTH WORKSHEET Total A+B+E+F+G Pin-to-Pin Length Subtract ABEFG *Add 1.1"... -
Page 9: Toggle Deductions/Stay Into Foil
Preassembly Toggle Deductions/Stay Into Foil Options Rigger supplied: Eye at lower end of stay or turnbuckle to mate with toggle. Use dimensions of Harken toggle below to build stay to correct length. Tip: Turnbuckles should be one-half to two-thirds open to allow shortening for new wire stretch and for fine-tuning mast rake. -
Page 10: Confirm Foil Length
Confirm foil length by laying foils alongside stay with turnbuckle components. Pull stay straight. Attach Harken toggle to bottom of stay. Adjust turnbuckle, if used, so that length of stay with Harken toggle will fit boat. Ideally, turnbuckle will be one-half to two-thirds open to allow for rig adjustment. Temporarily clamp short or long leg kit to bottom of unit. -
Page 11: Cutting/Drilling Top Foil
Assembly Cutting/Drilling Top Foil Determine top foil length using charts or by laying foils alongside wire. IMPORTANT! Confirm that you are using the correct unit size worksheet. Be sure to lay foils, lower unit, and leg kit alongside stay to confirm length before cutting. Use tape to mark foil. - Page 12 Assembly Cutting/Drilling Top Foil Measure from the end of the foil and put a mark showing hole distance from top of foil. Decimal Fraction Unit .59" " .98" 1" Tool: short tape measure Use center punch to start hole. Drill one of two holes for trim cap.
- Page 13 Assembly Foils/Connectors 1. Identify special length top foil with trim cap holes. Trim Cap Holes 2. Slide top foil and 2 m foils and connectors onto wire. 2a. Load connector so bushing cutouts facing up towards the top of stay. Note: On top foils under 10"...
-
Page 14: Foils/Connectors/Halyard Deflector
Assembly Foils/Connectors/Halyard Deflector 4. Put trim cap halves together over wire and tap in place. Tool: hammer 5. Secure with trim cap screws. Tool: Phillips screwdriver 6. If using halyard deflector, install above foil. Use red Loctite on screws. ® Halyard Deflector Red Loctite ®... - Page 15 Assembly Foils/Connectors 7. Hold plastic bushing halves in cutouts and over wire and insert up into foil. 7a. Make sure foil and connector screw holes are facing up. 7b. Make sure connector and foil are aligned. 7c. Hold plastic wedge in place with thumb as you insert into foil.
- Page 16 Assembly Foils/Connectors 9. Join lower part of connector to next foil. Put red Loctite on screw holes. Secure ® with foil screws. 10. Install connector bushings in top of adjuster tube and insert into 2 m foil. Adjuster Tube 10a. Make sure foil and adjuster tube screw holes are facing up.
-
Page 17: Halyard Swivel
Assembly Foils/Connectors/Halyard Swivel/Feeder/Drum Assembly 11. Place adjuster tube bushings over wire and insert into foils until tab snaps into holes on either side of adjuster tube. Tap in place. Tool: hammer 12. Slide halyard swivel onto foil so longer part is toward top of stay. 13. -
Page 18: Drum Assembly
® Secure with adjuster tube clamp screws. 16. Capture jaw/jaw toggle on eye using threaded crosspin. When using Harken rod adapter stud, be sure to use red Loctite and cotter pins ® to lock nosepiece into stud. -
Page 19: Leg Kit With Toggle Assembly
Assembly Leg Kit with Toggle Assembly 17. Slide one spacer on either side of jaw/jaw toggle. 18. Secure using cotter pins. Tools: slotted screwdriver, side cutters 19. Slip leg and washers onto threaded crosspin. ESP Unit 0, 1... - Page 20 Assembly Leg Kit with Toggle Assembly 19a. Make sure flat holes in leg line up with threaded crosspin flats. Line up flats 19b. Secure using washers and locknuts. Tools: Socket or Open End Wrench Unit Size 0, 1 10 mm If stay length is set, use side cutters or needlenose pliers to bend cotter pin to secure turnbuckle.
-
Page 21: Leg Kit With Toggle Assembly
Assembly Leg Kit with Toggle Assembly 21. Slip Leg Kit assembly onto neck of drum assembly and fit other collar. 22. Secure using Collar Screws. Tools: Hex Driver Unit Size 0, 1 5 mm 23. Push the assembled foils up toward the Approximate Space top of the stay leaving 1"... -
Page 22: Final
Assembly Final 24. Locate nearest group of three screw holes in adjuster tube, two for the foil and one for the feeder. Put blue Loctite in screw holes. Secure adjuster ® Blue Loctite ® tube with foil screws. Tool: slotted screwdriver 25. -
Page 23: Line To Cockpit/Line On Drum Assembly
Line to Cockpit Mount Lead Blocks Note: Harken lead blocks referenced below are an available option. Boat manufacturers may have alternate methods of running furling line to cockpit. Furling line can be led down either side of boat. If boat is in slip, consider mounting opposite dock. -
Page 24: Commissioning
Commissioning Line on Drum Assembly/Storm Sails Add Line to Drum Assembly Run line into drum assembly between guard posts and out hole in lower plate of spool. Exit opening in drum assembly as shown below. Tie a small overhand knot and pull it up tightly against spool. IMPORTANT! Do not run line through plastic opening in drum assembly. -
Page 25: Raise Sail
WARNING! Sail can become uncontrollable when raising in windy conditions, resulting in loss of footing. Choose wind conditions to match your experience and ability. If changing sails underway, take all safety precautions when working on the foredeck. See www.harken.com/manuals General Warnings and Instructions. -
Page 26: Check Halyards
Commissioning Check Halyards Check Halyards Once sail is raised, stand back from boat and use binoculars to make sure there is no interference from halyards. The jib halyard must exert a slight pull to the rear. This allows the foil to 8–10°... -
Page 27: Operation Check Halyards
They permit a very tight headstay to be eased when boat is not in use. For best performance, consider adding a backstay adjuster: either a block and tackle, a mechanical adjuster, or hydraulic adjuster like those offered by Harken. Remember to keep headstay tight for best performance when furling or reefing. -
Page 28: Furl/Reef
Uncleat furling line. Pull sheets to unfurl sail. IMPORTANT! Keep tension on furling line when unrolling sail so line spools tightly on drum. Use a Harken ratchet block or keep tension on the line by putting a single wrap of the furling line around a spare winch to provide drag on the line. This is very important when wind is blowing over 10 knots. -
Page 29: Secure Sail
Operation Reef/Secure Sail Reef A sail may be partially furled before you resume sailing. This is known as reefing. Tip: Place marks on foot of sail for a variety of reefed jib sizes. Place marks on jib lead track so lead block position matches reefed jib. -
Page 30: Adjust Turnbuckle
To use a halyard to hold foils lifted, tie a rolling hitch to the foils using another line or use the actual halyard if suitable. See www.harken.com/knots for tying resources. CAUTION! Foils have considerable weight and can drop and cut hands if placed underneath. -
Page 31: Maintenance
Clamp Screws WARNING! Parts can wear, loosen, or corrode and can break at load. Periodically inspect items listed below and any others as necessary. See www.harken.com/manuals General Warnings for additional safety information. Inspect 1) Unit for signs of chafe, wear, or damage. -
Page 32: Troubleshoot
Lead line into drum between guide posts. Line is wearing on plastic drum assembly Loctite is a trademark of Henkel AG & Company KGaA ® Warranty Online Product Registration www.harken.com/manuals www.harken.com/FurlingWarranty or call, write, email or fax Harken, Inc., Pewaukee, WI USA ESP Unit 0, 1... -
Page 33: Appendix
Appendix Dimensions/Sailmakers's Instructions Luff Length Note offsets above and below sail. If luff of sail is not long enough to put halyard swivel near top of headstay foil, a pendant must be added (see page 26). Tack Setback Note setback for tack shackle and cut the sail accordingly. Luff Tape Size - #6 ( "... - Page 36 Main Office and Harken Brandstore: Västmannagatan 81B SE-113 26 Stockholm Sweden Telephone: (46) 0303 61875 • Fax: (46) 0303 61876 Mailing address: Harken Sweden AB, Box 64, SE -440 30 Marstrand Web: harken.se • Email: harken@harken.se Harken UK, Ltd. Bearing House, Ampress Lane, Lymington, Hampshire S041 8LW, England Telephone: (44) 01590-689122 •...
Need help?
Do you have a question about the Unit 1 ESP and is the answer not in the manual?
Questions and answers