
Related Manuals for Seville Classics UltraGuard UHD20260


Summarization of Contents
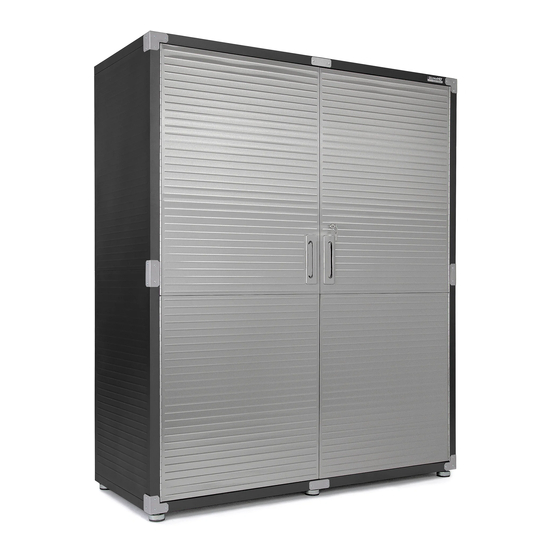
Assembly Instructions
Step 1: Install Left Side Panel (#1-A)
Assemble the left side panel by connecting upper and bottom parts with reinforcement.
Step 2: Install Right Side Panel (#2-A)
Assemble the right side panel by connecting upper and bottom parts with reinforcement.
Step 3: Install Left Door (#6-A)
Connect the left door's upper and bottom panels and attach the connection part.
Step 4: Install Right Door (#7-A)
Assemble the right door by connecting upper and bottom panels and attaching the connection part.
Step 5: Install Key Rod (#7-A3)
Insert and secure the key rod into the bottom tab hole of the right door.
Step 6: Install Top Panel (#3-A)
Attach connection parts to the top panels and secure them to the side panels.
Step 7: Install Bottom Panel (#4-A)
Assemble the bottom panel, including wheel reinforcement, and attach to side panels.
Step 8: Install Front Post (#12-A)
Attach the front post connection part and the front post to the cabinet structure.
Step 9: Install Back Post (#13-A)
Attach the back post connection part and the back post to the cabinet structure.
Step 10: Install Top Panel (#3-A) to Side Panels
Attach the assembled top panel to the left and right side panels.
Step 11: Install Bottom Panel (#4-A)
Attach the bottom panel to the left and right side panels, ensuring proper alignment.
Step 12: Install Back Post (#13-A)
Attach the back post to the middle back of the cabinet for structural support.
Step 13: Install Back Panels (#8, #9, #10, #11)
Install the four back panels onto the cabinet structure.
Step 14: Install Leveling Feet (#6)
Attach the leveling feet to the bottom of the cabinet for stability.
Step 15: Install Corner Protections (#15, #16, #17)
Secure corner protection pieces to the top, bottom, and sides of the cabinet.
Step 16: Install Front Post (#12-A)
Attach the front post to the front of the cabinet structure.
Step 17: Install Magnet (#23)
Place and secure magnets onto the top and bottom panels.
Step 18: Install Middle Shelves (#5)
Insert shelves into the cabinet by placing hooks into the support slots.
Step 19: Install Left and Right Door (#6-A, #7-A)
Attach the left and right doors to the side panels, allowing for adjustment.
Installing Wheels and Additional Shelves
Installing Wheels
Follow previous instructions to Step 14, but install wheels instead of leveling feet.
Installing Additional Shelves
Follow previous instructions to Step 18 to install extra shelves.
Need help?
Do you have a question about the UltraGuard UHD20260 and is the answer not in the manual?
Questions and answers