Table of Contents
Advertisement
Quick Links
Advertisement
Chapters
Table of Contents

Related Manuals for GORMAN-RUPP S4C


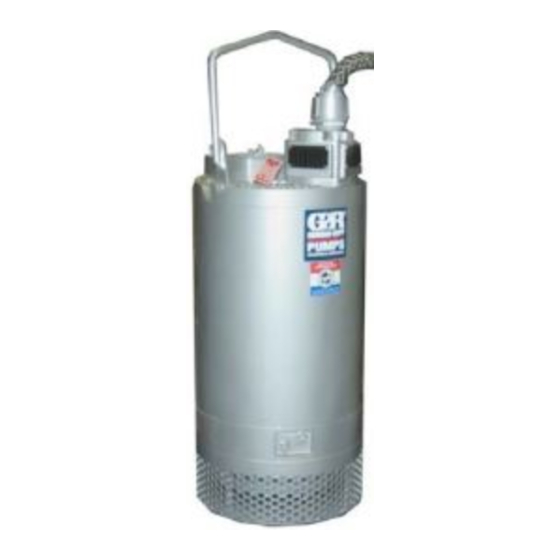
Summary of Contents for GORMAN-RUPP S4C
- Page 1 PUBLICATION NUMBER MR-04152 December 19, 1994 Rev. E 05‐15‐12 S SERIES PUMPS S4C, S4D and S4H All Materials And Voltages THE GORMAN‐RUPP COMPANY D MANSFIELD, OHIO www.grpumps.com GORMAN‐RUPP OF CANADA LIMITED ST. THOMAS, ONTARIO, CANADA Printed in U.S.A. 1995 The Gorman‐Rupp Company...
- Page 2 Register your new Gorman‐Rupp pump online at www.grpumps.com Valid serial number and e‐mail address required. RECORD YOUR PUMP MODEL AND SERIAL NUMBER Please record your pump model and serial number in the spaces provided below. Your Gorman‐Rupp distributor needs this information when you require parts or service. Pump Model: Serial Number:...
-
Page 3: Table Of Contents
MR-04152 S SERIES PUMPS INTRODUCTION Thank You for purchasing a Gorman‐Rupp S quire special attention, to those which could dam Series Pump. Read this manual carefully to learn age equipment, and to those which could be dan how to safely maintain and service your pump. Fail... - Page 4 S SERIES PUMPS MR-04152 FINAL ASSEMBLY ............
-
Page 5: Safety - Section A
4. Close the discharge valve (if throughout this manual to Gorman‐ used). Rupp S Series submersible motor driv en pumps. This manual will alert personnel to known procedures which require spe This pump is not designed to pump vol... - Page 6 S SERIES PUMPS MR-04152 coming power matches the voltage and tion of electrical parts not supplied or phase of the pump and control before approved by the manufacturer, can re connecting the power source. Do not sult in severe injury or death and void run the pump if the voltage is not within warranty.
-
Page 7: Troubleshooting - Section B
MR-04152 S SERIES PUMPS TROUBLESHOOTING - SECTION B Review all SAFETY information in Section A. 5. Close the discharge valve (if used). The following precautions should be taken before attempting to service the The electrical power used to operate pump; otherwise, injury or death could this pump is high enough to cause inju... - Page 8 S SERIES PUMPS MR-04152 TROUBLE POSSIBLE CAUSE PROBABLE REMEDY Float type sensing device(s) tangled or Check installation for free movement (AUTOMATIC obstructed. of float. MODE ) (CONT'D.) Defective liquid level sensing device(s) Repair or replace defective unit(s). or control panel.
-
Page 9: Electrical Testing
MR-04152 S SERIES PUMPS TROUBLE POSSIBLE CAUSE PROBABLE REMEDY PUMP RUNS WITH Pumping entrained air. Check liquid level in sump; check EXCESSIVE NOISE position of pump and liquid level OR VIBRATION sensing device(s). Damaged or unbalanced impeller. Replace impeller. Discharge piping not properly support‐... -
Page 10: Motor And Power Cable Continuity
S SERIES PUMPS MR-04152 while the pump is running at full load and at move the tubing or potting from only that terminal, and check for a loose connection. Be sure to re no load. All three amperage readings must place the tubing or potting and allow adequate dry... -
Page 11: Pump Maintenance And Repair - Section C
MR-04152 S SERIES PUMPS PUMP MAINTENANCE AND REPAIR - SECTION C GENERAL INFORMATION formed by a Gorman‐Rupp authorized Submersible repair facility or the factory. Review all SAFETY information in Section A. Any repairs to the motor assembly per formed by the customer or an unautho... - Page 12 S SERIES PUMPS MR-04152 SECTION DRAWING S4H SERIES ONLY Figure C-1. Typical S4C, S4D And S4H Series Pump Assembly PAGE C - 2 MAINTENANCE AND REPAIR...
- Page 13 MR-04152 S SERIES PUMPS Typical S4C, S4D And S4H Series Pump Assembly Parts Identification List Refer to the separate Parts List Manual for serviceable parts, part numbers and quantities. ITEM ITEM PART NAME PART NAME DIFFUSER RED PIPE BUSHING IMPELLER...
- Page 14 S SERIES PUMPS MR-04152 SECTION DRAWING Figure C-2. S4C,S4D And S4H Terminal Housing And Cable Assembly Standard and SST‐Fitted Models PAGE C - 4 MAINTENANCE AND REPAIR...
-
Page 15: Terminal Housing And Cable Assembly
MR-04152 S SERIES PUMPS Terminal Housing And Cable Assembly Standard and SST‐Fitted Models Parts Identification List Refer to the separate Parts List Manual for serviceable parts, part numbers and quantities. ITEM PART NAME DYNA SEAL WASHER UPPER TERMINAL PLATE GASKET... - Page 16 S SERIES PUMPS MR-04152 SECTION DRAWING Figure C-3. Terminal Housing And Cable Assembly All‐SST Models Only PAGE C - 6 MAINTENANCE AND REPAIR...
-
Page 17: Terminal Housing And Cable Assembly
MR-04152 S SERIES PUMPS Terminal Housing And Cable Assembly All‐SST Models Only Parts Identification List Refer to the separate Parts List Manual for serviceable parts, part numbers and quantities. ITEM PART NAME DYNA SEAL WASHER UPPER TERMINAL PLATE GASKET WIRE TERMINAL... -
Page 18: Pump End Disassembly
S SERIES PUMPS MR-04152 PUMP END DISASSEMBLY lift it, make certain that they are posi tioned so as not to damage the pump, and so that the load will be balanced. Review all SAFETY information in Section A. Select a suitable location, preferably indoors, to Follow the instructions on all tags, label and de... - Page 19 MR-04152 S SERIES PUMPS Draining Oil From Seal Cavity If inverting the pump is not practical, lay the pump on its side and secure it to prevent rolling. (Figure C-1) Diffuser And Wear Plate Removal If any further disassembly is to be performed on the pump, the seal oil cavity must be drained.
-
Page 20: Pump End Reassembly
S SERIES PUMPS MR-04152 rate the seal plate (7) from the intermediate (51). gaskets and shaft seal assemblies be used during Remove and discard the seal plate gasket (53). reassembly (see the parts lists for numbers). Place a clean cloth on a flat surface and place the seal plate on the cloth with the impeller side down. - Page 21 MR-04152 S SERIES PUMPS sion finished faces; even fingerprints on the faces grooves, and other damage that might cause leak can shorten seal life. If necessary, clean the faces age. If any components are worn, replace the com with a non‐oil based solvent and a clean, lint‐free plete seal;...
- Page 22 S SERIES PUMPS MR-04152 Subassemble the stationary element in the station Unpack the stationary seat and element. Subas ary seat. Position this subassembly in the interme semble the stationary element in the stationary diate bore with the sealing face up and cover the seat.
-
Page 23: Motor Disassembly
MR-04152 S SERIES PUMPS Slide the seal spring over the shaft and bellows re Inspect the wear plate (58). If one side is eroded, tainer and install the spring retainer. See Figure flip it over and install the smooth side next to the im... - Page 24 S SERIES PUMPS MR-04152 (Figure C-2 or C-3) NOTE It is recommended that a pump with a defective mo Carefully raise the terminal housing (5) from the tor be returned to Gorman‐Rupp, or to one of the motor housing until the terminals (19) are accessi...
-
Page 25: Impeller
MR-04152 S SERIES PUMPS er cable leads unless the power cable or terminals the pump casing (13) off the upper motor housing require replacement. If replacement is required, (16). Remove the O‐ring (15). the connections between the power cable leads... -
Page 26: Motor Housing
S SERIES PUMPS MR-04152 tilated area; free from excessive heat, sparks, and flame. Read and follow all precautions printed on solvent contain ers. Take care not to damage the stator end turns during removal from the motor hous Rotate the bearings by hand to check for rough... -
Page 27: Motor Reassembly
MR-04152 S SERIES PUMPS Hoisting Bail Thoroughly clean the inside of the motor housing (16) with fresh solvent. The interior must be dry (Figure C-1) and free of dirt or lint. If the hoisting bail (24) requires replacement, re move the hardware (26, 27 and 28) securing the bail to the motor housing. -
Page 28: Bearing Snap Ring
S SERIES PUMPS MR-04152 windings. Apply heat evenly to the outside of the be cleaned and inspected in place. It is housing; excessive heat is not required. strongly recommended that the bearings be replaced any time the shaft and rotor When the motor housing is sufficiently heated, po... -
Page 29: Upper Motor Housing
MR-04152 S SERIES PUMPS INSTALLATION OF SKF 5200 AND 5300 SERIES BEARINGS PART NUMBER MARKINGS ARE LOCATED EITHER ON BEARING O.D. (OFFSET FROM CENTER) OR ON SIDE FACE OF BEARING. FOR EITHER TYPE, POSITION BEAR ING WITH TEXT AWAY FROM IM... - Page 30 S SERIES PUMPS MR-04152 Replace the motor housing O‐ring (14). Position TION, Section B, to make electrical con the lower motor housing (10) down over the stator, nections. rotor shaft and assembled bearings so that it seats Clean the exterior of the power cable with warm squarely against the upper motor housing (16).
- Page 31 MR-04152 S SERIES PUMPS Slide a length of heat‐shrink tubing (14) up over less the power cable leads are properly each of the power cable leads. Install the leads on sealed in the terminal housing. Mois the terminal posts as shown in Figure C-7 and se...
- Page 32 S SERIES PUMPS MR-04152 Allow the adhesive to cure for at least one hour be short circuit, resulting in pump damage fore securing the terminal housing to the motor and possible serious injury or death to housing. personnel. 1 YELLOW - CONNECT TERMINAL TO GROUND...
- Page 33 MR-04152 S SERIES PUMPS bubbles and ensure the material has completely minal gland cap flange and the terminal housing covered the area around the terminal posts. when tighten the nuts. NOTE (Figure C-2 or C-3) The potting compound must completely cover the terminal posts and lead connections.
-
Page 34: Bail Bushing
S SERIES PUMPS MR-04152 the motor leads to the terminals (19) using the ny vacuum tested any time the seal(s) and/or motor lock machine screws (20). are serviced. All - Position the terminal housing, terminal plate Drain all of the oil from both the seal and motor and gasket against the upper motor housing. - Page 35 MR-04152 S SERIES PUMPS Vacuum Pump Quick Disconnect Manometer Fitting Full-Closing Ball-Type Venturi Shutoff Valve Submersible Pump Quick Disconnect Î Î Î Fitting Air Compressor Î Î Î Figure C-8. Vacuum Test System Table C-1 shows the vacuum to be drawn on each...
- Page 36 S SERIES PUMPS MR-04152 Table C-2. Oil Quantity Pump Model Seal Cavity Motor Cavity S4C/S4D/S4H 20 ounces (0,6 liter) 96 ounces (2,8 liters) (All Voltages) Table C-3. Pump Oil Specifications Specifications: Type ......
-
Page 37: The Gorman-Rupp Company
For U.S. and International Warranty Information, Please Visit www.grpumps.com/warranty or call: U.S.: 419-755-1280 International: +1-419-755-1352 For Canadian Warranty Information, Please Visit www.grcanada.com/warranty or call: 519-631-2870 THE GORMAN‐RUPP COMPANY D MANSFIELD, OHIO GORMAN‐RUPP OF CANADA LIMITED ST. THOMAS, ONTARIO, CANADA...
Need help?
Do you have a question about the S4C and is the answer not in the manual?
Questions and answers