
Related Manuals for kansai FBX1106


Summarization of Contents
Introduction
Indication of serial number
Explains how to read and interpret the machine's serial number and date of manufacture.
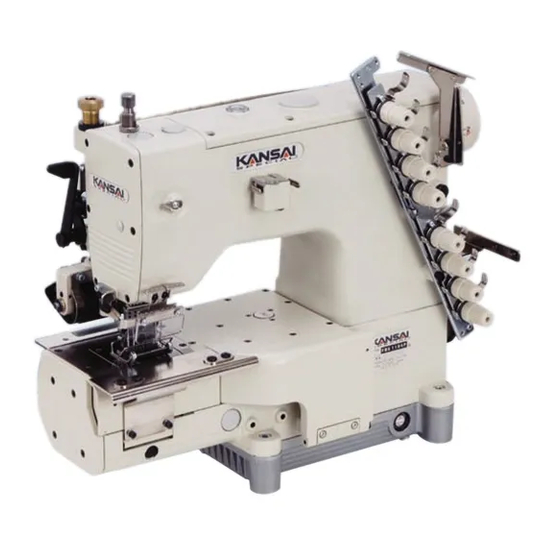
[1] SPECIFICATIONS
1-1 Stitch type
Specifies the stitch type used by the machine, identified as JIS401 double chain stitch.
1-2 Model
Details key specifications for FBX1104P and FBX1106P models.
1-3 Diagrammatic sketch of the Series
Provides a visual overview with dimensions for the FBX series machines.
[2] NEEDLES & THREADING THE MACHINE
2-1 Needles
Guide to selecting appropriate needles and their sizes for the fabric and thread.
2-2 Replacing the needle
Instructions on how to safely and correctly replace a needle, noting scarf direction.
2-3 To thread the machine
Step-by-step guide for threading the machine, including looper threading procedures.
[3] MACHINE SPEED
3-1 Machine speed & direction in which the machine pulley runs
Specifies recommended operating speeds and pulley rotation direction for optimal machine life.
3-2 Motor & belt
Details motor type, belt, and pulley selection for adjusting machine speed.
[4] LUBRICATION
4-1 Oil
Recommends using genuine Kansai Special oil and provides its part number for maintenance.
4-2 To fill the machine with oil
Instructions on how to properly fill the machine with lubricating oil to the correct level.
4-3 Replacing the oil and the oil element
Procedures for replacing the oil and cleaning or replacing the oil filter element for longevity.
[5] SEWING MACHINE INSTALLATION
5-1 Cutting the machine table
Provides dimensions and instructions for cutting the machine table to fit the sewing unit.
5-2 How to install the machine
Step-by-step guide for mounting the sewing machine onto its table and connecting components.
[7] TIMING OF THE LOOPER TO THE NEEDLE
7-1 Angle for installing the looper and position of the looper holder bracket
Details on setting the correct angle and position for the looper holder bracket.
7-2 Timing of the looper to the needle
Instructions for aligning the looper and needle timing for proper stitch formation and avoiding skips.
7-3 Looper setting distance
Specifies the correct clearance between the looper and needle at the bottom of the stroke.
7-4 Needle height
Instructions for adjusting the needle bar height relative to the needle plate.
[8] TIMING OF THE RETAINER LOOPER
8-1 Front to back position of the retainer looper
Guide for adjusting the front-to-back position of the retainer looper.
8-2 Left to right position of the retainer looper
Instructions for setting the left-to-right position of the retainer looper.
8-3 Adjusting the height of the retainer looper
Steps to adjust the vertical height of the retainer looper relative to the main looper.
8-4 Timing of the retainer looper to the needle
Details on timing the retainer looper with the needle for optimal performance.
[11] ADJUSTING THE FEED DOG & STITCH LENGTH
11-1 Adjusting of left-right position for the feed dog
How to align the feed dog with the needle drop holes for proper fabric feeding.
11-2 Adjusting of front-back position for the feed dog
Procedures to ensure equal clearance for the feed dog at front and back points.
11-3 Adjusting of height for the feed dog
Instructions for setting the correct height of the feed dog relative to the needle plate.
11-4 Adjusting of stitch length
Guide on how to adjust the stitch length using pulley position and a reference table.
[12] ADJUSTING OF THE NEEDLE FEED
12-1 Adjusting of front-back position of the needle
Steps to set the needle's front-back position for maximum stitch length.
12-2 Adjusting of front-back movement amount of the needle
How to adjust the needle's movement amount synchronized with the feed.
[13] ADJUSTING THE PRESSER FOOT
13-1 Presser foot pressure
Guidance on setting appropriate presser foot pressure for feeding fabric effectively.
13-2 Position of the presser foot
How to position the presser foot for correct needle alignment with the needle drop hole.
13-3 Foot lift
Specifies the correct clearance for the presser foot lift above the needle plate.
[14] ADJUSTING THE REAR PULLER DEVICE
14-1 Manual lever and position of the stopper
Instructions for positioning the manual lever and stopper for puller clearance.
14-2 To adjust the puller pressure
How to adjust the pressure of the puller for smooth fabric feeding.
14-3 Adjusting the feeding amount of the rear puller
Procedures for adjusting the fabric feeding amount controlled by the rear puller.
[15] ADJUSTING THE STITCH FORMATION
15-1 Thread tension adjustment
How to adjust thread tension for needle and looper threads based on sewing conditions.
15-2 Position of the needle thread eyelet
Guidance on adjusting the position of the needle thread eyelet to control tension.
15-3 Position of the looper thread take-up eyelet
Instructions for positioning the looper thread take-up eyelet and bar.
15-4 Silicon Tank
Explains the function of the silicon oil tank for thread lubrication and its maintenance.
Need help?
Do you have a question about the FBX1106 and is the answer not in the manual?
Questions and answers