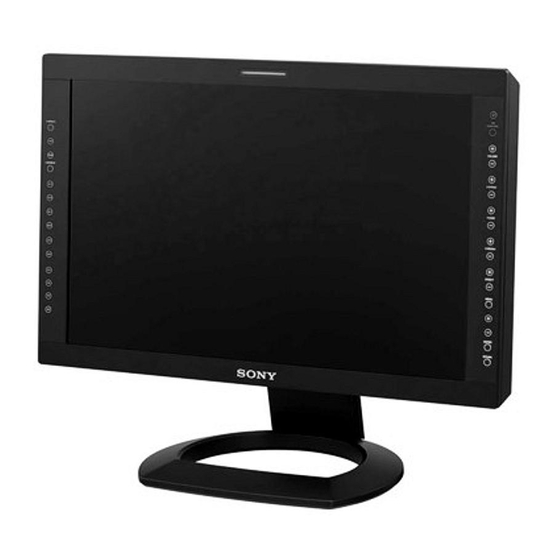
Sony LMD-2450W Operating Instructions Manual
Operating instructions
Hide thumbs
Also See for LMD-2450W:
- Service manual (54 pages) ,
- Operating instructions manual (38 pages) ,
- Catalog (20 pages)

Subscribe to Our Youtube Channel
Related Manuals for Sony LMD-2450W


Summary of Contents for Sony LMD-2450W
-
Page 1: Lcd Monitor
3-100-042-13 (1) LCD Monitor Operating Instructions LMD-2050W LMD-2450W © 2007 Sony Corporation... - Page 2 For the customers in Europe The manufacturer of this product is Sony Corporation, 4.Prevention against achieving hazardous 1-7-1 Konan, Minato-ku, Tokyo, Japan.
- Page 3 WARNING When installing the unit, incorporate a readily accessible disconnect device in the fixed wiring, or connect the power cord to an easily accessible socket- outlet near the unit. If a fault should occur during operation of the unit, operate the disconnect device to switch the power supply off, or disconnect the power cord.
-
Page 4: Table Of Contents
Table of Contents Precaution .............. 5 On Safety ............5 On Installation ............ 5 Handling the LCD Screen ........5 About the Fluorescent Tube ....... 5 On Cleaning ............5 On Repacking ............. 6 On Mounting on a Rack ........6 On Fan Error (LMD-2450W) ...... -
Page 5: Precaution
It is dangerous to use the unit with a becomes dark, unstable or does not turn on, consult your damaged power cord. Sony dealer. • Unplug the unit from the wall outlet if it is not to be used for several days or more. -
Page 6: On Repacking
Because of precise image, wide viewing angle technology and high speed response, real color image If you have any questions about this unit, contact your can be reproduced. authorized Sony dealer. Multi-format The monitor supports the video, Y/C, RGB, component, On Fan Error (LMD-2450W) SDI (HD/D1, when the optional input adaptor is used.) - Page 7 Rack mount Color space feature The monitor supports the VESA (100 × 100) standard. You can select one from among three color space The LMD-2050W may be mounted on an EIA-standard settings (SMPTE-C/EBU/ITU-R BT.709). 19-inch rack (using an optional mounting bracket). On-screen menus Two-display You can set the appropriate settings according to the...
-
Page 8: Location And Function Of Parts And Controls
Location and Function of Parts and Controls Front Panel COMPOSITE – COMPONENT – – – HD15 – – a Tally lamp f CONTRAST buttons You can check the status of the monitor by the color of Adjusts the picture contrast. the tally lamp. -
Page 9: Function Buttons
+/– buttons You can assign the function from among SCAN, Press to select the items and setting values. ASPECT, EXT SYNC, BLUE ONLY, MONO, ENTER button MARKER, H/V DELAY, MULTI DISPLAY, CLOSED Press to confirm a selected item on the menu. CAPTION and APA in FUNCTION BUTTON When the menu is not displayed and the button is SETTING of the USER CONFIG menu (see page 28). -
Page 10: Input Signals And Adjustable/Setting Items
Input signals and adjustable/setting items Input signal Item Video* B & W* Component* RGB* Computer Y/C* HD15 CONTRAST* BRIGHT* CHROMA* × × × × × × × × × × PHASE* (NTSC) APERTURE COLOR TEMP COLOR SPACE AUTO CHROMA/ × ×... -
Page 11: Rear/Bottom Panel
*8 Only when an NTSC signal is input and no markers *9 The signal can only be selected in the main display are displayed. Not displayed when the multi display (see “SUB INPUT SELECT” on page 27). is enabled. *10 When a BKM-244CC is installed, closed captions are displayed. - Page 12 Follow the instructions for this port. o SERIAL REMOTE connector (RJ-45) Connect to the network or Sony BKM-15R Monitor Control Unit by using a 10BASE-T/100BASE-TX LAN cable (shielded type, optional).
-
Page 13: Installing To The Rack (Lmd-2050W Only)
Remove the arm. Installing to the Rack (LMD-2050W only) You can attach the monitor to the rack after removing the stand. Put the monitor on a soft cloth with the surface of the LCD monitor downward. Remove four screws to remove the stand attachment bracket. -
Page 14: Adjusting The Height Of The Stand
LMD-2450W Adjusting the Height of the Stand You can adjust the height of the monitor in four levels – for the LMD-2050W and three levels for the LMD- 2450W by changing the position of the stand attachment bracket and the arm attachment position. Depending on the height, you can install the input adaptor with the stand attached to the monitor. -
Page 15: Connecting The Ac Power Cord
These screws are used for each display at the factory. Connecting the AC Power Cord – – – – – – – – – – – – Plug the AC power cord into the AC IN socket on the rear panel. Then, attach the AC plug holder (supplied) to the AC power cord. -
Page 16: Installing The Input Adaptor
Installing the Input Selecting the Default Adaptor Settings Before installing the input adaptor, disconnect the power When you turn on the unit for the first time after cord. purchasing it, select the area where you intend to use this unit from among the options. Remove the panel of the optional input slot. - Page 17 2 If LATIN AMERICA is selected: PAL&PAL-N area L A T I N A M E R I C A P A L & P A L - N A R E A Argentina – A R G E N T I N A P A R A G U A Y Paraguay –...
-
Page 18: Selecting The Menu Language
The setting items (icons) in the selected menu are Selecting the Menu displayed in yellow. Language USER CONFIGtSYSTEM SETTING M AT R I X : C O M P O N E N T L E V E L : xxxx N T S C S E T U P : You can select one of seven languages (English, French,... -
Page 19: Using The Menu
The menu icon presently selected is shown in Using the Menu yellow and setting items are displayed. USER CONFIGtSYSTEM SETTING The unit is equipped with an on-screen menu for making M AT R I X : C O M P O N E N T L E V E L : xxxxx various adjustments and settings such as picture control, N T S C S E T U P :... -
Page 20: Adjustment Using The Menus
About the memory of the settings Adjustment Using the The settings are automatically stored in the monitor memory. Menus Items The screen menu of this monitor consists of the following items. STATUS (the items indicate the current settings.) For the video input FORMAT COLOR TEMP COMPONENT LEVEL... -
Page 21: Adjusting And Changing The Settings
MATRIX Adjusting and Changing the COMPONENT LEVEL Settings NTSC SETUP SCAN FORMAT DISPLAY STATUS menu LANGUAGE POWER SAVING The STATUS menu is used to display the current status PICTURE DELAY MIN of the unit. The following items are displayed: MARKER SETTING For the video input MARKER ENABLE MARKER SELECT... -
Page 22: Color Temp/Space Menu
For the DVI/HD15 input Submenu Setting COLOR TEMP Selects the color temperature from STATUS 1/2 among D65, D93 and USER F O R M AT settings. xxxxxxx xxxxxxx MANUAL If you set the COLOR TEMP to xxxxx ADJUSTMENT USER setting, the item displayed is C O L O R T E M P xxxx changed from black to white, which... - Page 23 For the video input Submenu Setting SUB CONTROL Adjusts finely the adjustment range of the button on the front panel for USER CONTROL 1/3 CONTRAST, BRIGHTNESS, AU T O C H R O M A / P H A S E CHROMA and PHASE.
- Page 24 For the DVI/HD15 input Submenu Setting PICTURE CONTROL Adjusts to monitor the picture more * The 1/3 menu cannot be adjusted. clearly. • SIZE H: Adjusts the horizontal size of the picture. The USER CONTROL 2/3 higher the setting, the larger S U B C O N T R O L the horizontal size of the C O N T R A S T :...
-
Page 25: User Config Menu
USER CONFIG menu Submenu Setting The USER CONFIG menu is used for setting the FORMAT DISPLAY Selects the display mode of the system, marker, multi display, function button, closed signal format and scan mode. • ON: The format and scan mode caption and audio. -
Page 26: Scan Mode Image
Scan mode image 4 :3 16: 9 LMD-2050W: – 1280 × 720 LMD-2050W: LMD-2050W: 1400 × 1050 1680 × 945 LMD-2450W: LMD-2450W: 1600 × 1200 1920 × 1080 LMD-2450W: 1280 × 720 MARKER SETTING USER CONFIGtMARKER SETTING LMD-2050W: LMD-2050W: M A R K E R E N A B L E : 1470 ×... -
Page 27: Multi Display Setting
Submenu Setting MULTI DISPLAY • PIP/POP: The sub display is put in the main display for the 16:9 display SAFETY AREA Selects the safe area size for the and by the side of the main display aspect ratio determined by the for the 4:3 display. -
Page 28: Function Button Setting
About the function assigned to the FRAME Sets the position of the main display function button when MULTI DISPLAY is set to POP and the sub display is put on the 4:3 display. SCAN • RIGHT: The main display is put by Press to change the scan size of the picture according to the right side of the sub display. -
Page 29: Audio Setting
For finer according to the input signal, see “DOT Submenu Setting PHASE” on page 24. BKM-244CC Sets closed caption. When the menu screen is displayed, the APA does not • TYPE: Selects the closed caption function. signal format. •708: To display a closed caption signal conforming to the EIA/ Note CEA-708 standard. -
Page 30: Remote Menu
Submenu Setting Submenu Setting INPUT SELECT Selects the input audio signal. PARALLEL REMOTE Selects the PARALLEL REMOTE • ALL: The sound except from connector pins for which you want BKM-220D and BKM-243HS is to change the function. output. You can assign various functions to •... -
Page 31: Key Inhibit Menu
You can lock the setting so that they cannot be changed Submenu Setting by an unauthorized user. SERIAL REMOTE Selects the mode to be used. Select OFF or ON. • OFF: SERIAL REMOTE does If you set to ON, all items are displayed in black, not function. -
Page 32: Troubleshooting
Troubleshooting Specifications Picture performance This section may help you isolate the cause of a problem and as a result, eliminate the need to contact technical LCD panel a-Si TFT Active Matrix support. Pixel efficiency 99.99 % • The display is colored in green or purple t Select Viewing angle (up/down/left/right, contrast >... - Page 33 DVI input connector (1) Power ON, current probe method: DVI-D (1) 18.3 A (100 V), 37.1 A (240V) TMDS single link (2) Hot switching inrush current, Remote input connector measured in accordance with Parallel remote European standard EN55103-1: Modular connector 8-pin (1) 35.5 A (230 V) Serial remote LMD-2450W:...
-
Page 34: Available Signal Formats
Design and specifications are subject to change without notice. Note Always verify that the unit is operating properly before use. SONY WILL NOT BE LIABLE FOR DAMAGES OF ANY KIND INCLUDING, BUT Available signal formats NOT LIMITED TO, COMPENSATION OR REIMBURSEMENT ON ACCOUNT OF THE LOSS The unit is applicable to the following signal formats. - Page 35 Available HD15 input signal formats VESA DMT Sync. polarity Dot clock Resolution LMD-2050W LMD-2450W [MHz] [kHz] [Hz] Horizontal Vertical 640 × 480 60 Hz 25.175 31.469 59.940 Negative Negative 800 × 600 56 Hz 36.000 35.156 56.250 Positive Positive 800 × 600 60 Hz 40.000 37.879 60.317...
- Page 36 Others Sync. polarity Dot clock Resolution LMD-2050W LMD-2450W [MHz] [kHz] [Hz] Horizontal Vertical 720 × 400 70 Hz 28.322 31.469 70.087 Negative Positive 1280 × 800 60 Hz 68.900 48.935 59.969 Negative Negative Available DVI input signal formats Range of DVI input signal (available to UXGA/60Hz) (UXGA down convert display in LMD-2050W) Vertical frequency: 50.0 to 85.1 Hz Horizontal frequency: 31.5 to 77.0 kHz...
-
Page 37: Dimensions
LMD-2450W Dimensions Front 602.4 (23 LMD-2050W Front CONTROL COMPOSITE VOLUME – 518.5 (20 COMPONENT CONTRAST – PHASE – CHROMA – HD-15 BRIGHT – MENU – – – ENTER – RETURN – – – 320.0 (12 100 (4) 100 (4) Rear 320.0 (12 100 (4) 100 (4) - Page 38 Sony Corporation...
Need help?
Do you have a question about the LMD-2450W and is the answer not in the manual?
Questions and answers