
Related Manuals for AE RC10GT 7091


Summarization of Contents
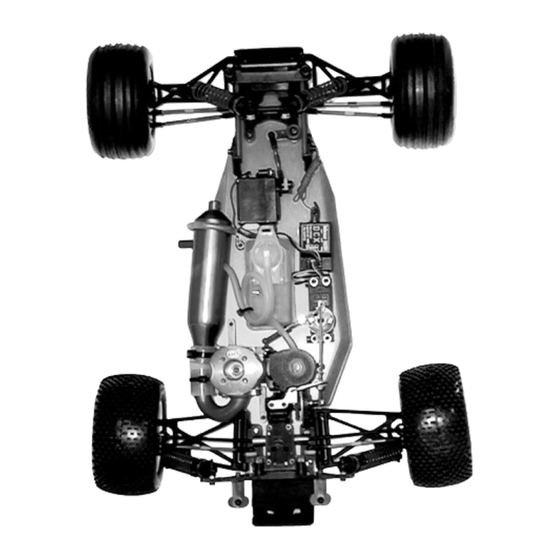
RC10GT Kit Overview and Requirements
Kit Configurations: Factory Team, Team GT, RTR Plus
Details and features of the different RC10GT kit versions.
Essential Equipment and Assembly Tools
Lists necessary tools and equipment for operating and building the RC truck.
Power Screwdriver Safety Warning
Crucial warning against using power screwdrivers on plastic parts.
Manual Navigation and Preparation
Building Guidance and Bag Organization
Instructions for following the manual, opening bags, and managing parts.
Understanding Manual Format and Part Identification
Explains how to interpret diagrams, part numbers, and assembly steps.
Bag A: Servo Saver Assembly - Initial Steps
Step 1: Servo Saver Assembly
Detailed guide for assembling the servo saver mechanism.
Bag A: Servo Saver Assembly - Final Steps
Steps 2-4: Servo Saver Assembly and Installation
Completing the servo saver assembly and installing it onto the chassis.
Bag B: Front Chassis Assembly - Shock Tower
Steps 1-3: Front Shock Tower Assembly and Mounting
Assembling and attaching the front shock tower to the chassis.
Steps 4-5: Front Assembly and Nose Mounts
Connecting the front suspension assembly and installing nose tube mounts.
Bag B: Front Chassis Assembly - Arms and Mounts
Steps 1-3: Front Arm and Shock Tower Assembly
Assembling front suspension arms and mounting the shock tower.
Steps 4-5: Front Assembly and Nose Tube Mounts
Attaching the front assembly and installing nose tube mounts.
Bag B: Nose Brace Tubes
Step 6: Nose Brace Tubes Installation
Installing nose brace tubes for chassis reinforcement.
Bag C: Steering and Caster Block Assembly
Steps 1-2: Caster Block and Arm Assembly
Assembling caster blocks and attaching them to the front A-arms.
Bag D: Engine and Transmission Mounts
Step 1: Engine and Transmission Mount Installation
Mounting the engine and transmission components to the chassis.
Bag E: Differential Assembly - Gears and Hubs
Steps 1-3: Differential Gear and Hub Setup
Assembling the differential gear, setting up left and right hubs.
Bag E: Differential and Transmission Assembly - Diffs
Steps 4: Hub Assembly and Diff Adjustment
Assembling differential hubs and adjusting the differential's tightness.
Bag E: Differential and Transmission Assembly - Transmission
Step 5: Transmission Assembly
Installing gears, shafts, and bearings into the transmission case.
Bag F: Brake and Torque Control System
Steps 1-2: Brake Adapter and Torque Control Assembly
Assembling the brake adapter and torque control components.
Steps 3-4: Brake Bracket Installation
Preparing and mounting the brake bracket assembly.
Bag F: Brake Cam and Transmission Mounting
Steps 5-6: Brake Cam and Spur Gear Installation
Installing the brake cam and the spur gear onto the transmission.
Step 7: Mount Transmission to Chassis
Attaching the completed transmission assembly to the vehicle chassis.
Bag G: Rear Chassis Components
Steps 1-3: Rear Bulkhead and Shock Tower
Assembling the rear bulkhead and installing the rear shock tower.
Bag H: Rear Suspension and Bumper Assembly
Steps 1-2: Rear Suspension and Bumper Parts
Lists parts for rear suspension arms, bumper, and mounts.
Bag H: Rear Suspension Assembly
Steps 1-2: Rear A-Arm and Bumper Mounting
Assembling the rear A-arms and mounting them with the bumper.
Bag I: MIP CVD Assembly (Team/FT)
Step 1: Team/FT MIP CVD Assembly
Detailed instructions for assembling MIP CVD drive shafts for Team/FT kits.
Rear Hub Carrier and Axle Assembly by Kit Type
Team/FT: Mount Rear Hub Carriers
Instructions for mounting rear hub carriers specific to Team/FT kits.
RTR+ / Team Built: Assemble Rear Axles
Guide for assembling rear axles for RTR+ and Team Built kits.
Bag J: Turnbuckle Components
Steps 1-2: Turnbuckle Parts and Assembly
Lists parts and details the assembly of front and rear turnbuckles.
Bag J: Turnbuckle and Body Mount Setup
Turnbuckle Setup and Rear Mounts
Finalizing turnbuckle setup and installing rear body mounts.
Bag K: Body Mounts
Steps 1-2: Front and Rear Body Mounts
Installing the front and rear body mounting components.
Bag L: Shock Assembly - Preparation
Step 1: Trim Shock Pistons
Preparing shock pistons by removing molding burrs for smooth action.
Step 2: Shock Parts Installation
Assembling shock components onto the shock tool for proper fitment.
Shock Part Removal and Dismantling Guides
Tips for safely removing parts from trees and dismantling shocks.
Bag L: Shock Assembly - Filling and Rebound
Step 3: Assemble Shock Shafts and Eyelets
Connecting shock shafts, eyelets, and pistons to the shock body.
Step 4: Fill Shocks and Set Rebound
Filling shocks with oil and adjusting for correct rebound travel.
Need help?
Do you have a question about the RC10GT 7091 and is the answer not in the manual?
Questions and answers