Table of Contents
Advertisement
Quick Links
Advertisement
Table of Contents

Summary of Contents for Mustek GSMART-D30
- Page 1 English Multi-Functional igital amera User Guide...
-
Page 2: Table Of Contents
Digital Camera User Guide ABLE OF ONTENTS Identifying the Parts .............. 1 LCD Display Icons ..............2 Preparation ................. 2 Loading Batteries .............. 2 Inserting the SD/MMC Card ..........3 Attaching the Strap ............3 Camera Settings Record Mode ..............4 Resolution/Flash/Zoom ........... -
Page 3: Identifying The Parts
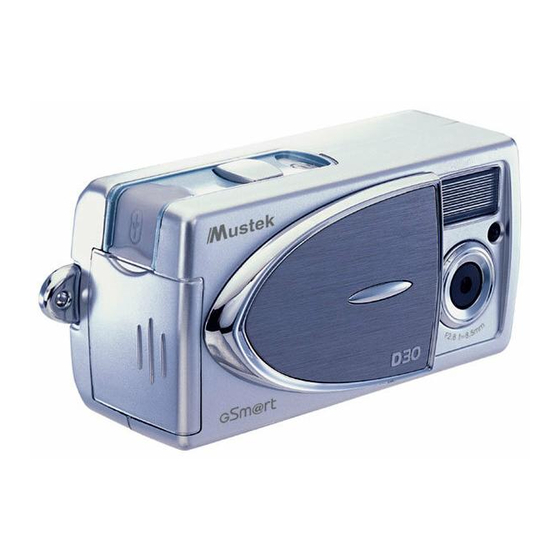
Digital Camera User Guide DENTIFYING THE ARTS Shutter button Power button Flash Photo Sensor Lens Self-timer LED Lens cover Battery & SD/MMC card cover USB port 10. strap holder 11. Control button Menu/Up/Exit Zoom/Right : Flash/Down/ Multi-image Resolution/Left 12. LCD display <... -
Page 4: Lcd Display Icons
Digital Camera User Guide LCD D ISPLAY CONS Memory card : The card is locked for writing. Image counter Battery Low: the power goes off in few seconds when it starts to blink. Zoom Macro/Normal mode Self-timer Flash REPARATION Resolution Loading Batteries a. -
Page 5: Inserting The Sd/Mmc Card
Digital Camera User Guide Inserting the SD/MMC Card (not supplied) b.Insert the card as c.Close the cover. a. Open the battery shown above. Push & SD/MMC card To remove the card the card all the cover Open the cover, then way in until it is push in the card to securely locked. -
Page 6: Record Mode
Digital Camera User Guide AMERA ETTINGS <Up> Record Mode <Right> <Left> Turn on the power. Press the below buttons to make settings before taking <Down> pictures. Resolution Flash Press the button repeatedly Press the button repeatedly to circle through the settings. to circle through the settings. -
Page 7: Menu
Digital Camera User Guide Menu Press the button to enter or exit the LCD menu. Press the <Left>/<Right> buttons to select the item, and press <Down> / <Up> to change settings. Items Settings Items Settings Auto shutdown: Self-timer: OFF ! ON OFF ! 1.5 min. -
Page 8: Playback Mode
Digital Camera User Guide Record Mode - continued Macro/Normal mode Push the Macro/Normal slide toward when taking close-up pictures at a range of 25 ~ 70 cm. Push toward when taking from any other distance. Playback Mode Menu Press the button to enter or exit the LCD menu. -
Page 9: Taking Pictures
Digital Camera User Guide AKING ICTURES Taking a Still Picture 1. Slide the lens cover. 2. Turn on the power, and make sure it is in REC ( ) mode. 3 Position the subject in the LCD display. 4. Press the Shutter button. Taking a Video Repeating step 1 and 2 above. -
Page 10: Playing Pictures Back
Digital Camera User Guide LAYING ICTURES Playing the Pictures 1. Turn on the power. 2. Set the camera to Playback( )mode. 3. Press the <Left>/<Right> buttons to review your pictures. * You can review up to 6 images at a time by pressing button (A). -
Page 11: Deleting Pictures
Digital Camera User Guide ELETING ICTURES Turn on the power. Set the camera to Playback mode. Press the <Left>/<Right> buttons to select the picture/video you want to delete. Press the (Menu) button. Select to delete one or select to delete all. Select YES to delete. -
Page 12: Installing Software
Digital Camera User Guide NSTALLING OFTWARE * For WinXP users, please refer to ‘Notice to Windows XP Users’ note. 1. Insert installer CD into the CD-ROM drive. 2. Close the CD-ROM drive. 3. An installer wizard will automatically launch. If the installer wizard does not appear, then;... -
Page 13: Downloading Pictures
Digital Camera User Guide OWNLOADING PICTURES Connecting To PC 1. Connect your camera to a computer via USB cable 2. Press the Power button. Tips: PC Camera Mode (OS: 98SE/Me/2000/XP) Repeating step 1 and 2 above. 3. Press (Mode) button. 4. -
Page 14: For Windows 98Se Users
Digital Camera User Guide 2. A removable disk dialoge appears 3. Double click on the drive NOTE: Please do not copy any files into the DCIM folder of your camera. Otherwise it may cause the camera unstable or crash. 4. You can drag-and-drop pictures to your PC. -
Page 15: For Mac Users
Digital Camera User Guide 3.Select USB Mass Storage Device and click on Stop to continue (B). 4.The Stop a Hardware device window will appear. Click on OK. 5.The Safe To Remove Hardware window will appear. Click on OK. For MAC Users (Mac OS: 9.x and 10.1 above) By connecting your camera to a MAC computer (referring to Connecting to PC), it will automatically detect Mass Storage drive. -
Page 16: Specifications
Digital Camera User Guide PECIFICATIONS Image Sensor 2.1M CMOS sensor Resolution Fine: 2048 x 1536 (H/W enhancement); High: 1600 x 1200 ; Standard: 640 x 480 Internal Memory 16MB Flash External Memory SD/MMC card slot Interface Flashlight Auto/Red-Eye/Off File Format JPEG/AVI Video Frame Rate(PC cam) 20 fps (320 x240)


Need help?
Do you have a question about the GSMART-D30 and is the answer not in the manual?
Questions and answers