Advertisement
I. Getting to know your camera
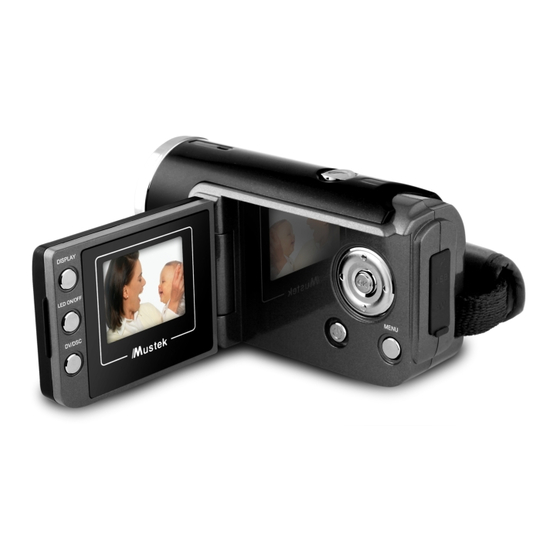
1. Configuration and installation
1
Display button
2
LED On / Off button
3
Mode button (DV / DSC)
4
Shutter button
5
Up button
6
OK button
7
AV / USB jack
8
Right button
9
MENU button
10
Down button
11
Power button
12
Left button
13
LCD screen
14
Tripod socket
15
SD card slot
16
Wrist strap
17
Battery cover
18
Lens
1
Advertisement
Table of Contents

Related Manuals for Mustek DV316L


Summary of Contents for Mustek DV316L
- Page 1 I. Getting to know your camera Display button 1. Configuration and installation LED On / Off button Mode button (DV / DSC) Shutter button Up button OK button AV / USB jack Right button MENU button Down button Power button Left button LCD screen Tripod socket...
-
Page 2: When Shooting Still Images
2. On-screen display A. When shooting movies B. When shooting still images Photo ta ken/ p hoto c a p a c ity Ca p ture m od e EV Va lule Reso lutio n ind ic a to r 2592x1944 Ba ttery level ind ic a tor 2048x1536... -
Page 3: When Playing Back
C. When playing back Playback mode The sequence of the current file/ The number of the recorded files Audio file Video file 6/20 Battery level indicator Still image Empty Half Full Protecting indicator 3. Preparation before capture 3.1 Battery Open the battery cover and load the batteries according to the polarity indicated inside the battery room. -
Page 4: Audio Recording
a) Open the LCD panel. b) Press the power button to turn on / off the camera. 5. Shooting a) Press the power button to enter default capture mode. If the camera is in other mode, press the mode button till the icon appears on the upper left corner of the screen. - Page 5 b) Press the shutter button to start recording. c) Press the shutter button again to stop recording. 8. Playback mode 8.1 Still image review a) Press the Mode button till the icon or the information “AVI” or “WAV” appears on the upper left corner of the screen to enter the playback mode.
-
Page 6: Image Download
file (WAV). c) Press the shutter button to play video or audio file and press shutter again to end playing. d) Press the left / right button to show previous file or next file. e) Press the ok button to have a pause and then press it again to continue. - Page 7 a) Connect the camera with a PC by a USB cable b) Double click the icon “my computer” on the desktop of PC c) Double click “ ” icon. d) Double click “DCIM” file folder. e) Copy all the files to your PC. Note: Do not take out the SD card or the batteries when you are copying the files to PC;...
- Page 8 Electronic shutter:1/2 ~ 1/1024 sec Shutter speed Self timer 10 sec / 20 sec Zoom 4 x digital zoom White balance Auto / Daylight / Tungsten / Fluorescent / Cloudy Exposure -2.0 ~ +2.0 Illumination Auto PC-camera 640 x 480 interface USB1.1 TV output...
- Page 9 Weight 0.14 kg (without batteries and SD card) Dimension 102 mm x 30 mm x 54 mm Note: The product design and the specifications are subject to change without notice. 2. System requirements: Windows 98SE/2000/ME/XP/Vista CPU: Pentium III 800MHz or above Memory:64 MB memory or above Disk space:Min.
Need help?
Do you have a question about the DV316L and is the answer not in the manual?
Questions and answers
what do i do when it doesnt leave the mustek screen logo