Advertisement
Table of Contents
- 1 User Manual
- 2 Table of Contents
- 3 Chapter 1. Welcome
- 4 Chapter 2-Installation
- 5 Chapter 3. Startup Wizard
- 6 Chapter 4-Recording And Playback Test
- 7 Chapter 5. Display Icon - Camera Placement and Display
- 8 Chapter 6.Record Icon - Record Settings and Scheduling
- 9 Chapter 7. Search Icon - Search and Playback
- 10 Chapter 8. Network Icon - Network Settings
- 11 Chapter 9.System Icon - System Settings
- 12 Chapter 10. Advanced Icon and Tabs
- 13 Appendices
- Download this manual
Advertisement
Table of Contents

Related Manuals for Night Owl P Series


Summary of Contents for Night Owl P Series
-
Page 1: User Manual
USER MANUAL L/P SERIES DVR SYSTEM 4/8 CHANNELS L Series P Series For more information on this product visit www.NightOwlSP.com... -
Page 2: Table Of Contents
Night Owl L / TL / P / WMC Series Manual Table of Contents Chapter 1. Welcome Chapter 2. Installation Chapter 3. Startup Wizard Chapter 4. Recording and Playback Test Chapter 5. Display icon - Camera Placement and Display Chapter 6.Record icon - Record Settings and Scheduling Chapter 7. -
Page 3: Chapter 1. Welcome
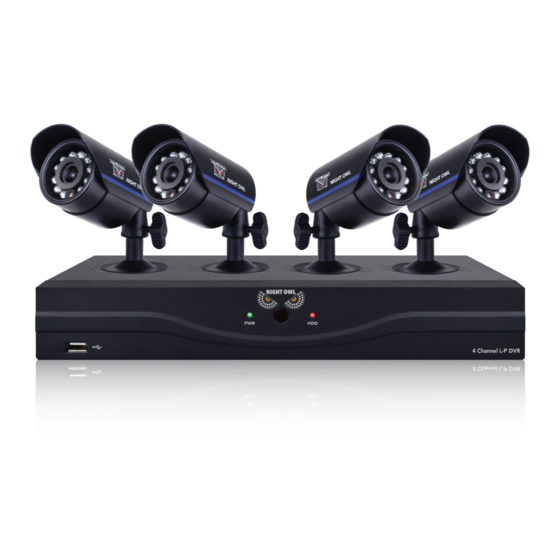
P Series WMC Series You Night Owl DVR can be controlled locally with a USB mouse or with the included remote control. You can also view your system remotely via router and internet browser with a computer or mobile device. - Page 4 Night Owl L / TL / P / WMC Series Manual Camera: Your Night Owl DVR Kit includes cameras. The number of cameras included in your kit depends on the model you have purchased. Below is a list of models and the quantity of...
-
Page 5: Chapter 2-Installation
WARNING: Do not connect power until monitor and camera connections have been made. Step 1: Connecting Your Night Owl DVR to a TV or Monitor Before connecting your DVR, check your TV or monitor to determine what type of connection is available - VGA or HDMI. Connect TV/Monitor with either VGA or HDMI cable to the matching connector on the DVR. - Page 6 Supply into a wall socket or surge protector. Make sure your monitor or TV is powered up. The Night Owl logo will appear followed the Startup Wizard or by a Live Feed. If you don’t see a live feed for all of your cameras, check the cables and connections and try...
-
Page 7: Chapter 3. Startup Wizard
Night Owl L / TL / P / WMC Series Manual CHAPTER 3—SET UP WIZARD SCREENS & ICONS Mouse Operations Using the mouse is the easiest way to interact with the set up screens and Live Feed To maximize or minimize – Double click on any of the images To access or exit Main Menu –... - Page 8 DVR to your router or modem with an Ethernet cable, and make sure that your router/modem is connected to the internet. A. The first step in configuring your Night Owl DVR is to setup a user name and password. Enter your username and password in the fields shown and click [Next Step].
- Page 9 Night Owl L / TL / P / WMC Series Manual adjust your settings and don’t want to set a new username and password you can click [Skip] B. Click [Manual] on the Network and System Setting screen C. Enter your values in the fields below to manually set up your network. If you do not know the information, click [Prev.
- Page 10 Night Owl L / TL / P / WMC Series Manual E. Enter Date and Time preferences and click [Next Step] to proceed to Step 2: Mobile access configuration. Step 2: Mobile Access Configuration – for both Automatic and Manual Setup Use this to view your security system from outside your local network E.g.
- Page 11 Step 3 Download and Install Night Owl Lite app – A. Go to either the App Store or Google Play Store and download the free app – Night Owl Lite (NOT Night Owl Pro – this program is not compatible with your system).
- Page 12 Night Owl L / TL / P / WMC Series Manual B. On your device press [+] to add. Enter same Login information as for DVR setup (Domain/DVR User ID/Password). Select the number of channels (CH) for your system. C. If everything is working you can now see your security system from your mobile device.
-
Page 13: Chapter 4-Recording And Playback Test
Night Owl L / TL / P / WMC Series Manual CHAPTER 4—RECORDING AND PLAYBACK TEST Live Feed Screen If you only want to monitor your system locally, you are done! The Live Feed screen should be showing you images from each of the cameras. You can now position them in the order you want on the screen. - Page 14 Night Owl L / TL / P / WMC Series Manual Now that you have confirmed that your cameras and DVR are working properly you may want to position your cameras around your property. Entries and windows are obvious choices for placement but there may also be special areas that are important to you.
-
Page 15: Chapter 5. Display Icon - Camera Placement And Display
Night Owl L / TL / P / WMC Series Manual CHAPTER 5— CAMERA PLACEMENT AND DISPLAY Placement: Night Owl cameras are intended for both indoor and outdoor use. Here are some helpful tips when mounting your cameras after initial testing and configuration: Place cameras in areas with a largely unobstructed view. - Page 16 [Display Icon]/[Privacy Zone] tab There may be certain sections in your recording area that you do not want to record. The Night Owl system allows you to mask off up to 4 areas on each camera/channel. Step 1:Select the channel/camera.
- Page 17 Night Owl L / TL / P / WMC Series Manual Step 4: Click [Apply] to save the settings or [Exit] to dismiss the changes. [Default] will return all values to the factory parameters.
-
Page 18: Chapter 6.Record Icon - Record Settings And Scheduling
Step 1: Select [Record icon], from then click on the [REC Para] tab to enter the recording parameter settings. Your Night Owl system lets you record video in a variety of ways choosing individual channels/cameras, specific times, as well as continuous recording or motion activated. - Page 19 Night Owl L / TL / P / WMC Series Manual no color or blue indicates no recording, red = motion triggered or manual recording green = normal recording. Main Stream Tab and Options Resolution: Your Night Owl system supports the following resolution formats: 960H,D1,HD1, and CIF.
-
Page 20: Chapter 7. Search Icon - Search And Playback
Night Owl L / TL / P / WMC Series Manual CHAPTER 7— SEARCH AND PLAYBACK You can search the recorded materials by Channel, Date/Time or Event. Step 1: Channel (CH): Select the channel(s)/camera(s) you want to search. Step 2: Search Date by entering in a date and [Search] for all recordings on that specific day. - Page 21 Night Owl L / TL / P / WMC Series Manual Step 4: Click and highlight the data you want to view and you will be shown channels to select. Then [Play]. Step 5: In Playback Mode left click to view the timeline at the bottom of the screen. You can scroll by using the blue time indicator (red and green sections are recorded material) or use the Rewind/Slow/Play/Pause/FFWD icons on the Play Control Bar.
- Page 22 Night Owl L / TL / P / WMC Series Manual Step 1: Enter a date and 1 or more channels. Select a start- time and end-time for your search. Step 2: Click [Search] All the recorded material recorded within that time range will be shown. You can now select one of these to playback.
-
Page 23: Chapter 8. Network Icon - Network Settings
Night Owl L / TL / P / WMC Series Manual CHAPTER 8. NETWORK SETTINGS About networking. To monitor your Night Owl security system from your local network you will need: A. High speed internet connection via a router/modem B. Router log-in info: User Name and Password You may be able to find this information in your router manual. - Page 24 Night Owl L / TL / P / WMC Series Manual For more about IP addresses and how to find them, see IP address in the Appendix/Glossary Step 2: SubStream Tab These settings offer the ability to enable/disable a video channel or adjust the frame rate of your recording, from 10 FPS to 30 FPS.
- Page 25 Night Owl L / TL / P / WMC Series Manual Step 4: Email Tab When a motion triggered recording begins, you can enable this function to email you a notification at that time. Check your email program for the information required.
-
Page 26: Chapter 9.System Icon - System Settings
Night Owl L / TL / P / WMC Series Manual CHAPTER 9 - SYSTEM SETTINGS This section contains basic settings and information about system status 1. HDD Management Tab State of drive (OK or NO ) — Ready to record or Not recognized Free/Total —... - Page 27 Night Owl L / TL / P / WMC Series Manual 2. PTZ: Pan-Tilt-Zoom only available for select camera models. For more information visit www.nightowlsp.com. 3. General: Set Date, Time, Video Format, Language, and Menu Timeout values.
- Page 28 Night Owl L / TL / P / WMC Series Manual 4. Users: To add a user select Enable then go to [Edit] to enter new user name and password Enable new user and [Apply] to save. 5. Info: This screen will show your Device Name, product ID, product Type, Hardware...
-
Page 29: Chapter 10. Advanced Icon And Tabs
Night Owl L / TL / P / WMC Series Manual CHAPTER 10 - ADVANCED 1. Set up Motion Detection parameters [Motion] Tab: Enables the motion detection function and lets you adjust sensitivity. Select a channel and Enable motion detection Choose an area and you will see the channel output full screen Drag the boundaries of the square to cover the area where you want to detect motion. - Page 30 Night Owl L / TL / P / WMC Series Manual 2. [Maintain] Tab StartupWizard:Enable or disable the Startup Wizard when the system is turned on. 4. Auto Reboot: If you experience lag or technical difficulties, you can enable an auto reboot sequence as part of a regular maintenance plan.
- Page 31 Night Owl L / TL / P / WMC Series Manual 10. Load Setting: Load the parameters of your system settings from a USB drive. Note: After loading the settings successfully, your system will reboot. 11. Save Settings: You can save the parameters of your system to a USB flash drive using this option.
-
Page 32: Appendices
Night Owl L / TL / P / WMC Series Manual Appendices Quick References A. Navigation and Symbol Legend Control and playback bar icons To see this menu right click with the mouse anywhere on the screen. Main Menu Lock View 4... - Page 33 Night Owl L / TL / P / WMC Series Manual B. Mouse Operation Right Click: (in Live Feed mode) Shows the Main Menu and function icons . It can also be used to exit menus. Left Click: Enter sub-menus, make selections, and change statuses in drop-down menus.
- Page 34 Night Owl L / TL / P / WMC Series Manual Q: Some channels display just a blank screen even if they receive video sources? A: Check to see if the camera is connected to the system properly (power and video cables) and that nothing is in front of the lens.
- Page 35 Night Owl L / TL / P / WMC Series Manual NightOwl DVR from your browser if you do not have a DDNS. If you do have a DDNS you will access you Night Owl DVR using the DDNS address YourDomainName.owldvr.com:2049 (2049 is the web port)
- Page 36 Night Owl L / TL / P / WMC Series Manual NTSC: Video standard for North America, most of South America, So. Korea and Taiwan (525 lines/30 FPS) NTP: Network Time Protocol. A system for synchronizing computer systems. IP Address: Internet Protocol Address. To find your IP external IP address go to: Whatsmyipaddress.com.
Need help?
Do you have a question about the P Series and is the answer not in the manual?
Questions and answers