
Related Manuals for Lorex LNR380


Summarization of Contents
Important Safeguards
General Precautions
General safety guidelines and warnings for operating the surveillance recorder and its accessories.
Installation Safety
Critical safety instructions to follow during the installation process to prevent hazards.
Contacting Lorex Support
Online Support
Accessing product information, manuals, and FAQs through the Lorex website.
Phone Support
Contacting customer service and technical support via phone for warranty and installation issues.
Installation Procedures
Service and Use
Guidance on product servicing, cleaning, and general usage practices.
Notices and Compliance
FCC/IC Notice
Regulatory information regarding radio frequency energy and interference compliance.
Modification Guidelines
Information on user modifications and their potential impact on device authority.
RoHS Compliance
Details on the product's compliance with the EU directive restricting hazardous substances.
Product Features
Network Video Recorder Features
Key specifications of the NVR, including resolution, recording speed, and storage capacity.
Connectivity Features
Information on the NVR's connectivity options like Stratus Solution and mobile viewing.
Recording and Playback
Recording Modes and Icons
Explains different recording modes and the visual indicators used for recording status.
Playback Options
Details on accessing and navigating recorded video using various playback features.
Video File Management
Procedures for backing up, exporting, and managing video files from the NVR.
Password Management
Steps to enable, disable, and manage user passwords for system access and security.
Camera Configuration
Motion Detection Settings
Configuring motion detection sensitivity, areas, and alarm actions for each camera.
Privacy Mask Configuration
How to block specific areas of the camera view from recording using privacy masks.
Tamper-proof and Video Loss Alarms
Setting up alarms for camera tampering and video connection loss.
System Configuration
Display and Network Settings
Adjusting display resolution, mouse speed, and configuring network IP addresses.
Email and DDNS Configuration
Setting up email alerts and configuring Dynamic DNS for remote access.
NVR Overview
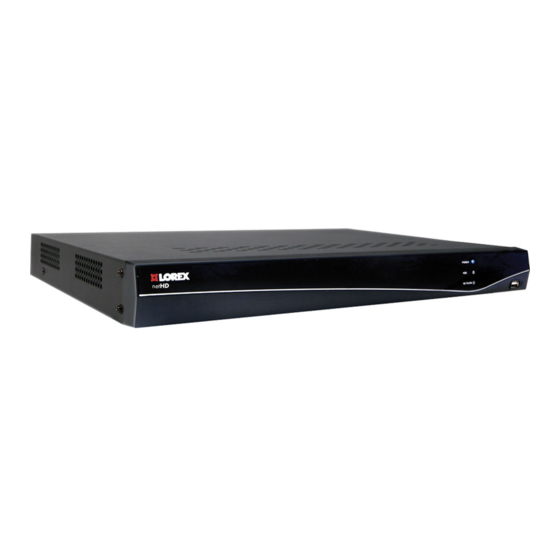
Front Panel Overview
Details the LEDs and USB ports on the front of the NVR unit.
Rear Panel Connections
Explains the function of each port on the rear panel of the 4 and 8-channel NVR models.
16-Channel Rear Panel Connections
Details the ports and connectors on the rear panel of the 16-channel NVR model.
Basic Setup Procedures
Connecting Peripherals
Instructions for connecting the mouse, Ethernet cable, and monitor to the NVR.
Powering On and Camera Connection
Steps to connect the power adapter and IP cameras directly to the NVR.
Initial System Configuration
Verifying camera images, setting system time, and managing default passwords.
Lorex Stratus Connectivity
Information on the cloud-based connectivity service for easy remote access.
Camera Installation Guidance
Installation Tips
Best practices for camera placement, cable routing, and environmental considerations.
Mounting Cameras
Instructions on how to securely mount cameras to various surfaces.
Connecting Cameras Over Local Network
Connecting Cameras Over LAN
Instructions for connecting IP cameras to the NVR via a local area network (LAN).
16-Channel Model LAN Connection
Specific steps for connecting cameras 9-16 to a 16-channel NVR over the local network.
4/8-Channel Model LAN Connection (Advanced)
Advanced method for connecting cameras over LAN on 4/8-channel NVRs.
Mouse Control Interface
Mouse Button Functions
How to use the left button, right button, and scroll wheel for NVR navigation.
Remote Control Operation
Remote Control Functions
Explanation of power, number keys, function buttons, and navigation controls.
Text and Number Entry
Using the remote control with the on-screen keyboard for text or numeric input.
On-Screen Display Navigation
Camera Toolbar Functions
Accessing quick controls for each camera, such as recording and image settings.
Digital Zoom Usage
How to zoom in on live or recorded video for a closer view.
Adjusting Camera Image Settings
Modifying brightness, contrast, saturation, and hue for camera video feeds.
Quick Menu Navigation
Accessing display options and quick controls via the right-click menu.
Virtual Keyboard Input
Using the on-screen keyboard for entering text and numeric data in system menus.
Setting System Date and Time
Daylight Savings Time (DST) Configuration
Enabling and configuring automatic time adjustments for Daylight Savings Time.
NTP Server Time Synchronization
Setting up the NVR to synchronize its time with an online NTP server.
Recording Operations
Recording Modes and Icons
Explains different recording modes and the visual indicators used for recording status.
Video Playback Methods
Quick Playback Usage
Reviewing the last five minutes of footage for a selected camera.
All-Day Playback
Accessing and viewing the last 24 hours of recorded footage for a camera.
Searching Recorded Video
Methods for searching recordings by time, event, or tags using the playback menu.
Locking Video Files
Protecting important video files from being overwritten on the hard drive.
Event Search Functionality
Searching for specific events like motion detection recorded by the NVR.
Tag Search for Video
Locating video footage using user-created tags for quick event retrieval.
On-Screen Playback Controls
Playback Quick Menu
Accessing additional playback controls and options via a context menu.
Digital Zoom in Playback
Using digital zoom to examine recorded footage more closely during playback.
Tagging Video Footage
Marking important moments in video footage for easy event tracking and searching.
Video Backup Procedures
Formatting Storage Drives
Preparing USB flash drives or external hard drives for use with the NVR by formatting them.
Quick Export Functionality
Quickly exporting video clips based on specified start and end times.
Search Export for Backup
Using search criteria to find and back up specific video files.
Video Clip Backup from Playback
Selecting and saving specific video durations directly from playback mode.
Playing Back Archived Video
Using the Quick Player to view video files saved from the NVR.
User Account Management
Password Protection Settings
Enabling or disabling the requirement for passwords to access system menus and playback.
Admin Password Change
Steps to securely change the system administrator's password.
Adding New User Accounts
Creating new user accounts with specific permissions for system access.
Managing User Accounts
Editing, deleting, or modifying existing user account details and permissions.
Manual Recording Setup
Selecting Manual or Scheduled Recording
Configuring cameras for manual recording or selecting scheduled recording operations.
Hard Drive (HDD) Management
Formatting the Hard Drive
Essential steps to format a new or replacement hard drive before use.
Hard Drive Type and Group Configuration
Setting hard drive modes like R/W, Read-only, or Mirror for recording and backup.
Recording Group Settings
Specifying which hard drive groups cameras should record to.
HDD Detect and SMART Settings
Advanced options for detecting hard drive health and running S.M.A.R.T. tests.
Hard Drive Error Checking
Procedures for scanning the hard drive for errors or bad sectors.
Overwrite Functionality
Enabling or disabling the automatic overwrite feature for full hard drives.
Recording Schedule Configuration
Configuring the Recording Schedule
Setting up recording schedules for cameras, including continuous and motion detection modes.
Recording Setup Details
Recording Resolution, Frame Rate, and Quality
Configuring camera video parameters like resolution, frame rate, and image quality.
Pre-Record and Post-Record Time Settings
Configuring the duration of video recorded before and after an event.
Substream Settings for Streaming
Adjusting video quality for remote streaming to conserve bandwidth.
Holiday Recording Schedules
Configuring Holidays
Setting specific dates as holidays to apply special recording configurations.
Camera Management
Camera Connection and Synchronization
Managing connected IP cameras, including initial connection and synchronization.
OSD Configuration
Customizing camera names, dates, and times displayed on the video feed.
Camera Image Adjustment
Fine-tuning camera image settings such as brightness, contrast, and saturation.
Motion Detection Configuration
Enabling and customizing motion detection sensitivity and areas for cameras.
Motion Detection Alarm Actions
Configuring system responses like full-screen alerts or email notifications for motion events.
Privacy Mask Setup
Configuring Privacy Areas
Blocking specific areas of the camera view to maintain privacy.
Tamper-proof Alarm Configuration
Tampering Alarm Settings
Enabling and setting sensitivity for alarms triggered by camera tampering.
Video Loss Alarm Configuration
Video Loss Alarm Settings
Setting up alarms to notify when a camera's video connection is lost.
Connecting NVR to PC/Mac via Internet
System Requirements for Client Software
Minimum system specifications needed to run the Lorex Client Software on a PC or Mac.
NVR Connection Steps
Step-by-step guide to connect the NVR to a router and obtain its device ID.
Internet Connection Setup
Instructions for connecting the NVR to the internet using PC or Mac.
Lorex Client Software
Control Panel Overview
Introduction to the client software's control panel and available menus.
Main View Functionality
Viewing live video streams from connected cameras within the client software.
E-Map Feature
Visualizing camera locations on a map or floor plan within the client software.
Event Search in Client Software
Searching for and reviewing recorded events using the client software's interface.
Remote Playback via Client Software
Accessing and playing back recorded video remotely using the client software.
Add Camera and Group Management
Adding cameras and organizing them into groups for easier management.
Local Log Search Function
Searching and viewing system logs directly from the NVR via the client software.
Account Management in Client Software
Configuring user accounts and passwords for accessing the client software.
Device Management
Adding, removing, and remotely configuring NVRs within the client software.
Camera Settings Configuration
Adjusting individual camera settings like image quality and recording schedules.
System Configuration for Client Software
Configuring the overall settings and behavior of the client software application.
Quick Playback Mode
Accessing Quick Playback
Steps to open and use quick playback to review recent footage.
Video Tagging and Downloading
Tagging Video Through Quick Playback
Marking important moments in video footage for easy event tracking.
Downloading Tagged Video Files
Downloading video clips marked with tags to your computer's hard drive.
Accessing Recordings and Screenshots
Viewing All Files (Recordings & Downloads)
Accessing manual recordings and downloaded video files via the 'All Files' option.
Viewing Saved Screenshots
Locating and viewing screenshots captured using the client software.
Video Player Functionality
Opening Backup Video Files
Using the client software's video player to open extracted backup video files.
E-Map and Event Search
E-Map Controls
Tools for creating and managing E-Maps to visualize camera locations.
Event Search Functionality
Searching for and reviewing recorded events like motion detection.
Event Search Controls
Using the interface to search for events and view playback.
Downloading Event Video Files
Saving event-related video footage directly to your computer.
Remote Playback Operations
Accessing Remote Playback
Steps to connect to the NVR and select cameras for remote playback.
Remote Playback Controls
Using the interface controls for navigating and managing remote playback.
Downloading Video Files Remotely
Downloading video files from the NVR remotely via playback.
Camera and Log Management
Creating Camera Groups
Organizing cameras into groups for simplified management within the client software.
Modifying or Deleting Cameras/Groups
Changing names or removing camera groups from the client software.
Local Log Search
Searching and viewing system logs directly from the NVR.
Backing Up Log Search Results
Saving log search results to your computer's hard drive.
Client Software User and Device Management
Account Management
Creating and managing user accounts with different permission levels.
Adding User Accounts
Steps to create new user accounts with administrator or operator privileges.
Modifying User Accounts
Editing existing user account settings and permissions.
Deleting User Accounts
Removing user accounts from the client software.
Device Management
Adding, removing, and remotely configuring NVRs within the client software.
Modifying or Deleting NVRs
Changing connection details or removing NVRs from the client software.
Configuring NVR Settings via Device Management
Remotely configuring NVR settings through the client software's device management.
General NVR Settings
Configuring general system settings for the NVR, like device name and overwrite.
Network Settings
Configuring IP addresses (DHCP/Static) and system ports for NVR networking.
User Account Configuration
Adding and configuring user accounts and their permissions on the NVR.
Modifying and Deleting Users
Editing existing user accounts or deleting them from the system.
HDD and File Management
Configuring hard drive settings and searching for video files on the NVR.
Log and Holiday Management
Searching system logs and configuring holiday schedules for recording.
Camera Settings Configuration
Adjusting Picture Settings
Fine-tuning camera image settings such as brightness, contrast, and saturation.
Configuring Video Quality
Setting resolution, frame rate, and quality for main, sub, and event streams.
Configuring Camera Recording Schedules
Customizing recording schedules for cameras, including templates and advanced options.
OSD and Privacy Masks
Configuring camera display text (OSD) and privacy areas on the video feed.
Motion Detection Settings
Enabling and customizing motion detection sensitivity and areas for cameras.
Tampering Alarm Settings
Enabling and setting sensitivity for alarms triggered by camera tampering.
Video Loss Alarms
Setting up alarms to notify when a camera's video connection is lost.
System Configuration (Client Software)
General Client Software Options
Configuring general client software settings like screen switching and log keeping.
File Save Folder Configuration
Setting default save locations for screenshots and video files.
Alarm Sound Settings
Configuring audio alerts for system events using custom WAV files.
Client Email Configuration
Setting up outgoing email for alerts, including SMTP server details.
Mobile Apps: Accessing NVR Remotely
Compatible Devices and Platforms
List of supported mobile devices and operating systems for NVR access.
iPhone Connectivity
Connecting to the NVR using the Lorex netHD Stratus app on an iPhone.
iPhone Live View Interface
Navigating the live view interface on an iPhone for monitoring cameras.
iPhone Playback and Device Management
Accessing recorded video and managing NVR connections on an iPhone.
iPad Connectivity
Connecting to the NVR using the Lorex netHD Stratus Plus app on an iPad.
iPad Live View Interface
Navigating the live view interface on an iPad for monitoring cameras.
iPad Playback
Viewing recorded video from the NVR on an iPad.
Android Phone Connectivity
Connecting to the NVR using the Lorex netHD Stratus app on an Android phone.
Android Phone Live View Interface
Navigating the live view interface on an Android phone for monitoring cameras.
Android Phone Playback
Viewing recorded video from the NVR on an Android phone.
Android Tablet Connectivity
Connecting to the NVR using the Lorex netHD Stratus Plus app on an Android tablet.
Android Tablet Live View Interface
Navigating the live view interface on an Android tablet for monitoring cameras.
Android Tablet Playback
Viewing recorded video from the NVR on an Android tablet.
Appendix B: Installing or Replacing the Hard Drive
Installing the Hard Drive
Step-by-step instructions for safely installing a new hard drive into the NVR.
Removing the Hard Drive
Procedure for safely removing an existing hard drive from the NVR.
Formatting the Hard Drive
Essential steps to format a new or replacement hard drive before use.
Appendix C: DDNS Setup (Advanced)
System Requirements for DDNS Setup
Minimum system specifications needed to run the Lorex Client Software for DDNS setup.
Accessing NVR on Local Network (LAN)
Steps to connect the NVR to a local network and obtain its IP address.
Connecting to NVR via LAN on PC
Instructions for connecting to the NVR on the LAN using a PC and client software.
Port Forwarding Configuration
Steps to port forward necessary ports on the router for remote connectivity.
Creating a DDNS Account
Guide to setting up a free Lorex DDNS account for remote access.
Enabling DDNS on the NVR
Configuring the NVR settings to enable DDNS service.
Connecting via DDNS Address in Client Software
Steps to connect to the NVR using its DDNS address in the client software.
Connecting NVR via Web Browser
Connecting Using DDNS or Local IP Address
How to access the NVR using its DDNS or local IP address in a web browser.
Connecting Using Internet Explorer
Guide for accessing the NVR through Internet Explorer, including plug-in installation.
Connecting Using Safari
Instructions for accessing the NVR through Safari, including plug-in download.
Connecting Using Chrome/Firefox
Steps for accessing the NVR through Chrome or Firefox browsers.
Navigating the Web Browser Interface
Overview of the web interface controls for live view and playback.
Web Browser Remote Playback
Playing back recorded files from the NVR directly through a web browser.
Troubleshooting Common Issues
Power and Remote Control Issues
Solutions for problems related to system power, startup, and remote control detection.
Hard Drive and Picture Display Problems
Troubleshooting for hard drive detection, full storage, and monitor picture issues.
Camera Connectivity and System Beep Issues
Resolving issues with camera connection, synchronization, and startup beeps.
Notification and Email Issues
Solutions for problems with motion detection alarms and receiving email notifications.
Need help?
Do you have a question about the LNR380 and is the answer not in the manual?
Questions and answers