
Related Manuals for Marmitek SAFEGUARD


Summary of Contents for Marmitek SAFEGUARD
- Page 1 SAFEGUARD SAFEGUARD TOTALGUARD TOTALGUARD ENGLISH USER’S GUIDE 20071 / 20090424 • SAFEGUARD / TOTALGUARD ALL RIGHTS RESERVED...
-
Page 2: Table Of Contents
__________________________________________________________________________ 3.1.1 Using the Key Chain Remote Control _________________________________________________________________ 3.1.2 Registering the Key Chain Remote Control ____________________________________________________________ Comfort Remote Control SH624 (standard with TotalGuard, optional with SafeGuard) _____________________________ 3.2.1 Using the Comfort Remote Control __________________________________________________________________ 3.2.2 Registering the Comfort Remote... - Page 3 Adding a wired sensor to the Door/Window Sensor DS90 _____________________________________________________ Emergency sensors ______________________________________________________________________________________ Sensor 27-32 Marmitek X-10 ON/OFF trigger function ________________________________________________________ 9.6.1 Apply/Cancel a sensor ______________________________________________________________________________ 9.6.2 Using the Marmitek X-10 ON/OFF trigger function ______________________________________________________ Deregistering a Door/Window Sensor ______________________________________________________________________ Deregistering a Motion Detector___________________________________________________________________________ Advanced Home Automation functions______________________________________________________________ 10.1 Checking the status of the security system...
-
Page 4: Safety Warnings
• In case of improper usage or if you have opened, altered and repaired the product yourself, all guarantees expire. Marmitek does not accept responsibility in the case of improper usage of the product or when the product is used for purposes other than specified. -
Page 5: Basic Options
BASIC OPTIONS 1. Your Marmitek surveillance system The contents of your set: The Marmitek SafeGuard system is an effective security system for your home. In this kit you will find the following components: 1. Security console SC9000 2. Motion Detector MS90 3. -
Page 6: Important Properties
BASIC OPTIONS Marmitek TotalGuard-systeem The Marmitek TotalGuard system is identical to the SafeGuard system, but also contains components for prevention and comfort. The TotalGuard system also contains the following components: 1. Lamp/Dimmer Module LM12 2. Comfort Remote Control SH624 3. One extra DS90 Door/Window Sensor ☺... -
Page 7: Signal Range
(13) Menu Start - Call up the menu or step down in the menu. (14) ON - Switch on a Marmitek X-10 Module (see 7.7). (15) OFF - Switch off a Marmitek X-10 Module (see 7.7). (16) OK - Confirm setting. -
Page 8: Installing The Console
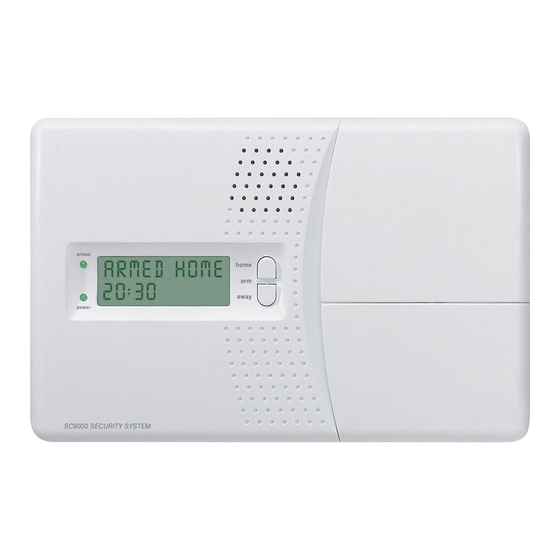
Preferably use alkaline batteries (not rechargeable batteries). After inserting the batteries and closing the compartment, enter your PIN code (factory settings 0000, see 8.3) to remove the word ‘TAMPER’. The display will now read ‘DISARMED’ and you will hear a double tone to conf MARMITEK... -
Page 9: Mounting The Security Console
PIN code (factory settings 0000, see 8.3) to remove the word ‘TAMPER’. The display will now read ‘DISARMED’ and you will hear a double tone to confirm. Then the text HOME CONTROL will be shown. SAFEGUARD / TOTALGUARD... -
Page 10: Choosing Your Language
Press OK to confirm. E N G L I S H Press Clear and then 1 (=Yes) to quit the menu. Q U I T M E N U 1 . Y E S 2 . N O MARMITEK... -
Page 11: The Menu In English
Delay before the system calls out in case of an alarm (8.1). ANSWER DELAY Delay before the system picks up the phone when dialling in (8.1). 9. SET TIMER Submenu: NEW TIMER Setting a new timer (7.8). SAFEGUARD / TOTALGUARD... -
Page 12: Installing Remote Controls
No. If you choose Yes, you will quit the menu. If you choose No, you go back to the main menu. ☺ You can also remove remote controls from the menu, e.g. when you have lost a remote control. This method is described in 8.2. ☺ Read chapter 12 for information on replacing the batteries.. MARMITEK... -
Page 13: Comfort Remote Control Sh624 (Standard With Totalguard, Optional With Safeguard)
BASIC OPTIONS 3.2 Comfort Remote Control SH624 (standard with TotalGuard, optional with SafeGuard, art. no. 09170) 1. PANIC With this red button the panic alarm can be activated immediately. 2. CONTROL INDICATOR Lights up when the remote control transmits radio signals when pressing the buttons. -
Page 14: Installing The Sensors
(on e.g. the backdoor), set the switch to MIN. 4. Keep the tamper contact (9) on the transmitter pressed for 4 seconds. Release the button. The door/window sensor has now chosen a unique code, which can be registered with your console. MARMITEK... -
Page 15: Registering A Door/Window Sensor
MS90 at a height of about 180 cm from the floor and place it in such a way that the detector can cover the area you want to secure. The mounting bracket can be placed at an angle (90°) or directly against the wall. SAFEGUARD / TOTALGUARD... -
Page 16: Using The Motion Detector
7. Press CLEAR again to quit the menu. To confirm your choice, press 1 for Yes or 2 for No. If you choose Yes, you will quit the menu. If you choose No, you go back to the main menu. ☺ Read chapter 12 for information on replacing the batteries. MARMITEK... -
Page 17: Smoke Detector Sd10 /Sd90
BASIC OPTIONS 4.3 Smoke Detector SD10 / SD90 The Marmitek Smoke Detector will make sure you are warned in case of a fire. When you’re at home, the built-in siren will be triggered. Combined with your security system the internal siren, the telephone dialler and the lights will be activated. This gives you an optimal warning and makes sure your exits are well lit. -
Page 18: Storing Phone Numbers
5.2 Storing phone numbers The Marmitek SC9000 console is equipped with a telephone dialler. In the case of an alarm up to 6 telephone numbers can be dialled. All persons called will be able to listen to the message you have recorded (5.3). The message needs to be confirmed by the person answering the phone by pressing a 0 on their phone. -
Page 19: Using The Security System
Please note: Make sure the front door is closed when you switch on the device. Via the Comfort Remote Control SH624 Set the switch to SEC. Press the ARM AWAY button. The alarm is switched on instantly. SAFEGUARD / TOTALGUARD... -
Page 20: Panic Alarm
1. Activate the alarm via the KR21 Key Chain Remote Control Keep the bottom two buttons of the remote control pressed. The panic alarm is instantly triggered. Depending on the console settings the siren will be triggered or not (see 9.1). MARMITEK... -
Page 21: What Happens When The Alarm Goes Off
The zone indicator of the sensor concerned will now flash quickly. If there are more sensors causing problems, the information on the next sensor will be displayed. The bypass is valid until you switch off the alarm (Disarm). SAFEGUARD / TOTALGUARD... -
Page 22: Prevention And Comfort - 'Home Automation
Marmitek offers you the choice. You Marmitek system is equipped with functions to secure your home. The system uses an intelligent process to control the lighting in your house, so that it appears as if you are at home. -
Page 23: Addressing Your Modules
7.2 Addressing your modules An address can be set for every Marmitek X-10 module. This address consists of a HOUSECODE (A-P) and a UNITCODE (1-16). The HOUSECODE of all your components needs to be set to the same letter code (keep all the HOUSECODES set to A. -
Page 24: Comfort Functions Of The Sh624 Comfort Remote Control
Switch (4) SEC setting: The bottom five buttons (1) are used to switch the Marmitek X-10 modules with corresponding addresses (UnitCodes 1-5). Use the green button (3) to dim lamps connected to a lamp/dimmer module. -
Page 25: Clearing The Timer Settings
7. When a timer is shown, you can press CLEAR to delete the timer. 8. You need to confirm your choice (CLEAR TIMER). Press1 for Yes and 2 for No. 9. Press CLEAR again to quit the menu. SAFEGUARD / TOTALGUARD... -
Page 26: Advanced System Functions
You can delete sensors, remote controls, timers or all settings via the menu MEMORY CLEAR. ☺ The PIN code is never erased. This code can only be reset by a Marmitek Authorised Service Center. 1. To access the menu, press the menu or menu button. -
Page 27: Changing The Access Code (Pin)
You also use this code to disarm the alarm via the number pad. Make sure you memorise the code, because only a Marmitek Authorised Service Center can help you reset the code to the factory setting (0000). The Service Center will charge you for resetting the console. -
Page 28: Using Wired Inputs
A few examples: • Securing a window with multiple magnetic contacts. • Adding extra sensors to your Marmitek system, e.g. smoke detectors, temperature sensors, sensors to detect electrical failures, etc. 1. Open the transmitter part of the DS90 by removing the screw. -
Page 29: Emergency Sensors
☺ Make sure the DS90 Door/Window Sensor is set to MIN if you want the message to be passed on without a delay (see 8.1). 9.6 Sensor 27-32 Marmitek X-10 ON/OFF trigger function The Marmitek SC9000 console is equipped with a sensor trigger function for sensors 27 to 32. 9.6.1 Apply/Cancel a sensor 1. -
Page 30: Using The Marmitek X-10 On/Off Trigger Function
No. If you choose Yes, you will quit the menu. If you choose No, you go back to the main menu. 9.6.2 Using the Marmitek X-10 ON/OFF trigger function ARM the system. If the zone selected by procedure above has triggered the system. The House code of the system (default A)+1, unit code 7-12 + ON or OFF (selected by user in procedure above) will be transmitted via the mains. -
Page 31: Advanced Home Automation Functions
10.Advanced Home Automation functions In chapter 7 you learnt how to use the Marmitek X-10 Home Automation options of your security system. But there is a lot more. Marmitek not only has the Plug & Play modules described, but a large number of built-in switches, sun blind switches, remote controls and special modules which can be used in combination with your security system. -
Page 32: All Home Automation Functions At A Glance
HouseCode. The HouseCode of the console, the remote controls and the Home Automation modules all have to have the same letter. The 1 in the basic address is called the UnitCode. If your neighbours also have a Marmitek security system, it may be necessary to change the basic addresses and the addresses of your Marmitek X-10 modules. - Page 33 7. Press CLEAR again to quit the menu. Did you already have several Marmitek X-10 modules installed before installing the security system? Then you may need to change the basic UnitCode for the system. This means you do not need to change the addresses of the existing system.
-
Page 34: Telephone Functions
When you press 9 9 followed by *, the console will do a status check: The status can be: ARMED HOME: The system is set to ARM HOME mode. ARMED AWAY: The system is set to ARM AWAY mode. MARMITEK... -
Page 35: Operate Lights And Equipment Via An Outside Phone
3. If your PIN is correct, you will hear ‘PIN accepted’. If your PIN is incorrect, you will hear ‘Error’. 4. Press 4 *: The Marmitek X-10 module with UnitCode 4 will be switched on. You will hear ‘4 ON’ to confirm. -
Page 36: Frequently Asked Questions
What to do if a zone indicator flashes quickly? You have pressed the CLEAR button to activate the security system while a sensor or motion detector indicated an error. Solve the problem (i.e. close the window, replace the batteries) before activating the zone. MARMITEK... - Page 37 If necessary replace the battery/ies. When using multiple phases in your house, you may need to couple these phases for Marmitek X-10 signals. See www.marmitek.com for more information.
-
Page 38: Tabels
________ _____________________________________________________________________________ ____________________ ________ _____________________________________________________________________________ Wired input 1 ________ _____________________________________________________________________________ Wired input 2 TABEL TELEPHONE NUMBERS Memory position Telephone number Name ___________________ _____________________________ __________________________________________________________ ___________________ _____________________________ __________________________________________________________ ___________________ _____________________________ __________________________________________________________ ___________________ _____________________________ __________________________________________________________ ___________________ _____________________________ __________________________________________________________ ___________________ _____________________________ __________________________________________________________ MARMITEK... -
Page 39: Technical Data
433.92 MHz Sends X-10 Key codes: On, Off. RF receiver frequency: 433.92 MHz Certification: TBR21 approved telephone selector Standard for TotalGuard, optional for SafeGuard: Integrated siren: 95 dB (A) Capacity: Up to and incl.: 30 sensors (door/ window, motion sensors... -
Page 40: Declaration Of Conformity
All rights reserved. Copyright and all other proprietary rights in the content (including but not limited to model numbers, software, audio, video, text and photographs) rests with Marmitek B.V. Any use of the Content, including without limitation, distribution, reproduction, modification, display or transmission without the prior written consent of Marmitek is strictly prohibited.
Need help?
Do you have a question about the SAFEGUARD and is the answer not in the manual?
Questions and answers