Table of Contents
Advertisement
Quick Links
Installer's Guide
Upflow/Horizontal and Downflow
Gas-Fired, Direct/Non-Direct Vent, 2–Stage
Condensing
Furnaces with High Efficiency Motor
U U p p f f l l o o w w , , C C o o n n v v e e r r t t i i b b l l e e t t o o
H H o o r r i i z z o o n n t t a a l l R R i i g g h h t t o o r r
H H o o r r i i z z o o n n t t a a l l L L e e f f t t
S9X2B040U2PSAA
S9X2B040U3PSAA
S9X2B060U3PSAA
S9X2B060U4PSAA
S9X2B080U3PSAA
S9X2B080U4PSAA
S9X2C080U4PSAA
S9X2C080U5PSAA
S9X2C100U4PSAA
S9X2C100U5PSAA
S9X2D120U5PSAA
Only qualified personnel should install and service the equipment. The installation, starting up, and servicing of heating, ventilating, and
air-conditioning equipment can be hazardous and requires specific knowledge and training. Improperly installed, adjusted or altered
equipment by an unqualified person could result in death or serious injury. When working on the equipment, observe all precautions in the
literature and on the tags, stickers, and labels that are attached to the equipment.
May 2017
D D o o w w n n f f l l o o w w O O n n l l y y
S9X2B040D2PSAA
S9X2B060D3PSAA
S9X2B080D4PSAA
S9X2C100D5PSAA
S9X2D120D5PSAA
18-CE02D1-1B-EN
S S A A F F E E T T Y Y W W A A R R N N I I N N G G
1 1 8 8 - - C C E E 0 0 2 2 D D 1 1 - - 1 1 B B - - E E N N
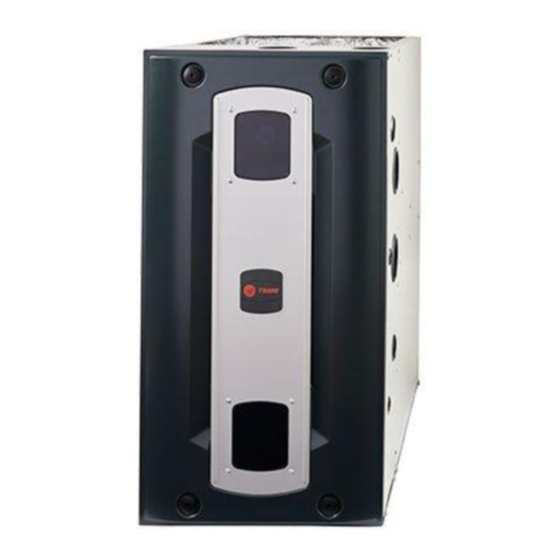
N N o o t t e e : : Graphics in this document are for
representation only. Actual model may
differ in appearance.
Advertisement
Table of Contents

Related Manuals for Ingersoll-Rand S9X2B040U2PSAA


Summary of Contents for Ingersoll-Rand S9X2B040U2PSAA
- Page 1 H H o o r r i i z z o o n n t t a a l l R R i i g g h h t t o o r r S9X2B040D2PSAA H H o o r r i i z z o o n n t t a a l l L L e e f f t t S9X2B060D3PSAA S9X2B040U2PSAA S9X2B080D4PSAA S9X2B040U3PSAA S9X2C100D5PSAA...
- Page 2 SAFETY SECTION— FURNACES I I n n g g e e r r s s o o l l l l R R a a n n d d h h a a s s a a p p o o l l i i c c y y o o f f c c o o n n t t i i n n u u o o u u s s p p r r o o d d u u c c t t W W A A R R N N I I N N G G a a n n d d p p r r o o d d u u c c t t d d a a t t a a i i m m p p r r o o v v e e m m e e n n t t a a n n d d i i t t r r e e s s e e r r v v e e s s t t h h e e E E L L E E C C T T R R I I C C A A L L S S H H O O C C K K , , F F I I R R E E , , O O R R...
- Page 3 S S A A F F E E T T Y Y S S E E C C T T I I O O N N — — F F U U R R N N A A C C E E S S W W A A R R N N I I N N G G W W A A R R N N I I N N G G H H A A Z Z A A R R D D O O U U S S G G A A S S E E S S ! !
- Page 4 S S A A F F E E T T Y Y S S E E C C T T I I O O N N — — F F U U R R N N A A C C E E S S W W A A R R N N I I N N G G W W A A R R N N I I N N G G E E X X P P L L O O S S I I O O N N H H A A Z Z A A R R D D ! !
- Page 5 S S A A F F E E T T Y Y S S E E C C T T I I O O N N — — F F U U R R N N A A C C E E S S C C A A U U T T I I O O N N C C A A U U T T I I O O N N I I M M P P R R O O P P E E R R V V O O L L T T A A G G E E C C O O N N N N E E C C T T I I O O N N ! !
- Page 6 S S A A F F E E T T Y Y S S E E C C T T I I O O N N — — F F U U R R N N A A C C E E S S C C A A U U T T I I O O N N C C A A U U T T I I O O N N D D O O N N O O T T U U S S E E A A S S C C O O N N S S T T R R U U C C T T I I O O N N...
- Page 7 S S A A F F E E T T Y Y S S E E C C T T I I O O N N — — F F U U R R N N A A C C E E S S W W A A R R N N I I N N G G C C A A U U T T I I O O N N C C A A R R B B O O N N M M O O N N O O X X I I D D E E P P O O I I S S O O N N I I N N G G...
-
Page 8: Table Of Contents
Table of Contents Accessories....... . . 9 Horizontal Applications ....69 Document Pack Contents . -
Page 9: Accessories
H H o o r r i i z z o o n n t t a a l l R R i i g g h h t t o o r r S9X2B040D2PSAA H H o o r r i i z z o o n n t t a a l l L L e e f f t t S9X2B060D3PSAA S9X2B040U2PSAA S9X2B080D4PSAA S9X2B040U3PSAA S9X2C100D5PSAA... -
Page 10: Furnace Installation Guidelines
Furnace Installation Guidelines The following sections give general guidelines for the c. The Furnace return air duct must be complete installation of the gas furnaces. and sealed to the Furnace. d. The Furnace input rate and temperature rise Safety Practices and Precautions must be verified to be within the nameplate marking. -
Page 11: Locations And Clearances
F F u u r r n n a a c c e e I I n n s s t t a a l l l l a a t t i i o o n n G G u u i i d d e e l l i i n n e e s s These Furnaces have been classified as CATEGORY IV 1 in. -
Page 12: Outline Drawings
Outline Drawings 18-CE02D1-1B-EN... - Page 13 O O u u t t l l i i n n e e D D r r a a w w i i n n g g s s 18-CE02D1-1B-EN...
- Page 14 O O u u t t l l i i n n e e D D r r a a w w i i n n g g s s 18-CE02D1-1B-EN...
- Page 15 O O u u t t l l i i n n e e D D r r a a w w i i n n g g s s 18-CE02D1-1B-EN...
- Page 16 O O u u t t l l i i n n e e D D r r a a w w i i n n g g s s 18-CE02D1-1B-EN...
- Page 17 O O u u t t l l i i n n e e D D r r a a w w i i n n g g s s 18-CE02D1-1B-EN...
-
Page 18: Furnace General Installation
Furnace General Installation S-Series Furnace Panel Removal The following sections give general instructions for the installation of the gas furnaces. Note: Use a 5/16” Allen wrench to remove the front panel. Fits 5/16” Allen wrench 18-CE02D1-1B-EN... -
Page 19: Gas Piping
F F u u r r n n a a c c e e G G e e n n e e r r a a l l I I n n s s t t a a l l l l a a t t i i o o n n Gas Piping Important: When converting the gas piping from the factory default, the plug must be removed from the new gas piping... - Page 20 F F u u r r n n a a c c e e G G e e n n e e r r a a l l I I n n s s t t a a l l l l a a t t i i o o n n Important: When converting the gas piping from the factory default, the plug must be removed from the new gas piping location and swapped with the grommet from the default...
- Page 21 F F u u r r n n a a c c e e G G e e n n e e r r a a l l I I n n s s t t a a l l l l a a t t i i o o n n The upflow/horizontal furnace is shipped standard for left side installation of gas piping.
-
Page 22: Combustion And Input Check
F F u u r r n n a a c c e e G G e e n n e e r r a a l l I I n n s s t t a a l l l l a a t t i i o o n n Combustion and Input Check Make sure all gas appliances are off except the furnace. -
Page 23: Gas Valve Adjustment
F F u u r r n n a a c c e e G G e e n n e e r r a a l l I I n n s s t t a a l l l l a a t t i i o o n n Gas Valve Adjustment Changes can be made by adjusting the manifold pressure, or changing White-Rodgers 36J... -
Page 24: High Altitude Derate
F F u u r r n n a a c c e e G G e e n n e e r r a a l l I I n n s s t t a a l l l l a a t t i i o o n n High Altitude Derate Input ratings (BTUH) of these Furnaces are based on sea level operation and should not be changed at elevations up to 2,000 ft. -
Page 25: General Venting
F F u u r r n n a a c c e e G G e e n n e e r r a a l l I I n n s s t t a a l l l l a a t t i i o o n n General Venting FURNACE EXHAUST MUST BE VENTED TO THE OUTDOORS. -
Page 26: Special Case Venting
F F u u r r n n a a c c e e G G e e n n e e r r a a l l I I n n s s t t a a l l l l a a t t i i o o n n Special Case Venting Special instructions for direct vent furnace air intake. - Page 27 F F u u r r n n a a c c e e G G e e n n e e r r a a l l I I n n s s t t a a l l l l a a t t i i o o n n Option 2 —...
-
Page 28: Vent Terminations
F F u u r r n n a a c c e e G G e e n n e e r r a a l l I I n n s s t t a a l l l l a a t t i i o o n n Vent Terminations For DIRECT VENT APPLICATION: The Furnaces must be vented to Vent terminations... - Page 29 F F u u r r n n a a c c e e G G e e n n e e r r a a l l I I n n s s t t a a l l l l a a t t i i o o n n ATTACHING VENT PIPING Important: Products installed in Canada must use vent systems that are certified to the Standard for Type BH Gas Venting...
- Page 30 F F u u r r n n a a c c e e G G e e n n e e r r a a l l I I n n s s t t a a l l l l a a t t i i o o n n APPROVED VENT PIPE MATERIALS PVC VENT FITTING MATERIAL These fittings are available from your Gas Furnace Distributors.
-
Page 31: Maximum Vent Length Table
F F u u r r n n a a c c e e G G e e n n e e r r a a l l I I n n s s t t a a l l l l a a t t i i o o n n Maximum Vent Length Table Maximum Total Equivalent Length In Feet Maximum Vent Length Table... -
Page 32: Horizontal Venting
F F u u r r n n a a c c e e G G e e n n e e r r a a l l I I n n s s t t a a l l l l a a t t i i o o n n Horizontal Venting 3”... - Page 33 F F u u r r n n a a c c e e G G e e n n e e r r a a l l I I n n s s t t a a l l l l a a t t i i o o n n COMBUSTIBLE MATERIAL WALL COUPLING PVC WALL...
-
Page 34: Horizontal Venting Through Wall
F F u u r r n n a a c c e e G G e e n n e e r r a a l l I I n n s s t t a a l l l l a a t t i i o o n n Table 2. -
Page 35: With Concentric Vent Kit
F F u u r r n n a a c c e e G G e e n n e e r r a a l l I I n n s s t t a a l l l l a a t t i i o o n n Horizontal Venting Through Wall with Concentric Vent Kit These Furnaces may be installed as direct vent (as shipped) or BAYVENT200B / BAYVENTCN200B... - Page 36 F F u u r r n n a a c c e e G G e e n n e e r r a a l l I I n n s s t t a a l l l l a a t t i i o o n n Important: The Commonwealth of Massachusetts requires compliance with regulation 248 CMR 4.00 and 5.00 for installation of through –...
- Page 37 F F u u r r n n a a c c e e G G e e n n e e r r a a l l I I n n s s t t a a l l l l a a t t i i o o n n Non-Direct Vent Termination Clearances Canadian Installations US Installations...
- Page 38 F F u u r r n n a a c c e e G G e e n n e e r r a a l l I I n n s s t t a a l l l l a a t t i i o o n n Direct Vent Termination Clearances Canadian Installations US Installations...
-
Page 39: Venting Through The Roof
F F u u r r n n a a c c e e G G e e n n e e r r a a l l I I n n s s t t a a l l l l a a t t i i o o n n Venting Through The Roof Support Horizontal pipe every 3’0”... - Page 40 F F u u r r n n a a c c e e G G e e n n e e r r a a l l I I n n s s t t a a l l l l a a t t i i o o n n When penetrating roof with PVC vent pipe, a flexible flashing may be used for a weather tight seal.
-
Page 41: Air For Combustion And Ventilation
F F u u r r n n a a c c e e G G e e n n e e r r a a l l I I n n s s t t a a l l l l a a t t i i o o n n Downward Venting Downward Venting Furnace may be in vertical or horizontal configuration. - Page 42 F F u u r r n n a a c c e e G G e e n n e e r r a a l l I I n n s s t t a a l l l l a a t t i i o o n n Confined spaces are installations with less than 50 cu.
- Page 43 F F u u r r n n a a c c e e G G e e n n e e r r a a l l I I n n s s t t a a l l l l a a t t i i o o n n All air from outdoors The confined space shall be provided with two permanent openings, one commencing within 12 inches of the top and CONFINED SPACE...
-
Page 44: Duct Connections
F F u u r r n n a a c c e e G G e e n n e e r r a a l l I I n n s s t t a a l l l l a a t t i i o o n n Duct Connections Air duct systems should be installed in accordance with standards for When the furnace is located in a utility room adjacent to the living... - Page 45 F F u u r r n n a a c c e e G G e e n n e e r r a a l l I I n n s s t t a a l l l l a a t t i i o o n n Table 3.
- Page 46 F F u u r r n n a a c c e e G G e e n n e e r r a a l l I I n n s s t t a a l l l l a a t t i i o o n n Furnace in Horizontal Left with Coil Bend furnace flanges up.
- Page 47 F F u u r r n n a a c c e e G G e e n n e e r r a a l l I I n n s s t t a a l l l l a a t t i i o o n n Furnace in Horizontal Right with “A”...
- Page 48 F F u u r r n n a a c c e e G G e e n n e e r r a a l l I I n n s s t t a a l l l l a a t t i i o o n n Downflow Furnace with Coil Bend furnace flanges down.
- Page 49 F F u u r r n n a a c c e e G G e e n n e e r r a a l l I I n n s s t t a a l l l l a a t t i i o o n n Horizontal Right and Downflow Furnace —...
- Page 50 F F u u r r n n a a c c e e G G e e n n e e r r a a l l I I n n s s t t a a l l l l a a t t i i o o n n Table 4.
- Page 51 F F u u r r n n a a c c e e G G e e n n e e r r a a l l I I n n s s t t a a l l l l a a t t i i o o n n Table 4.
- Page 52 F F u u r r n n a a c c e e G G e e n n e e r r a a l l I I n n s s t t a a l l l l a a t t i i o o n n Table 4.
- Page 53 F F u u r r n n a a c c e e G G e e n n e e r r a a l l I I n n s s t t a a l l l l a a t t i i o o n n Table 4.
- Page 54 F F u u r r n n a a c c e e G G e e n n e e r r a a l l I I n n s s t t a a l l l l a a t t i i o o n n Table 4.
- Page 55 F F u u r r n n a a c c e e G G e e n n e e r r a a l l I I n n s s t t a a l l l l a a t t i i o o n n Table 4.
-
Page 56: Return Air Filters
F F u u r r n n a a c c e e G G e e n n e e r r a a l l I I n n s s t t a a l l l l a a t t i i o o n n Return Air Filters Return Air Filters TYPICAL UPFLOW RETURN AIR FILTER INSTALLATIONS... - Page 57 F F u u r r n n a a c c e e G G e e n n e e r r a a l l I I n n s s t t a a l l l l a a t t i i o o n n Upflow Furnaces: When the upflow furnace is installed in the horizontal right or left application and a return duct is attached to the top side, do not...
-
Page 58: Electrical Connections
F F u u r r n n a a c c e e G G e e n n e e r r a a l l I I n n s s t t a a l l l l a a t t i i o o n n Electrical Connections Make wiring connections to the unit as indicated on enclosed wiring diagram. - Page 59 F F u u r r n n a a c c e e G G e e n n e e r r a a l l I I n n s s t t a a l l l l a a t t i i o o n n Two Stage Thermostat Furnace...
- Page 60 F F u u r r n n a a c c e e G G e e n n e e r r a a l l I I n n s s t t a a l l l l a a t t i i o o n n Single Stage Thermostat Furnace...
-
Page 61: Twinning
F F u u r r n n a a c c e e G G e e n n e e r r a a l l I I n n s s t t a a l l l l a a t t i i o o n n Twinning NOTES: TWINNING CONNECTION DIAGRAM... - Page 62 F F u u r r n n a a c c e e G G e e n n e e r r a a l l I I n n s s t t a a l l l l a a t t i i o o n n NOTES: TWINNING CONNECTION DIAGRAM 1.
- Page 63 F F u u r r n n a a c c e e G G e e n n e e r r a a l l I I n n s s t t a a l l l l a a t t i i o o n n TWINNING CONNECTION DIAGRAM NOTES: FOR TWINNING S-SERIES FURNACES...
- Page 64 F F u u r r n n a a c c e e G G e e n n e e r r a a l l I I n n s s t t a a l l l l a a t t i i o o n n NOTES: 1.
-
Page 65: Condensate Drain Instructions
Condensate Drain Instructions The following sections give general instructions for the Repositioning of the condensate trap is covered in the installation of the gas furnace condensate drains. exhaust air options section. Cutouts with plugs and grommets are provided on the left and right hand side of the furnace cabinets for drain connections IN VERTICAL C C A A U U T T I I O O N N APPLICATIONS. -
Page 66: Vertical Applications
C C o o n n d d e e n n s s a a t t e e D D r r a a i i n n I I n n s s t t r r u u c c t t i i o o n n s s Vertical Applications VERTICAL APPLICATIONS Note: For easiest installation, remove the spring clip from the end of... - Page 67 C C o o n n d d e e n n s s a a t t e e D D r r a a i i n n I I n n s s t t r r u u c c t t i i o o n n s s Downflow furnace - Cut the 90 degree section of the condensate tubing off and connect the tubing to the condensate trap.
- Page 68 C C o o n n d d e e n n s s a a t t e e D D r r a a i i n n I I n n s s t t r r u u c c t t i i o o n n s s Plug the bottom hole with plug provided in document pack.
-
Page 69: Horizontal Applications
C C o o n n d d e e n n s s a a t t e e D D r r a a i i n n I I n n s s t t r r u u c c t t i i o o n n s s Attaching the condensate drain line. -
Page 70: General Start-Up And Adjustment
General Start-up and Adjustment Preliminary Inspections The following sections give instructions for the general start-up and adjustment of the gas furnaces. With gas and electrical power "OFF", ensure: Turn knob on main gas valve within the unit to the "OFF" position. Turn the external gas valve to "ON". -
Page 71: Options
Furnace Combustion Air Exhaust Options Important: All plugs must be in place for sealed combustion. Note: If the electrical and natural gas connections are moved to the right side, remove the plugs and move them to the left side. Note: Default is left side for electric and natural gas connections. The grommets will move from the left side to the right side. - Page 72 F F u u r r n n a a c c e e C C o o m m b b u u s s t t i i o o n n A A i i r r E E x x h h a a u u s s t t O O p p t t i i o o n n s s Table 6.
-
Page 73: Top Vented Combustion Air
F F u u r r n n a a c c e e C C o o m m b b u u s s t t i i o o n n A A i i r r E E x x h h a a u u s s t t O O p p t t i i o o n n s s Upflow Furnace in Upflow Position —... - Page 74 F F u u r r n n a a c c e e C C o o m m b b u u s s t t i i o o n n A A i i r r E E x x h h a a u u s s t t O O p p t t i i o o n n s s Slide PVC pipe through vent outlet adaptor and insert into inducer outlet.
-
Page 75: Upflow Furnace In Upflow Position - Left Side Vented Combustion Air
F F u u r r n n a a c c e e C C o o m m b b u u s s t t i i o o n n A A i i r r E E x x h h a a u u s s t t O O p p t t i i o o n n s s Upflow Furnace in Upflow Position —... - Page 76 F F u u r r n n a a c c e e C C o o m m b b u u s s t t i i o o n n A A i i r r E E x x h h a a u u s s t t O O p p t t i i o o n n s s Remove two 3”...
- Page 77 F F u u r r n n a a c c e e C C o o m m b b u u s s t t i i o o n n A A i i r r E E x x h h a a u u s s t t O O p p t t i i o o n n s s Remove the three inducer mounting screws.
- Page 78 F F u u r r n n a a c c e e C C o o m m b b u u s s t t i i o o n n A A i i r r E E x x h h a a u u s s t t O O p p t t i i o o n n s s Attach the vent outlet gasket to the vent outlet.
-
Page 79: Air
F F u u r r n n a a c c e e C C o o m m b b u u s s t t i i o o n n A A i i r r E E x x h h a a u u s s t t O O p p t t i i o o n n s s Upflow Furnace in Horizontal Left Position —... - Page 80 F F u u r r n n a a c c e e C C o o m m b b u u s s t t i i o o n n A A i i r r E E x x h h a a u u s s t t O O p p t t i i o o n n s s Remove three inducer screws.
- Page 81 F F u u r r n n a a c c e e C C o o m m b b u u s s t t i i o o n n A A i i r r E E x x h h a a u u s s t t O O p p t t i i o o n n s s Remove 3”...
- Page 82 F F u u r r n n a a c c e e C C o o m m b b u u s s t t i i o o n n A A i i r r E E x x h h a a u u s s t t O O p p t t i i o o n n s s Slide PVC through vent outlet adaptor and insert into inducer outlet.
-
Page 83: Upflow Furnace In Horizontal Left
F F u u r r n n a a c c e e C C o o m m b b u u s s t t i i o o n n A A i i r r E E x x h h a a u u s s t t O O p p t t i i o o n n s s Connect PS2 tubing to switch and new sensing location. - Page 84 F F u u r r n n a a c c e e C C o o m m b b u u s s t t i i o o n n A A i i r r E E x x h h a a u u s s t t O O p p t t i i o o n n s s Remove plug from 3”...
- Page 85 F F u u r r n n a a c c e e C C o o m m b b u u s s t t i i o o n n A A i i r r E E x x h h a a u u s s t t O O p p t t i i o o n n s s Attach the vent outlet gasket to the vent outlet.
- Page 86 F F u u r r n n a a c c e e C C o o m m b b u u s s t t i i o o n n A A i i r r E E x x h h a a u u s s t t O O p p t t i i o o n n s s Condensate Trap Installation Reinstall the condensate adapter if it was earlier removed or ensure adapter is still in place.
-
Page 87: Position - Side Vented Combustion
F F u u r r n n a a c c e e C C o o m m b b u u s s t t i i o o n n A A i i r r E E x x h h a a u u s s t t O O p p t t i i o o n n s s Upflow Furnace in Horizontal Right Position —... - Page 88 F F u u r r n n a a c c e e C C o o m m b b u u s s t t i i o o n n A A i i r r E E x x h h a a u u s s t t O O p p t t i i o o n n s s Attach the vent outlet gasket to the vent outlet.
- Page 89 F F u u r r n n a a c c e e C C o o m m b b u u s s t t i i o o n n A A i i r r E E x x h h a a u u s s t t O O p p t t i i o o n n s s Remove condensate drain plug from top right location on cold header.
- Page 90 F F u u r r n n a a c c e e C C o o m m b b u u s s t t i i o o n n A A i i r r E E x x h h a a u u s s t t O O p p t t i i o o n n s s Condensate Trap Installation Reinstall the condensate adapter if it was earlier removed or ensure adapter is still in place.
-
Page 91: Combustion Air
F F u u r r n n a a c c e e C C o o m m b b u u s s t t i i o o n n A A i i r r E E x x h h a a u u s s t t O O p p t t i i o o n n s s Upflow Furnace in Horizontal Right Position —... - Page 92 F F u u r r n n a a c c e e C C o o m m b b u u s s t t i i o o n n A A i i r r E E x x h h a a u u s s t t O O p p t t i i o o n n s s Remove three inducer screws.
- Page 93 F F u u r r n n a a c c e e C C o o m m b b u u s s t t i i o o n n A A i i r r E E x x h h a a u u s s t t O O p p t t i i o o n n s s Remove the pressure switch bracket assembly.
- Page 94 F F u u r r n n a a c c e e C C o o m m b b u u s s t t i i o o n n A A i i r r E E x x h h a a u u s s t t O O p p t t i i o o n n s s Slide PVC through vent outlet adaptor and insert into inducer outlet.
- Page 95 F F u u r r n n a a c c e e C C o o m m b b u u s s t t i i o o n n A A i i r r E E x x h h a a u u s s t t O O p p t t i i o o n n s s Connect PS2 tubing to switch and new sensing location.
-
Page 96: Combustion Air
F F u u r r n n a a c c e e C C o o m m b b u u s s t t i i o o n n A A i i r r E E x x h h a a u u s s t t O O p p t t i i o o n n s s Downflow Furnace —... - Page 97 F F u u r r n n a a c c e e C C o o m m b b u u s s t t i i o o n n A A i i r r E E x x h h a a u u s s t t O O p p t t i i o o n n s s Slide PVC pipe through vent outlet adaptor and insert into inducer outlet.
-
Page 98: Vented Combustion Air
F F u u r r n n a a c c e e C C o o m m b b u u s s t t i i o o n n A A i i r r E E x x h h a a u u s s t t O O p p t t i i o o n n s s Downflow Furnace —... - Page 99 F F u u r r n n a a c c e e C C o o m m b b u u s s t t i i o o n n A A i i r r E E x x h h a a u u s s t t O O p p t t i i o o n n s s Remove two 3”...
- Page 100 F F u u r r n n a a c c e e C C o o m m b b u u s s t t i i o o n n A A i i r r E E x x h h a a u u s s t t O O p p t t i i o o n n s s Remove the three inducer mounting screws.
- Page 101 F F u u r r n n a a c c e e C C o o m m b b u u s s t t i i o o n n A A i i r r E E x x h h a a u u s s t t O O p p t t i i o o n n s s Attach the vent outlet gasket to the vent outlet.
-
Page 102: Integrated Furnace Control Menu
Integrated Furnace Control Menu S9X2 Control System Menu Single Stage OD Example Example stage Gas Heat Tap 3 STATUS MENU Example Example Stage Pressure Switch 1st Stage Pressure Switch Error Error ACTIVE ERRORS Example Example Example 1st Stage Pressure Switch Stage Pressure Switch Open Limit Switch Error Error... - Page 103 I I n n t t e e g g r r a a t t e e d d F F u u r r n n a a c c e e C C o o n n t t r r o o l l M M e e n n u u S9X2 Control System Menu Single Stage OD Con nued from previous page.
- Page 104 I I n n t t e e g g r r a a t t e e d d F F u u r r n n a a c c e e C C o o n n t t r r o o l l M M e e n n u u S9X2 Control System Menu Two Stage OD Example Example...
- Page 105 I I n n t t e e g g r r a a t t e e d d F F u u r r n n a a c c e e C C o o n n t t r r o o l l M M e e n n u u S9X2 Control System Menu Two Stage OD Con nued from previous page.
- Page 106 I I n n t t e e g g r r a a t t e e d d F F u u r r n n a a c c e e C C o o n n t t r r o o l l M M e e n n u u S9X2 System Status Menu Example...
-
Page 107: Codes
Integrated Furnace Control Display Codes Menu Options Idle Active Alarm Menu Last 6 Faults (To clear — Hold Option button down for 5 seconds after entering the L6F menu) Code Release Number Cooling Off Delay (Seconds) Outdoor Unit Type Blower Constant Fan Airflow Heat Off Delay (Seconds) Inter-Stage Delay (Seconds) Gas Heating CFM (1st and 2nd stage airflow are selectable) -
Page 108: Fault Code Recovery
I I n n t t e e g g r r a a t t e e d d F F u u r r n n a a c c e e C C o o n n t t r r o o l l D D i i s s p p l l a a y y C C o o d d e e s s Fault Code Recovery Fault Code Recovery To view the last 6 faults, press the “Menu”... -
Page 109: Sequence Of Operation
Sequence of Operation N N o o t t e e : : The seven segment LED readout is based on N N o o t t e e : : There are two flame sense pads located on thermostat input. During a simultaneous call for the IFC, marked “FP”. - Page 110 S S e e q q u u e e n n c c e e o o f f O O p p e e r r a a t t i i o o n n 4. When PS1 closes, the ignitor relay on the IFC will 12.
- Page 111 S S e e q q u u e e n n c c e e o o f f O O p p e e r r a a t t i i o o n n CL2 = Cooling, Stage 2 T T w w o o S S t t a a g g e e H H e e a a t t P P u u m m p p tp4 = Speed Tap 4 1.
- Page 112 Ingersoll Rand (NYSE: IR) advances the quality of life by creating comfortable, sustainable and efficient environments. Our people and our family of brands — including Club Car ® , Ingersoll Rand ® , Thermo King ® ® Trane — work together to enhance the quality and comfort of air in homes and buildings; transport and protect food and perishables;...
Need help?
Do you have a question about the S9X2B040U2PSAA and is the answer not in the manual?
Questions and answers