Teac AD-RW900 Owner's Manual
Cd recorder/reverse cassette deck
Hide thumbs
Also See for AD-RW900:
- Owner's manual (148 pages) ,
- Schematic diagram (30 pages) ,
- Service manual (51 pages)
Table of Contents
Advertisement
Advertisement
Table of Contents

Related Manuals for Teac AD-RW900


Summary of Contents for Teac AD-RW900
- Page 1 3D0804193A AD-RW900 CD Recorder/Reverse Cassette Deck OWNER’S MANUAL...
-
Page 2: Important Safety Instructions
IMPORTANT SAFETY INSTRUCTIONS 1) Read these instructions. 2) Keep these instructions. 3) Heed all warnings. 4) Follow all instructions. CAUTION: TO REDUCE THE RISK OF ELECTRIC SHOCK, DO NOT 5) Do not use this apparatus near water. REMOVE COVER (OR BACK). NO USER-SERVICEABLE PARTS 6) Clean only with dry cloth. - Page 3 < IF YOU ARE EXPERIENCING PROBLEMS WITH THIS PRODUCT, this product is completely confined in the protective housings. CONTACT TEAC FOR A SERVICE REFERRAL. DO NOT USE THE The label required in this regulation is as follows: PRODUCT UNTIL IT HAS BEEN REPAIRED.
- Page 4 For European customers Disposal of electrical and electronic equipment (a) All electrical and electronic equipment should be disposed of separately from the municipal waste stream via collection facilities designated by the government or local authorities. (b) By disposing of electrical and electronic equipment correctly, you will help save valuable resources and prevent any potential negative effects on human health and the environment.
-
Page 5: Table Of Contents
Contents What You Can Do with This Unit Thank you for choosing this TEAC product. Read this manual Playback carefully to get the best performance from this unit. CD/CD-R/CD-RW What You Can Do with This Unit ........5 (Audio CD/MP3/WMA disc) Before Use . -
Page 6: Before Use
Before Use < When the unit is turned on, if a TV is turned on nearby lines might What’s in the box appear on the TV screen depending on the frequency of the TV Confirm that the standard accessories are included. broadcast. -
Page 7: Discs
CD standard might not play correctly with this player. If you use mechanisms. such discs with this unit, TEAC Corporation and its subsidiaries will not be responsible for any consequences or guarantee the quality < While printable CD-R and CD-RW discs utilizing modern printing of reproduction. -
Page 8: Usb Flash Drives
Compact Disc can be played or used for recording. recording or the erasure of files. Doing so could damage the AD-RW900 and the connected USB < Do not touch the signal side (the unlabeled side). flash drive. -
Page 9: Mp3 Files
MP3 Files Cassette Tapes (1) This unit can play MP3 files that are on CD-R/CD-RW discs and external Tape types USB flash drives. There are several types of cassette tapes. < This unit can play back mono and stereo MP3 files that are in the Cassette tapes that can be played by this unit MPEG-1 Audio Layer 3 format with a sampling rate of 16-48 kHz and a bit rate of 320 kbps or less. -
Page 10: Connections
Notes on turning on or off the power tab for “side A” “side A” When an amplifier is connected to the AD-RW900, turn on or off the power of the AD-RW900 and the amplifier in the following sequence. When turning on the power 1. - Page 11 AD-RW900 (back side) Wall socket Computer CD Player, Ampli er Turntable MD Deck, etc. DIGITAL OUT PLAY (OUT) (IN) TAPE/MD/CD-R DIGITAL IN terminal [DIGITAL IN] After all connections are complete, connect the power cord’s plug to the AC wall socket.
-
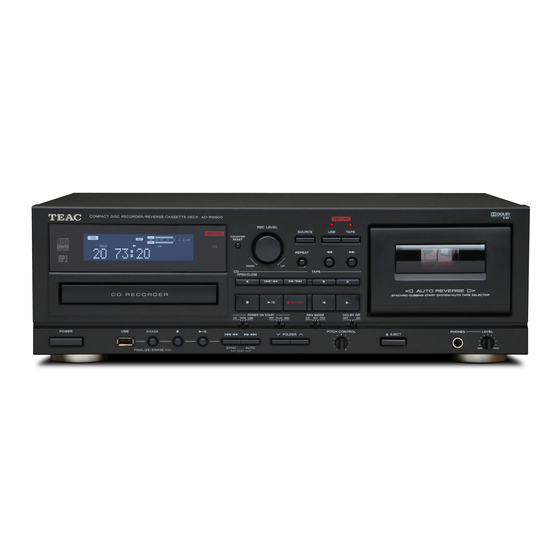
Page 12: Identifying The Parts (Main Unit)
Identifying the Parts (Main Unit) 12 13 32 31 Display RECORD USB See “Display” on pages 16-18. Use to record to an external USB flash drive. Press it once to enable recording standby, and press it again to start recording Remote sensor (pages 39-40). - Page 13 Use these buttons to select folders (pages 21 and 23). Doing so could damage the AD-RW900 and the connected POWER ON START OFF-PLAY-REC (TAPE) USB flash drive.
-
Page 14: Identifying The Parts (Remote Control Unit)
Identifying the Parts (Remote Control Unit) DISPLAY Press this button to change the display information (pages 16-18). SOURCE Use this button to select a source (page 19). PROGRAM Use this button to program tracks/files (pages 25-27). CLEAR Use this button to clear programmed tracks/files (page 27). REPEAT Use this button to set the repeat function (page 24). -
Page 15: Remote Control Unit
Remote Control Unit (1) The included remote control allows this unit to be operated from a distance. Skip ( . / / )/Search ( m / , ) When using the remote control, point it towards the remote sensor on Press these buttons to skip through files. -
Page 16: Display
Remote Control Unit (2) Display (1) Precautions concerning batteries CD mode Misuse of batteries could cause them to rupture or leak leading During playback to fire, injury or the staining of nearby things. Please read and Audio CD observe the following precautions carefully. Elapsed time of current track (min./sec.) <... -
Page 17: Recording Mode
(Example: Recording from a file of more than 100 minutes in TAPE mode length) Tape counter Current folder Current file Elapsed time of current number number file (hr./min./sec.) USB mode (Example: Recording on a CD from a cassette tape) During playback Recording source Recording indicator Currently playing file number... -
Page 18: Basic Operation
LINE IN PHONO Display (2) Basic Operation Changing the display (CD/USB mode) Turning the unit on or off During playback in CD mode or USB mode, each time the DISPLAY Press the POWER button to turn the unit on or off. button is pressed, the display changes as follows: When the unit turns on, the display lights. -
Page 19: Listening With Headphones
Selecting a source for playback/recording Listening with headphones Each time the SOURCE button is pressed, the source changes as To listen with headphones, turn the LEVEL knob to minimize the follows: volume level before connecting the headphones plug to the PHONES jack. -
Page 20: Listening To A Cd
Listening to a CD Press the SOURCE button repeatedly to select “CD”. Press the CD OPEN/CLOSE (L) button again to close the tray. CAUTION Be careful not to let your finger be pinched by the tray. Loading a disc takes a few seconds. <... -
Page 21: Stopping Playback
Suspending playback temporarily Search for a part of a track/file (Pause mode) Hold down During playback, hold down a CD Search (m or ,) button to Press the CD Play/Pause (t/J) button during playback to stop search a part of a track/file. Release it when you find the beginning playback at the current position. -
Page 22: Listening To Files On A Usb Flash Drive (Mp3/Wma)
Doing so could damage the AD-RW900 and the connected USB flash drive. < This section uses MP3 file as an example to explain the operation process;... -
Page 23: Selecting A Folder
Skipping to an earlier or later file Repeat, shuffle and programmed playback These functions can be used in USB mode. Please see the following sections for details about using them. Shuffle playback e page 24 Repeat playback e page 24 Programmed playback e pages 25-27 During playback Press a USB Skip (. -
Page 24: Shuffle Playback
Shuffle Playback Repeat Playback This function can be used in CD and USB modes. This function can be used in CD and USB modes. Use this function to play the tracks/files on a disc/USB flash drive in random order. Press the REPEAT button to cycle through the following playback modes: Pressing the SHUFFLE button turns the shuffle mode on and off. -
Page 25: Programmed Playback
Programmed Playback (1) This function can be used in CD and USB modes. Press a CD/USB Skip ( . or / ) button to select a track/file, then press the PROGRAM button. Up to 30 tracks/files can be programmed in the desired order. When playback is stopped, press the PROGRAM button to enter program mode. - Page 26 Programmed Playback (2) Adding tracks/files to the end of the program Overwriting part of the program When playback is stopped, press the PROGRAM button repeatedly When playback is stopped, press the PROGRAM button repeatedly until “TRACK 00” appears on the display. until the program number of the track that you want to change appears on the display.
-
Page 27: Clearing The Program
Checking the program order Clearing the program Hold down Press repeatedly more than 1 sec. When playback is stopped, press the PROGRAM button repeatedly. The numbers of the programmed tracks/files and their program When playback is stopped, press the PROGRAM button, followed numbers will be shown in order. -
Page 28: Listening To A Cassette Tape
Listening to a Cassette Tape (1) You can play Normal (type ), Chrome (type ) and Metal (type ) tapes Put a cassette tape in the compartment. with this unit. NOTE For the sake of simplicity, we refer to the tape side facing you as “side A”... - Page 29 Set the DOLBY NR (noise reduction) switch. Pausing playback temporarily Press the TAPE Pause (J) button during playback to stop playback Set the switch to the ON position when playing back tapes at the current position. recorded with Dolby NR. To resume playback, press the TAPE Pause (J) button again or To play tapes recorded without Dolby NR, set the switch to the press the Reverse/Forward play (g or t) button.
-
Page 30: About Recording
Listening to a Cassette Tape (2) About Recording CD-R and CD-RW Fast-forwarding/Rewinding a tape A CD-R disc can be recorded only once. Recorded tracks cannot be erased. However, if some recordable time is still available, additional recording is possible. If you finish recording and finalize the CD-R disc, it can be played with a normal CD player. -
Page 31: Before Recording
LINE IN PHONO Before Recording Recording on a CD (1) Before you start recording, make sure that you understand Load a recordable CD-R or CD-RW disc into the unit. the following points: < Up to 99 tracks can be recorded according to the CD standards. When a 100th track is about to be recorded, recording will stop automatically. - Page 32 LINE IN PHONO Recording on a CD (2) < When you record a record or other sources with much interference, Select the mode of track number assignment using the more track numbers than expected may be added unintentionally. AUTO button. <...
-
Page 33: To Pause Recording
Prepare the recording source. To stop recording Recording from a cassette tape To record the entire tape, rewind the tape to its starting point. To record from the middle of a tape, stop or pause at the point from where you want to start recording. Select the DOLBY NR (noise reduction) setting (page 10). -
Page 34: Synchronous Recording To Cd
LINE IN PHONO LINE IN PHONO Recording on a CD (3) Synchronous recording to CD The convenient synchronous recording function automatically starts Manual track division recording when receiving analog or digital signals from an externally connected device such as a CD player and MD deck, and stops recording when signal reception is complete. - Page 35 Prepare the recording source. Start playing the source. Sync recording will start. Recording from a cassette tape If no sound is heard for 8 seconds or longer during synchronous To record the entire tape, rewind the tape to its starting point. recording, recording stops.
-
Page 36: Finalizing
Finalizing Finalizing is the addition of TOC (recorded data information) to discs. Press the CD Play/Pause (t/J) button to start finalizing. If you finalize a CD-R, it will become playable on other CD players. Finalized CD-R discs cannot be used for additional recording. If you finalize a CD-RW, it will become playable on other CD players that are compatible with CD-RW discs Press the input SOURCE button and select CD mode. -
Page 37: Unfinalizing (Cd-Rw Only)
Unfinalizing (CD-RW only) If you want to record again on a finalized CD-RW, unfinalize it. Press the CD Play/Pause (t/J) button to start unfinalizing. By unfinalizing (reversing the finalization), you will be able to record and delete tracks on the CD-RW again. Press the input SOURCE button and select CD mode. -
Page 38: Erasing Tracks From A Disc (Cd-Rw Only)
Erasing tracks from a disc (CD-RW only) Press the input SOURCE button and select CD mode. Erasing the last track Press the FINALIZE/ERASE button until “ERASE” and the last track number appear on the display. < You can also erase all the tracks from the currently selected track number to the last track at once. -
Page 39: Recording On A Usb Flash Drive
< Before recording, check the remaining capacity of the USB flash recording. Doing so might cause damage to the AD-RW900 drive using a PC. You cannot check the remaining memory and the connected USB flash drive. - Page 40 LINE IN PHONO Recording on a USB Flash Drive (2) (When recording from a tape , LINE IN or PHONO) Prepare the recording source. Adjust the recording level. Recording from CD Before recording, adjust the recording level. Failure to do so To record all the tracks/files on a CD, stop the disc first.
- Page 41 Press the RECORD USB button again to start recording. Manually dividing files When recording from an external source, you must also start (adding track numbers during recording) playback of that source. When you are recording from a tape or device connected to the LINE IN or PHONO jacks or recording from such a device has been paused, you can press the RECORD USB button to divide the recording into tracks and create new file names.
-
Page 42: Erasing Files From A Usb Flash Drive
Doing so might cause damage to the AD-RW900 and the You can record on Normal (type ) and Chrome (type ) tapes with connected USB flash drive. - Page 43 Adjust the recording level. Set the reverse mode setting using the REV MODE switch, and set the recording direction. Before recording, adjust the recording level. Failure to do so could cause the recorded sound to be distorted or noisy. 1. Play the source (external source) to be recorded. 2.
-
Page 44: Erasing Recordings
LINE IN PHONO Recording on a Cassette Tape (2) Erasing recordings Press the RECORD TAPE button again to start recording. When recording from an external source, you must also start With every new recording, the contents of a cassette tape will be playback of the source. -
Page 45: Timer-Controlled Playback And Recording
< Read the instructions of each component you intend to use with this unit. “TIMER” appears on the AD-RW900’s display. < Be sure to connect each plug securely. To prevent hum and noise, do not bundle the connection cords. - Page 46 < The recording level is set to 0 dB; it cannot be adjusted. At this time, do not press the AD-RW900 POWER button. Leave the button pushed in (the on position). If the (Example: Recording a broadcast program) POWER button is in the off position, timer playback will not function.
- Page 47 When this setting is completed, the power to all components will be switched off. At this time, do not press the AD-RW900 POWER button. Leave the button pushed in (the on position). If the POWER button is in the off position, timer recording will not function.
-
Page 48: Recording To A Computer
Recording to a Computer Connection illustraion AD-RW900 (Back side) Computer On its rear panel, this unit has a USB port for the output of audio Adjusting the recording level signals. When connected to a computer by USB cable, this unit can convert audio signals to digital data and send it to the computer. -
Page 49: Troubleshooting
CD-R/RW discs might not be possible. Try again with another yourself before you call your dealer or a TEAC service center. disc. Moreover, the problem might be caused by something other than this e You cannot play unfinalized CD-R/RW discs. -
Page 50: Mp3 Playback Order
Troubleshooting (2) MP3 Playback Order MP3 files on a CD or a USB flash drive can be stored in folders in the same way that files are managed on a computer. Moreover, multiple folders can be contained inside another folder. No sound even if the USB Play/Pause (t/J) button is pressed e Confirm that there are MP3 files on the USB device. -
Page 51: Specifications
Specifications CD recorder Pickup ........3-beam, semiconductor laser USB port (A-type) Recording media . - Page 52 Phone: (323) 726-0303 TEAC CANADA LTD. 5939 Wallace Street, Mississauga, Ontario L4Z 1Z8, Canada Phone: (905) 890-8008 TEAC MEXICO, S.A. DE C.V. Río Churubusco 364, Colonia Del Carmen, Delegación Coyoacàn, CP 04100, México DF, México Phone: (5255) 5010-6000 TEAC UK Ltd.
Need help?
Do you have a question about the AD-RW900 and is the answer not in the manual?
Questions and answers