
Related Manuals for Teac CD-RW890MKII


Summary of Contents for Teac CD-RW890MKII
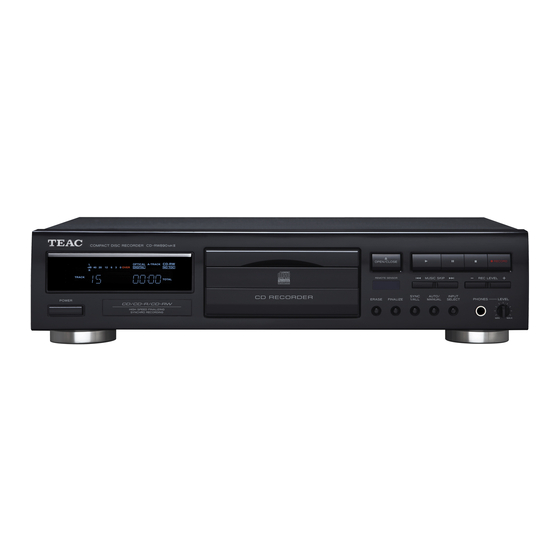
- Page 1 77-20RW89000004 CD-RW890 " CD Recorder OWNER’S MANUAL MODE D’EMPLOI MANUAL DEL USUARIO...
-
Page 2: Important Safety Precautions
DECLARATION OF CONFORMITY We, TEAC AUDIO EUROPE, Liegnitzer Straße 6, 82194 Gröbenzell, Germany declare in own responsibility, the TEAC product described in this manual is in compliance with the corresponding technical standards. CAUTION Changes or modifications not expressly approved by the party responsible for compliance could void the user’s authority to... - Page 3 Laser information o Do not use batteries of types other than those specified. Do not mix new batteries with old ones or use different types of batteries This product contains a semiconductor laser system inside the cabinet together. and is classified as a “CLASS 1 LASER PRODUCT”. To prevent being exposed to the laser beam, do not try to open the o Do not heat or disassemble batteries.
-
Page 4: Important Safety Instructions
IMPORTANT SAFETY INSTRUCTIONS CAUTION 1) Read these instructions. 2) Keep these instructions. o Do not expose this apparatus to drips or splashes. 3) Heed all warnings. o Do not place any objects filled with liquids, such as vases, on 4) Follow all instructions. the apparatus. -
Page 5: Table Of Contents
Troubleshooting . . . . . . . . . . . . . . . . . . . . . . . . . . . . . . . . . . . . . . . . . . . . . . . . 25 You can download updates for this unit from the TEAC Global Site: http://teac-global.com/... -
Page 6: Discs
Handling disc conform to the CD standard may not play back correctly in this player . If you use such discs in this unit, TEAC Corporation and < Always place the disc on the disc tray with the label side its subsidiaries cannot be responsible for any consequences or uppermost . -
Page 7: Connections
Connections CAUTION: < Switch off the power to all equipment before making connections . < Read the instructions of each component you intend to use with this unit . < Be sure to insert each plug securely . To prevent hum and noise, avoid bundling the signal interconnection cables together with the AC power cord . -
Page 8: Unit Functions And Remote Control
Unit Functions and Remote Control Q P O N M L Only on Remote control unit a Numeric buttons Use these buttons to select track numbers . b REPEAT (1/ALL, A-B) Use these buttons to select a repeat mode . c Search (m/,) Use these buttons to search for a part of a track . -
Page 9: Remote Control Unit
Remote Control Unit The provided remote control unit allows the unit to be operated Main unit and Remote control unit from a distance . When operating the remote control unit, point it POWER towards the REMOTE SENSOR on the front panel of the unit . Press this button to turn the unit on or off . -
Page 10: Basic Operation
Basic Operation Basics of Playback Press the OPEN/CLOSE (L) button. Turning on the power The disc tray is opened . Place a disc on the tray with the disc label side up. Press the POWER button to turn on the unit . Using Headphones <... - Page 11 disc type indicator To stop playback total number of the tracks total play time of the disc The disc type indicator shows the type of disc currently loaded . Press the Stop (H) button to stop playback . A commercial pre-recorded CD CD-R: To skip to the next or previous track A finalized CD-R...
-
Page 12: Direct Playback
Direct Playback Shuffle Playback During playback, press the SHUFFLE button so that the tracks can be track 7: played randomly . track 10: In the stop mode, press the SHUFFLE button, then the Play (y) button . While in stop or playback mode, you can use the numeric buttons of When the shuffle playback of all the tracks has been finished, the the remote control unit to select a track . -
Page 13: Time Display
Time Display Repeat Playback Each time the TIME button is pressed, the display changes as Each time the REPEAT button is pressed, the repeat mode changes follows: as follows: REPEAT ALL REPEAT 1 CD/CD-R/CD-RW playback (off) (Ex . ) REPEAT ALL (Repeat all the tracks) All the tracks of the disc will be played repeatedly . -
Page 14: A-B Repeat
A-B Repeat Programmed Playback (1) Up to 32 tracks can be programmed in the desired order . < Insert a disc before beginning programming . < Programmed playback works with finalized discs only . Press the PROGRAM button in the stop mode. You can play back the designate point of track repeatedly . - Page 15 When the selection of track numbers has been finished, To overwrite the program press the Play (y) button to start program playback. In the stop mode, press the PROGRAM button repeatedly until the program number to be changed appears on the display.
-
Page 16: About Recording
Programmed Playback (2) About Recording CD-R and CD-RW To delete a track from the program A CD-R disc can be recorded only once . Recorded tracks cannot be In the stop mode, press the PROGRAM CHECK button erased . However, if some recording time is still available, additional repeatedly until the program number to be deleted recording is possible . -
Page 17: Before Recording
Before Recording Recording (1) Before you start recording, make sure that you understand Load a recordable CD-R or CD-RW disc into the unit. the following points: < Up to 99 tracks can be recorded according to the CD standards . When a 100th track is about to be recorded, recording will stop automatically . - Page 18 Recording (2) S-LVL-60/50/40/30 If track numbers are not properly added Track numbers are added automatically when silence is detected . When you record sources with interference via ANALOG, track The auto track function activates and “A-TRACK” appears . The numbers may not be added if the increment level is lower than the displayed number indicates the increment level .
-
Page 19: Manual Track Division
To pause recording Play the source to be recorded and adjust the recording level so that the loudest sound does not exceed the “OVER” indicator on the peak level meter . Press the Pause (J) button . “WAITING” briefly appears on the The level can be adjusted as follows: display, then recording is paused . -
Page 20: Synchronous Recording
Synchronous Recording The convenient synchronous recording function automatically starts Press the SYNC 1/ALL button and select “SYNC 1” or “SYNC recording when receiving analog or digital signals from an externally ALL”. connected device such as a CD player and MD deck, and stops recording when signal reception is complete . -
Page 21: Finalize
Finalize Unfinalize Finalizing is a process of writing the TOC data (recorded data) to a If a finalized CD-RW is unfinalized, recording and erasing will be disc . possible on the CD-RW . Finalized CD-Rs can be played with other CD players . No more tracks Load a finalized (not recordable) disc. -
Page 22: Erasing The Last Track (Cd-Rw)
Erasing the Last Track (CD-RW) Load a recorded CD-RW. Press the Play (y) button to start erasing. Only the last track, or tracks from the selected one to the last one, Press the ERASE button in the stop mode. will be erased . When the operation has been finished, the display returns to the track/time display . -
Page 23: Erasing All Tracks (Cd-Rw)
Erasing All Tracks (CD-RW) Load a recorded CD-RW. Press the Play (y) button to start erasing. All tracks will be erased . Press the ERASE button twice. The time required appears on the display . When the operation has been finished, the display returns to the track/time display . -
Page 24: Erasing All Tracks In Refresh Mode (Cd-Rw)
Erasing All Tracks In Refresh Mode (CD-RW) Erasing in the refresh mode takes time . It is recommended to use Press the Play (y) button to start erasing. “ERASE DISC” when erasing all tracks . A disc that causes an error during recording may be recovered by erasing all tracks on the disc in the refresh mode . -
Page 25: Troubleshooting
A playback-only disc or finalized disc has been loaded . Use a yourself before you call your dealer or a TEAC service center . recordable disc . -
Page 26: Messages
Messages Messages Error Messages BLANK 0:00 CANT COPY A blank CD-R/CD-RW disc is set on the disc tray . The source disc has been digitally copied . Serial Copy Management System prohibits the copying of digital copies . CLOSE This error message also appears when no more digital input signal Closing the disc tray . -
Page 27: Specifications
Specifications Media type . . . . . . . . . . . . . . . . . . . . . . . . . . . . . . . . . . . . . . . . . . . . . . . . . . . . . . . . Standard Accessories CD-RW and CD-R for Digital audio (record and playback) Remote control unit (RC-1275) x 1... -
Page 28: Précautions De Sécurité Importantes
DÉCLARATION DE CONFORMITÉ Le symbole d'éclair à tête de flèche dans un triangle < Nous, TEAC AUDIO EUROPE, Liegnitzer Straße 6, équilatéral sert à prévenir l'utilisateur de la présence 82194 Gröbenzell, Allemagne, déclarons sous notre dans l'enceinte du produit d'une « tension dangereuse »... - Page 29 V Précautions concernant les piles Pour les consommateurs européens Un mauvais emploi des piles peut entraîner leur rupture ou leur fuite, avec pour conséquence un incendie, des blessures ou la salissure des Mise au rebut des équipements électriques et élec- objets proches.
-
Page 30: Instructions De Sécurité Importantes
INSTRUCTIONS DE SÉCURITÉ IMPORTANTES ATTENTION 1) Lisez ces instructions. 2) Conservez ces instructions. o N'exposez pas cet appareil aux gouttes ni aux éclaboussures. 3) Tenez compte de tous les avertissements. o Ne placez pas d'objet rempli de liquide sur l'appareil, comme 4) Suivez toutes les instructions. -
Page 31: Avant D'utiliser L'appareil
< Il est possible que l'appareil devienne chaud durant l'utilisation, Utilisation du site mondial TEAC ....... . . 31 laissez donc toujours un espace suffisant autour de lui pour la ventilation. -
Page 32: Raccordements
Raccordements ATTENTION : < Éteignez tous les appareils avant de faire les raccordements. < Lisez les modes d'emploi de tous les éléments que vous comptez employer avec cet appareil. < Assurez-vous que chaque fiche est bien enfoncée. Pour éviter tout ronflement ou bruit parasite, ne regroupez pas les câbles de modulation de signal avec le cordon d'alimentation secteur. -
Page 33: Disques
à la norme CD peuvent ne pas être correctement lus par cet appareil. Si vous utilisez de tels disques dans cette unité, TEAC Corporation et ses filiales ne pourront être tenues pour responsables des conséquences quelles qu'elles soient, ni garantir la qualité... -
Page 34: Fonctions De L'appareil Et De La Télécommande
Fonctions de l'appareil et de la télécommande F G H Q P O N M L Uniquement sur la télécommande a Touches numériques Utilisez ces touches pour sélectionner des numéros de piste. b REPEAT (1/ALL, A-B) Utilisez ces touches pour sélectionner un mode de lecture en boucle. -
Page 35: Télécommande
Télécommande La télécommande fournie permet la commande à distance de Appareil et télécommande l'appareil. Pour utiliser la télécommande, pointez-la vers le capteur POWER de télécommande (REMOTE SENSOR) du panneau avant de l'appareil. Appuyez sur cette touche pour allumer ou éteindre l'appareil. <... -
Page 36: Fonctionnement De Base
Fonctionnement de base Bases de la lecture Appuyez sur la touche OPEN/CLOSE (L). Mise sous tension Le tiroir de disque s'ouvre. Placez un disque sur le tiroir avec sa face sérigraphiée vers le haut. Appuyez sur l'interrupteur d'alimentation POWER pour allumer l'appareil. - Page 37 Indicateur de type de disque Pour arrêter la lecture Nombre total de pistes Durée totale de lecture du disque L'indicateur de type de disque affiche le type de disque actuellement chargé. Appuyez sur la touche Stop (H) pour arrêter la lecture. CD : CD commercial pré-enregistré...
-
Page 38: Lecture Directe
Lecture directe Lecture aléatoire Durant la lecture, appuyez sur la touche SHUFFLE pour que les pistes Piste 7 : soient lues en ordre aléatoire. Piste 23 : À l'arrêt, appuyez sur la touche SHUFFLE, puis sur la touche Lecture (y). À l'arrêt ou en lecture, vous pouvez utiliser les touches numériques Quand la lecture aléatoire de toutes les pistes est terminée, de la télécommande pour sélectionner une piste. -
Page 39: Affichage Du Temps
Affichage du temps Lecture en boucle Chaque fois que vous appuyez sur la touche TIME, l'affichage Chaque fois que vous appuyez sur la touche REPEAT, le mode de change comme suit : lecture en boucle change comme suit : REPEAT ALL REPEAT 1 Lecture des CD/CD-R/CD-RW (off) (Ex.) -
Page 40: Lecture En Boucle A-B
Lecture en boucle A-B Lecture programmée (1) 32 pistes peuvent être programmées dans l'ordre désiré. < Insérez un disque avant de commencer la programmation. < La lecture programmée ne fonctionne qu'avec des disques finalisés. Appuyez à l'arrêt sur la touche PROGRAM. Vous pouvez lire en boucle le segment de piste désigné. - Page 41 Quand la sélection des numéros de piste est terminée, Pour modifier le programme appuyez sur la touche Lecture (y) pour lancer la lecture du À l'arrêt, appuyez plusieurs fois sur la touche PROGRAM programme. jusqu'à ce que le numéro de piste à changer dans le programme s'affiche à...
-
Page 42: À Propos De L'enregistrement
Lecture programmée (2) À propos de l'enregistrement CD-R et CD-RW Pour supprimer une piste du programme Un CD-R ne peut être enregistré qu'une fois. Les pistes enregistrées À l'arrêt, appuyez plusieurs fois sur la touche PROGRAM ne peuvent pas être ef facées. Toutefois, s'il reste du temps CHECK jusqu'à... -
Page 43: Avant L'enregistrement
Avant l'enregistrement Enregistrement (1) Avant de commencer l'enregistrement, assurez-vous de bien Chargez un CD-R ou CD-RW enregistrable dans l'appareil. comprendre les points suivants : < La norme CD permet d'enregistrer jusqu'à 99 pistes. Quand une 100e piste est sur le point d'être enregistrée, l'enregistrement s'arrête automatiquement. - Page 44 Enregistrement (2) S-LVL-60/50/40/30 de piste dans ce cas, désactivez la fonction auto track et appuyez sur Les numéros de piste sont automatiquement ajoutés quand du la touche RECORD pendant l'enregistrement d'une piste. silence est détecté. < Quand vous enregistrez un disque ou d 'autres sources contenant La fonction auto track s'active et “A-TRACK”...
- Page 45 Pour mettre en pause l'enregistrement Faites jouer la source à enregistrer et réglez le niveau d'enregistrement pour que les passages les plus forts ne dépassent pas l'indicateur “OVER” du crête-mètre. Appuyez sur la touche Pause (J). “WAITING” apparaît brièvement Le niveau peut être réglé comme suit : dans l'écran, puis l'enregistrement est mis en pause.
-
Page 46: Enregistrement Automatisé ("Synchronisé")
Enregistrement automatisé ("synchronisé") La fonction très pratique d'enregistrement automatisé lance Appuyez sur la touche SYNC 1/ALL et sélectionnez “SYNC 1” automatiquement l'enregistrement à réception de signaux ou “SYNC ALL”. analogiques ou numériques de l'appareil externe connecté tel qu'un lecteur de CD ou une platine MD, et arrête l'enregistrement à la fin de la réception du signal. -
Page 47: Finalisation
Finalisation Définalisation La finalisation est le processus d'écriture des données de la table des Si un CD-RW finalisé est définalisé, l'enregistrement et l'effacement matières ou TOC (données enregistrées) sur un disque. redeviennent possibles sur ce CD-RW. Les CD-R finalisés peuvent être lus par d'autres lecteurs de CD. Chargez un disque finalisé... -
Page 48: Effacement De La Dernière Piste (Cd-Rw)
Effacement de la dernière piste (CD-RW) Chargez un CD-RW enregistré. Appuyez sur la touche Le c ture (y ) pour lancer l'effacement. Appuyez à l'arrêt sur la touche ERASE (effacer). Seules la dernière piste ou toutes celles allant de la piste sélectionnée à... -
Page 49: Effacement De Toutes Les Pistes (Cd-Rw)
Effacement de toutes les pistes (CD-RW) Chargez un CD-RW enregistré. Appuyez sur la touche Le c ture (y ) pour lancer l'effacement. Appuyez deux fois sur la touche ERASE. Toutes les pistes seront effacées. Le temps nécessaire apparaît dans l'écran. Quand l'opération est terminée, l'écran revient à... -
Page 50: Effacement De Toutes Les Pistes En Mode Rafraîchissement (Cd-Rw)
Effacement de toutes les pistes en mode rafraîchissement (CD-RW) L'effacement en mode rafraîchissement prend du temps. Il est Appuyez sur la touche Le c ture (y ) pour lancer recommandé d'utiliser “ERASE DISC” (effacer le disque) pour effacer l'effacement. toutes les pistes. Un disque qui cause une erreur durant l'enregistrement peut être récupéré... -
Page 51: Guide De Dépannage
Un disque réservé à la lecture ou déjà finalisé a été chargé. appel à votre revendeur ou au service après-vente de TEAC. Utilisez un disque enregistrable. e Le niveau d'enregistrement est trop bas. Réglez le niveau Pas d'alimentation. -
Page 52: Messages
Messages Messages Messages d'erreur CANT COPY BLANK 0:00 Le disque source a été copié numériquement. Le système de Un CD-R/CD-RW vierge est dans le tiroir de disque. gestion de copie en série (SCMS) interdit la copie de copies numériques. CLOSE Ce message d'erreur apparaît aussi en cas de disparition du signal Fermer le tiroir de disque. -
Page 53: Caractéristiques Techniques
Caractéristiques techniques Types de support ..CD-RW et CD-R pour audio numérique Accessoires standard (enregistrement et lecture) Télécommande (RC-1275) x 1 CD (lecture uniquement) Pile (AA, R6 ou SUM-3) x 2 Convertisseur de fréquence Câble RCA x 2 d'échantillonnage d'entrée . -
Page 54: Precauciones De Seguridad Importantes
DECLARACIÓN DE CONFORMIDAD TEAC AUDIO EUROPE, Liegnitzer Straße 6, 82194 Gröbenzell, Alemania, declara bajo su plena res- ponsabilidad que el producto TEAC descrito en este manual cumple con las normas técnicas correspondientes. PRECAUCIÓN Cualquier cambio o modificación efectuada en este equipo que no haya sido expresamente aprobada por la parte responsable del cumplimiento de los requisitos exigidos podría invalidar el dere-... - Page 55 Información sobre el láser o Si las pilas presentan fugas, limpie el líquido que haya caído en el compartimento y sustituya las pilas por otras nuevas. Este producto contiene en el interior de su carcasa un sistema de láser semiconductor y está clasificado como "PRODUCTO LÁSER DE CLASE o No utilice pilas que no sean del tipo especificado.
-
Page 56: Instrucciones De Seguridad Importantes
INSTRUCCIONES DE SEGURIDAD IMPORTANTES PRECAUCIÓN 1) Lea estas instrucciones. 2) Conserve estas instrucciones. o No exponga este aparato a salpicaduras ni goteras. 3) Tenga en cuenta todas las advertencias. o No coloque objetos que contengan líquidos, como por ejem- plo jarrones, sobre el aparato. 4) Siga todas las instrucciones. -
Page 57: Antes De Utilizar La Unidad
"Products" (productos) . 4) Seleccione y descargue las actualizaciones que necesite . Registro del producto Los clientes de EE . UU . disponen del siguiente sitio web de TEAC para registrar el producto por internet: http://audio.teac.com/support/registration/... -
Page 58: Conexiones
Conexiones PRECAUCIÓN: < Desconecte la alimentación de todos los equipos antes de realizar las conexiones . < Lea las instrucciones de cada uno de los componentes que pretenda usar con esta unidad . < Asegúrese de insertar firmemente cada clavija . Para evitar ruidos y zumbidos, no junte los cables de interconexión de señal con el cable de alimentación de CA . -
Page 59: Discos
. correctamente en este reproductor . Si usa tales discos en esta unidad, TEAC Corporation y sus subsidiarias no se responsabilizarán de las consecuencias ni garantizarán la calidad de reproducción . Si experimenta problemas con estos discos no estándar, deberá... -
Page 60: Funciones De La Unidad Y Mando A Distancia
Funciones de la unidad y mando a distancia F G H Q P O N M L Sólo en la unidad de mando a distancia a Botones numéricos Utilice estos botones para seleccionar los números de las pistas . b REPEAT (1/ALL, A-B) Utilice estos botones para seleccionar un modo de repetición . -
Page 61: Mando A Distancia
Mando a distancia El mando a distancia suministrado permite la operación de la unidad Unidad principal y mando a distancia a distancia . Para operar el mando a distancia, apúntelo hacia el POWER REMOTE SENSOR en el panel frontal de la unidad . Pulse este botón para encender o apagar la unidad . -
Page 62: Operación Básica
Operación básica Reproducción básica Pulse el botón OPEN/CLOSE (L). Encendido de la unidad La bandeja del disco está abierta . Coloque un disco en la bandeja con el lado de la etiqueta del disco hacia arriba. Pulse el botón POWER para encender la unidad . Uso de los auriculares <... - Page 63 indicador de tipo de disco Para detener la reproducción número total de pistas tiempo de reproducción total del disco El indicador del tipo de disco muestra el tipo de disco actualmente cargado . Pulse el botón de Parada (H) para detener la reproducción . Para saltar a la pista siguiente o anterior Un CD pregrabado comercial CD-R:...
-
Page 64: Reproducción Directa
Reproducción directa Reproducción aleatoria Durante la reproducción, pulse el botón SHUFFLE para que las pistas pista 7: se reproduzcan al azar . pista 10: En el modo de parada, pulse el botón SHUFFLE y luego el botón de Reproducción (y) . Mientras está... -
Page 65: Visualización Del Tiempo
Visualización del tiempo Reproducción repetida Cada vez que pulsa el botón TIME, la pantalla cambia como sigue: Cada vez que pulsa el botón REPEAT, el modo de repetición cambia como sigue: Reproducción de CD/CD-R/CD-RW REPEAT ALL REPEAT 1 (desactivado) (Ej . ) REPEAT ALL (repite todas las pistas) Todas las pistas del disco se reproducirán de forma repetida . -
Page 66: Repetición A-B
Repetición A-B Reproducción programada (1) Pueden programarse hasta 32 pistas en el orden deseado . < Inserte un disco antes de iniciar la programación . < La reproducción programada funciona sólo con discos finalizados . Pulse el botón PROGRAM en el modo de parada. Es posible la reproducción repetida del punto designado de la pista . - Page 67 Cuando termine de seleccionar los números de las pistas, Para sobrescribir el programa pulse el botón de Reproducción (y) para iniciar la En el modo de parada, pulse el botón PROGRAM repetidas reproducción programada. veces hasta que en la pantalla aparezca el número de programa que desea cambiar.
-
Page 68: Acerca De La Grabación
Reproducción programada (2) Acerca de la grabación CD-R y CD-RW Para borrar una pista del programa Un disco CD-R puede grabarse sólo una vez . Las pistas grabadas En el modo de parada, pulse el botón PROGRAM CHECK no pueden borrarse . No obstante, si todavía hay algún tiempo de repetidas veces hasta que en la pantalla aparezca el grabación disponible, es posible la grabación adicional . -
Page 69: Antes De La Grabación
Antes de la grabación Grabación (1) Antes de iniciar la grabación, asegúrese de haber Cargue un disco CD-R o CD-RW grabable en la unidad. comprendido los siguientes puntos: < Se puede grabar un máximo de 99 pistas de conformidad con las normas de los CD . - Page 70 Grabación (2) S-LVL-60/50/40/30 desactive la función de pista automática y pulse el botón RECORD Los números de pista se añaden automáticamente cuando se mientras se está grabando la pista . detecta silencio . < Cuando grabe un disco u otras fuentes con un alto nivel de La función de pista automática se activa y aparece “A-TRACK”...
- Page 71 Para poner la grabación en pausa Reproduzca la fuente que desee grabar y ajuste el nivel de grabación de manera que el sonido más alto no exceda el indicador “OVER” en el medidor de nivel máximo . Pulse el botón Pausa (J) . Aparece “WAITING” en la pantalla y la El nivel se puede ajustar como sigue: grabación entra en pausa .
-
Page 72: Grabación Sincronizada
Grabación sincronizada La función de grabación sincronizada es conveniente debido a Pulse el botón SYNC 1/ALL y seleccione “SYNC 1” o “SYNC que la grabación comenzará automáticamente cuando se reciben ALL”. señales analógicas o digitales procedentes de un dispositivo externo conectado como, por ejemplo, un reproductor de CD o una platina de MD, y se detendrá... -
Page 73: Finalización
Finalización Desfinalización El proceso de escritura de datos TOC (datos grabados) en un disco se Si se “desfinaliza” un disco CD-RW finalizado, se podrá grabar y conoce como finalización . borrar en el mismo . Los discos CD-R finalizados pueden reproducirse con otros Cargue un disco finalizado (no grabable). -
Page 74: Borrado De La Última Pista (Cd-Rw)
Borrado de la última pista (CD-RW) Cargue un CD-RW grabado. Pulse el botón de Reproducción (y) para iniciar el borrado. Se borrará sólo la última pista, o las pistas desde la que está Pulse el botón ERASE en el modo de parada. seleccionada hasta la última . -
Page 75: Borrado De Todas Las Pistas (Cd-Rw)
Borrado de todas las pistas (CD-RW) Cargue un CD-RW grabado. Pulse el botón de Reproducción (y) para iniciar el borrado. Se borrarán todas las pistas . Pulse el botón ERASE dos veces. El tiempo requerido aparece en la pantalla . Cuando finalice la operación, la pantalla vuelve a la indicación de pista/tiempo . -
Page 76: Borrado De Todas Las Pistas En El Modo Refresh (Cd-Rw)
Borrado de todas las pistas en el modo Refresh (CD-RW) El borrado en el modo refresh tarda un tiempo . Para borrar todas las Pulse el botón de Reproducción (y) para iniciar el borrado. pistas, se recomienda utilizar “ERASE DISC” . Un disco que cause un error durante la grabación puede recuperarse borrando todas las pistas en el modo refresh . -
Page 77: Solución De Problemas
La grabación no es posible. Si surge algún problema con la unidad y antes de ponerse en contacto con su distribuidor o centro de servicio de TEAC, consulte e Se ha cargado un disco de sólo reproducción o un disco la siguiente tabla y considere si usted mismo puede resolver el finalizado . -
Page 78: Mensajes
Mensajes Mensajes Mensajes de error BLANK 0:00 CANT COPY Se ha cargado un disco CD-R/CD-RW en blanco en la bandeja del La fuente del disco ha sido copiada digitalmente . El Sistema de disco . Gestión de Copias en Serie prohíbe el copiado de copias digitales . Este mensaje de error también aparece cuando se deja de recibir CLOSE señal digital de entrada durante la grabación . -
Page 79: Especificaciones
Especificaciones Tipo de medio . . . . . . . . . . . . . . . . . . . . . . . . . . . . . . . . . . . . . . . . . . . . . . . . . . Accesorios estándar CD-RW y CD-R para Digital audio (grabación y reproducción) Mando a distancia (RC-1275) x1... - Page 80 TEAC AUDIO EUROPE Liegnitzer Straße 6, 82194 Gröbenzell, Germany Phone: +49-8142-4208-141 This appliance has a serial number located on the rear panel. Please record the serial number and retain it for your records. 0515 . MA-2185B Model name: CD-RW890MKII Serial number...
Need help?
Do you have a question about the CD-RW890MKII and is the answer not in the manual?
Questions and answers