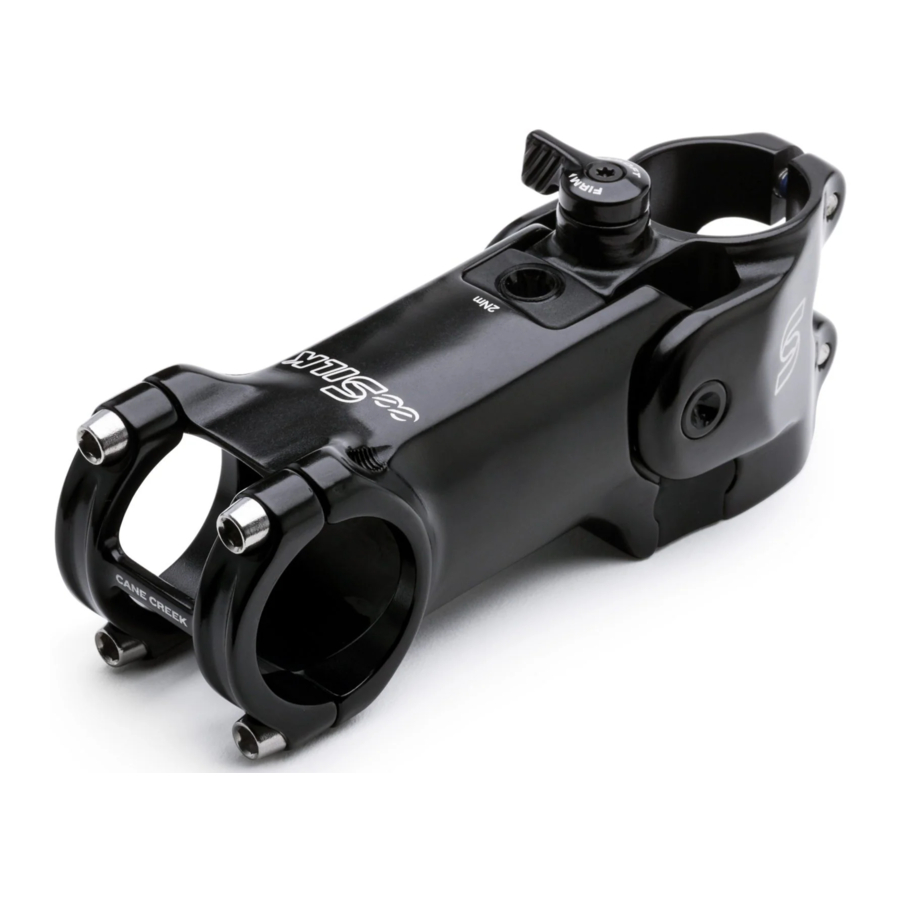
Cane Creek eeSILK Manual
- Initial installation instructions (2 pages) ,
- Initial installation instructions (2 pages) ,
- Quick start manual (3 pages)
Advertisement

Installation Instructions

ID Description
- Body (1)
- Faceplate (1)
- Bushing (2)
- Steerer Tube Mount (1)
- Axle (1)
- Elastomer (3)
- Elastomer Preload Wedge (1)
- Preload Extractor Cap (1)
- Elastomer Bolt (1)
- Clamp Bolt (6)
- Compliance Switch Helix (1)
- Compliance Switch Dowel (1)
- Compliance Switch Lever (1)
- Screw - M3x0.5 - 5mm - Torx (1)
- Compliance Switch Wedge (1)
- Compliance Switch Bushing (1)
- C-Clip - Smalley VHM - 12 (1)
- O-ring - 9.2 x 1.78 (1)
Take note that the eeSilk stem can only be installed in one orientation with the compliance switch facing up and the elastomer facing down and needs +52mm of steerer tube to be installed correctly.

- Install the eeSilk stem on your bicycle's steerer tube. The eeSilk can only be installed in one orientation with the lockout lever facing up and the elastomer facing down. Carbon steerer tubes should extend completely through the stem for proper clamping pressure and safety.
- It is recommended to have a minimum of 2mm of steerer tube extend above the stem and use a 5mm headset spacer between the stem and headset top cap. More than a 5mm spacer above and more than 40mm of spacers below the stem is not recommended.
- Install handlebar to stem tightening stem faceplate bolts in an alternating X pattern and torque to 5Nm.
- Center/align stem to front wheel and torque stem clamp bolts to 5Nm
Selecting Elastomer
The eeSilk stem ships with one (1) elastomer installed and two (2) elastomers included in the box. (see chart).
Cane Creek recommends riding the installed elastomer before experimenting with other elastomers. Unlike recommending a rider weight rating, the eeSilk stem elastomers were developed based on different riding styles and terrain. It is suggested that if you ride rougher conditions, experiment with a firmer elastomer.
| Stem Length | Installed Elastomer | Included Elastomers | |
| 80mm | Medium | Soft | Medium/Firm |
| 90mm | Medium | Soft | Medium/Firm |
| 100mm | Firm | Medium/Firm | Extra Firm |
*additional elastomers available separately*

Changing Elastomer

Removal:
- With stem installed on bicycle, press down slightly on handlebars to preload elastomer and remove pressure on stem preload wedge and bolt.
- With 4mm hex wrench, loosen elastomer bolt on top of stem body while keeping pressure on handlebar.DO NOT loosen preload extractor cap.
- With preload assembly removed, lift stem and handlebar to remove elastomer.
Install:
- Elastomer can only be install in one orientation. Make sure chosen elastomer rating indication is facing down. Elastomer is marked with "TOP" and should face up toward stem. Curved surfaces should be facing handlebar.
- Preload wedge can only be installed in one orientation. While pressing down slightly on handlebar, install preload wedge assembly with 4mm hex wrench.
Failure to install elastomer or preload wedge correctly can cause damage or improper function and could lead to injury.
Compliance Switch

The eeSilk stem features both soft and firm settings. To achieve firm setting turn switch clockwise 90° to achieve firm setting (there is no middle setting).
Depending on the elastomer durometer used, rider weight, and rider position over the handlebars, the firmness of the eeSilk Stems firm setting will vary.
Maintenance
- Periodically inspect all surfaces of this component for cracks or signs of damage. If you find any cracks or damage, immediately cease using the part and contact Cane Creek customer service.
- Periodically clean your Cane Creek component with water and mild soap. Never use a high-powered washer to clean.
- To maintain the high performance, safety, and long life of your component and bicycle, periodically check the fastener torque values
- Improperly cleaned and maintained components may fail, resulting in a loss of control of the bicycle and SERIOUS INJURY OR DEATH.
SAFETY AND WARNINGS
Installation and service of Cane Creek products requires specific bicycle tools, supplies, and knowledge. All Cane Creek products should be installed and serviced by a qualified bicycle service technician, in accordance with Cane Creek specifications. Improperly installed, serviced, and maintained products can fail, resulting in SERIOUS INJURY OR DEATH.
Setup and configurations vary greatly between bicycle manufacturers, carefully read this manual and your bicycle's owner's manual. Failure to follow items outlined in these manuals, including but not limited to installation procedures, warnings, Nm torque specifications, maintenance requirements, service intervals, and/or modifications could lead damage causing loss of control of the bicycle and result in SERIOUS INJURY OR DEATH.
DO NOT attempt to force parts to fit. Confirm compatibility before installation and use. DO NOT disassemble, modify, or use aftermarket parts with or to repair Cane Creek components. Doing so many cause damage to the component or bicycle which could lead to loss of control of the bicycle and result in SERIOUS INJURY OR DEATH.
Each time, before you ride, be sure all components are installed correctly, tightened to specification and you are familiar with how your bicycle and Cane Creek components operate. Components that are out of adjustment, improperly installed, or are not used properly, can cause loss of control of the bicycle and result in SERIOUS INJURY OR DEATH.
All components on a bicycle, including Cane Creek components, should be inspected, and adjusted at periodic intervals and after a crash or fall. Inspect the exterior for wear or damage, inspect for correct torque settings and listen for unfamiliar noise. If any damage is noticed, stop use and contact your local dealer or Cane Creek directly.
Documents / ResourcesDownload manual
Here you can download full pdf version of manual, it may contain additional safety instructions, warranty information, FCC rules, etc.
Advertisement


Need help?
Do you have a question about the eeSILK and is the answer not in the manual?
Questions and answers