Advertisement
Available languages
Available languages
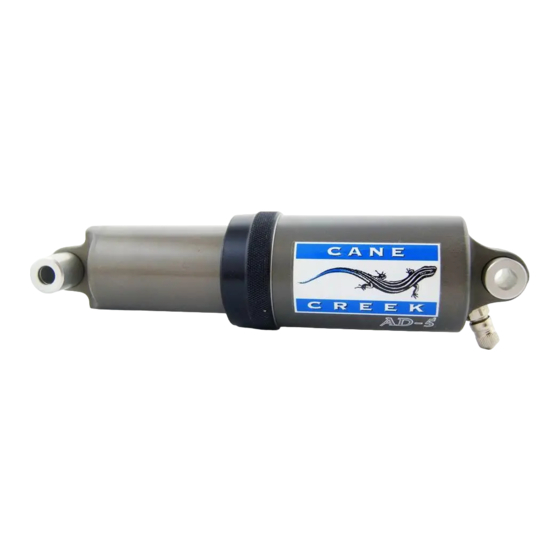
AD-5 Shock
The Cane Creek AD-5 rear shock is a combined spring and damper system for rear suspension mountain bikes. The shock utilizes pressurized air as both
the springing and damping medium. The unit is typically filled with air to a pressure between 110 and 250 psi (7.6 - 17.2 bar), depending on the weight
and preferences of the rider. The springing system is like a conventional air spring, where the spring force is generated by reducing the volume of the
pressurized air chamber, thereby increasing its internal pressure. The damping forces are generated by flowing the pressurized air into and out of several
internal chambers through valves as the shock is compressed and extended. This valving is tuned specifically for each frame design. The AD-5 system
also incorporates a negative spring air chamber which assists the initial travel and provides very smooth performance.
Setup and adjustments:
The springing and damping characteristics of the AD-5 shock are controlled by air pressure. The air pressure is set based on the weight of the rider and
the desired performance characteristics. Pressure is controlled with a standard shock pump, which should be capable of over 200 psi (13.8 bar) and have
a pressure gauge. The shock should be inflated as indicated on the following chart. After some riding, this initial pressure setting can be adjusted up or
down to suit the rider's preferences. Reduced pressure will provide a smoother, more "plush" ride, but with a greater tendency to bottom out. Increased
pressure will give a firmer ride with somewhat quicker rebound.
ATTENTION: Use a metal cap with seal to prevent leakage of air from the valve. Inflate or deflate shock only while it is installed on the bike.
Rider's Weight
lbs. (kilos)
100 (45)
110 (50)
120 (54)
130 (59)
140 (64)
* 100 kPa = 1 bar
Recommended Maintenance:
Proper care for the AD-5 rear shock includes checking the pressure periodically, keeping the shaft and exposed rod wiper clean, and occasionally lubricating
the seals. Remember that some air will be lost whenever the pressure is checked. Lubricating the seals is a fairly simple process requiring only a few simple
tools, and is recommended after approximately 200 hours of use.
piston shaft
lock ring
wire ring
large
cylinder
Figure 1
lock ring
seal
bushing
piston shaft
Figure 2
piston
spanner wrench
Figure 3
hooked
tool
plug
volume adjustment
plate
piston
shaft
retaining
ring
Figure 4
lock
ring
rod wiper
AS0125
Figure 5
seal bushing
O-ring
AD0108
O-ring
AD0108
quad ring
AD0301
Figure 6
valve screw
washer
valve
piston
shim
O-ring
AD0302
O-ring
AD0303
Figure 7
volume
O-ring
adjustment
AD0106
plate
O-ring
AD0110
Figure 8
Shock Pressure
Rider's Weight
psi (bars*)
110 (7.6)
120 (8.3)
130 (9.0)
140 (9.7)
150 (10.3)
Servicing the AD-5:
Section A: Shock Disassembly and Seal Replacement
For periodic maintenance or if the
shock is not holding pressure, it can be
disassembled and serviced easily. If the
shock is losing pressure, apply soapy
water to the exterior of the shock prior
to disassembly. The bubbles formed will
indicate the leak's location. We
recommend ordering a seal kit before
opening the shock. The kit contains the
seals and grease required to properly rebuild the shock. Call a Cane Creek technical-service representative at
800-234-2725.
1. Deflate the shock and clamp the valve end of the shock in a soft-jawed vice, being careful not to damage the
shock's eyelet (Figure 1).
2. Unscrew (counterclockwise) the black, lock ring in the middle of the shock. DO NOT USE TOOLS (pliers, vice
grips, etc.) Wrapping a cloth or large rubber band around the ring will improve your grip.
3. Carefully pull the piston shaft out of the large cylinder. Prevent contamination of the seals by keeping all parts
clean and free of dirt.
4. Remove the lock ring from the piston shaft by sliding it over the eyelet end. The seal bushing can also be
removed in the same manner (Figure 2).
5. Remove the rod wiper from the lock ring (Figure 5), the seals from the seal bushing (Figure 6), and the
AD0303 o-ring seal from the piston (Figure 7). Be very careful not to scratch the seal grooves while removing the
seals. Wipe all the surfaces using a clean lint-free cloth (Do not use solvent). Liberally apply Cane Creek Defriction
Lube to the seal grooves and the new seals. Install the seals as shown in Figure 5, 6, and 7. In order to modify the
shock's valving set-up, please refer to section B.
6. If the "soapy water" test revealed a leak around the bushing (AD0127) in the piston shaft eyelet, then the
volume adjustment plate must be removed to replace the seals. If the test did not show a leak around the bushing
you can skip to step 10.
7. To remove the volume adjustment plate, clamp the piston shaft eyelet in the vice, and use a spanner wrench to
unscrew (counter-clockwise) and remove the piston (Figure 3). With the piston shaft still clamped in the vice,
remove the white plug in the center of the volume adjustment plate. Insert the hooked tool into the plate's opening
and carefully pull it upward being careful not to damage the plate. Work from side to side not allowing the plate to
become jammed within the shaft (Figure 4).
8. Before reinstalling the volume adjustment plate, inspect the seals (Figure 8) for cuts or dirt that may allow
leaks. Replace seals if necessary. Lubricate the seals and push the plate carefully down into the shaft, keeping it
level. If it gets stuck, remove it, and start over. Be careful not to cut or pinch the seals while reinstalling the volume
adjustment plate. When properly installed, the groove (or four side holes in the shaft if the plate is in the highest
position) will be barely visible just above the plate.
9. Replace the white plug in the center of the volume adjustment plate. Screw (clockwise) the piston back onto
the shaft and tighten it using the spanner wrench.
10. Reinstall the seal bushing on the piston shaft by sliding it over the eyelet end of the piston shaft. The
bushing's smaller end is to be toward the piston. Be careful not to cut or pinch the seals while reinstalling the seal
bushing.
11. Apply Cane Creek Defriction Lube to the interior of the large cylinder and carefully insert the piston shaft
assembly into the large cylinder.
12. Slide the seal bushing down the
shaft and into the open end of the
large cylinder as far as it will go. Now
slide the lock ring over the seal bushing
and screw it (clockwise) onto the large
cylinder. The lock ring should capture
the wire ring at the end of the threads
leaving half of it exposed. Be sure that the wire ring is evenly in place all the way around the shock.
13. Align the eyelets by turning the piston shaft (clockwise). Inflate the AD-5 with a shock pump to about 150 psi
(10.3 bar). Submerge it in water to see if any bubbles come from the shock indicating leaks. If a leak is detected,
disassemble the shock again and check the appropriate seal for cuts or dirt. If there are no leaks, the shock can be
remounted on the bike and inflated to riding pressure.
Section B: Tuning Modifications
The AD-5 Rear Shock is designed to be used with a wide variety of bike frames. The shocks are built and tuned at the
factory for a particular bike. If the factory settings are not appropriate for your preferences or riding abilities you can
change the factory setting relatively easily. There are four different factors involved in tuning the AD-5. First, air pressure is
the easiest to vary and is usually based on the rider's weight. A higher pressure is recommended for heavier riders.
Second, compression damping is determined by the thickness of a small round valve shim in the piston. Using a
thicker valve shim increases the compression damping, slowing the rate at which the shock compresses.
Third, rebound damping is controlled by the passage of air through a small hole in the piston. This hole is located in
the valve screw on the piston. If a screw with a larger hole is used, then the rebound will be faster.
Lastly, the volume of the shock can be varied to change the shape of the spring curve. The volume is set by a plate
located in the piston shaft. Moving the plate to a position deeper inside the shaft will increase the shock's air volume
and make the spring curve more linear. A smaller shock air volume will make the spring curve more progressive
causing the shock to bottom-out less frequently.
Changing these settings is described in the following instructions. If you want to know the settings on your shock or
if you have other questions prior to disassembling it, please call a technical-service representative at 800-234-2725.
1. Clamp the piston shaft eyelet in the vice, and use a spanner wrench to unscrew (counter-clockwise) and remove
the piston (Figure 3). To change either the compression damping or rebound damping, the brass screw in the piston
must be removed using a socket wrench. You can replace the valve shim or brass screw with components from the
Tuning Kit. Be sure to reassemble the parts as shown in Figure 7. Tighten the screw snugly--do not use excessive
force.
2. To change the shock's volume the black volume adjustment plate within the piston shaft must first be removed.
This is described in step 7 of section A. Once you have removed the volume adjustment plate from the shaft, you
will see a small, metal retaining ring in one of three internal grooves. This ring positions the volume adjustment plate
within the shaft. Remove the retaining ring from its groove using your fingernail. Do not use tools that could scratch
the inside of the shaft. Move the ring to the desired groove and snap it back in place.
3. The shock is ready for reassembly. Return to step 8 of Section A.
Shock Pressure
lbs. (kilos)
psi (bars*)
150 (68)
160 (11.0)
160 (73)
170 (11.7)
170 (77)
180 (12.4)
180 (82)
190 (13.1)
190 (86)
200 (13.8)
Required Tools:
Seal Kit
Required Tools:
Hooked tool
Cane Creek Components
®
Rider's Weight
lbs. (kilos)
200 (91)
210 (95)
220 (100)
230 (104)
240 (109)
Soft-jawed vice
Needle-nose pliers
355 Cane Creek Road
Fletcher, NC 28732 USA
Tel: 800-234-2725
828-684-3551
Fax: 828-684-1057
www.canecreek.com
Shock Pressure
psi (bars*)
210 (14.5)
220 (15.2)
230 (15.9)
240 (16.5)
250 (17.2)
3mm
Lint-free cloth
Spanner Wrench
8mm socket wrench
Advertisement
Table of Contents

Related Manuals for Cane Creek CANE CREEK AD5 REAR SHOCK


Summary of Contents for Cane Creek CANE CREEK AD5 REAR SHOCK
- Page 1 AD-5 Shock The Cane Creek AD-5 rear shock is a combined spring and damper system for rear suspension mountain bikes. The shock utilizes pressurized air as both the springing and damping medium. The unit is typically filled with air to a pressure between 110 and 250 psi (7.6 - 17.2 bar), depending on the weight and preferences of the rider.
- Page 2 AD-5 Anleitung Das Cane Creek AD-5 Federelement ist ein kombiniertes Feder- und Dämpfersystem für die Hinterradfederung von Mountain Bikes. Das Federelement arbeitet mit Druckluft sowohl zum Federn als auch zum Dämpfen. Normalerweise wird das Federelement mit einem Druck von 7,6 - 17,2 bar mit Luft gefüllt, je nach Gewicht und Fahrstil des Fahrers.
- Page 3 Instrucciones para el AD-5 El amortiguador trasero Cane Creek AD-5 es un sistema combinado de muelle y amortiguador para bicicletas de montaña con suspensión a la rueda trasera. Utiliza aire a presión como medio de amortiguación y absorción de movimientos. Por lo general, esta unidad suele llenarse con aire a una presión de entre 7,6 y 17,2 bares (110- 250 psi), dependiendo del peso y de las preferencias del ciclista.
- Page 4 Mode d’emploi de l’AD-5 L’amortisseur arrière Cane Creek AD-5 est un système, combinant ressort et amortisseur conçu pour les vélos tout terrain à suspension arrière. L’amortisseur utilise de l’air pressurisé comme moyen de détente et d’amortissement. L’unité est généralement remplie d’air pour obtenir une pression variant entre 7,6 et 17,2 bar (110 et 250 psi), selon le poids et les préférences du cycliste.
- Page 5 AD-5-Istruzioni L’ammortizzatore posteriore Cane Creek AD-5 è un sistema combinato di molla e ammortizzatore per la sospensione posteriore delle mountain bike. L’ammortizzatore utilizza aria compressa come mezzo elastico ed ammortizzante. L’unità è normalmente riempita di aria in pressione fra 7,6 e 17,2 bar (110 e 250 psi), a seconda del peso e delle preferenze dei biker.
- Page 6 AD-5 Instruções O amortecedor traseiro Cane Creek AD-5 é um sistema combinado de amortecimento hidráulico com molas para bicicletas de montanha com suspensão traseira. O amortecedor usa ar pressurizado tanto para ressalto como para amortecimento. A unidade está normalmente cheia de ar pressurizado entre 110 e 250 psi (7,6 –...
- Page 7 AD-5 Instructies De Cane Creek AD-5 achterschokdemper is een combinatie van veren en hydraulische demping voor mountainbikes met achtervering. De schokdemper gebruikt perslucht als medium voor zowel de vering als de demping. De luchtdruk in de eenheid ligt gewoonlijk tussen 110 en 250 psi (7,6 - 17,2 bar). Dit hangt af van het gewicht en de wensen van de fietser.
- Page 8 AD-5 Shock AD-5 Exploded Shock AD-5 Explosionszeichnung Diagrama de despiece del AD-5 Vue éclatée 1. Valve Cap (AD0124) 1. Ventilkappe (AD0124) AD-5: 2. Air Valve (AD0101) 2. Luftventil (AD0101) 1. Capuchon de valve (AD0124) 3. O-ring Seal (AD0111) 3. O-Ring-Dichtung (AD0111) 2.
Need help?
Do you have a question about the CANE CREEK AD5 REAR SHOCK and is the answer not in the manual?
Questions and answers