Table of Contents
Advertisement
Quick Links
The US Futaba Service Center will warranty this radio for one year after the purchase date from defects
in materials or workmanship. Please read the enclosed Futaba Warranty Card for full details of this
radio's warranty.
Make sure you save the receipt or invoice you were given when you bought your radio! It is your
proof of purchase and we must see it before we can honor the warranty.
To return your radio for repairs covered under the warranty, or for non-warranty service, please ship it with
a detailed explanation of your concerns to the address listed below. Please include as many means of
contact as possible. Daytime fax number and email address will allow us to provide you automated
information updates, and will assist the service team in contacting you as quickly as possible.
Futaba Service Center
1610 Interstate Drive
Champaign IL 61822
www.futaba-rc.com
phone: 217-398-0007
8:00am - 5:00 pm Central Time M-F
fax: 217-398-7721
email: support@futaba-rc.com
Warranty
Instruction Manual
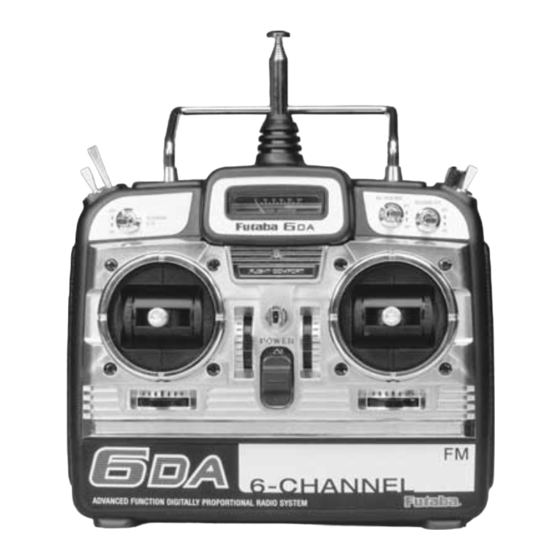
Thank you for purchasing the Futaba 6DA 6-channel with Flight Set radio system. Whether this is your first
R/C radio system, or you're moving up or replacing a trusted old friend, we believe you'll be pleased with
your 6DA. Futaba is the leader in R/C radio technology.
Please read this instruction manual carefully and use the 6DA radio system safely. If you are unfamiliar with
some of the terms in this instruction manual, take a few minutes to read the glossary. It contains useful
information about terms that will help you understand the functions and features of this radio. Save this
manual for future reference and, most of all, have fun!
Safety Information ......................2
Features & Specifications ............6
Battery Care ................................7
Installing Servos ..........................7
Setting Up Your Radio Gear ........8
Transmitter Operation...............10
Servo Reversing .........................11
Throttle EPA ..............................12
AST's .........................................13
Dual Rates.................................14
Aileron-to-Rudder Mixing .........15
Retractable Landing Gear..........18
Flaps..........................................19
Flap-to-Elevator Mixing .............19
Prepare to Fly............................20
Glossary ....................................21
Troubleshooting Guide ..............23
•No part of this manual may be reproduced in any form without prior permission.
•The contents of this manual are subject to change without prior notice.
•This manual has been carefully written. Please write to Futaba if you feel that any corrections or clarifications should be made.
•Futaba is not responsible for the misuse of this product.
Entire Contents © Copyright 2001
Radio System
FUTZ8570 V1.0
Advertisement
Table of Contents

Related Manuals for FUTABA 6DA


Summary of Contents for FUTABA 6DA
-
Page 1: Table Of Contents
•The contents of this manual are subject to change without prior notice. •This manual has been carefully written. Please write to Futaba if you feel that any corrections or clarifications should be made. •Futaba is not responsible for the misuse of this product. -
Page 2: Safety Information
• When placing the transmitter (Tx) on the even if the modulation Rx or Tx out of tune ......Send to Futaba service center for retuning ground during flight preparations, be sure method (AM, Crash damage ........Send to Futaba service center for inspection and repair that the wind cannot knock it over. - Page 3 8837 for information on NiCd battery recycling in your area. opposite side of reverse is the normal side. Futaba’s involvement in this program is part of our Do not store the R/C set in the following commitment to preserving our environment and conserving places: our natural resources.
- Page 4 The 6DA is a 6-channel radio, so it can independently operate 6 servos in a model. - An electronic action within a transmitter Power switch: Turns the transmitter “On” or “Off.” In the...
-
Page 5: Trainer Function
The trainer function is a very effective way to train students. To use it, the optional trainer cord TC-FM switch Turning clockwise lowers flaps. Turning is necessary. The special trainer cord can be connected to all Futaba FM and PCM transmitters (Ch.5) manufactured after 1991. -
Page 6: Features & Specifications
35 or 40MHz. • Flight Set Adjustment Control Center 1. Deploy flaps using • Narrow-band Transmission Technology • 6DA Transmitter (Tx) on 1. Rotate Flap knob the Flap knob. • Fully Proportional Flap Control either 35 or 40MHz. -
Page 7: Battery Care
RETRACTABLE LANDING GEAR BATTERY CARE • The transmitter includes a genuine Futaba 8-cell bucket, the water will come out at a certain rate. • First, follow your model’s • The retract channel has no NiCd battery pack, NT8S, already installed. -
Page 8: Setting Up Your Radio Gear
SETTING UP YOUR RADIO GEAR AILERON DIFFERENTIAL • For aerodynamic reasons, if a • Connector Connection: BEFORE model’s two ailerons move the Insert the receiver, servo, and battery connectors fully and firmly. same amount, some models will yaw, or pull, toward the dropped Servo Connection •... -
Page 9: Dual Aileron Servos/Flaperons
DUAL AILERON SERVOS/FLAPERONS USING THE FREQUENCY BOARD • Twin aileron servos are a very beneficial set up • Activate the flaperon feature with dip switch #9. which allows the modeler more precise control Note that both aileron servos now move with the and adjustment of the aileron response of the aileron stick. -
Page 10: Transmitter Operation
TRANSMITTER OPERATION & SERVO MOVEMENT AILERON-TO-RUDDER MIXING Turning on the power: Turning off the power: • When a model is rolled, it loses some lift and so the model slides Set the transmitter (Tx) throttle stick to idle. Stop the engine. nose down in the turn. -
Page 11: Servo Reversing
ELEVATOR AND AILERON DUAL RATES SERVO REVERSING • Servo Reversing is a feature that BEFORE • A “dual rate,” or second, lower rate, allows correct on the model’s ailerons or direction a servo travels without 3. Check the throw. elevators can make the model mechanically changing easier to handle at higher speeds,... -
Page 12: Throttle Epa
THROTTLE END POINT ADJUSTMENTS (EPA) ADJUSTABLE SERVO TRAVEL (AST) • Read your model’s instructions to • Always adjust the throw as closely determine the proper distance as possible first by moving the • Move the throttle stick to full each control surface should move. clevises in or out on the model's throttle.
Need help?
Do you have a question about the 6DA and is the answer not in the manual?
Questions and answers