WMF PERFECT PREMIUM Manual
- User manual (526 pages) ,
- Operating instructions manual (286 pages) ,
- Operating instructions manual (614 pages)
Advertisement
- 1 STRUCTURE OF THE APPLIANCE
- 2 TECHNICAL SPECIFICATIONS AND INFORMATION
- 3 UNPACKING THE PRESSURE COOKER
- 4 OPERATING THE SAFETY ELEMENTS
- 5 USING THE PRESSURE COOKER FOR THE FIRST TIME
- 6 OPERATING THE PRESSURE COOKER
- 7 PRESSURE COOKER COOKING SETTINGS
- 8 REDUCING PRESSURE AND COOLING DOWN
- 9 OPENING THE PRESSURE COOKER
- 10 TYPES OF USE AND PREPARATION
- 11 CLEANING, MAINTENANCE AND STORAGE
- 12 TROUBLESHOOTING
- 13 TIPS AND TRICKS FOR COOKING
- 14 TABLE OF COOKING TIMES FOR PRESSURE COOKING
- 15 IMPORTANT SAFETY INSTRUCTIONS
- 16 Documents / Resources
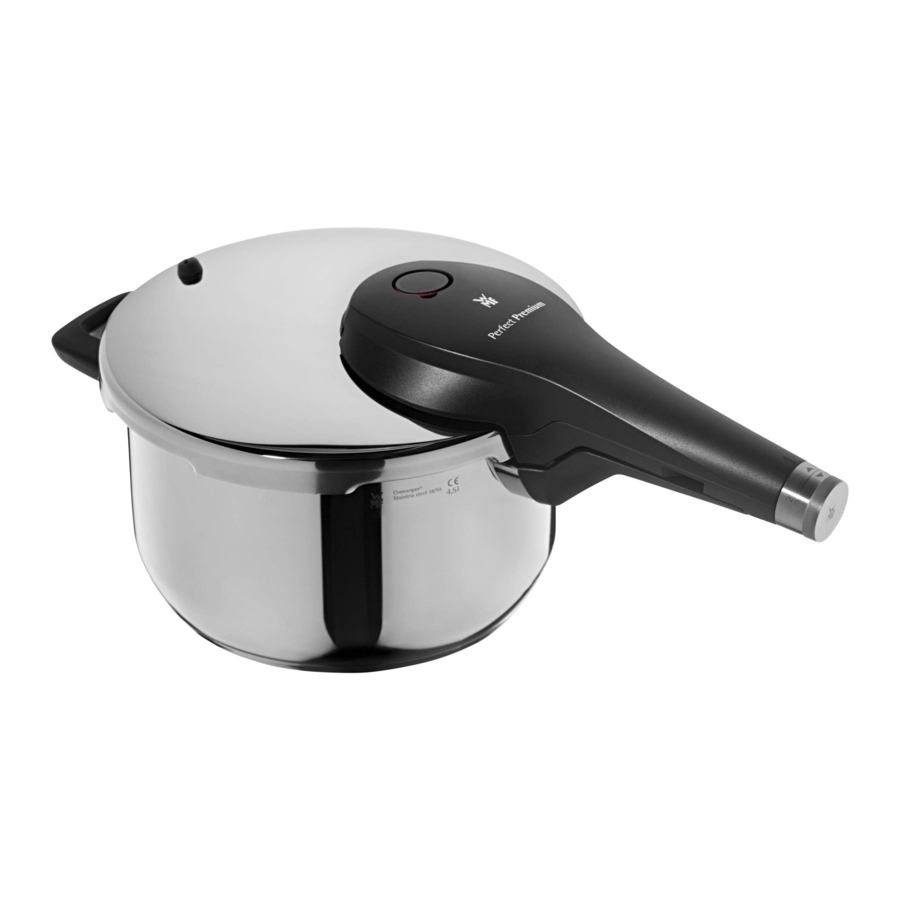
STRUCTURE OF THE APPLIANCE

- Pot
- Side handle
- Long handle
- Long handle marking
- Locking mechanism on long handle
- Lid
- Safety valve
- Holder
- Lid position marking
- Safety slot
- Removable lid handle
- Control knob
- Locking mechanism in lid handle
- Handle unlocking device
- Pressure regulation device
- Pressure indicator
- Holding slot
- Double seal
- Safety opening system
- Sealing lip on lid handle
- Seal ring
- Opening symbol
- Green marking
- Handle marking
TECHNICAL SPECIFICATIONS AND INFORMATION
TECHNICAL SPECIFICATIONS
Manufacturer: WMF GmbH
Type: Perfect Premium
Material
Pot/lid: Cromargan®, stainless steel 18/10
Base: TransTherm® universal base
Handles: Heat-insulating plastic
Seals: Silicone
| Dimensions | |||
| FILL VOLUMES | 3.0–8.5 l | ||
| BASE | 190 mm | ||
| INSIDE | 220 mm | ||
| LENGTH OF POT WITH HANDLES | 416 mm | ||
| LENGTH OF POT WITH LID | 468 mm | ||
| Height | |||
| VOLUMES | POT | POT WITH LID | POT WITH LID AND HANDLE |
| 3.0 l | 91 mm | 120 mm | 145 mm |
| 4.5 l | 129 mm | 158 mm | 183 mm |
| 6.5 l | 186 mm | 215 mm | 240 mm |
| 8.5 l | 236 mm | 265 mm | 290 mm |
Empty weight
3.0 l 2.85 kg 4.5 l 3.10 kg
6.5 l 3.40 kg 8.5 l 3.65 kg
PS value: 150 kPa
Pressure values
First green ring: approx. 106°C, 25 kPa operating pressure, 40 kPa control pressure
Second green ring: approx. 115°C, 70 kPa operating pressure, 90 kPa control pressure
Hotplate size
Max. ø 190 mm for 3.0–8.5 l
Inside scale for filling height (depending on total volume): 1/3, 1/2, 2/3
Suitable hob types

ACCESSORY, SPARE AND WEAR PARTS
Accessories

Perforated insert 22 cm (item no. 07 8941 6000)
Insert set 22 cm (item no. 07 8942 6030)
Glass lid 22 cm (item no. 07 9618 6380)
Spare parts

Lid handle 11
(Item no. 08 9580 6030)
Lid 6 with handle 11
(Item no. 07 9580 6042)
Wear parts

Seal ring 21
22 cm (item no. 60 6856 9990)
Safety valve 7
(item no. 07 9615 9510)
Double seal 18
(Item no. 60 9614 9510)
UNPACKING THE PRESSURE COOKER
- Open the packaging and check that all the parts are included:
- Pot 1 with side handle 2 and long handle 3
- Lid 6 with removable handle 11: Lid with safety valve 7, replaceable double seal 18
- Seal ring (gray) 21
- Operating Instructions If any parts are missing, please contact your authorized WMF dealer/service department or contact WMF directly.
- Remove all stickers and tags.
- Dispose of unrequired packaging material in accordance with the applicable regulations.
- Read the Operating Instructions carefully and keep them within reach of the pressure cooker.
- For the warranty conditions, see the enclosed warranty declaration.
OPERATING THE SAFETY ELEMENTS
| Safety elements | Description |
| Pressure regulating device in the lid handle | If the intended pressure for selected cooking setting 2 is exceeded, the pressure regulation device 15 opens automatically and excess steam escapes. This immediately reduces overpressure. |
| Safety valve | If the pressure regulation device 15 does not engage, excess pressure is reduced immediately via the safety valve 7. |
| Safety slot on the rim of the pot | If all other safety devices fail to engage, due to a blockage caused by food residue for example, the safety slot 10 functions as the "emergency exit". If excess pressure builds up, the seal ring 21 is pressed out as far as possible through the safety slot 10 so that steam can escape and the pressure is reduced. |
| Pressure indicator on the lid handle | The pressure indicator 16 has a visual aid to enable anticipatory, energy-saving cooking. It indicates the current status of the cooking pressure. It consists of a red ring (pressurized) and two green rings (cooking levels 1 and 2). |
| Safety opening system | The safety opening system 19 prevents the pressure cooker from being opened if it still contains residual pressure. The pressure cooker can only be opened once the pressure is released completely. |
| Controlled steam release via the rotary knob | The rotary knob 12 can be set to release steam slowly or quickly. |
| Locking mechanism | The locking mechanism 13 is located in the lid handle 11 and prevents the pres- sure cooker from being opened during cooking. |
USING THE PRESSURE COOKER FOR THE FIRST TIME
DISASSEMBLING THE PRESSURE COOKER, REMOVING THE LID


-
- Turn the rotary knob 13 until the opening symbols 22 line up with the handle marking 24.
- Pull the rotary knob 12 back toward the end of the handle as far as it will go.
> The green marking 23 on the lid handle 11 must be completely visible. - Using your left hand, firmly hold only the long handle 3 of the pot 1.
- Using your right hand, hold the lid handle 11 and turn it to the right until the lid 6 lifts off.
The lid marking 9 and long handle marking 4 must be aligned. - Remove the lid 6 via the handle 11.
- Disassemble the lid (see image sequence G); to do so first rotate the lid 6.

- Pull the seal ring 21 carefully out at the rim of the pot and put it to one side.
- Hold the lid 6 firmly and press the handle unlocking device 14 towards the end of the handle.
- Remove the lid 6 from the long handle.

CLEANING THE PRESSURE COOKER FOR THE FIRST TIME
- Disassemble the pressure cooker as per chapter "DISASSEMBLING THE PRESSURE COOKER, REMOVING THE LID".
- Fill the pot 1 two-thirds with water (see inside scale on image I) and add 2-3 tablespoons of normal vinegar.

- Boil the pot 1 containing the vinegar water without the lid 6 for approx. 5–10 minutes.
- Then rinse all parts thoroughly by hand.
- After washing, dry all parts well.

ASSEMBLING THE PRESSURE COOKER

Risk of burns caused by incorrectly assembled lid
The lid must not be assembled incorrectly. It must only be assembled in the manner described.
- Observe the instructions closely.
- Check it is fitted correctly.
ASSEMBLING THE LID


- Check the lid rim, lid handle, safety devices and seal ring for soiling or blockages.
- Turn the lid 6 so that the rim is facing downwards.
- Rotate the handle 11 and hold it firmly.
- Insert the holding slot 17 on the lid handle 11 into the holder 8 of the lid 6.
- Slowly fold the handle 11 down.
- Rotate the lid 6 with handle 11.
- Align the lid 6 and handle 11 so that the double seal 18 is not crushed or damaged by the rims of the lid openings.
- Carefully push the lid 6 downwards until you hear it click into place. Check that it has clicked into place by pushing the slider back.
- Insert the seal ring 21 in the rim of the pot and carefully press it under the rim. The seal ring 21 must sit completely below the curved rim of the pot.
POSITIONING THE LID

- Place the pot 1 on a firm surface.
- Position the lid 6 with the rim facing downwards on the pot 1. The position marker 9 on the lid and the long handle marker 4 must be aligned, otherwise the lid cannot be put into position. The seal ring 21 must be inserted in the rim of the lid!
- Using your left hand, firmly hold the long handle 3 of the pot 1.
- Using your right hand, twist the lid 6 to the left using the handle 11.
- Once both handles 3/11 are perfectly aligned, push the rotary knob 12 all the way forward. There must be no visible gap between the handle 11 and rotary knob 12.
OPERATING THE PRESSURE COOKER
CHECKING THE SAFETY DEVICES
Remove the lid 6 as per chapter "DISASSEMBLING THE PRESSURE COOKER, REMOVING THE LID".
- Pull the seal ring 21 carefully out at the rim of the pot and put it to one side.
- Remove the lid handle 11 as per chapter "DISASSEMBLING THE PRESSURE COOKER, REMOVING THE LID".
- Check whether the seal ring 21 and the inner rim of the lid are clean.
- Check whether the...
- safety slot 10 in the rim of the lid
- safety regulation device 15
- pressure indicator 16
- handle unlocking device 14
- safety valve 7 are clean and are not blocked.
- €Soak off and clean any incrustations, remove any blockages (see chapter Cleaning).
- Check whether the ball in the safety valve 7 on the underside of the lid is visible.
> If necessary, shake the lid 6 until the ball is visible again.
> In case of damage, it must be replaced by the WMF dealer/service department. - Test the movement of the pressure regulation device 15 by carefully pressing it with your finger.
- Check whether all seals are clean, undamaged and fitted correctly.

> The double seal 18 must not cover any other valve, both arrows must be aligned and the seal must fit snugly against the handle 11.
> The double seal 18 must also be positioned under the sealing lip 20 on the lid handle 11.


OPENING THE LID
To open the pressure cooker, remove the lid 6 as per chapter "DISASSEMBLING THE PRESSURE COOKER, REMOVING THE LID".
FILLING THE PRESSURE COOKER
Place the food in the pot with sufficient liquid, and if necessary use inserts and a trivet (see chapter "FRYING"). First brown the meat in the pot as per chapter "COOKING WITH INSERTS AND TRIVET".
LOCKING THE PRESSURE COOKER
- If necessary, assemble the lid as per chapter "ASSEMBLING THE PRESSURE COOKER".
- Position and lock the lid as per chapter "ASSEMBLING THE PRESSURE COOKER".
COOKING FOOD
Cook the food under pressure in the pressure cooker. Due to the build-up of steam in the pot, the temperatures are higher than with "normal" cooking. This reduces the cooking times by up to 70 percent, resulting in considerable energy savings. By cooking briefly in steam, the food largely retains its aromas, flavor and vitamins.
TIP
Energy-conscious users can switch the heat source off before the end of the cooking time, as the heat stored in the pot is sufficient to complete the cooking process.
Risk of burns caused by leaking food
Hot food can leak out through the pressure regulation device, the safety valve or the side safety slot and cause burns.
- Fill the pressure cooker to maximum two thirds (see inside marking) of its capacity.
- Fill the pressure cooker to maximum half of its capacity if you are cooking swelling, pureed or heavily foaming foods such as soups, pulses, stews, broths, offal or pasta.
 ATTENTION
Damage caused by too little/no liquid
Risk of overheating and damage
- Never heat up the pressure cooker without liquid or unsupervised on the highest setting.
- Only use the pressure cooker if it contains sufficient liquid (minimum 0.25 l water).
PRESSURE COOKER COOKING SETTINGS
Variation of cooking times
The cooking times can be different for the same food, as the quantity, form and properties of the food vary.
COOKING SETTING 1
Gentle cooking setting for sensitive foods such as vegetables, fish or compote.
The food is cooked very gently on this setting, while the aromas and nutrients are largely retained. On cooking setting 1, the pressure indicator rises to the first green cooking ring.
- Check that the pressure cooker is locked correctly.
- Place the pressure cooker on the hob
- Turn the rotary knob 1212 counterclockwise to cooking setting 1.

- Turn the hob onto a high energy setting.
> The pressure cooker warms up.- Via the safety valve 7, which is the automatic cooking system at the same time, air escapes during the parboil phase until the valve closes and the pressure builds up.
- The pressure indicator 16 starts to rise. The increase in pressure can be observed through the recess next to the pressure indicator and the heat setting can be adjusted accordingly.
- The red ring on the pressure indicator indicates that the pot can now no longer be opened.
- Once the pressure indicator 16 clearly displays the first green cooking ring, the cooking time begins.
- Make sure that the ring position on the pressure indicator 16 remains stable.
- If the pressure indicator 16 drops below the first green cooking ring, increase the heat setting.
> As a result, the cooking time is extended slightly. - If the pressure indicator 16 rises above the first green cooking ring, the excess steam pressure is audibly released via the pressure regulation device 15.
- Remove the pressure cooker from the hob.
- Wait until the pressure indicator has dropped to the first green cooking ring.
- Select a lower heat setting and return the pressure cooker to the hob.
- Once the cooking time is complete, remove the pressure cooker from the hob and reduce the pressure (see chapter "REDUCING PRESSURE AND COOLING DOWN")
- Once the pressure has been reduced, shake the pressure cooker and open it carefully.

COOKING SETTING 2
Fast cooking setting for all other foods
A lot of time and energy is saved on this cooking setting. On cooking setting 2, the pressure indicator rises to the second green cooking ring. Excess pressure is automatically regulated.
- Check that the pressure cooker is locked correctly.
- Place the pressure cooker on the hob.
- Turn the rotary knob 12 clockwise to cooking setting 2 (see image C).
- Turn the hob onto the highest cooking setting.
> The pressure cooker warms up.- Via the safety valve 7, which is the automatic cooking system at the same time, air escapes during the parboil phase until the valve closes and the pressure builds up.
- The pressure indicator 16 starts to rise. The increase in pressure can be observed through the recess next to the pressure indicator and the heat setting can be adjusted accordingly.
- The red ring on the pressure indicator indicates that the pot can now no longer be opened.
> Once the pressure indicator 16 clearly displays the second green cooking ring, the cooking time begins.
- Make sure that the ring position on the pressure indicator 16 remains stable.
- If the pressure indicator 16 drops below the second green cooking ring, select a higher heat setting on the hob.
> As a result, the cooking time is extended slightly. - If the pressure indicator 16 rises above the second green cooking ring, the excess steam pressure is audibly released via the pressure regulation device 15.
- Remove the pressure cooker from the hob.
- Wait until the pressure indicator has dropped to the second cooking ring.
- Place the pressure cooker back on the hob on a lower heat setting.
- Once the cooking time is complete, remove the pressure cooker from the hob and reduce the pressure as per chapter "REDUCING PRESSURE AND COOLING DOWN".
- Once the pressure has been reduced, shake the pressure cooker and open it carefully.
Tip
If the cooking operating pressure for cooking setting 2 is exceeded, the pressure regulation device audibly engages, which means that the heat setting needs to be lowered.
REDUCING PRESSURE AND COOLING DOWN
Releasing steam from the pot
For foaming or swelling foods (e.g. pulses, meat broths, grains), do not reduce the pressure as per method 2 or 3. Otherwise potatoes in their skins, for example, explode if steamed using these methods.
METHOD 1 – USE OF RESIDUAL HEAT
- Remove the pressure cooker from the hob.
> After a short while, the pressure indicator drops. - If the cooking indicator 16 disappears completely into the lid handle, turn the rotary knob 12 until the opening symbols 22 line up with the handle marking 24 (see image A).
- Pull the rotary knob 12 back toward the end of the handle. The remaining residual heat escapes.
- If no more steam is escaping, shake the pot and open it.
METHOD 2 – SLOW RELEASE OF STEAM
(Automatic steam release – see image A)
- Turn the rotary knob 12 until the opening symbols 22 line up with the handle marking 24.
> Steam escapes slowly. - If the cooking indicator disappears completely into the lid handle, shake the pot and open it.
METHOD 3 - QUICK STEAM RELEASE
(Automatic steam release – see image A)
- Turn the rotary knob 12 until the opening symbols 22 line up with the handle marking 24.
- Pull the rotary knob 12 back toward the end of the handle
> Steam escapes quickly. - If the cooking indicator 16 disappears completely into the lid handle 11, shake the pot and open it.
METHOD 4 – NO STEAM ESCAPES
- Place the pressure cooker in the sink and allow cold water to run over the lid.
- If the cooking indicator disappears completely into the lid handle, shake the pot and open it.
Risk of burns when quickly releasing steam
When quickly releasing steam via the cooking slider 16 or under running water, there is a risk of burns caused by hot steam or cooked food.
- Shake the pressure cooker before opening it.
- Always keep your hands, head and body away from the danger zone – above the lid 16 and the lateral safety slot 10 on the rim of the lid.
OPENING THE PRESSURE COOKER
OPENING AFTER COOKING
(See image sequence E)
- First reduce the pressure as per chapter "REDUCING PRESSURE AND COOLING DOWN". The residual pressure safety device ensures that the pot can only be opened once the pressure has been completely reduced, which means that the pressure indicator 16 should no longer be visible. If the pressure indicator remains visible, the residual pressure safety device has triggered.
> Before opening, the pressure must have been reduced. - Turn the rotary knob 12 until the opening symbols 22 line up with the handle marking 24.
- Pull the rotary knob 12 back toward the end of the handle as far as it will go.
> The green marking 23 on the lid handle 11 must be completely visible. - Shake the pot.
- Using your left hand, firmly hold the long handle 3 of the pot 1.
- Using your right hand, hold lid handle 11 and turn it to the right until the lid 6 unlocks.
> The lid marking 9 and long handle marking 4 must be aligned. - To open the lid handle 11 with lid 6, tilt it slightly downwards so that the residual steam flows out to the front and away from you.
- Lift off the lid 6.
TYPES OF USE AND PREPARATION
COOKING WITH INSERTS AND TRIVET
You can prepare several dishes at the same time in the pressure cooker – depending on its height. The individual foods are separated using inserts stacked on top of each other. If meat, for example, is to be cooked on the bottom of the pot, place a trivet on the bottom of the pot so that the first insert is positioned above the meat.
Information about accessories
Inserts and trivets can be purchased from your WMF dealer/service department. Unperforated inserts are used for vegetables, while perforated inserts are used for potatoes. The dish with the longest cooking time is first placed in the pot without an insert.
- When preparing dishes with different cooking times, the pot must be opened occasionally. As a result, steam escapes which means that you need to add a little more than the required liquid to the pot and top it up if necessary.
Examples
> Roasts (20 minutes) – bottom of pot
> Potatoes (8 minutes) – perforated insert
> Vegetables (8 minutes) – unperforated insert - First cook the roast for 12 minutes.
- Open the pot as per chapter "DISASSEMBLING THE PRESSURE COOKER, REMOVING THE LID".
- Place the potatoes in the perforated insert on a trivet, then place vegetables on top in an unperforated insert.
- Close the pot as per chapter "ASSEMBLING THE PRESSURE COOKER" and cook for a further 8 minutes.
TIP
If the cooking times do not vary much, you can place all the inserts in the pot at the same time.
FRYING
Before cooking, food (e.g. onions, pieces of meat etc.) can be fried in the pressure cooker just like in a traditional pot.
- Remove the lid 6 as per chapter "DISASSEMBLING THE PRESSURE COOKER, REMOVING THE LID" and fry the food.
- To finish cooking...
- loosen the frying food,
- add the required amount of liquid (at least 0.25 l),
- if necessary, add other food – with or without inserts.
- Position and lock the lid as per chapter "ASSEMBLING THE PRESSURE COOKER".
- Set the rotary knob 12 to the required cooking setting as per chapter "PRESSURE COOKER COOKING SETTINGS".
USING FROZEN FOOD
- Add the minimum amount of liquid (0.25 l of water).
- Add the still frozen food to the pot.
- Defrost meat for roasting.
- Add vegetables to an unperforated insert directly from the packaging.
> The cooking times are longer with frozen food.
PREPARING GRAINS OR PULSES
When preparing grains or pulses in the pressure cooker, they do not need to be soaked.
> The cooking times are extended by around half as much.
> Note that the pot may only be filled half way.
- Add the minimum amount of liquid (0.25 l) to the pot and then add two parts liquid to every one part grains/pulses.
- Just before the end of the cooking time, turn the heat setting off and use the residual heat on the hotplate to continue swelling.
STERILIZING
- Baby bottles, preservation jars etc. can be sterilized. To do so, place the parts with the opening downwards in a perforated insert.
- Add 0.25 l of water.
- Sterilize for 20 minutes on cooking setting 2.
- Allow to cool down slowly (steam release method 1).
PRESERVING
- Prepare the food as usual and fill into preservation jars.
- Fill the pot with 0.25 l of water.
- Place the preservation jars in a perforated insert.
- Preserve preservation jars with 1 l content in the 6.5 l or 8.5 l pressure cooker, and smaller preservation jars in the 4.5 l pressure cooker.
- Cook vegetables/meat on cooking setting 2 for approx. 20 minutes, stone fruit on cooking setting 1 for approx. 5 minutes and pip fruit for approx 10 minutes.
- To release the steam, allow the pot to cool down slowly (steam release method 1), otherwise the juice is forced out of the preservation jars if the other methods are used.
CLEANING, MAINTENANCE AND STORAGE
CLEANING
To clean the pressure cooker, use hot water and regular washing-up liquid.
> Do not use any sandy, abrasive cleaning detergents, steel wool or the hard sides of sponges.
- Remove the lid handle 11 as per chapter "DISASSEMBLING THE PRESSURE COOKER, REMOVING THE LID" and only clean under running water (see image sequence G).
- Remove the seal ring 21 from the lid 6 and rinse by hand.
- Soak gently stuck food residues. Boil heavily stuck food residues in the pressure cooker with a little water.
- Clean the valves using a damp cotton swab in the event of soiling or blockage.
> Do not use any sharp or pointed objects. - The pot, inserts and trivet can be cleaned in the dishwasher.
> However, this can cause discoloration on the surface. This does not impair function.
> We therefore recommend cleaning by hand. - Boil the pressure cooker with vinegar water to remove any limescale deposits.
- Dry the cookware well after it has been cleaned.
STORAGE
Store the cleaned, dried pressure cooker in a clean, dry and protected place.
- Remove the lid 6 as per chapter "DISASSEMBLING THE PRESSURE COOKER, REMOVING THE LID".
- Pull the seal ring 21 out of the rim of the pot and store it separately.
- Remove the lid handle 11 as per chapter "DISASSEMBLING THE PRESSURE COOKER, REMOVING THE LID" and place in the pot 1 or lid 6.
- Place the lid 6 upside down on the pot 1.
MAINTENANCE/REPLACING WEAR PARTS
Store the cleaned, dried pressure cooker in a clean, dry and protected place.
- The side handle and long handle must be replaced by the WMF dealer/service department.
- Regularly check wear parts and if necessary, replace them with original spare parts.
- Immediately replace the seal ring and double seal with original spare parts in the event of damage, hardening, discoloration or incorrect fit.
REPLACING THE SEAL RING
Store the cleaned, dried pressure cooker in a clean, dry and protected place.
- Remove the lid 6 as per chapter "DISASSEMBLING THE PRESSURE COOKER, REMOVING THE LID".
- Rotate the lid 6.
- Pull the defective seal ring 21 out of the rim of the pot and dispose of it.
- Insert the new original seal ring 21 in the rim of the pot and carefully press under the rim.
> The seal ring 21 must sit completely below the curved rim of the pot.
REPLACING THE DOUBLE SEAL
Store the cleaned, dried pressure cooker in a clean, dry and protected place.
- If necessary, remove the lid 6 from the pot as per chapter "DISASSEMBLING THE PRESSURE COOKER, REMOVING THE LID".
- Disassemble the lid (see image sequence G); to do so rotate the lid 6.
- Hold the lid 6 firmly and press the handle unlocking device 14 towards the end of the handle.
- Remove the lid handle 11.
- Pull the double seal 18 off the lid handle 11 and dispose of it (see image J.)
- Carefully refit the new original double seal 18
> The double 18 must not cover any other valve.
> The arrows on the double seal 18 and the bottom of the handle must line up.
> The double seal 18 seal must fit snugly and flat against the handle.
> The double seal 18 must be positioned under the sealing lip 20 of the handle in such a way that the bulge of the sealing lip is above the edge of the seal.
REPLACING THE SAFETY VALVE
- Remove the lid 6 from the pot as per chapter "DISASSEMBLING THE PRESSURE COOKER, REMOVING THE LID".
- Rotate the lid 6.
- Remove the defective safety valve 7 from the pot lid 6 and dispose of it.
- By applying a little pressure and by gently turning the new safety valve 7, carefully push it from the inside through the opening. This does not damage the safety valve.
TIP
To make it easier to insert the safety valve, you can apply a little cooking oil so that the head of the safety valve slides better.
TROUBLESHOOTING
IN THE EVENT OF MALFUNCTIONS, YOU MUST REMOVE THE PRESSURE COOKER FROM THE HOB. NEVER USE FORCE TO OPEN THE PRESSURE COOKER!
| Malfunction | Possible cause | Solution |
| Parboiling time too long or the pressure indicator does not rise | Diameter of the hotplate unsuitable | Choose a hotplate that matches the diameter of the pot |
| Cooking setting unsuitable | Turn up to the highest cooking setting | |
|
| |
| Ball in safety valve/automatic cooking system is not fitted correctly |
| |
| No liquid |
| |
| Steam is escaping from the lid | Seal ring and/or pot rim are not clean |
|
| Rotary knob is not set to heat setting 1 or 2 | Set the rotary knob 12 to heat setting 1 or 2. | |
| Seal ring damaged or hard (due to wear) | Replace seal ring 21 with an original WMF seal ring | |
| Double seal is not fitted correctly or is damaged | Correct the position of the double seal 18 or replace with an original WMF spare part. | |
| Steam is constantly escaping from the safety valve/automatic cooking system (does not apply to the parboil phase) | The safety valve ball is not fitted correctly in the valve |
|
| Rotary knob cannot be pulled back and the pressure cooker cannot be opened accordingly | Safety opening system blocked |
|
TIPS AND TRICKS FOR COOKING
- Gently grease the seal ring with cooking oil or fat to make it easier to access when opening and closing.
- The cooking time begins once the aforementioned ring is visible on the pressure indicator.
- The stated cooking times are guide values; we recommend that you select shorter cooking times as you can always cook for a little longer.
- The cooking times stated for vegetables are for al dente dishes.
- The cooking temperature for the first ring is 106°C (especially suitable for vegetables and fish) and for the second ring is 115°C (especially suitable for meat).
Find recipes at www.wmf.com!
TABLE OF COOKING TIMES FOR PRESSURE COOKING
| Food | Cooking time | Notes |
| PORK AND VEAL COOK ON SECOND COOKING RING; FILL WITH AT LEAST 0.25 L LIQUID; NO SPECIAL INSERT REQUIRED | ||
| Pork schnitzel | 5–7 min. | — |
| Pork goulash | 10–15 min. | — |
| Roast pork | 20–25 min. | Cooking time depends on size and shape |
| Veal schnitzel | 5–7 min. | — |
| Veal goulash | 10–15 min. | — |
| Veal shank | 25–30 min. | — |
| Veal tongue | 15–20 min. | Cover with water |
| Roast veal | 20–25 min. | Cooking time depends on size and shape |
| BEEF COOK ON SECOND RING; MINIMUM FILL QUANTITY 0.25 L LIQUID; A PERFORATED INSERT IS REQUIRED FOR BEEF TONGUE | ||
| Meat loaf | 10–15 min. | — |
| Braised beef | 30–35 min. | — |
| Beef tongue | 45–60 min. | — |
| Schnitzel | 6–8 min. | — |
| Goulash | 15–20 min. | — |
| Roulades | 15–20 min. | — |
| Roast beef | 35–45 min. | Cooking time depends on size and shape |
| POULTRY COOK ON SECOND RING; MINIMUM FILL QUANTITY 0.25 L LIQUID; A PERFORATED INSERT IS REQUIRED FOR BOILING HEN | ||
| Boiling hen | 20–25 min. | max. 1/2 fill quantity |
| Chicken pieces | 6–8 min. | — |
| Turkey leg | 25–30 min. | Depends on the thickness of the legs |
| Turkey ragout | 6–10 min. | Turkey is identical |
| Turkey cutlet | 2–3 min. | — |
| GAME COOK ON SECOND COOKING RING; FILL WITH AT LEAST 0.25 L LIQUID; NO SPECIAL INSERT REQUIRED | ||
| Roast hare | 15–20 min. | — |
| Saddle of hare | 10–12 min. | — |
| Roast venison | 25–30 min. | — |
| Venison goulash | 15–20 min. | — |
| LAMB COOK ON SECOND COOKING RING; FILL WITH AT LEAST 0.25 L LIQUID; NO SPECIAL INSERT REQUIRED | ||
| Lamb ragout | 20–25 min. | The cooking times for mutton are longer |
| Roast lamb | 25–30 min. | Cooking time depends on size and shape |
| FISH COOK ON FIRST RING; MINIMUM FILL QUANTITY 0.25 L LIQUID; NO INSERT IS REQUIRED FOR RAGOUT OR GOULASH | ||
| Fish fillets | 2–3 min. | Steamed in own juice |
| Entire fish | 3–4 min. | Steamed in own juice |
| Ragout or goulash | 3–4 min. | — |
| SOUPS COOK ON SECOND RING; MIN. 0.25 L LIQUID UP TO MAX. 1/2 POT CAPACITY; NO INSERT REQUIRED | ||
| Pea soup, lentil soup | 12–15 min. | Soaked pulses |
| Meat broth | 25–30 min. | Applies to all kinds of meat |
| Vegetable soup | 5–8 min. | — |
| Goulash soup | 10–15 min. | — |
| Chicken soup | 20–25 min. | Cooking time depends on the size |
| Potato soup | 5–6 min. | — |
| Oxtail soup | 35 min | — |
| VEGETABLES COOK ON FIRST RING; MINIMUM FILL LEVEL 0.25 L LIQUID; NO INSERT IS REQUIRED FOR SAUERKRAUT AND BEETROOT; THE PERFORATED INSERT SHOULD BE USED FOR ALL OTHER DISHES; COOK BEANS AND LARGER VEGETABLES ON SECOND RING | ||
| Eggplant, zucchini and tomatoes | 2–3 min. | Vegetables cooked in steam do not leach out as quickly |
| Cauliflower, peppers, leeks | 3–5 min. | — |
| Peas, celery, kohlrabi | 4–6 min. | — |
| Fennel, carrots, savoy cabbage | 5–8 min. | — |
| Beans, green cabbage, red cabbage | 7–10 min. | Second ring |
| Sauerkraut | 10–15 min. | Second ring |
| Beetroot | 15–25 min. | Second ring |
| Boiled potatoes | 6–8 min. | Second ring |
| Potatoes in their skins | 6–10 min. | Second ring, potatoes in their skins explode if the steam is released quickly |
| PULSES COOK ON SECOND RING; MIN. 0.25 L LIQUID UP TO MAX. 1/2 POT CAPACITY; TWO PARTS WATER TO ONE PART GRAINS; COOK UNSOAKED GRAINS 20–30 MIN. LONGER; COOK RICE PUDDING ON FIRST RING | ||
| Peas, beans, lentils | 10–15 min. | Cook thick beans for 10 min. longer |
| Buckwheat, millet | 7–10 min. | Cooking time for soaked grains |
| Sweetcorn, rice, green spelt | 6–15 min. | Cooking time for soaked grains |
| Cook rice pudding | 20–25 min. | on first ring |
| Long-grain rice | 6–8 min. | — |
| Whole-grain rice | 12–15 min. | — |
| Wheat, rye | 10–15 min. | Cooking time for soaked grains |
| FRUIT COOK ON FIRST RING; MINIMUM FILL QUANTITY 0.25 L LIQUID | ||
| Cherries, plums | 2–5 min. | Perforated insert is recommended |
| Apples, pears | 2–5 min. | Perforated insert is recommended |
IMPORTANT SAFETY INSTRUCTIONS
These Operating Instructions contain important information indicated by graphical symbols and signal words:

Indicates a hazardous situation that can cause serious injuries (e.g. burns caused by steam or hot surfaces).
Indicates a potentially hazardous situation that can lead to minor or moderate injuries.
ATTENTION indicates a situation that can lead to material damage.
NOTE provides additional information regarding safe handling of the pressure cooker.
 Symbols Observe and follow the instructions.
PROPER USE
The pressure cooker is only suitable for
- the hob types listed in these instructions
- cooking or stewing food (with and without inserts/trivet)
- preserving normal household quantities in preserving jars (with perforated insert)
- extracting juice from small amounts of fruit (with insert)
- sterilizing baby bottles, preserving jars etc. (with perforated insert)
The pressure cooker is not suitable for
- use in a hot oven or in a microwave
- deep frying food in oil
- sterilization in medical environments
- hob types other than those listed, or naked flames
- camping stoves
Operating Instructions
- must be treated with care
- must always be stored near the pressure cooker
- must be shared with other users who must read them
Keep these Operating Instructions in a safe place for future reference. Read these notes carefully before use. The pressure cooker may only be used when the person has read and understood the safety instructions. Failure to observe these instructions can lead to damage and burns when using the pressure cooker.
GENERAL INFORMATION
Operation only by people familiar with handling the product
The pressure cooker may only be used by people who have first familiarized themselves with the Operating Instructions and who have read the safety instructions.
- Do not pass on the pressure cooker to people who are unfamiliar with the product.
- Do not let children play with or use the pressure cooker.
Do not modify the pressure cooker/safety devices
The safety devices prevent hazardous situations. They only function when they remain unmodified and when the pot and lid are matching.
- Do not make any modifications to the pressure cooker or its safety devices.
- Only use the Perfect Premium lid 6 together with a matching Perfect Premium pot 1 and vice versa. Do not use any other lids or pots.
Keep out of reach of children and pets
Keep children and pets away from the pressure cooker while it is in use as the pressure cooker is heavy, very hot and steam can escape from it.
Foreseeable misuse
In order to prevent misuse and the dangers or burns associated with it, do not use the pressure cooker:
- in a hot oven or in a microwave
- for deep frying food in oil
- for sterilization in medical environments
- on hob types other than those listed or over open flames.
Do not allow the pot handles to protrude over the hotplate
- If the handles 2/3/11 protrude over hotplates or the flames of a gas hob, they can get very hot and cause burns if touched.
Check and replace wear parts regularly
Replace wear parts (double seal 18, seal ring 21) with original spare parts if there are signs of discoloration, cracks, hardening, damage or improper fit.
- The seal ring 21 must be touching the rim of the lid.
- Replace the seal ring 21 after the pressure cooker has been used around 400 times, at the latest after two years.
- Only use WMF original spare parts.
USING THE PRODUCT FOR THE FIRST TIME
Before using the pressure cooker for the first time, you must fill it with water only (see the stated fill quantities) and cook for at least five minutes on the second cooking setting. This must also be taken into account explicitly each time the product is checked.
BEFORE EACH USE
Risk of burns due to damaged/missing or incorrectly inserted parts
Prior to each use, check whether all the parts are present, are in good condition and are correctly inserted/locked. If parts are missing, damaged, deformed or incorrectly inserted, there is a risk of burns caused by hot surfaces and escaping steam.
- Check that the lid 6 is assembled/inserted correctly.
- Insert any missing parts (e.g. double seal 18, seal ring 21).
- If the pressure cooker has damaged, deformed, discolored or broken parts, do not use it and contact the WMF dealer/service department.
- If the parts do not function as per the description in the Operating Instructions, do not use the pressure cooker and contact the WMF dealer/service department.
- Check whether the pressure cooker is safely locked.
Risk of burns due to malfunctioning safety devices
Prior to each use, check that the safety devices are working properly and are not damaged, soiled or blocked. Otherwise this can lead to risk of burns caused by hot surfaces and escaping steam.
- Check that the double seal 18 is fitted correctly. The seal ring 21 must be touching the rim of the lid.
- If the pressure cooker has damaged, deformed, discolored or broken parts, do not use it and contact the WMF dealer/service department.
- Remove any soiling/blockages.
Risk of burns due to inadequate cleaning
Before each use, check the safety valves/devices and the pressure indicator for soiling and blockages, otherwise steam can escape uncontrollably. This can result in burns.
- Check and, if necessary, clean the safety devices and pressure indicator 16.
Risk of burns caused by incorrectly assembled lid
The lid must be assembled correctly. It must only be assembled in the manner described.
- Observe the instructions closely.
- Check it is fitted correctly.
DURING USE
Risk of injury caused by high pressure
High pressure builds up in the pot during cooking. If this pressure discharges, it can cause severe burns and injuries.
- Always check whether the pressure cooker is securely locked.
- Never use force to open the pressure cooker. The pressure cooker only opens easily when it is completely depressurized.
- If the pressure cooker is pressurized, move it carefully.
- Never leave the pressure cooker unsupervised during use.
Risk of burns caused by hot steam
If no pressure builds up in the pressure cooker, but instead steam escapes, there is a risk of burns to your hands and face caused by hot surfaces and escaping steam.
- Turn the hob off immediately, leave the pot to cool down and then check it.
Risk of burns caused by escaping steam
During cooking, hot steam occasionally escapes from the lid 6.
- Never reach into the steam.
- Always keep your hands, head and body away from the danger zone – above the lid 6 and the lateral safety slot 10 on the rim of the lid.
- Never leave the pressure cooker unsupervised during use.
- Keep out of reach of children and household pets.
- Always position the pressure cooker so that escaping steam is not directed towards people who are in the room. This is especially important for "open kitchens".
Risk of burns when quickly releasing steam
When quickly releasing steam via the rotary knob 12 or under running water, there is a risk of burns caused by hot steam or cooked food.
- Shake the pressure cooker before opening it.
- You must never immerse the pressure cooker in cold water.
- Always keep your hands, head and body away from the danger zone above the lid 6 and the lateral safety slot 10 on the rim of the lid.
Risk of burns caused by the formation of bubbles
(superheating)
When opening the lid of the cooled down pressure cooker, hot cooked food can cause bubbles to form and spurt out of the pot. When piercing meat with skin, hot liquid may spurt out. This can result in burns or scalds.
- Always shake the pressure cooker before opening it.
- Do not immediately pierce hot meat that was cooked with its skin (e.g. ox tongue); you must let it cool down first.
Risk of burns caused by leaking food
If the pressure cooker is overfilled, hot food can leak out via the safety valve 7, pressure regulation device 15 or lateral safety slot 10 and cause burns.
- Never overfill the pressure cooker.
- Fill the pressure cooker to maximum twothirds of its capacity.
- Fill the pressure cooker to maximum half of its capacity if you are cooking pureed, viscous or heavily foaming foods such as soups, pulses, stews, broths, offal or pasta.
- First cook the food in the open pot, stir and, if necessary, skim off any foam.
Risk of burns from the hot pot/lid
The pressure cooker gets very hot during cooking. When used on gas hobs, the handles can also get very hot due to the open flames. Risk of burns when touched.
- Never touch the hot outer surfaces of the pressure cooker.
- Only hold the pot 1/lid 6 via the plastic handles.
- Use gloves or hand protection (e.g. pan holders).
- Always use an aid, such as pan holders, to remove hot inserts and trivets.
- When the pressure cooker is hot, only place it on heat-resistant surfaces.
ATTENTION
Damage caused by too little/no liquid
Never heat up the pressure cooker without liquid or unsupervised on the highest setting, otherwise there is a risk of overheating and damage.
- Only use the pressure cooker if it contains sufficient liquid (minimum 0.25 l water, broth, sauce, etc.).
- When cooking viscous food, make sure there is sufficient liquid.
- If there is too little or no liquid, turn the hob off immediately and do not move the pressure cooker until it has completely cooled down.
- Never leave the pressure cooker unsupervised.
CORRECT CLEANING
Clean the pressure cooker after each use!
Risk of burns caused by damage during cleaning
Do not use brushes, abrasives or chemicals to clean the safety devices, as they will damage them and result in a risk of burns caused by escaping steam.
- Observe the instructions for cleaning and care.
- Dry the cookware well each time after it has been cleaned.
NECESSARY REPAIRS
Damage caused by improper repairs/incorrect spare parts
Repairs may only be carried out by a WMF dealer/service department, otherwise the pressure cooker may be damaged or the safety devices may no longer function correctly and result in a risk of burns.
- If repairs are necessary, contact a WMF dealer/service department.
- Handles that are cracked or will not fit correctly must be replaced by a WMF dealer/service department.
- Only use WMF original pressure cooker spare parts.
SUITABLE HOB TYPES
Suitable hob types and hotplate sizes
The pressure cooker may only be used on induction, glass ceramic, gas and electric hobs. The diameter of the hotplate or gas flame must not be wider than the base of the pot.
- On gas hobs, the gas flame must not protrude out past the base of the pot.
- For optimal heat transfer and connection with the hob, the pot size and the hotplate must match.
- With glass ceramic or electric hobs, the diameter of the hotplate must be no wider than 190 mm (3.0–8.5 l).
- On induction hobs, a buzzing noise may occur when used at high cooking settings. This occurs for technical reasons and does not indicate that your hob or pressure cooker is faulty.
PRESERVING THE SERVICE LIFE
ATTENTION
Damage to the pressure cooker
To prevent damage to the pressure cooker:
- Do not strike kitchen utensils on the rim of the pot.
- Only add salt to boiling water and stir it to stop the salt from attacking the bottom of the pot.
- Avoid the build-up of soiling between the base of the pot and the hotplate, as otherwise this can scratch the hotplate (e.g. glass ceramic).
Documents / ResourcesDownload manual
Here you can download full pdf version of manual, it may contain additional safety instructions, warranty information, FCC rules, etc.
Advertisement


Need help?
Do you have a question about the PERFECT PREMIUM and is the answer not in the manual?
Questions and answers