Table of Contents
Advertisement
Quick Links
Advertisement
Table of Contents

Related Manuals for Getinge GSS-P


Summary of Contents for Getinge GSS-P
- Page 1 USER MANUAL GSS-P&R EXAMPLE 0011345678-010-01...
- Page 3 Getinge, and nothing in this manual shall be construed as assigning any such intellectual property rights or rights to any person.
-
Page 5: Table Of Contents
3.8.3 Service..................46 3.8.4 User management..............46 3.8.5 About..................52 3.9 Screen menu..................... 52 3.10 Reports menu....................54 3.10.1 Print alarms................55 3.10.2 Print recipe................55 3.10.3 Print test page................ 55 3.10.4 Print machine setup............... 56 3.10.5 Print last cycle................ 56 www.getinge.com... - Page 6 8.3.4 Cleaning the loading equipment..........90 8.4 Test and maintenance..................90 Programs and cycles 9.1 Program modification..................92 9.1.1 Posttreatment modification............93 9.2 Basic steam sterilization principles............... 93 9.2.1 The vacuum cycle..............93 9.2.2 Liquid cycles, vented containers..........95 Recycling and disposal www.getinge.com...
- Page 7 IP type Table of contents | 7 Glossary................................. 98 Index................................101 Appendix..............................107 www.getinge.com...
-
Page 8: Index Of Warnings
Risk of injury Water leakage may cause a conductive path from live electrical parts. WARNING Fire hazard The heat in the sterilizer might ignite flammable and explosive materials. Flammable and explosive materials must not be processed in this sterilizer. www.getinge.com... - Page 9 Overloading the loading equipment may cause it to break and the load to fall off. Do not exceed the maximum load weight limits for the loading equipment. WARNING Possibility of injury Make sure that the temperature sensor is positioned in the load. www.getinge.com...
- Page 10 Before starting a new sterilization after a an incomplete one, make sure that the goods and the packaging material are intended for repeated sterilizations. If necessary, prepare or repackage the goods before restarting the sterilization. Consult the manufacturer of the goods and packaging material for instructions. www.getinge.com...
- Page 11 The sterilizer must cool down before cleaning. Turn off the sterilizer and allow to cool, for example overnight. WARNING Heavy parts The doors and chamber are heavy and can cause injury by crushing. When dismounting the sterilizer's doors or chamber, make sure they are properly supported to avoid crushing accidents. www.getinge.com...
-
Page 12: Introduction
Records of attendance at training are maintained, and evidence of understanding demonstrated. Getinge Sterilization AB shall not be liable for any damages, directly or indirectly, due to actions, which are not in accordance with this manual. -
Page 13: Symbols In This Manual
Hand pinch hazard The equipment or parts of the equipment could pinch or crush hands and fingers. Crush hazard The equipment or parts of the equipment could pinch or crush human body parts. www.getinge.com... -
Page 14: Warranty
Risk of injury. Electrical shock hazard Electrical danger. Burn hazard Hot surface or heat emitting area. Hand pinch hazard The equipment or parts of the equipment could pinch or crush. Warranty For warranty issues, contact your local Getinge representative. www.getinge.com... -
Page 15: Intended Use Of The Product
Administrators Maintenance personnel The user must be familiar with national and local requirements and regulations. 1.2 Contact information Getinge Sterilization AB Ekebergsvägen 26 | SE-305 75 Getinge | Sweden Telephone: +46 (0)10 335 0000 Internet: www.getinge.com www.getinge.com... -
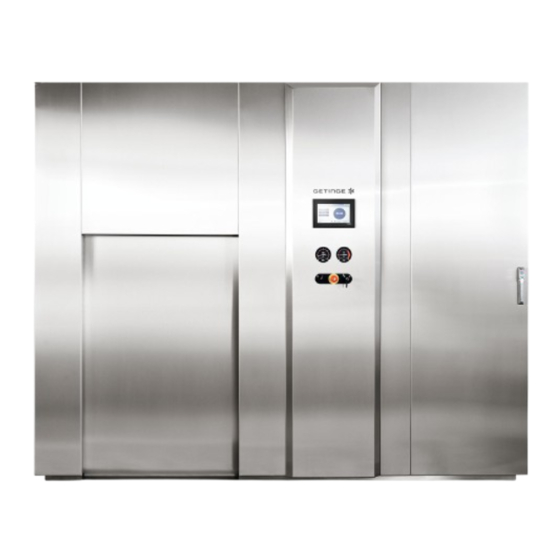
Page 16: Sterilizer Overview
Both audible and visual notifications are provided in the event of deviations from operating parameters. The sterilization is an automatic batch process performed in a closed chamber. Each process is customized for a specified product group. www.getinge.com... -
Page 17: Power Supply
1.3.2 Media supply The sterilizer must be supplied with: Water Steam Compressed air For detailed information and requirements on the media and the media installations, see the Installation Manual. www.getinge.com... -
Page 18: Air Detector
The sterilizer is sealed to the facility walls, ceiling and floor. 1.3.5 Product identification The sterilizer nameplate The unique identification information for the sterilizer is found on the nameplate. The marking is attached to the electrical cabinet. www.getinge.com... -
Page 19: Product Naming
The first 7 to 10 characters of the product name is built-up according to the syntax GSS–Z:YYYYYY. Designation Description GSS–Z Range name Where Z represents a product specific capital letter. YYYYYY Model number Represents a number series that can be derived from the size of the chamber (3 to 6 digits). www.getinge.com... -
Page 20: Consumables
1.4 Consumables Spare parts To guarantee correct operation and product safety; parts for recorders, printers, and periodic maintenance must be genuine Getinge spare parts or parts approved by Getinge. Printer consumables To guarantee correct operation and product safety, use only consumables approved by Getinge or by the manufacturer of the printer. -
Page 21: Safety
IP type Safety | 21 Safety 2.1 Product liability Modifications to the equipment without the express approval of Getinge Sterilization AB, or incorrect use of the unit, invalidates the manufacturer’s product liability. 2.2 Safety precautions Read the manual The sterilizer is designed with a number of built-in safety devices. To avoid personal injury, it is very important that these safety devices are not disconnected. -
Page 22: Safety Features
They must not be replaced with components of any make or design that has not been approved by Getinge. It is very important that the reliability of these components is maintained during the entire product life cycle. -
Page 23: Safety Interlocks
Backflow can occur from the higher ambient pressure to the lower chamber pressure. By blocking the drain, the risk for contaminants from outside entering the chamber is eliminated. www.getinge.com... -
Page 24: Mandatory Reporting
IP type Safety | 24 2.4 Mandatory reporting Incidents and accidents involving a Getinge sterilizer must be reported immediately in writing. The manufacturer of the concerned device is obliged to investigate incidents and accidents involving the device and report them to the authorities concerned. -
Page 25: Control Panel
Since illustrations are reused for different variants, certain details may differ from the variant in question. The essential information in the illustrations is however always accurate. 0000008876 1. Operator panel 2. Gauge, chamber pressure 3. Gauge, jacket pressure 4. Control switch 5. Key switch 6. Emergency stop push button www.getinge.com... -
Page 26: Control Switch
Locked 0000009299 Unlocked 0000009300 0000009298 NOTE Before working inside the chamber, turn the key to the Locked position and remove it. To prevent someone from closing the door, bring the key with you. www.getinge.com... -
Page 27: Emergency Stop
It is not possible to lock the emergency stop button when inactivated. 3.4 Pressure gauges NOTE Since illustrations are reused for different variants, certain details may differ from the variant in question. The essential information in the illustrations is however always accurate. www.getinge.com... - Page 28 For more information, see Chapter 3.9 “Screen menu” on page 52. Pressure gauge symbols The pressure that is measured is indicated by the symbol on the dial of the gauge. www.getinge.com...
-
Page 29: Digital Indicator
You navigate menus, enter data and issue commands by tapping the appropriate buttons on the screen. Using the touchscreen Always use your fingers when interacting with the touchscreen. Never apply exaggerated force or use any kind of object to operate the screen, or damage may result. www.getinge.com... -
Page 30: Display Layout
Menu button. For information about the menus, see Chapter 3.7 “Menus” on page 35 NOTE If a command button or a menu button is unavailable, you do not have the user right to perform this task. www.getinge.com... -
Page 31: Buttons And Symbols
Indicates that the doors are Doors locked locked. 0000009796 Indicates that the doors are Doors closed closed, but not locked. 0000009795 In process Indicates that a process is running. 0000009799 Indicates that a process is Process failure completed, but with failure. 0000009808 www.getinge.com... -
Page 32: Command Buttons
Log out the current user. 0000009871 Open the Select recipe Cycles view. 0000009878 Menu Open the Main menu. 0000009873 Batch Open the Batch data view. 0000009864 Back Go back one step. 0000009863 Only available in the Edit Delete recipes view. 0000012156 www.getinge.com... - Page 33 0000009868 Print a calibration report for Print analog inputs. 0000009877 Save Save settings. 0000009881 Save as Save with a new name. 0000009881 Download Load program to the PLC. 0000010929 New recipe. Only available in the Recipes view. 0000010931 www.getinge.com...
-
Page 34: Other Buttons
0000009885 alarm. NOTE When the sterilizer is ready to start, the color of the Start button changes to green. Other buttons Function / symbol Description Mute an alarm signal. 0000009874 Alarm handling Close a message dialog box. 0000009997 www.getinge.com... -
Page 35: On-Screen Keyboards
For a condensed overview of the menu structure, see the menu tree in the Appendix. NOTE If a menu button is unavailable, you do not have user right to perform this task. 3.8 System menu “Main menu è System menu” www.getinge.com... -
Page 36: System, Submenu
Report setup Settings for process log and printers. Machine setup Configuration tool – parameter settings. About data setup Machine identification settings. Date and time Date and time settings. Panel setup “Main menu è System menu è Settings è Panel setup” www.getinge.com... -
Page 37: Adjusting Brightness
“Main menu è System menu è Service è Export/import”. Batch data setup “Main menu è System menu è Settings è Batch data setup” PREREQUISITES Standby Operating mode Login Maintenance personnel The Batch data setup provides you to modify and customize the process reports for batch processing. www.getinge.com... - Page 38 Tap a value box in the column Req. length . ð The on-screen keyboard appears. Enter a relevant value. Tap the keyboard enter key to save. Editing the batch data headers “Main menu è System menu è Settings è Batch data setup” www.getinge.com...
-
Page 39: Report Setup
“Main menu è System menu è Settings è Language” Selecting language PREREQUISITES 0000009703 Standby Operating mode Login Supervisor Maintenance personnel Tap to select the language to be displayed in the operator panel. Report setup “Main menu è System menu è Settings è Report setup” www.getinge.com... -
Page 40: Machine Setup
Standby Operating mode Login Maintenance personnel Tap a value box. ð The on-screen keyboard appears. Enter a new value [seconds]. Tap the keyboard enter key to save. Machine setup “Main menu è System menu è Settings è Machine setup” www.getinge.com... - Page 41 “Main menu è System menu è Settings è About data setup” PREREQUISITES 0000009703 Standby Operating mode Login Supervisor Maintenance personnel The About data setup view Heading Description Machine name Name of the machine. Order number Unique order number. Panel version Application version. Panel identification Internal ID www.getinge.com...
-
Page 42: Date And Time
“Main menu è System menu è Settings è Date and time” PREREQUISITES 0000009703 Standby Operating mode Login Supervisor Maintenance personnel The Date and time view Heading Description Panel time Operator panel time PLC time System time Enter new date and time MM/DD/YYYY HH:MM:SS www.getinge.com... -
Page 43: Edit Recipes
“Main menu è System menu è Recipes è Edit recipes” PREREQUISITES 0000009703 Operating mode Standby Login Supervisor Maintenance personnel Tap Edit recipes . ð The recipes view appears. Tap the Program Type: drop down arrow. Tap to select program type. www.getinge.com... -
Page 44: Creating A New Recipe
ð The value is set. 11. Repeat step 8-10 for all of the parameters you want to set. 12. Tap Save. ð The new recipe is saved. Copying a recipe “Main menu è System menu è Recipes è Edit recipes” www.getinge.com... -
Page 45: Deleting A Recipe
Tap the Program Type: drop down arrow. Tap to select program type. Tap the Recipe: drop down arrow. Tap to select the recipe you want to delete. Tap Delete . ð A dialog box appears. Tap Yes to verify deletion. ð The recipe is deleted. www.getinge.com... -
Page 46: Service
“Main menu è System menu è User management” PREREQUISITES 0000009703 Operating mode Standby Login Operator Supervisor Administrator Maintenance personnel This is the menu entry for managing user accounts. For a conceptual description, see Chapter “Access management” on page 50. www.getinge.com... -
Page 47: Adding A New User
Deleting an user account “Main menu è System menu è User management” PREREQUISITES 0000009703 Operating mode Standby Login Administrator In the User column, tap the account to delete. ð The on-screen keyboard appears. Empty the cell from any characters. www.getinge.com... - Page 48 Current status is Authorized . Tap the relevant user group from the drop down list. ð The user is authorized and assigned to the selected user group. Disabling an user account “Main menu è System menu è User management” www.getinge.com...
-
Page 49: Change Password
Change password “Main menu è System menu è User management” All users have permission to change their own password. Changing your password PREREQUISITES 0000009703 Operating mode Standby Login Your assigned user account Tap Password ð A dialog box appears. www.getinge.com... -
Page 50: Access Management
The control system is delivered with predefined user accounts. Change the default passwords before taking the system at use. Factory presets User account Default password User group operator 762430 Operators super 531020 Supervisors maint 826033 Maintenance personnel admin 243160 Administrators www.getinge.com... - Page 51 Print test page Input of batch data Cycle abort Cycle continue (Posttreatment) Cycle continue (Pretreatment) Repeat test (Filter WIT) Step cycle Panel setup Change HMI language About data setup Date and time Edit recipe Print alarms Print recipe Print machine setup www.getinge.com...
-
Page 52: About
“Main menu è Screen” Switching process screen Tap to select the layout for how you prefer to display real time process status. The process screen is available in three different layouts: Circle graph Plot graph Details www.getinge.com... -
Page 53: Circle Graph
The set exposure temperature. Plot graph The plot graph screen displays: Remaining process time [hours:minutes]. A graph displaying the process trend curve over time. The current value of the monitored sensors. Maximum four sensors at the same time. www.getinge.com... -
Page 54: Reports Menu
Send information about the sterilizer settings to the printer. Print last cycle Send the latest process report to the printer. Print audit trail Send the audit trail log to the printer. For information about the printer setup, see Chapter “Report setup” on page 39. www.getinge.com... -
Page 55: Print Alarms
3.10.3 Print test page “Main menu è Reports è Print test page” Printing a test page PREREQUISITES 0000009703 Operating mode Standby Login Operator Supervisor Maintenance personnel Tap Print test page to test communication and performance of the printer. www.getinge.com... -
Page 56: Print Machine Setup
Tap Print last cycle to send the latest process report to the printer. NOTE This feature is available only from the end of a cycle until the start of the next cycle. 3.10.6 Print audit trail “Main menu è Reports è Print audit trail” www.getinge.com... -
Page 57: Alarms Menu
Alarms , submenu Button Description Active alarms A list of existing alarms and warnings . Alarm history A list of existing and previous alarms. Columns in the alarm list view Column Description Alarm Alarm designation. Date Date for status change. www.getinge.com... -
Page 58: Active Alarms
Active alarms list. 3.11.2 Alarm history Viewing occurred alarms “Main menu è Alarms è Alarm history” In Alarm history you can view—but not edit—a list of the last 200 stored alarms and warnings that have occurred. www.getinge.com... -
Page 59: Printers And Report Systems
For information about the settings, see the manual delivered with the printer. 4.2 JUMO recorder LOGOSCREEN The LOGOSCREEN is a paperless recorder that can record and store data from a number of independent measurement probes. For example: Chamber temperature Chamber pressure www.getinge.com... -
Page 60: Process Report
Log table Sensor values during the process phases. Information about alarms. Information about other events during the process. Process Summary Time when the process ended. Exposure time. Maximum and minimum temperature during sterilization. www.getinge.com... - Page 61 IP type Printers and report systems | 61 Title Description Process status Pass or Fail. Signature Space for date and signature by the person who evaluated the report. www.getinge.com...
-
Page 62: Start-Up And Shutdown
In an emergency, it may be necessary to remove all electrical power from the sterilizer and to turn off the media supplies. All personnel at the site must know the location of the main switch for the electrical power and the media supply shut-off valves. www.getinge.com... -
Page 63: Operation
Goods containing fabrics or other porous material must not be left in the sterilizer chamber previous to, or after sterilization. Such goods may ignite due to heat and excessive drying. WARNING Risk of cross-contamination Do not process biohazardous waste in this sterilizer. www.getinge.com... - Page 64 Avoid heating the load Heating of items to be processed before starting the program may jeopardize the sterilization result because of decreased steam penetration. Do not load the sterilizer before an appropriate program is chosen and ready to be started. www.getinge.com...
-
Page 65: Door Operation
The gasket is pressed against the door by compressed air. 6.2 Load flow control Load flow control provide restrictions for opening of the doors. The restrictions are determined by the purpose of and the result of a process. The flow control is individually configured for each process type. www.getinge.com... - Page 66 Loading, cycle start and unloading from side 1. 2→2 Loading, cycle start and unloading from side 2. NOTE Side 1 is defined as the control side. Loading, cycle start and unloading may be made from different sides depending on the application and the selected recipe. www.getinge.com...
-
Page 67: Workflow
Clean Undamaged Prepare, pack and load the goods according to the standard operation procedure (SOP) for your facility. For general advices on loading goods on carriers and shelves, see Chapter 6.4 “Loading guidance” on page 68 www.getinge.com... -
Page 68: Loading Guidance
WARNING Risk of injury Overloading the loading equipment may cause it to break and the load to fall off. Do not exceed the maximum load weight limits for the loading equipment. www.getinge.com... -
Page 69: Related Information
Loading liquids in open containers WARNING Explosion hazard Liquids in open or vented containers shall be processed with appropriate programs intended for open liquids only. Processing of liquids with improper programs may cause explosions or burns. www.getinge.com... -
Page 70: Login And Logout
Valid password. On the process screen, tap Login . ð The login dialog box appears. Tap the User field. ð The on-screen keyboard appears. Type your username. Tap the Password field. www.getinge.com... -
Page 71: Logging Out
Program Combination Sheet. Tap Download . ð The selection is loaded to the system (PLC). 6.7 Loading the sterilizer For advice on how to load the goods into the chamber, see Chapter 6.4 “Loading guidance” on page 68 www.getinge.com... -
Page 72: Starting A Program
When the sterilizer is ready to start, the color of the Start button changes to green. If not, check that: the sterilizer doors are closed; no active alarms are present; no information messages are present; you have entered required batch data. www.getinge.com... -
Page 73: Batch Data
Figure 14: Example of a screen view during an on-going process. The information tells you, among other things, the time elapsed and the time that remains. Batch data Batch data is manually added process information that is passed on to the process report. www.getinge.com... -
Page 74: Completing And Unloading
NOTE The number of input characters must meet the length requirement. Tap the keyboard enter key to save. 6.9 Completing and unloading When the sterilization process completes, a primary indication of the result is displayed on the operator panel. www.getinge.com... - Page 75 Otherwise, unload without touching the sterilized goods. If unloading manually, use heat insulating tools or personal protective equipment (PPE). Tap Close to close the door. Place the goods in a low traffic area, away from cold-air vents or air conditioning, for cooling down to room temperature. www.getinge.com...
- Page 76 Packaging items Handling goods after failed sterilization processing – Unloading – Repackaging The following must be performed if a process fails. For example, if an alarm has occurred and the program has been aborted. PREREQUISITES 0000009703 Operating mode Standby www.getinge.com...
- Page 77 Evaluate and sign the process report. Make sure that the traceability of the goods is passed onto the next sterilization. Correct the fault that caused the alarm. For information about the alarm and recommended actions, see the Alarm List. www.getinge.com...
-
Page 78: Evaluating The Process Report
The traceability of the goods is passed on to the next sterilization. The goods have cooled down outside the chamber in order to facilitate the moist heat penetration at the next sterilization, if this is appropriate for the type of goods. www.getinge.com... -
Page 79: Aborting A Program
Phase name: Standby, Status indicator: Process failure. Tap the [ ] button to acknowledge the faulty process. 6.12 Handling alarms Alarms can be muted from any side of the sterilizer. All other alarm handling must be performed from Side 1. www.getinge.com... -
Page 80: Responding To An Alarm During Standby
ð The alarm is removed from Active alarms and recorded in the Alarm history . 6.12.2 Responding to an alarm during a running process Muting the alarm PREREQUISITES 0000009703 Operating mode In process Operating condition Alarm triggered Tap the button to silence the alarm. www.getinge.com... - Page 81 Wait for the sterilizer to abort and return to standby mode. ð The Process failure message window appears; indicating that the process is completed, but with failure. www.getinge.com...
- Page 82 Process failure – Alarm active Correct the fault that caused the alarm. For information about the alarm and recommended actions, see the Alarm List. For unloading, see “Unloading after a failed process” on page 76. Process halt during pretreatment www.getinge.com...
-
Page 83: Emergencies
Alarm List. For unloading, see “Unloading after a failed process” on page 76. 6.13 Emergencies In an emergency the sterilizer can be stopped by pushing the emergency stop button located on the control panel. www.getinge.com... - Page 84 Turning off the electrical power to the sterilizer during a running process may endanger the safety systems. If stopping the sterilizer during a running process, press the emergency stop button as first choice. Only switch off the power to the sterilizer if it is absolutely necessary. www.getinge.com...
- Page 85 Select whether to open or close the door when responding to the alarm Activated during a process. Confirm the alarm. Log in. End the program. For detailed information about responding to an alarm, see Chapter 6.12 “Handling alarms” on page 79 . www.getinge.com...
-
Page 86: Alarms And Messages
The process screen displays information about the ongoing process. If a process failure occurs, the operator workspace of the screen is covered by an alarm message dialog box. When a process completes, the screen displays a message window that indicates whether it completed successfully or with failures. www.getinge.com... -
Page 87: Maintenance
The door must stop and return to fully opened, otherwise the test has failed and the door must be adjusted. Contact maintenance personnel. Door gasket Check that the door gasket is clean and undamaged. Printer Check that the printer has sufficient paper. Check the operation of the printer. www.getinge.com... -
Page 88: Weekly Care
NEVER USE STEEL WOOL. Steel wool is highly abrasive and could scratch surfaces. Salt residues Spillage and stains containing salts must immediately be removed. Use plenty of water to remove stains. If they still persists, use a Getinge approved cleaning product. www.getinge.com... -
Page 89: Cleaning The Control Panel
Inspect the strainer in the chamber floor drain and manually remove any contaminations. If you have difficulties in removing any contaminations from the strainer, contact maintenance personnel. www.getinge.com... -
Page 90: Weekly Cleaning Procedure
The test and maintenance programs must not be used for sterilization of goods. The maintenance programs are started from the Select recipe view. For more information, see Chapter 6.6 “Selecting a recipe” on page 71 NOTE For detailed information about the test and maintenance programs, see the Service Manual. www.getinge.com... - Page 91 Manual leak rate test (Manual LRT) Semiautomatic test to ensure that the air detector responds to a manually induced air leak to the chamber. Sterile in place (SIP) Sterilization of the air filter in situ (in its original place). www.getinge.com...
-
Page 92: Programs And Cycles
Create a new program based on a program type. Edit recipe To edit the program parameters, see Chapter 3.8.2 “Edit recipes” on page 43. Create a new recipe To create a new program, see Chapter 3.8.2 “Edit recipes” on page 43. www.getinge.com... -
Page 93: Posttreatment Modification
It is critical that the proper programs are used. For information about the specific programs available for this sterilizer, see the Program Combination Sheet. 9.2.1 The vacuum cycle Basic principles Cycles including vacuum are suitable for sterilizing of goods that withstand pressure variations. www.getinge.com... -
Page 94: Typical Load
Steam pulses or pulsed air can be used to assist vacuum drying. Before the process is completed the chamber pressure is brought to atmospheric. The equalization is supported by letting filtered air into the chamber. The filter prevents microorganisms from entering. www.getinge.com... -
Page 95: Liquid Cycles, Vented Containers
Countdown of the exposure time stops if the temperature falls below the definite sterilizing temperature. An alarm is set if a temperature sensor registers a value outside the temperature tolerances. www.getinge.com... - Page 96 Posttreatment The purpose of the posttreatment is to cool down the load and prevent it from boiling over. The chamber pressure is slowly ramped down to atmospheric pressure. The door remains locked until the set cooling temperature is reached. www.getinge.com...
-
Page 97: Recycling And Disposal
WEEE directive Waste electrical and electronic equipment must be collected separately and disposed of to the local return and collection systems. For identification, electrical and electronic equipment is marked with the symbol to the left. 0000011990 www.getinge.com... - Page 98 The carriers can be loaded to the sterilizer either manually or by automatic equipment. non-condensable gases Air and other gases that do not condense during a steam sterilization. operator An operator includes persons installing, operating, maintaining, cleaning, repairing or moving equipment. www.getinge.com...
- Page 99 The probability of a single viable microorganism being present on an item in a batch after sterilization. The required SAL is determined by the intended use of the item. subatmospheric pressure Less or lower than that of the atmosphere. See also, atmospheric pressure. www.getinge.com...
- Page 100 IP type Glossary | 100 www.getinge.com...
- Page 101 ......26 configuring setup ..... . 38 www.getinge.com...
- Page 102 ......28 consumables ......20 Getinge doors addresses .
- Page 103 ......16 daily routines ......87 www.getinge.com...
- Page 104 ......31 components ......22 www.getinge.com...
- Page 105 ......18 in manual ......13 www.getinge.com...
- Page 106 ....... 67 cleaning ......88 www.getinge.com...
- Page 107 IP type Appendix | 107 Appendix www.getinge.com...
- Page 108 Calibration Diagnostics HMI shutdown AI auto temperature Analog inputs User management AI auto pressure Analog outputs Audit trail AI manual Digital inputs Digital outputs System log About Steam generator 0000011283 * Available functions may vary depending on machine configuration. www.getinge.com...
- Page 110 Getinge Sterilization AB Ekebergsvägen 26 305 75 GETINGE Sweden Telephone: +46 (0) 10 335 0000 Fax: +46 (0) 35 549 52 email: info@getinge.com Internet: www.getinge.com...
Need help?
Do you have a question about the GSS-P and is the answer not in the manual?
Questions and answers