
Subscribe to Our Youtube Channel
Related Manuals for Getinge Livit Flex


Summary of Contents for Getinge Livit Flex
- Page 1 User Manual Livit Flex Biocontroller for 3 L and 15 L Single-Use Bioreactors Software Version 2.7.1 Original instructions...
-
Page 2: Table Of Contents
4 Actuators: Cold Water Valve and Thermo Circulator 5 Actuators: Pumps and Tubing 6 Actuator Control 7 Agitation 8 Reactor Types 9 Auxiliaries 10 Sensors and Livit Links 11 Start-Up Kits III SOFTWARE 1 General Page 1 of 357 © Getinge Applikon June 27, 2024... - Page 3 8 System Options 9 Alarms 10 Copyright Notices and Disclaimers IV APPENDIX PID CONTROL 1 Introduction 2 Control Variables and Parameters 3 Actuators Variables and Parameters 4 PID in Applikon Controllers Acronyms Page 2 of 357 © Getinge Applikon June 27, 2024...
- Page 4 6.4.3 Filling the Reactor with Medium ......Page 3 of 357 © Getinge Applikon June 27, 2024...
- Page 5 2.6 Rule of Thumb: Gas Flow Rate ....... Page 4 of 357 © Getinge Applikon June 27, 2024...
- Page 6 9.3 Integrated Single-Use Sample System ......115 Page 5 of 357 © Getinge Applikon June 27, 2024...
- Page 7 5.1 Sequential Control ........174 Page 6 of 357 © Getinge Applikon June 27, 2024...
- Page 8 7.2.8 Analog Out ........277 Page 7 of 357 © Getinge Applikon June 27, 2024...
- Page 9 3.2.1 IT: Actuator Output Interval Time ......342 Page 8 of 357 © Getinge Applikon June 27, 2024...
- Page 10 4.5 Default PID Control Settings ....... . . 355 Acronyms Page 9 of 357 © Getinge Applikon June 27, 2024...
-
Page 11: Safety
WARNING Important issue concerning personnel health and personal safety. Refer to this manual. WARNING Risk of electrical shock hazard. WARNING Hot surface. WARNING Risk of physical injury. Additional information. Disposal instructions. Lifting instructions. Page 10 of 357 © Getinge Applikon June 27, 2024... -
Page 12: Safety Warnings
These relays may generate sparks during operation, therefore it is not allowed to use flammable substances in the vicinity of the controller while this device is in operation. Page 11 of 357 © Getinge Applikon June 27, 2024... - Page 13 Only apply these drives with the pump heads and tubing that are described in this manual. • Switch-off the pump drive before replacing any tubes or pump heads. Page 12 of 357 © Getinge Applikon June 27, 2024...
-
Page 14: Intended Use
• This set of equipment is designed for bioprocess control and must not be used for other pur- poses. • All Livit Links must be used in combination with Getinge controllers and must not be used with other devices (i.e. personal computers, laptops, etc.), with the exception of the pH and dO Livit Links. -
Page 15: Eu Declaration Of Conformity
EN 61010-1:2010 / EN 61010-2-010:2020 / EN 61010-2-051:2021 2014/30/EU (EMC) EN 61326-1:2021 / EN 61000-3-2:2019 / EN 61000-3-3:2013 *For Livit Flex, the Machinery Directive includes the requirements of the Low Voltage Directive. Digitally signed by Lukas Lukas van Mierlo Delft,... -
Page 16: I Operation
User Manual-Operation Part I OPERATION Page 15 of 357 © Getinge Applikon June 27, 2024... -
Page 17: General Operation
For (re)configuring Control Loops, refer to the section about configuring control loops in the Software Part of this manual. The PID control algorithm is described in the Appendix on PID Control in this manual. Page 16 of 357 © Getinge Applikon June 27, 2024... -
Page 18: Operating The Control Console
Grayed out options and commands are unavailable to the user, as a result of a running process or of a lack of authorization. For more information about the different icons and the other graphical display conventions refer to the relevant sections in the Software Part of this Manual. Page 17 of 357 © Getinge Applikon June 27, 2024... -
Page 19: Process Value And Control Loop Presentation
A numeric keypad will pop up and a new setpoint value can be entered. For more details about the keypad refer to the section on keypad and keyboard in the Software Part of this manual. Page 18 of 357 © Getinge Applikon June 27, 2024... -
Page 20: Reconfiguring The Configured Control Loops
The Control Loop configuration can be edited by opening the sensor widgets and pressing on the Control option in the Settings menu: For detailed information, refer to the relevant section about configuring control loops in the Software Part of this manual. Page 19 of 357 © Getinge Applikon June 27, 2024... -
Page 21: Editing The Actuator Settings
(like name, engineering unit, limits, range, etc.) can be adjusted to the current assignment. For detailed information, refer to the relevant section about actuators settings in the Software Part of this manual. Page 20 of 357 © Getinge Applikon June 27, 2024... -
Page 22: Trend Chart
An overview of the experiment data is also displayed in the Chart Page as shown below: For further details about the chart page refer to the section about screen management in the Software Part of this manual. Page 21 of 357 © Getinge Applikon June 27, 2024... -
Page 23: Tubing Loading For Pumps
At the side of the pump head there are symbols that point to both the inner and outer slot. The table below shows the recommended slot position for the different tubing size. Tube bore size Inner slot Outer slot For further instructions refer to the Watson Marlow manual. Page 22 of 357 © Getinge Applikon June 27, 2024... - Page 24 User Manual-Operation 2 TUBING LOADING FOR PUMPS Example of liquid addition by using a pump The picture below shows how to add liquids via a pump and the medium inlet triple. Page 23 of 357 © Getinge Applikon June 27, 2024...
-
Page 25: Livit Links Connection And Devices Installation
HMI in the alarm list, in the top bar of the sensor widget ("probe not connected") and inside the sensor widget (red icon ) as shown below: Page 24 of 357 © Getinge Applikon June 27, 2024... -
Page 26: Installing And Uninstalling Devices
After installation, the cables can be discon- nected. After connecting the Livit Links, the following pop up message will appear on the HMI screen: Page 25 of 357 © Getinge Applikon June 27, 2024... - Page 27 This is done by pressing on the Display Name input field and entering a new name for the device. The user can assign the hardware to a desired bioreactor: Page 26 of 357 © Getinge Applikon June 27, 2024...
- Page 28 Select the desired action and bioreactor and press NEXT to proceed with the next device, if more devices have been connected. Once the desired options have been chosen for all the devices, press INSTALL: Page 27 of 357 © Getinge Applikon June 27, 2024...
- Page 29 When the system is ready for installation, the following message will be displayed: Confirm the installation by pressing INSTALL. To uninstall a sensor or an actuator, navigate to the System Options screen accessible via the settings icon Page 28 of 357 © Getinge Applikon June 27, 2024...
- Page 30 The devices that are used in a control loop or running cannot be uninstalled and will be grayed out: Page 29 of 357 © Getinge Applikon June 27, 2024...
- Page 31 (such as a gas actuator): Press the UNISTALL DEVICE button and the following message will be displayed: Press UNINSTALL to confirm. Page 30 of 357 © Getinge Applikon June 27, 2024...
-
Page 32: Ph Sensor Calibration
3. Rinse the probe with deionized water. 4. Place the probe in the pH 7 buffer and allow it to stabilize. 5. Open the pH widget and select the Calibrate option in the Settings menu: Page 31 of 357 © Getinge Applikon June 27, 2024... - Page 33 International mode and in mV unit in the Raw mode. 6. Select the 2-POINT CALIBRATION and the following screen will be presented: Page 32 of 357 © Getinge Applikon June 27, 2024...
- Page 34 For the accurate pH reference value at the calibration temperature, refer to the label on the calibration buffer. 8. Wait for stabilization of the uncalibrated value. When the values are stable press CONTINUE. Page 33 of 357 © Getinge Applikon June 27, 2024...
- Page 35 11. Place the probe in the pH 4 buffer and allow it to stabilize. 12. Enter the Second Calibration Value. For the accurate pH reference value at the calibration temperature refer to the label on the calibration buffer. Page 34 of 357 © Getinge Applikon June 27, 2024...
- Page 36 For instructions on how to perform a Sample Correction, refer to the section about correction of measured pH value in the Operation Part of this manual. Page 35 of 357 © Getinge Applikon June 27, 2024...
-
Page 37: Actuator And Dose Monitor Settings
The acid pump settings screen will be opened: After pressing the button, the Dose Monitor screen will be presented: For enabling / disabling the dose monitor function, Engineer rights are required. Page 36 of 357 © Getinge Applikon June 27, 2024... - Page 38 (only as long as the prime button is pressed). When pressing the PRIME button the actuator output will be set to 100%. After releasing the PRIME button the output will be set back to 0%. Page 37 of 357 © Getinge Applikon June 27, 2024...
- Page 39 Alternatively, change the engineering unit by selecting it from the drop-down menu: Changing the time unit and/or engineering unit from the drop-down menu will result in a slope recal- culation. Page 38 of 357 © Getinge Applikon June 27, 2024...
-
Page 40: Actuator Calibration
Make sure to choose the correct engineering unit in the General settings window. 3. Select the option and keep the button pressed. This is done to fill the tubing with the liquid and eliminate air bubbles. Page 39 of 357 © Getinge Applikon June 27, 2024... - Page 41 It is also recommended to replace the tubing regularly since the wear of the tubing has an effect on the dosage. Page 40 of 357 © Getinge Applikon June 27, 2024...
- Page 42 6. Set the desired output (for example 100 %) and press START RUN: 7. The pump will start running: In case the pump stops or gives issues repeat the priming action. Page 41 of 357 © Getinge Applikon June 27, 2024...
- Page 43 Press CONFIRM to proceed. If the slope and offset values are zero, verify that the correct engineering unit has been selected before starting the calibration procedure (mL instead of L, for example). Page 42 of 357 © Getinge Applikon June 27, 2024...
-
Page 44: Bioreactor Preparation
Standard Operating Procedures that are applicable in your lab. CAUTION Single-use Bioreactor The AppliFlex ST Single-use bioreactor is intended for "single-use" only. Getinge App- likon is not liable in case of damage caused by multiple use of the bioreactor. Page 43 of 357 ©... -
Page 45: Sensors
For instructions on how to connect and install the Presens optical single-use sensors Livit Links, refer to the chapter about Livit Links Connection and Sensors Installation in the Operation Part of this manual. Page 44 of 357 © Getinge Applikon June 27, 2024... -
Page 46: Single-Use Ph Sensor Preparation
The sensor is now fully calibrated. If one wishes to perform an actual calibration, this can be done by pressing the 1-POINT CALIBRA- TION or 2-POINT CALIBRATION buttons and following the instructions on the screen. Page 45 of 357 © Getinge Applikon June 27, 2024... -
Page 47: Moving The Reactor To A Biological Safety Cabinet (Bsc)
3. Spray the AppliFlex ST Single-use bioreactor and the autoclavable bags with the sterile reusable sensors with 70% ethanol and place them inside the BSC. 4. Spray the liquid addition bottles (e.g. for medium, acid and alkali) and place them inside the BSC. Page 46 of 357 © Getinge Applikon June 27, 2024... -
Page 48: Making Hydraulic Connections
Luer Lock and/or CPC (male and female) connectors. Use pinch clamps or hose clips to close the connecting tubing between reagent container and the AppliFlex ST Single-use bioreactor. Page 47 of 357 © Getinge Applikon June 27, 2024... - Page 49 All hydraulic connection lines can be used for tube welding. Tube welding is used as sanitary tubing connection outside a BSC. An example of the tube welding procedure is presented below. Example of the Tube Welding procedure Page 48 of 357 © Getinge Applikon June 27, 2024...
-
Page 50: Mounting The Ph And Do Sensors
Remark: The bioreactor may also be filled with medium through one of the sensor ports, using a funnel. If this option is preferred, the bioreactor can best be filled with medium before the sensors are mounted. Page 49 of 357 © Getinge Applikon June 27, 2024... -
Page 51: Preparing Cultivation
The heating blanket high limits can be changed in the Limits settings of the Heating Blanket widget, as long as the conversion type is set to "Capped". For more information refer to the relevant section about Actuator Settings-Limits in the Software Part of this manual. Page 50 of 357 © Getinge Applikon June 27, 2024... - Page 52 - connect one alligator clip to the level/foam sensor in the reactor and the other clip to the reference. Connect the level sensor Livit Link to the biocontroller via the USB-C cable. Page 51 of 357 © Getinge Applikon June 27, 2024...
- Page 53 Make sure the stirrer motor is not running. In case of a 3 L single-use bioreactor, mount the motor adapter on top of the bioreactor top plate and place the stirrer motor in the motor adapter. Page 52 of 357 © Getinge Applikon June 27, 2024...
-
Page 54: Control Loops
The types of control will be displayed in the drop-down menu under Control Type, as shown in the window below: For information concerning the controller settings, refer to the Appendix on PID Control in this manual. Page 53 of 357 © Getinge Applikon June 27, 2024... -
Page 55: Preset Pid Parameter Values
4. If the Process Value is stable from the beginning, the P value can be increased to such an extent that it is just not oscillating around setpoint. 5. The P value is now optimized. Page 54 of 357 © Getinge Applikon June 27, 2024... - Page 56 • Concentration liquid addition: 3 L 1 M, 15 L 3 M • Flow rate of gas: Cell 0.1 vvm, Microbial 2 vvm • Cool water temperature: 16 °C • Tube size: L/S 16 Page 55 of 357 © Getinge Applikon June 27, 2024...
-
Page 57: Level Control
(depending on the control loop configuration). The actuator can therefore be activated in case of "Contact" or "No Contact" with the medium. For further information on the level control loop configuration refer to the Software part of this manual. Page 56 of 357 © Getinge Applikon June 27, 2024... -
Page 58: Cultivation
For more information refer to the section below about start, stop and recording options. 10. Proceed with the inoculation as described in the section below about inoculation. Page 57 of 357 © Getinge Applikon June 27, 2024... -
Page 59: Start, Stop And Recording Options
To start recording data from a specific bioreactor press the recording icon and the following window will open: Press START to confirm. During recording, the recording icon will turn red Page 58 of 357 © Getinge Applikon June 27, 2024... - Page 60 Press START ALL to confirm. To stop all the control loops in all bioreactors, press on the stop icon and the following message will be displayed: Press STOP to confirm. Page 59 of 357 © Getinge Applikon June 27, 2024...
- Page 61 When starting data recording, if too many records are present, recording will be dispabled and the following message will be displayed: To be able to proceed, some records will need to be exported or removed. Page 60 of 357 © Getinge Applikon June 27, 2024...
- Page 62 Data Management in the Software part of this manual. To stop recording from all bioreactors press again on the recording icon and press STOP: Page 61 of 357 © Getinge Applikon June 27, 2024...
- Page 63 To stop all bioreactors and the recording, press on the stop icon and the following message will be displayed: Select the Stop Data Recording option and press STOP ALL to confirm. Page 62 of 357 © Getinge Applikon June 27, 2024...
-
Page 64: Polarographic Do
Before starting the dO calibration routine, the dO control loop must be stopped. 2. Open the dO widget, select the Calibrate option in the Settings menu and select the 1-POINT CALIBRATION: Page 63 of 357 © Getinge Applikon June 27, 2024... - Page 65 User Manual-Operation 8 CULTIVATION 3. The following screen will be presented: 4. Set the air output to the maximum actuator output to saturate the system with air: Page 64 of 357 © Getinge Applikon June 27, 2024...
- Page 66 To improve the air saturation set the agitation at the highest possible rate. 6. After the dO reading is stable, turn off the air actuator by pressing on the stop icon Page 65 of 357 © Getinge Applikon June 27, 2024...
- Page 67 User Manual-Operation 8 CULTIVATION 7. Press CONTINUE and you will be directed to the following screen: 8. Enter the calibration value (100 = 100% air saturation) and press CONTINUE: Page 66 of 357 © Getinge Applikon June 27, 2024...
- Page 68 0.33 – 0.66 - 0.5 – 0.5 oxygen 1.60 – 3.30 - 0.5 – 0.5 11. Press CONFIRM and the slope and offset values will be overwritten in the Calibration page. Page 67 of 357 © Getinge Applikon June 27, 2024...
-
Page 69: Verification Of The Quality Of The Do Sensor
20 minutes. If the reading in air is too high, the sensor requires maintenance after the cultivation run. Refer to the User Manual of the smart dO sensor. Page 68 of 357 © Getinge Applikon June 27, 2024... -
Page 70: Inoculation
• Redo all sensors cables and pump tubing connections, put the stirrer motor in place and insert the Pt-100 temperature sensor in the thermometer pocket • Start all configured control loops at the biocontroller The cultivation has now been started. Page 69 of 357 © Getinge Applikon June 27, 2024... -
Page 71: View Process Data
At the end of an experiment the process data can be exported from the Chart page. Follow the in- structions on import/export data given in the chapter about the Chart page in the Screen Management section in the Software Part of this manual. Page 70 of 357 © Getinge Applikon June 27, 2024... -
Page 72: Sampling
If extra substrate is needed in the culture during fermentation, it can be added as described in the section about making hydraulic connections. Make sure there is enough space left in your vessel for additions. Page 71 of 357 © Getinge Applikon June 27, 2024... -
Page 73: Correction Of Measured Ph Value
1. Take a sample from the broth and measure the pH value off-line. 2. Open the pH widget and select the Calibrate option from the Settings menu. The calibration screen will be presented: Page 72 of 357 © Getinge Applikon June 27, 2024... - Page 74 3. Press on CALC. SAMPLE CORRECTION and the following screen will be displayed, where the off-line measured pH value can be entered: 4. Enter the desired process value and press CALCULATE: Page 73 of 357 © Getinge Applikon June 27, 2024...
- Page 75 User Manual-Operation 8 CULTIVATION 5. The sample correction will be calculated: 6. When the calculation is completed press APPLY: Page 74 of 357 © Getinge Applikon June 27, 2024...
- Page 76 User Manual-Operation 8 CULTIVATION 7. The difference between the on-line and off-line measured pH values is presented as correction value: Page 75 of 357 © Getinge Applikon June 27, 2024...
-
Page 77: Harvesting, Deactivation, Cleaning
The sensors must be cleaned according to the instructions below. The bioreactor content and the bioreactor itself may be disposed of according to the relevant Standard Operating Procedures. Page 76 of 357 © Getinge Applikon June 27, 2024... -
Page 78: Sensors Cleaning And Storage
For general information concerning cleaning and maintenance of the dO sensor (including replacing and refilling the membrane module), refer to the User Manual that comes with the dO2 sensor. Page 77 of 357 © Getinge Applikon June 27, 2024... -
Page 79: System Warnings
4. Pressing RESUME will restart all the control loops and the actuators that were running before the e-stop was pressed. 5. The RESUME ALL button can be used to resume the processes of all the biocontrollers if more biocontrollers are connected. Page 78 of 357 © Getinge Applikon June 27, 2024... - Page 80 3. To stop the process press on the HALT button. This will stop the control loops and actuators, which will have to be restarted manually. 4. The HALT ALL button can be used to halt the processes of all the biocontrollers if more bio- controllers are connected. Page 79 of 357 © Getinge Applikon June 27, 2024...
-
Page 81: Power Failure During Operation
Power Fail message. The RESUME and HALT buttons are initially grayed out (Engineer rights are required to resume). After logging in, the RESUME and HALT buttons will be available. Page 80 of 357 © Getinge Applikon June 27, 2024... - Page 82 The powerfail software functionality will only function if the powerfail hardware is also installed. If the software is upgraded to version 2.7, then the proper hardware should also be installed for the functionality to work. Contact Getinge Applikon for the hardware installation.
-
Page 83: Hardware
User Manual-Hardware Part II HARDWARE Page 82 of 357 © Getinge Applikon June 27, 2024... -
Page 84: Control Console
HMI, system with different sensors and actuators. It is possible to reconfigure a system. To reconfigure the system refer to the local Getinge Applikon representative. For further information about bioreactor and system configuration refer to the relevant sections in the Software Part of this manual. -
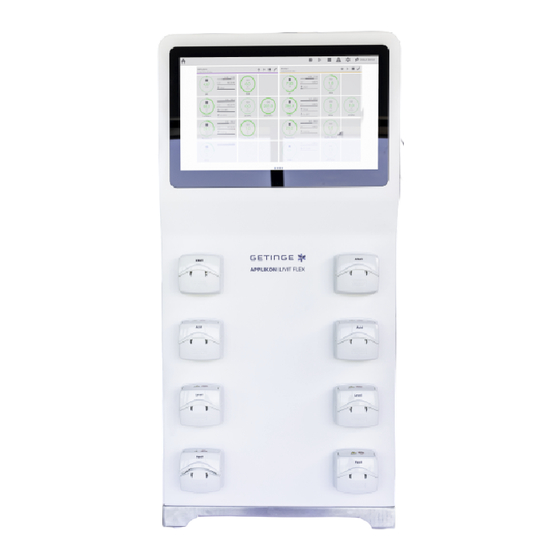
Page 85: Front View
The front side of the biocontroller can be equipped with a full HD touch screen and up to 8 variable speed pump drives. The configuration of the delivered system may differ from the one shown below depending on the chosen configuration. Page 84 of 357 © Getinge Applikon June 27, 2024... -
Page 86: Side View
• 1 5-pins M16 (’audio’) connector for the stepper stirrer motor • 1 3-pins M16 (’audio’) connector for the emergency stop button • 1 M9 connector for the filter heater Page 85 of 357 © Getinge Applikon June 27, 2024... -
Page 87: Emergency Stop Button
The Remote Emergency Stop button should be placed in a location which is easy to reach. Z510330500 Generic Emergency Stop Assembly connection cable L = 2 m Page 86 of 357 © Getinge Applikon June 27, 2024... -
Page 88: Rear View
Off position to reset the overcurrent tripping device and then back to the On position to start the device again. An overcurrent situation is a sign of malfunctioning of the device. Contact technical support for inspecting the device. Page 87 of 357 © Getinge Applikon June 27, 2024... -
Page 89: Lifting The Biocontroller
• (if installed) Drain the Thermo Circulator / Cold Water Valve. Cover the Water Inlet and Outlets with blind caps. • (if necessary) Clean the outside of the biocontroller cabinet according to the instructions below. Page 88 of 357 © Getinge Applikon June 27, 2024... -
Page 90: Cleaning Instructions
• Clean and dry the bioreactor with all its auxiliaries and store it preferably in its original packag- ing. 1.9 Cleaning Instructions The biocontroller may be cleaned with a moist tissue in combination with a non-abrasive cleaner (i.e. 70 % ethanol). Page 89 of 357 © Getinge Applikon June 27, 2024... -
Page 91: Actuators: Gas Supply Section
These valves offer higher accuracy and can be used also in combination with a Mass Flow Meter (MFM). Different flow ranges are available, from 200 mL/min to 46 L/min. Z310132065 Metering Valve Module Page 90 of 357 © Getinge Applikon June 27, 2024... -
Page 92: Mass Flow Meters
• If three gas supply lines need to be controlled, the 3-channel IQ FLOW MFC or three pieces of the 1-channel EL-FLOW/FLEXI-FLOW MFC are mounted, depending on the required gas flow Page 91 of 357 © Getinge Applikon June 27, 2024... -
Page 93: Electronic Gas Selection Block
If the electronic Gas Selection Block is used in combination with a MFM, a metering valve should be used in the gas line. For example, for an electronic Gas Selection Block with 3 MFM’s, 1 item with article number Z310133010 Page 92 of 357 © Getinge Applikon June 27, 2024... -
Page 94: Specifications For Inlet Gases
The picture below shows how to connect the gasses output of the biocontroller to an air inlet sparger, via the tubing (size 25) connections, as represented by the red arrow. Z364022500 Norprene Food tubing size 25 Page 93 of 357 © Getinge Applikon June 27, 2024... -
Page 95: Actuators: Heating Blanket
Take appropriate precautions when handling and wear personal protection equip- ment (PPE) to prevent burns. • Make sure the heating blanket and the Temperature Control Loop are turned off when connecting/disconnecting the heating blanket to/from the controller. Page 94 of 357 © Getinge Applikon June 27, 2024... -
Page 96: Specifications
Bioreactor Article number A (mm) B (mm) P (W) 2 L Applikon Z311023020 3 L Applikon/AppliFlex Z311023030 5/7 L Applikon Z311023070 15 L Applikon/AppliFlex and 20 L Applikon Z311023150 Page 95 of 357 © Getinge Applikon June 27, 2024... -
Page 97: Installation On The Bioreactor And Electrical Connection
> 200 ms. Customers who wish to implement their own PWM scheme are advised to maintain a value of Tcycle > 200 ms in order to remain compliant. Page 96 of 357 © Getinge Applikon June 27, 2024... -
Page 98: Actuators: Cold Water Valve And Thermo Circulator
Water to heat exchanger Male V0W2130105 Female V0W2130109 Water from heat exchanger Female V0W2130104 Male V0W2130110 Water to condenser Male V0W2130105 Female V0W2130109 Water from condenser Female V0W2130104 Male V0W2130110 Page 97 of 357 © Getinge Applikon June 27, 2024... - Page 99 4 ACTUATORS: COLD WATER VALVE AND THERMO CIRCULATOR Shown below are the pictures of the connectors and counter connectors reported in the previous table. On bioreactor V0W2130100 On biocontroller V0W2130103 V0W2130101 V0W2130104 V0W2130102 V0W2130105 V0W2130109 V0W2130110 Page 98 of 357 © Getinge Applikon June 27, 2024...
-
Page 100: Thermo Circulator Unit
Depending on the hardness of the tap water, the Thermo Circulator must be decalcified from time to time. For operating instructions regarding decalcification refer to the section "Decalcification of the Thermo Circulator" in the Operation section of this or other relevant manuals. Page 99 of 357 © Getinge Applikon June 27, 2024... -
Page 101: Cold Water Valve Module And Condenser Module
Tap water is normally used as medium for heating and cooling. The use of deionized water will cause corrosion inside the Thermo Circulator. For conditions other than specified above (e.g. use of a chiller with organic solvents), contact Getinge Applikon or your local distributor. -
Page 102: Actuators: Pumps And Tubing
When working with replaceable pump heads, do not use different pump heads and tubing than the ones described in this user manual. • Switch off the pump drive before replacing any tubes or external pump heads. Page 101 of 357 © Getinge Applikon June 27, 2024... -
Page 103: Pumps
Deviations can occur due to several factors, such as wear of tubing, physical differences in tubing, pressure in the tubing, difference in liquid, liquid temperature, ambient temperature, ambient pressure, differences in pumphead. Page 102 of 357 © Getinge Applikon June 27, 2024... -
Page 104: Actuator Control
"No Contact" and "Contact") can be edited by using the Settings options. It is possible to choose Pulse Time or Dead Time as first action. For further information refer to the related Software section of this or other relevant manuals. Page 103 of 357 © Getinge Applikon June 27, 2024... -
Page 105: Agitation
2006/42/EEC. WARNING Hot surfaces. Take precautions to prevent burns. • When the stirrer motor has been put into operation, it will become hot. Take pre- cautions to prevent personal injury. Page 104 of 357 © Getinge Applikon June 27, 2024... -
Page 106: Torque Overview
75 mm 1 x Marine 750 rpm 2.95 m/s * with microbial configurations the M33 motor can only reach 600 rpm with 3 impellers and 700 rpm with 2 impellers. Page 105 of 357 © Getinge Applikon June 27, 2024... -
Page 107: Stirrer Motors
As a result, the stirrer motor can also be used in combination with in situ sterilizable bioreactors for microbial applications up to 130 L and 270 L. Z510003031 Brushless Stirrer Motor M33 Page 106 of 357 © Getinge Applikon June 27, 2024... -
Page 108: Motor Cable
7. When the running-in interval has elapsed, the stirrer motor can be stopped and the bioreactor can be disassembled and be prepared for a new run. WARNING Hot surfaces. Be careful, after completing the running-in interval the stirrer motor will be hot. Page 107 of 357 © Getinge Applikon June 27, 2024... -
Page 109: Maintenance
The stirrer motors are virtually maintenance free since they do not contain carbon brushes. However, the ball bearing needs to be replaced every 20,000 operating hours. Please return the stirrer motor to the Technical Support department of Getinge Applikon or its repre- sentative. -
Page 110: Reactor Types
AppliFlex ST Single-use 3L bioreactor Cell with SU Sensors* Z811110351 Holder for AppliFlex ST Single-use 3L bioreactor *The article numbers are subjected to change. Refer to the Data Sheets for the latest information. Page 109 of 357 © Getinge Applikon June 27, 2024... -
Page 111: 3-Liter Appliflex St Microbial Configuration Bioreactor
AppliFlex ST Single-use 3L bioreactor Microbial High Density* Z811110351 Holder for AppliFlex ST Single-use 3L bioreactor *The article numbers are subjected to change. Refer to the Data Sheets for the latest information. Page 110 of 357 © Getinge Applikon June 27, 2024... - Page 112 1000 rpm. The high density microbial configuration is used for those cultivations that require maximum heat exchange and supports agitation at up to 2000 rpm. Page 111 of 357 © Getinge Applikon June 27, 2024...
-
Page 113: 15-Liter Appliflex St Cell Configuration Bioreactor
AppliFlex ST Single-use 15L bioreactor Cell with SU Sensors* Z811110380 Holder for AppliFlex ST Single-use 15L bioreactor *The article numbers are subjected to change. Refer to the Data Sheet for the latest information. Page 112 of 357 © Getinge Applikon June 27, 2024... -
Page 114: Auxiliaries
In the image below, examples of cross sections of an AppliFlex ST Single-use bioreactor are pre- sented: In this example, the medium is aerated through the Sparger Pipe. For the specifications of the reactors inserts refer to the designated Data Sheets. Page 113 of 357 © Getinge Applikon June 27, 2024... -
Page 115: Off-Gas Line Configuration (Filter Heating)
For connection of the Filter Heater to the biocontroller, the connection for Filter Heater Module must be installed in the biocontroller: Z350002430 Filter Heater 6W 24V Z310131050 Connection for Filter Heater Page 114 of 357 © Getinge Applikon June 27, 2024... -
Page 116: Integrated Single-Use Sample System
Two syringes can be connected to the Sample System. Syringe 1 is used to remove medium from the Sample Pipe (to prevent taking "old" sample). Syringe 2 is used to withdraw sample from the Single-use bioreactor. Page 115 of 357 © Getinge Applikon June 27, 2024... -
Page 117: Sensors And Livit Links
• red = wrong probe / probe not connected • yellow = updating • purple = calibrating The yellow and purple lights are only applicable for pH and dO Livit Links. Page 116 of 357 © Getinge Applikon June 27, 2024... -
Page 118: Livit Links
The Livit Link is connected on one side to the temperature and level sensors and on the other side to the USB Type-C port of the biocontroller with a USB Type-C cable. Page 117 of 357 © Getinge Applikon June 27, 2024... -
Page 119: Analog I/O
The Analog Input/Output Livit Link (left image below) can be used to connect analog devices, ac- tuators/outputs such as external pumps or analog inputs such as analog sensors to the Livit Flex controller. It allows for connection of up to 4 analog inputs and 2 analog outputs. The following specifications apply: •... - Page 120 • White: Analog Out (pin 5) • Brown: Ground (pin 6 or 8) • Green: Digital Out (pin 3) • Yellow: Digital Com (pin 4) Page 119 of 357 © Getinge Applikon June 27, 2024...
-
Page 121: Balance
Check that the power requirements of the balance are compatible with the 15 V support of the cable. For more information about the balance settings, consult the balance vendor documenta- tion. Page 120 of 357 © Getinge Applikon June 27, 2024... - Page 122 24-h Format (factory setting) Menu Setting Alterable (factory setting) Extra Functions Ext. Switch Function Menu Key (factory setting) Power On Mode Stand-by / On (factory setting) Menu Reset Do Not Reset Page 121 of 357 © Getinge Applikon June 27, 2024...
- Page 123 The table below contains the menu settings for the Sartorius balance. Setup/Balance Menu Value ISOCAL DEVICE/RS232 menu VALUE DAT./REC. BAUD 9600 PARITY STOPBIT 1 BIT HANDSHK. NONE DATABIT 7 BITS DATA.OUT/COM.SBI menu Value COM.OUTP AUTO.W/O FORMAT 16 CHARS Page 122 of 357 © Getinge Applikon June 27, 2024...
-
Page 124: Livit Links Holders
Shown below is an example of two different Livit Links with their respective holders and the placing tool. Z110980001 Livit Link Holder, 4 pcs Z110980005 Livit Sensor Holder, 4 pcs The part numbers include 4 holders, the adhesive strips and the placing tool. Page 123 of 357 © Getinge Applikon June 27, 2024... -
Page 125: Article Numbers
At the sensor side, the Level sensor cable is equipped with two jacks. One jack needs to be inserted at the top side of the hollow sensor, the other jack fits in the 2 mm hole in the top plate of the bioreactor. Page 124 of 357 © Getinge Applikon June 27, 2024... - Page 126 Livit Link Mettler Toledo pCO2 ISM M80 Z110981020 Livit Link Hamilton Easyferm Arc pH Z110982030 Livit Link Hamilton Visiferm DO Arc Z110981520 Livit Link Hamilton Redox Z110986035 Livit Link Hamilton Dencytee Arc Page 125 of 357 © Getinge Applikon June 27, 2024...
-
Page 127: Start-Up Kits
HOSE BARB 1/8" - FEM LUERLOCK PC V0W0030110 HOSE BARB 1/16"- MALE LUERLOCK PC V0W0030100 MALE CAP FITS FEMALE LUERLOCK PC V0W6050003 STERILISATION BAG 300 X 500 MM < 134C Page 126 of 357 © Getinge Applikon June 27, 2024... -
Page 128: Software
User Manual-Software Part III SOFTWARE Page 127 of 357 © Getinge Applikon June 27, 2024... -
Page 129: General
Home Screen provide access to the other main screens. Accessing the other main screens is also possible by swiping the screen left or right. The minimum screen resolution supported by the software is 1920 x 1080. Page 128 of 357 © Getinge Applikon June 27, 2024... -
Page 130: Icons
In the top bar of each bioreactor the following icons are displayed: start recording start recording data from the bioreactor start start the bioreactor stop stop the bioreactor edit edit parameters Page 129 of 357 © Getinge Applikon June 27, 2024... -
Page 131: Graphical Display Conventions
Colors of the Process Value (PV) Widgets Sensor Widget Control Loop No control loop configured and no process running Control loop configured and no process running Process running Process running and warning about process parameter Page 130 of 357 © Getinge Applikon June 27, 2024... - Page 132 Passive buttons: Passive (non-accessible) buttons are grayed out. These actions are unavailable to the user because of lack of access rights or because the function is in use (e.g. running controller). Page 131 of 357 © Getinge Applikon June 27, 2024...
-
Page 133: Keypad And Keyboard
For entering texts (like passwords and names), an alphanumeric keyboard is used. The lower case alphanumeric keyboard is shown below: Page 132 of 357 © Getinge Applikon June 27, 2024... - Page 134 ) will force the next letter to be pre- sented in upper case. Pressing the shift button twice will set the entire keyboard to upper case: Password recognition is case-sensitive. Page 133 of 357 © Getinge Applikon June 27, 2024...
-
Page 135: Update Software Version
3. Press on the update icon and the following window will open: 4. Press on the INSTALL x.x.x.x button and a confirmation window will open: Press UPDATE HMI to confirm. Page 134 of 357 © Getinge Applikon June 27, 2024... - Page 136 User Manual-Software 1 GENERAL 5. When the update is successfully installed, the following window will open: Press the RESTART button to restart the HMI. Page 135 of 357 © Getinge Applikon June 27, 2024...
- Page 137 3. Press on the update icon and the following window will open: 4. Press on the INSTALL x.x.x.x button and a confirmation window will open: Press UPDATE INSTRUMENT(S) to confirm. Page 136 of 357 © Getinge Applikon June 27, 2024...
- Page 138 User Manual-Software 1 GENERAL 5. When the update is successfully installed, the following window will open: Press the RESTART button to restart the instrument. Page 137 of 357 © Getinge Applikon June 27, 2024...
-
Page 139: Authentication
Same rights as operator and can additionally Default Engineer 0000 configure the application. Default Service Reserved for Getinge Applikon For service engineer work. 2.2 Login Procedure By pressing on the LOG IN button in the main top bar, the menu with the login levels... - Page 140 The LOG IN button will be replaced by the current login level ( Depending on the user rights some options will not be available to the user, as a result of a lack of authorization. These options will be grayed out. Page 139 of 357 © Getinge Applikon June 27, 2024...
-
Page 141: Authorization Table
Edit Remote Access Parameters Create New Users (Operators and Engineers) Delete Users (Operators and Engineers) Edit Controller Actuator Configuration Edit Controller Settings Export / Import Configuration and Process Value Files Page 140 of 357 © Getinge Applikon June 27, 2024... -
Page 142: User Management
(Operators or Engineers), change the Create new user passwords and log out. Change password For a user with Operator rights some options are grayed out as they are not allowed. Log out Page 141 of 357 © Getinge Applikon June 27, 2024... -
Page 143: Create New User
User Name and Password fields to check the requirements for new user names and passwords. Choose a user name and a password, confirm the password and select the Access Level (Operator or Engineer): Page 142 of 357 © Getinge Applikon June 27, 2024... - Page 144 User Manual-Software 2 AUTHENTICATION Press CREATE to confirm: In the login drop-down menu the new user will be displayed in the list of users: Page 143 of 357 © Getinge Applikon June 27, 2024...
-
Page 145: Change Password
Users can change their own password. To change the password press on the icon. The following window will open: Enter the old password, enter the new password, confirm it and press CHANGE PASSWORD. Page 144 of 357 © Getinge Applikon June 27, 2024... -
Page 146: Delete User
Swipe the user you want to delete to the left. While swiping to the left, a red bar wil appear. Press Remove inside the red bar. Confirm the removal of the user by pressing REMOVE. Page 145 of 357 © Getinge Applikon June 27, 2024... -
Page 147: Edit Automatic Logout Interval
The user can enable the Auto Logout option by enabling the toggle and select the desired inactive time from the drop-down menu: To disable the Auto Logout option, disable the toggle. Page 146 of 357 © Getinge Applikon June 27, 2024... -
Page 148: Screen Management
The last dot opens up the page management screen, which can be used to create additional screen pages. 3.1 Add Pages invokes the following dialog, providing 3 different types of screens to create: Page 147 of 357 © Getinge Applikon June 27, 2024... -
Page 149: Dashboard
If both bioreactors are selected the following screen will be displayed: After this, one can add widgets to the slots within each bioreactor. To do so, refer to the section on Configuring a bioreactor. Page 148 of 357 © Getinge Applikon June 27, 2024... -
Page 150: Overview
ADD PAGE. If both bioreactors are selected the following screen will be displayed: To display the overview of the sensors and actuators press on the modify (pencil) icon: Page 149 of 357 © Getinge Applikon June 27, 2024... - Page 151 User Manual-Software 3 SCREEN MANAGEMENT A list of parameters will be displayed: Select the parameters and press APPLY. Page 150 of 357 © Getinge Applikon June 27, 2024...
- Page 152 By pressing on the drop-down menu icon the actuators configured in the control loop will be displayed: To start the control loops press on the start icon and to stop them press on the stop icon Page 151 of 357 © Getinge Applikon June 27, 2024...
-
Page 153: Chart
3.1.3 Chart To plot the experiment data for a bioreactor, select the Chart page type and press ADD PAGE. A page will be opened where a chart can be created: Page 152 of 357 © Getinge Applikon June 27, 2024... - Page 154 If experimental data has been recorded but no bioreactors are selected in the Experiment Data win- dow, the only available option is REMOVE ALL. When one or more bioreactors are selected, all options are available (REMOVE, REMOVE ALL and CHART). Page 153 of 357 © Getinge Applikon June 27, 2024...
- Page 155 The following window will open and new record title and description can be inserted and confirmed by pressing APPLY: To create a chart page select one or more bioreactors and press CHART. Page 154 of 357 © Getinge Applikon June 27, 2024...
- Page 156 A chart page will be created as displayed below: REMOVE/EXPORT EXPERIMENT DATA In this screen experiment data can be removed and exported. Press on the export icon and the following window will open: Page 155 of 357 © Getinge Applikon June 27, 2024...
- Page 157 OPEN RECORD MENU button: For detailed instructions on how to remove and export record data, refer to the relevant section about Open Record Menu in the System Options chapter of this manual. Page 156 of 357 © Getinge Applikon June 27, 2024...
- Page 158 (which will turn into ). The following screen will be displayed: After selecting the sensors, the related graphs will be displayed. The example below shows a graph displaying the dO data: Page 157 of 357 © Getinge Applikon June 27, 2024...
- Page 159 To access the graph settings press on one of the sensors, which will invoke the Graph Settings window: Here one can select what will be displayed in the graph (Process Value, Setpoint, Low Limit, High Limit, Control Output) and modify the y axis range. Page 158 of 357 © Getinge Applikon June 27, 2024...
- Page 160 Remember to lock the graph again by pressing on the unlocked icon which will then turn into Changes made to the axes ranges can be reset by pressing on the reset icon Page 159 of 357 © Getinge Applikon June 27, 2024...
-
Page 161: Remove
To remove the selected page, press REMOVE, otherwise press on the cross to close this win- dow. To exit the Remove page screen, press on the cross at the top right corner of the page. Page 160 of 357 © Getinge Applikon June 27, 2024... -
Page 162: Move
If one wishes to move another page instead, first swipe to the desired page or select it using the dots. Page 161 of 357 © Getinge Applikon June 27, 2024... - Page 163 Select the page of destination by swiping to the desired page or selecting it using the dots. That page will be shown underneath the arrow icon: Pressing on moves the page to the desired destination. To exit the Move page screen, press on the CANCEL button. Page 162 of 357 © Getinge Applikon June 27, 2024...
-
Page 164: Clear All
To remove all widgets and page configurations, press CLEAR ALL. To exit the Clear All Pages screen, press on the cross to close this window. Page 163 of 357 © Getinge Applikon June 27, 2024... -
Page 165: Configuring A Bioreactor
Widgets are screen components intended to display information and perform some functions. To create a widget press on the modify (pencil) icon in the top bar of the bioreactor. The following screen will be displayed: Page 164 of 357 © Getinge Applikon June 27, 2024... - Page 166 When dragging the widget, the slot is displayed in a green color. After dropping the widget, it will be placed in the desired slot as follows: Page 165 of 357 © Getinge Applikon June 27, 2024...
- Page 167 On Windows PCs this is done by hovering the mouse on one of the empty grey slots in the bioreactor dashboard and pressing on the plus sign that will appear, as shown below. The plus sign is only visible on Windows PCs and not on the controller HMI. Page 166 of 357 © Getinge Applikon June 27, 2024...
- Page 168 To configure widgets, refer to the section about configuring widgets. To move, resize and/or delete widgets, refer to the section about moving, resizing and deleting wid- gets. Page 167 of 357 © Getinge Applikon June 27, 2024...
-
Page 169: Moving, Resizing And Deleting Widgets
Use these icons to resize the widgets and press APPLY. To delete a widget press on the delete icon displayed on the top right corner of the widget and press APPLY to confirm. Page 168 of 357 © Getinge Applikon June 27, 2024... -
Page 170: Configuring Widgets
4 CONFIGURING A BIOREACTOR 4.3 Configuring Widgets Press on the widget to configure it. After pressing on the widget the following window will open: Select the desired SENSOR or ACTUATOR and press APPLY. Page 169 of 357 © Getinge Applikon June 27, 2024... - Page 171 The image below shows an example of a configuration of a pH sensor and two pumps as actuators: Repeat the same procedure for configuring all the desired sensors and actuators and press APPLY. The created widgets will be visible in the main screen as follows: Page 170 of 357 © Getinge Applikon June 27, 2024...
- Page 172 In a large widget the same information of a medium widget is displayed, together with a small view of the trend chart: Page 171 of 357 © Getinge Applikon June 27, 2024...
-
Page 173: Configuring Control Loops
Open the sensor widget (in this case the pH sensor widget) and select the option the Settings menu at the left side of the screen: Press on the arrows ( ) below "Assigned Actuators" and the following window will open: Page 172 of 357 © Getinge Applikon June 27, 2024... - Page 174 Drag the other desired actuator (Alkali) and place it below the Upward Control (to increase the pH of the medium): To delete an actuator drag it back to the list of actuators. When the actuators have been assigned close the window. Page 173 of 357 © Getinge Applikon June 27, 2024...
-
Page 175: Sequential Control
(air), a stirrer and another gas (O ) actuators can all be assigned to the dO sensor to increase the amount of dissolved oxygen when the process value is below setpoint. Page 174 of 357 © Getinge Applikon June 27, 2024... - Page 176 Settings menu at the left side of the screen: Press on the arrows ( ) below "Assigned Actuators" and the following window will open: Page 175 of 357 © Getinge Applikon June 27, 2024...
- Page 177 The other actuators to increase the amount of dissolved oxygen will be assigned in a sequential man- ner. Drag the Air actuator and place it below the Upward Control: Page 176 of 357 © Getinge Applikon June 27, 2024...
- Page 178 Drag the stirrer actuator and place it below the Air actuator: Drag the O actuator and place it below the stirrer actuator: When the actuators have been assigned close the window. Page 177 of 357 © Getinge Applikon June 27, 2024...
- Page 179 When the stirrer reaches its maximum speed and the dO value is still too low, the controller will start activating the O actuator as well. Page 178 of 357 © Getinge Applikon June 27, 2024...
-
Page 180: Sensors
Note that this only starts the control loop without recording data. To stop the control loop press on the stop icon The start/stop icon is only visible when a control loop is configured. Page 179 of 357 © Getinge Applikon June 27, 2024... -
Page 181: Trend Chart
The Trend Chart shows the trend of the process value: Data from the last hour, last 24 hours, last 72 hours, or all collected data can be visualized from the drop-down menu, after unlocking the lock icon. Page 180 of 357 © Getinge Applikon June 27, 2024... -
Page 182: Calibrate
For detailed information about the calibration procedure and sample correction, refer to the the sec- tions about pH sensor calibration and sample correction in the Operation Part of this manual. Page 181 of 357 © Getinge Applikon June 27, 2024... -
Page 183: Limits
2. The alarm limits may exceed the measuring range by 2%. 3. If the sensor is configured in a control loop, the corresponding setpoint value must be between the alarm limit values. Page 182 of 357 © Getinge Applikon June 27, 2024... - Page 184 By pressing on the input fields, one can change the High Limit and Low Limit of the alarm limits. If the process value falls out of the limits range, an alarm notification will appear. Page 183 of 357 © Getinge Applikon June 27, 2024...
- Page 185 The limits settings described above are the most common ones. When different limits settings apply (level sensor, stirrer, etc.), refer to the relevant sections describing the limits settings for the specific sensor. Page 184 of 357 © Getinge Applikon June 27, 2024...
-
Page 186: Control
Software Part of this manual. The type of control can be selected from the drop-down menu under Control Type, as shown in the window below: Page 185 of 357 © Getinge Applikon June 27, 2024... - Page 187 For further instructions on the optimization of the values refer to the section about Preparing Cultivation-Control Loops in the Operation Part of this manual. External Control The external control option can be used with external control units (such as a temperature control unit). Page 186 of 357 © Getinge Applikon June 27, 2024...
- Page 188 Dead Time (no action), a sequence of pump action (Pulse Time) and no pump action (Dead Time) is repeated until the desired situation (no contact or contact) occurs again. Page 187 of 357 © Getinge Applikon June 27, 2024...
- Page 189 3 seconds and then one last pulse of 1 second. During these pulses the antifoam will be added, for a maximum time of 10 seconds, while alternating with the dead time. It is also possible to choose Pulse Time or Dead Time as first action: Page 188 of 357 © Getinge Applikon June 27, 2024...
-
Page 190: Actuators
By pressing on the actuator name the information related to the actuator will be displayed: The operator can perform some actions, such as enabling/disabling and resetting the dose monitor, changing the time unit, entering a manual control output and priming the actuator. Page 189 of 357 © Getinge Applikon June 27, 2024... -
Page 191: General
To stop the identification process press on STOP IDENTIFYING. The sensor can be uninstalled as long as it is not used in a running control loop. Page 190 of 357 © Getinge Applikon June 27, 2024... -
Page 192: Advanced
Shown below is an example of the Advanced settings screen for the level sensor: For more information about the advanced settings of each sensor, refer to the advanced settings of the specific sensors in the Available Sensors section. Page 191 of 357 © Getinge Applikon June 27, 2024... -
Page 193: Available Sensors
The sensor can be uninstalled as long as it is not used in a running control loop. When the health status of the sensor is low, an alarm notification will appear suggesting to replace the sensor probe. Page 192 of 357 © Getinge Applikon June 27, 2024... -
Page 194: Polarographic Do Smart Sensor
Before starting the dO calibration routine, the dO control loop must be stopped. 2. Open the dO widget, select the Calibrate option in the Settings menu and select the 2-POINT CALIBRATION: Page 193 of 357 © Getinge Applikon June 27, 2024... - Page 195 HMI screen, as shown above. When the gas actuators and the sensor are not configured in a loop, the gas actuators will have to be manually turned on/off, as shown below. Page 194 of 357 © Getinge Applikon June 27, 2024...
- Page 196 To improve the air saturation set the agitation at the highest possible rate. 5. After the dO reading is stable, turn off the air actuator by pressing on the stop icon Page 195 of 357 © Getinge Applikon June 27, 2024...
- Page 197 User Manual-Software 6 SENSORS 6. Press CONTINUE and you will be directed to the following screen: 7. Enter the calibration value (100 = 100% air saturation) and press CONTINUE: Page 196 of 357 © Getinge Applikon June 27, 2024...
- Page 198 User Manual-Software 6 SENSORS 8. The calibration will be started: 9. When the process is complete you will be redirected to the Calibration screen: Page 197 of 357 © Getinge Applikon June 27, 2024...
- Page 199 11. Press CONTINUE and you will be directed to the following screen. Enter the calibration value (0 = 0% air saturation) and press CONTINUE: Page 198 of 357 © Getinge Applikon June 27, 2024...
- Page 200 0.33 – 0.66 - 0.5 – 0.5 14. Press CONFIRM and the slope and offset values will be overwritten in the Calibration page. Page 199 of 357 © Getinge Applikon June 27, 2024...
- Page 201 The sensor can be uninstalled as long as it is not used in a running control loop. When the health status of the sensor is low, an alarm notification will appear suggesting to replace the sensor probe. Page 200 of 357 © Getinge Applikon June 27, 2024...
-
Page 202: Optical Do Lumisens Sensor
Before starting the LumiSens calibration routine, the LumiSens control loop must be stopped. 2. Open the LumiSens widget, select the Calibrate option in the Settings menu and select the 1-POINT CALIBRATION: Page 201 of 357 © Getinge Applikon June 27, 2024... - Page 203 User Manual-Software 6 SENSORS 3. The following screen will be presented: 4. Set the air output to the maximum actuator output to saturate the system with air: Page 202 of 357 © Getinge Applikon June 27, 2024...
- Page 204 This can take 15-20 minutes, depending on the volume of the bioreactor. To improve the air saturation set the agitation at the highest possible rate. 6. After the dO reading is stable, turn off the air actuator by pressing on the stop icon press CONTINUE. Page 203 of 357 © Getinge Applikon June 27, 2024...
- Page 205 8. The calibration will be started: 9. When the calibration is complete, the following message will be displayed: If not already done, turn off the air actuator and press OK. Page 204 of 357 © Getinge Applikon June 27, 2024...
- Page 206 The sensor can be uninstalled as long as it is not used in a running control loop. ADVANCED In this screen the advanced information about the sensor is displayed, such as measurement interval, pressure, internal compensation temperature, humidity, tip status, mode and calibration parameters: Page 205 of 357 © Getinge Applikon June 27, 2024...
- Page 207 When these values have been entered as calibration parameters at the biocontroller, the sensor is ready for use. To reset the phase angles and temperature click on the RESET PHASE ANGLE AND TEMP button. Page 206 of 357 © Getinge Applikon June 27, 2024...
- Page 208 The "Air" and "Oxygen" modes can be selected from the drop-down menu: The "Air" mode will measure saturated air in solution and the "Oxygen" mode will measure pure oxygen in solution. Page 207 of 357 © Getinge Applikon June 27, 2024...
-
Page 209: Temperature Sensor
START IDENTIFYING. A light will blink on the Livit Link, which will help to identify the device. The sensor can be uninstalled as long as it is not used in a running control loop. Page 208 of 357 © Getinge Applikon June 27, 2024... -
Page 210: Level/Foam Sensor
Upon contact/no contact, an interlock alarm will occur and the affected actuators will be turned off/on. For further information about the alarm state, interlock state and affected actuators refer to the Limits section in the Settings Options chapter. Page 209 of 357 © Getinge Applikon June 27, 2024... - Page 211 In this screen some advanced information about the sensor is displayed: Press on the input fields to change the text that will be displayed in case of "Contact" or "No Contact" with medium. Page 210 of 357 © Getinge Applikon June 27, 2024...
- Page 212 For foam detection in most cases high sensor sensitivity is used (measuring signal of 26 S equals contact between sensor and foam). In case of highly conductive foam, the low sensitivity can best be selected (measuring signal of 200 S equals contact between sensor and foam). Page 211 of 357 © Getinge Applikon June 27, 2024...
-
Page 213: Pressure Switch
(gas actuators or pumps, for example) will be turned off. For further information about the alarm state, interlock state and affected actuators refer to the Limits section in the Settings Options chapter. Page 212 of 357 © Getinge Applikon June 27, 2024... - Page 214 Press on the input fields to change the text that will be displayed in case of high and low pressure. It is also possible to choose between low and high sensitivity: Page 213 of 357 © Getinge Applikon June 27, 2024...
-
Page 215: Balance
The balance is connected to the Sartorius SBI USB/RS232 Livit Links via an additional cable, as shown below: For more information about these Livit Links and cables, refer to the section about Balance in the Hardware Part of this manual. Page 214 of 357 © Getinge Applikon June 27, 2024... - Page 216 To tare the balance press on the TARE button. The function of the TARE button is identical to the Tare button on the balance and it will reset the balance reading to 0. Page 215 of 357 © Getinge Applikon June 27, 2024...
-
Page 217: Bluesens Bluevary Sensor
During installation, the BlueSens BlueVary Livit Link will be visible in the software as Gas Channel 1 and Gas Channel 2, which correspond to the gas cartridges. These names can be changed in the General tab. Page 216 of 357 © Getinge Applikon June 27, 2024... - Page 218 In this screen the advanced information about the sensor is displayed: The sensor’s advanced information include: • Gas type: type of cartridge gas (O , CO • Cartridge ID • System ID • Pressure Page 217 of 357 © Getinge Applikon June 27, 2024...
-
Page 219: Bluesens Bcp Sensor
BlueSens BCP Livit Link, as shown below: The BlueSens BCP Gas Sensor is connected to the bioreactor and to the exhaust as shown below: Page 218 of 357 © Getinge Applikon June 27, 2024... - Page 220 START IDENTIFYING. A light will blink on the Livit Link, which will help to identify the device. The sensor can be uninstalled as long as it is not used in a running control loop. Page 219 of 357 © Getinge Applikon June 27, 2024...
- Page 221 User Manual-Software 6 SENSORS ADVANCED In this screen the advanced information about the sensor is displayed: The sensor’s advanced information include the cartridge ID and the pressure. Page 220 of 357 © Getinge Applikon June 27, 2024...
-
Page 222: Mettler Ph Sensor
For the sensor calibration procedure and sample correction, select the desired action in the Calibra- tion tab and follow the instructions on the screen. Refer to the sections about pH sensor calibration and sample correction in the Operation Part of this manual. Page 221 of 357 © Getinge Applikon June 27, 2024... - Page 223 START IDENTIFYING. A light will blink on the Livit Link, which will help to identify the device. The sensor can be uninstalled as long as it is not used in a running control loop. Page 222 of 357 © Getinge Applikon June 27, 2024...
- Page 224 The sensor’s advanced information is the following: • Serial number • Dynamic lifetime indicator (number of days left before sensor replacement) • Unit type The unit type can be selected from the drop-down menu: Page 223 of 357 © Getinge Applikon June 27, 2024...
-
Page 225: Mettler Polarographic Do Sensor
Operation Part of this manual and Polaro- graphic dO smart sensor in the Software Part of this manual, respectively. When performing a 2-point calibration, perform the first calibration with N and the second with air/O Page 224 of 357 © Getinge Applikon June 27, 2024... - Page 226 Livit Link, which will help to identify the device. The sensor can be uninstalled as long as it is not used in a running control loop. ADVANCED In this screen the advanced information about the sensor is displayed: Page 225 of 357 © Getinge Applikon June 27, 2024...
- Page 227 The unit type can be selected from the drop-down menu: By default, the dO sensor presents its result as % Air saturation. If required, the sensor value can also be expressed as % O2 saturation or in nano-Amperes. Page 226 of 357 © Getinge Applikon June 27, 2024...
-
Page 228: Mettler Optical Do Sensor
For the sensor calibration procedure, select the desired action in the Calibration tab and follow the instructions on the screen. For the 1-point calibration general procedure, refer to the section about Optical dO sensor (Lu- miSens) in the Software Part of this manual. Page 227 of 357 © Getinge Applikon June 27, 2024... - Page 229 Livit Link, which will help to identify the device. The sensor can be uninstalled as long as it is not used in a running control loop. ADVANCED In this screen the advanced information about the sensor is displayed: Page 228 of 357 © Getinge Applikon June 27, 2024...
- Page 230 The unit type can be selected from the drop-down menu: By default, the Optical dO sensor presents its result as % Air saturation. If required, the sensor value can also be expressed as % O2 saturation or in nano-Amperes. Page 229 of 357 © Getinge Applikon June 27, 2024...
-
Page 231: Mettler Co Sensor
Typically, after 10-20 sterilization cycles the pH electrode should be replaced. The sensor’s Dynamic Lifetime Indicator function will indicate this. Page 230 of 357 © Getinge Applikon June 27, 2024... - Page 232 START IDENTIFYING. A light will blink on the Livit Link, which will help to identify the device. The sensor can be uninstalled as long as it is not used in a running control loop. Page 231 of 357 © Getinge Applikon June 27, 2024...
- Page 233 % CO saturation. If required, the sensor value can also be expressed as CO concentration (mg/l) or potential (pH mV, measured by the pH sensor that is mounted inside). Page 232 of 357 © Getinge Applikon June 27, 2024...
-
Page 234: Hamilton Ph Sensor
7. For the sensor calibration procedure and sample correction, select the desired action in the Calibration tab and follow the instructions on the screen. Refer to the sections about pH sensor calibration and sample correction in the Operation Part of this manual. Page 233 of 357 © Getinge Applikon June 27, 2024... - Page 235 When the health status of the sensor is low, an alarm notification will appear suggesting to replace the sensor probe. ADVANCED In this screen the advanced information about the sensor is displayed: Page 234 of 357 © Getinge Applikon June 27, 2024...
- Page 236 This number indicates the number of times that the temperature has been increased to > 121°C while the sensor was connected to the control device. The values for the number of SIP and CIP cycles are "Read Only". Page 235 of 357 © Getinge Applikon June 27, 2024...
-
Page 237: Hamilton Do
Operation Part of this manual and Polarographic sensor in the Software Part of this manual, respectively. The slope and offset values are not available (not provided by Hamilton) and therefore not displayed in this screen. Page 236 of 357 © Getinge Applikon June 27, 2024... - Page 238 When the health status of the sensor is low, an alarm notification will appear suggesting to replace the sensor probe. ADVANCED In this screen the advanced information about the sensor is displayed: Page 237 of 357 © Getinge Applikon June 27, 2024...
- Page 239 The number of Steam-In-Place cycles will not be incremented while putting the reactor in an auto- clave. This number indicates the number of times that the temperature has been increased to > 121°C while the sensor was connected to the control device. Page 238 of 357 © Getinge Applikon June 27, 2024...
-
Page 240: Hamilton Redox Sensor
The redox sensor calibration routine requires one buffer solution, preferably at ORP value of 475 mV. For the sensor calibration procedure, select the desired action in the Calibration tab and follow the instructions on the screen. Page 239 of 357 © Getinge Applikon June 27, 2024... - Page 241 When the health status of the sensor is low, an alarm notification will appear suggesting to replace the sensor probe. ADVANCED In this screen the advanced information about the sensor is displayed: Page 240 of 357 © Getinge Applikon June 27, 2024...
- Page 242 The number of Steam-In-Place cycles will not be incremented while putting the reactor in an auto- clave. This number indicates the number of times that the temperature has been increased to > 121°C while the sensor was connected to the control device. Page 241 of 357 © Getinge Applikon June 27, 2024...
-
Page 243: Hamilton Dencytee Biomass Sensor
For the sensor calibration procedure, select the desired action in the Calibration tab and follow the instructions on the screen. For more information, refer to the Hamilton Operating Instructions Manual that comes with the sensor. Page 242 of 357 © Getinge Applikon June 27, 2024... - Page 244 Livit Link, which will help to identify the device. The sensor can be uninstalled as long as it is not used in a running control loop. ADVANCED In this screen the advanced information about the sensor is displayed: Page 243 of 357 © Getinge Applikon June 27, 2024...
- Page 245 When the sensor is unsupported, the parameters can be set using the Hamilton Arc Air software. For more information refer to the Hamilton Operating Instructions Manual that comes with the sensor. Page 244 of 357 © Getinge Applikon June 27, 2024...
-
Page 246: Presens Optical Ph Single-Use Sensor
Operation Part of this manual. Fill in the supplied calibration values in the respective input fields in the Advanced screen. The pH calibration values must be copied from the calibration datasheet. Page 245 of 357 © Getinge Applikon June 27, 2024... - Page 247 The pH settings must be copied from the calibration datasheet. The user should not change the Current and Average general settings. From the drop-down menu it is possible to select the temperature sensor to link for temperature compensation. Page 246 of 357 © Getinge Applikon June 27, 2024...
-
Page 248: Presens Optical Do Single-Use Sensor
If one wishes to perform an actual calibration, this can be done by pressing the 1-POINT CALIBRA- TION or 2-POINT CALIBRATION buttons and following the instructions on the screen. Page 247 of 357 © Getinge Applikon June 27, 2024... - Page 249 The user should not change the Current and Average general settings. From the drop-down menu it is possible to select the temperature sensor to link for temperature compensation. Page 248 of 357 © Getinge Applikon June 27, 2024...
-
Page 250: Aber Futura Biomass Sensor
The correlation between the capacitance and the cell density depends on the type of process (bacterial, microbial or cell culture) and cell size. Therefore, the biomass measure- ment needs to be calibrated. Page 249 of 357 © Getinge Applikon June 27, 2024... - Page 251 START IDENTIFYING. A light will blink on the Livit Link, which will help to identify the device. The sensor can be uninstalled as long as it is not used in a running control loop. Page 250 of 357 © Getinge Applikon June 27, 2024...
- Page 252 Electrical cleaning of the probe by pressing the CLEAN button can best be performed in an aqueous saturated NaCl or KCl solution (conductivity approx. 30 mS/cm). As a result of the cleaning action, small gas bubbles will be formed on the sensor surface. Page 251 of 357 © Getinge Applikon June 27, 2024...
-
Page 253: Analog Input
Analog Input Livit Link via the 15 pins D-sub connector. For more information about this Livit Link, refer to the section about Analog I/O Livit Link in the Hardware Part of this manual. Page 252 of 357 © Getinge Applikon June 27, 2024... - Page 254 START IDENTIFYING. The sensor can be uninstalled as long as it is not used in a running control loop. Page 253 of 357 © Getinge Applikon June 27, 2024...
-
Page 255: Actuators
When a cultivation is running and the actuators are active in the control loop, the setpoint value in the top bar will be replaced by the loop symbol and the actuator output will turn green: Page 254 of 357 © Getinge Applikon June 27, 2024... -
Page 256: Trend Chart
It is possible to manually change the range (lower and upper trend graph limits). To modify the axes ranges, unlock the graph by pressing on the lock icon which will turn into Page 255 of 357 © Getinge Applikon June 27, 2024... -
Page 257: Calibrate
The Calibrate screen shows the calibration options and slope and offset parameters. For more information about the calibration procedures, refer to the section about actuator calibration in the Operation Part of this manual. Page 256 of 357 © Getinge Applikon June 27, 2024... -
Page 258: Limits
30%. The user can change the limits by pressing on the relevant input fields. In the drop-down menu below Conversion Type different conversion types can be selected: Page 257 of 357 © Getinge Applikon June 27, 2024... - Page 259 15 L single-use bioreactor. The heating blanket high limits can be manually changed. For more instructions refer to the relevant section about Installation in the Operation Part of the user manual. Page 258 of 357 © Getinge Applikon June 27, 2024...
-
Page 260: General
If the actuator is configured in a control loop it cannot be uninstalled and the button UNINSTALL DEVICE will be grayed out. Page 259 of 357 © Getinge Applikon June 27, 2024... -
Page 261: Dose Monitor
Once the dose monitor is enabled, the current dose can be reset. For further information about these procedures refer to the section about dose monitor in the Opera- tion Part of this manual. Page 260 of 357 © Getinge Applikon June 27, 2024... -
Page 262: Advanced
Shown below is an example of the Advanced settings screen for the Acid pump actuator: For more information about the advanced settings of each actuator, refer to the advanced settings of the specific actuator in the Available Actuators section. Page 261 of 357 © Getinge Applikon June 27, 2024... -
Page 263: Available Actuators
Configuring Control Loops in the Software Part of this manual. 7.2.1 Pump CALIBRATE For more information about the calibration procedure refer to the section about actuator calibration in the Operation Part of this manual. Page 262 of 357 © Getinge Applikon June 27, 2024... - Page 264 For further information refer to the General section in the Actuators Settings Options section. ADVANCED In this screen the advanced information about the actuator is displayed: The rotation direction can be changed between clock wise and counter clock wise from the drop-down menu. Page 263 of 357 © Getinge Applikon June 27, 2024...
-
Page 265: Heating Blanket
The heating blanket can be unistalled as long as it is not used in a control loop. For further information refer to the General section in the Actuators Settings Options section. Page 264 of 357 © Getinge Applikon June 27, 2024... - Page 266 If for example the interval time is 5 s and the actuator output is 20 %, the actuator will be on for 1 s and off for 4 s. For more information refer to the section about actuator parameters in the Appendix on PID Control in this manual. Page 265 of 357 © Getinge Applikon June 27, 2024...
-
Page 267: Cooling Valve
The cooling valve can be unistalled as long as it is not used in a control loop. For further information refer to the General section in the Actuators Settings Options section. Page 266 of 357 © Getinge Applikon June 27, 2024... - Page 268 If for example the interval time is 5 s and the actuator output is 20 %, the actuator will be on for 1 s and off for 4 s. For more information refer to the section about actuator parameters in the Appendix on PID Control in this manual. Page 267 of 357 © Getinge Applikon June 27, 2024...
-
Page 269: Thermo Circulator Unit (Tcu)
As an internal device, it is recommended not to uninstall the TCU. For further information refer to the General section in the Actuators Settings Options section. Page 268 of 357 © Getinge Applikon June 27, 2024... - Page 270 The Pulse Width Modulation Interval is related to the interval time when the actuator is on and off. For more information refer to the section about actuator parameters in the Appendix on PID Control in this manual. Page 269 of 357 © Getinge Applikon June 27, 2024...
-
Page 271: Filter Heater
As an internal device, it is recommended not to uninstall the filter heater. For further information refer to the General section in the Actuators Settings Options section. Page 270 of 357 © Getinge Applikon June 27, 2024... - Page 272 If for example the interval time is 5 s and the actuator output is 20 %, the actuator will be on for 1 s and off for 4 s. For more information refer to the section about actuator parameters in the Appendix on PID Control in this manual. Page 271 of 357 © Getinge Applikon June 27, 2024...
-
Page 273: Gas
As an internal device, it is recommended not to uninstall the gas actuator. For further information refer to the General section in the Actuators Settings Options section. Page 272 of 357 © Getinge Applikon June 27, 2024... - Page 274 If the electronic gas selection block configuration is selected, it is possible to select the gas outlet between sparger and overlay from the drop-down menu: The address can only be changed by a service engineer. Page 273 of 357 © Getinge Applikon June 27, 2024...
- Page 275 For more information refer to the section about actuator parameters in the Appendix on PID Control in this manual. The type of gas can be selected from the drop-down menu: Page 274 of 357 © Getinge Applikon June 27, 2024...
- Page 276 20 %, the actuator will be on for 1 s and off for 4 s. For more information refer to the section about actuator parameters in the Appendix on PID Control in this manual. Page 275 of 357 © Getinge Applikon June 27, 2024...
-
Page 277: Stirrer
For further information refer to the General section in the Actuators Settings Options section. ADVANCED In this screen the advanced information about the actuator is displayed: The rotation direction can be changed between clock wise and counter clock wise from the drop-down menu. Page 276 of 357 © Getinge Applikon June 27, 2024... -
Page 278: Analog Out
Analog I/O Livit Link via the 15 pins D-sub connector. For more information about this Livit Link, refer to the section about Analog I/O Livit Link in the Hardware Part of this manual. Page 277 of 357 © Getinge Applikon June 27, 2024... - Page 279 In this screen the operator can change the low and high limits of the actuator output. Make sure to adjust the lower limit so that it is suitable for the connected device type. Page 278 of 357 © Getinge Applikon June 27, 2024...
- Page 280 In this screen the advanced information about the actuator is displayed: The inhibit mode can be changed from the drop-down menu: The inhibit mode should match with the analog device that is connected. Page 279 of 357 © Getinge Applikon June 27, 2024...
-
Page 281: System Options
Bioreactor Configuration and System Configuration shown at the left side of the screen. 8.1 Bioreactor Configuration 8.1.1 Bioreactors The Bioreactors screen shows the bioreactor(s) in use. Page 280 of 357 © Getinge Applikon June 27, 2024... - Page 282 To change the color displayed in the top bar of a bioreactor, press on the CHANGE COLOR button. A color chart will be displayed: After picking a new color you will be redirected to the Bioreactors screen. Page 281 of 357 © Getinge Applikon June 27, 2024...
- Page 283 The high limit of the heating blanket will also be changed, since different high limits apply to different bioreactors types. By selecting the AppliFlex bioreactor type, the high limit will change to 50% and the conversion type to "Capped". Press CONFIRM to proceed. Page 282 of 357 © Getinge Applikon June 27, 2024...
- Page 284 START IDENTIFYING ACTUATORS button the actuators will start running (depending on the type of device, pumps will start running, gas actuators will be opened and so on) which will help to identify the device. Page 283 of 357 © Getinge Applikon June 27, 2024...
-
Page 285: Control Loops
When the control loops are active, they will be displayed in action as follows: It is possible to start or stop the single Control Loops by pressing on the start or stop icons, respectively. Page 284 of 357 © Getinge Applikon June 27, 2024... - Page 286 In this window the control options can be adjusted and control loops can be configured. For further information about control loop configuration refer to the section about configuring control loops in the Software Part of this manual. Page 285 of 357 © Getinge Applikon June 27, 2024...
-
Page 287: Dose Monitors
To reset all dose monitors at once, press on the RESET ALL DOSE MONITORS button and the following message will be displayed: Press CONFIRM to proceed. All dose monitors will be reset to zero. Page 286 of 357 © Getinge Applikon June 27, 2024... - Page 288 For instructions on how to adjust actuators and dose monitor settings refer to the chapter about Actuator and Dose Monitor Settings in the Operation Part of this manual. Page 287 of 357 © Getinge Applikon June 27, 2024...
-
Page 289: Data Management
HMI configurations and export debug information. On the HMI of Windows computers the CONVERT RAW button will be available in the Experiment Data screen. This button is not available on the HMI of the biocontroller. Page 288 of 357 © Getinge Applikon June 27, 2024... - Page 290 A maximum of 20 records can be stored. If the number is exceeded, a system alarm will pop up. The Record Title and Description can be changed by pressing on the pencil icon Page 289 of 357 © Getinge Applikon June 27, 2024...
- Page 291 The following window will open and new record title and description can be inserted and confirmed by pressing APPLY: To remove experiment data from a bioreactor, select the bioreactor and press REMOVE: Page 290 of 357 © Getinge Applikon June 27, 2024...
- Page 292 Unexported data will be permanently lost. Confirm the action by pressing REMOVE: To remove all records press REMOVE ALL. The following message will be displayed: To remove all experiment data, check the confirmation box and press REMOVE ALL. Page 291 of 357 © Getinge Applikon June 27, 2024...
- Page 293 Connect a USB drive to the USB-C port dedicated to data & settings export at the side of the biocon- troller cabinet, press on the folder icon and choose a location to export the record data. Page 292 of 357 © Getinge Applikon June 27, 2024...
- Page 294 Select the File Format and Data Interval from the drop-down menus. An HMI on an instrument, such as a Livit Flex, can only export raw and CSV files. When the application is running on a Windows computer, raw, CSV and Excel files can be exported.
- Page 295 Then press on the button and the following window will open: Select a save location for the exported file(s). Select the file format for export and the data interval from the drop-down menus. Page 294 of 357 © Getinge Applikon June 27, 2024...
- Page 296 Select the desired raw file(s) that need to be converted to Excel/CSV. To export the alarm data for the selected records check the confirmation box. Press EXPORT to confirm: If needed, press ABORT to end the process. Page 295 of 357 © Getinge Applikon June 27, 2024...
-
Page 297: Instrument Configuration
The IMPORT button is grayed out since this function can be performed only by users with Service rights. Export Instrument Configuration To export the instrument configuration press on and the following message will be displayed: Page 296 of 357 © Getinge Applikon June 27, 2024... - Page 298 The instrument configuration file exported contains extended information about the devices that are connected, including parameters and settings (such as parameter names, control loop configurations, etc.). The calibration parameters of the sensors are not included. Page 297 of 357 © Getinge Applikon June 27, 2024...
- Page 299 Here the HMI and instrument debug information and the system information can be exported. HMI Debug Information To export the HMI debug information press on and the following message will be displayed: Page 298 of 357 © Getinge Applikon June 27, 2024...
- Page 300 The HMI debug log files will be exported in two folders called "Crash Files" and "Debug Logs". Instrument Debug Information To export the instrument debug information press on and the following window will open for the instrument selection: Page 299 of 357 © Getinge Applikon June 27, 2024...
- Page 301 , select a folder where the HMI debug log will be exported (root directory of USB drive) and press EXPORT: The debug log files will be exported in two folders called "Crash Files" and "Debug Logs". Page 300 of 357 © Getinge Applikon June 27, 2024...
- Page 302 The system info file contains information about the HMI, the instrument and the devices that are connected (e.g. pH sensor, dO sensor, etc.). This information includes hardware version, software version, disk space, memory usage, IP address, uptime, etc. Page 301 of 357 © Getinge Applikon June 27, 2024...
-
Page 303: System Configuration
Status of the connection and the Connection Message, which is displayed in case of errors during the connection. To add a connection to an instrument, press on ADD CONNECTION at the bottom right of the screen. The following window will open: Page 302 of 357 © Getinge Applikon June 27, 2024... - Page 304 By clicking on the settings icons of the HMI or of the instrument, the following window will open: Here one can enable and disable the DHCP and change the IP address. Page 303 of 357 © Getinge Applikon June 27, 2024...
- Page 305 In the absence of these two conditions the HMI will no longer be accessible and the IP address will need to be restored. If this happens contact Getinge Applikon for support. The DHCP (Dynamic Host Configuration Protocol) can be enabled to automatically receive an IP address from a DHCP server in the network.
- Page 306 To disable the DHCP for the HMI, uncheck the box DHCP Enabled and press APPLY to proceed. To enable the DHCP for the Instrument, check the box DHCP Disabled and press APPLY: Page 305 of 357 © Getinge Applikon June 27, 2024...
- Page 307 8 SYSTEM OPTIONS The following message will be displayed: Press PROCEED to enable the DHCP. To disable the DHCP for the Instrument, uncheck the box DHCP Enabled and press APPLY to proceed. Page 306 of 357 © Getinge Applikon June 27, 2024...
-
Page 308: Opc Ua Setup
Any changes to control loops (installation of sensors and/or actuators) require a restart of the OPC server (by disabling and then re-enabling the OPC UA server via the toggle), or, alternatively, by restarting the controller. Page 307 of 357 © Getinge Applikon June 27, 2024... - Page 309 When the USB dongle is connected, the toggle for enabling and disabling OPC UA will appear under the Server Status. To start the communication with the controller via OPC UA, enable the toggle. To stop the communi- cation, disable the toggle. Page 308 of 357 © Getinge Applikon June 27, 2024...
- Page 310 The OPC control tag is a timer with a maximum value of 60 seconds. When a value is received by the Livit Flex controller while the timer is active, the user is logged off and locked out for this period of time.
- Page 311 The lock icon will be replaced by a log in icon and the user will be able to log in again. Page 310 of 357 © Getinge Applikon June 27, 2024...
-
Page 312: Instrument Setup
When the system power is good, the info button will be displayed in the accent color selected . When the system power is out of range, the info button will be dis- played in the alarm color Page 311 of 357 © Getinge Applikon June 27, 2024... - Page 313 Here the sensors installed on the instrument are displayed. When pressing on one of the sensors, for example the pH sensor, a window will open which displays the settings of the sensor: Page 312 of 357 © Getinge Applikon June 27, 2024...
-
Page 314: Instrument Operations
Livit Links Connection and Devices Installation in the Operation Part of this manual. Clear Configuration To reset the configuration of the system and the IP address, click on the following message will be displayed: Click on CONFIRM to proceed. Page 313 of 357 © Getinge Applikon June 27, 2024... - Page 315 The instrument will be restarted and the users will be logged out: Click on ACKNOWLEDGE and log in again. After logging in, it may be necessary to install new hardware. Proceed as described in the section about searching for Livit Links. Page 314 of 357 © Getinge Applikon June 27, 2024...
- Page 316 Press CONFIRM to proceed. The instrument will be restarted and the users will be logged out: Press ACKNOWLEDGE and log in again. Page 315 of 357 © Getinge Applikon June 27, 2024...
- Page 317 Select the time and press SET TIME to confirm. Licenses To view the licences present on the instrument press on and the following window will open showing the available licenses: Page 316 of 357 © Getinge Applikon June 27, 2024...
-
Page 318: Interface Settings
To clear the HMI configuration (graphs and theme configurations), press on the CLEAR HMI CON- FIGURATION button. The following message will be displayed: Press CONFIRM to confirm. The HMI will restart and load the default settings. Page 317 of 357 © Getinge Applikon June 27, 2024... -
Page 319: Screen Settings
The Screen Settings options are available only on the HMI of the biocontroller and not on the HMI of Windows computers, since Windows provides its own screensaver functionality: To adjust the the screen saver time out, enable the screen saver toggle: Page 318 of 357 © Getinge Applikon June 27, 2024... - Page 320 User Manual-Software 8 SYSTEM OPTIONS To edit the screen saving interval, press on the input field and enter a new desired time: To adjust the screen brightness use the slider: Page 319 of 357 © Getinge Applikon June 27, 2024...
- Page 321 It is possible to change the Interface Theme of the screen and Primary Color. The light theme is displayed below: To change the theme, press on the drop-down menu and select the desired theme: Page 320 of 357 © Getinge Applikon June 27, 2024...
- Page 322 To change the Primary Color, press on CHANGE COLOR. A color chart will be displayed: After picking a new color you will be redirected to the Interface Settings screen. Page 321 of 357 © Getinge Applikon June 27, 2024...
-
Page 323: Screen Cleaning
To disable the touch input, press on the DISABLE TOUCH INPUT FOR 20 SECONDS button. In this time interval clean the screen with a soft cloth, dampened with a mild glass cleaner, before the touch screen is reactivated. Page 322 of 357 © Getinge Applikon June 27, 2024... -
Page 324: Alarms
(different icons), location (bioreactor and biocontroller), activation and deactivation time (sorted in descending order, latest activated alarms first), acknowledgement status and message (alarm explanation and recommended action): Page 323 of 357 © Getinge Applikon June 27, 2024... - Page 325 95%, 97%, 99% and 100% capacity of the database is reached. At the bottom of the alarm history screen the status bar is shown, which displays the number of total, active, and acknowledged alarms: Page 324 of 357 © Getinge Applikon June 27, 2024...
-
Page 326: Icons
Open Record Menu in the System Options chapter of this manual (System Options > Bioreactor Configuration > Data Management > Open Record Menu). Page 325 of 357 © Getinge Applikon June 27, 2024... -
Page 327: Filters
For example, when typing "stirrer", the alarm messages re- lated to stirrers will be displayed as shown below. The search function is case insensitive. Page 326 of 357 © Getinge Applikon June 27, 2024... - Page 328 The Instrument filter filters the alarms based on the instrument: • All: shows alarms from all instruments • Livit Flex: shows alarms from the Livit Flex instrument This filter is useful when more than one instrument is connected to the HMI and the user wants to check the alarms from only one instrument.
- Page 329 A combination of different filters can be used. For example if the user selects bioreactor 1 and active status, then only the active alarms from bioreactor 1 will be shown. Page 328 of 357 © Getinge Applikon June 27, 2024...
-
Page 330: Acknowledge Alarms
To close the Alarm History press on the cross icon Page 329 of 357 © Getinge Applikon June 27, 2024... -
Page 331: Clear Alarm Data
Select the instrument and press CLEAR DATA: The following message will be displayed: Press CLEAR to confirm. All the alarm data will be deleted. Page 330 of 357 © Getinge Applikon June 27, 2024... -
Page 332: Copyright Notices And Disclaimers
(b) Give prominent notice with the combined library that part of it is a work based on the Library, and explaining where to find the accompanying uncombined form of the same work. Page 331 of 357 © Getinge Applikon June 27, 2024... -
Page 333: Qt Xlsx Writer
Limitations on Rights to Redistribute This Code Unicode, Inc. hereby grants the right to freely use the information supplied in this file in the creation of products supporting the Unicode Page 332 of 357 © Getinge Applikon June 27, 2024... - Page 334 CLAIM, DAMAGES OR OTHER LIABILITY, WHETHER IN AN ACTION OF CONTRACT, TORT OR OTHERWISE, ARISING FROM, OUT OF OR IN CONNECTION WITH THE SOFTWARE OR THE USE OR OTHER DEALINGS IN THE SOFTWARE. Page 333 of 357 © Getinge Applikon June 27, 2024...
-
Page 335: Appendix Pid Control
User Manual-Appendix PID Control Part IV APPENDIX PID CONTROL Page 334 of 357 © Getinge Applikon June 27, 2024... -
Page 336: Introduction
The type of the control algorithm is called PID. The three letters P, I and D are abbreviations, where: P = Proportional Control I = Integral Control D = Derivative Control Page 335 of 357 © Getinge Applikon June 27, 2024... -
Page 337: Control Algorithm
The Derivative part of the controller action is based on the measured process value and not on the difference between process value and setpoint. The PID variables and parameters are discussed in detail in the next sections on Control and Actua- tors Variables and Parameters. Page 336 of 357 © Getinge Applikon June 27, 2024... -
Page 338: Control Variables And Parameters
The Controller Output is expressed in %. Theoretically, the controller output of the control device may vary between -400% and +400%. The real controller output range however depends on the actuator configuration. Page 337 of 357 © Getinge Applikon June 27, 2024... -
Page 339: Control Parameters
When the Proportional Gain value is varied, the angle in the relationship between parameter value and controller output is changed. Below an example is presented of different values of Proportional Gain (P = 20 and P = 50). Page 338 of 357 © Getinge Applikon June 27, 2024... -
Page 340: I: Integral Time
The mathematical expression for derivative control is: (0 1 (0 1 Derivative control is enabled by setting the derivative gain to a value > 0 min. The total Control Output for a PID control loop is: Page 339 of 357 © Getinge Applikon June 27, 2024... -
Page 341: Db: Dead Band
Dead Band area. In other words, a Process Value within the Dead Band area will not cause a contribution to the calculated I- or D-part of the PID controller output. Page 340 of 357 © Getinge Applikon June 27, 2024... -
Page 342: Actuators Variables And Parameters
(addition of acid / base, heating / cooling, respectively). For more information about control loop configurations, refer to the section on sequential control in this Appendix. Page 341 of 357 © Getinge Applikon June 27, 2024... -
Page 343: Actuator Parameters
A Lower Limit that is higher than 0 % causes a positive actuator action as soon as the corresponding control loop is switched on. An Upper Limit that is lower than 100 % will limit the maximum actuator output. Page 342 of 357 © Getinge Applikon June 27, 2024... - Page 344 Limits button in the Settings menu. The following window will open: In the drop-down menu below Conversion Type different conversion types can be selected: Page 343 of 357 © Getinge Applikon June 27, 2024...
- Page 345 User Manual-Appendix PID Control 3 ACTUATORS VARIABLES AND PARAMETERS By pressing on the information icon next to the conversion type, an explanation of the different actuator output limit types will be displayed: Page 344 of 357 © Getinge Applikon June 27, 2024...
-
Page 346: Pid In Applikon Controllers
*** The stirrer control loop is either configured as an actuator in the dO control cascade or it is used as a stand-alone controller (in the latter case, the setpoint is set manually). Page 345 of 357 © Getinge Applikon June 27, 2024... -
Page 347: Sequential Control
(or MFC) is directly related to the (negative) controller output CO between –100 % and 0 %. AO as a function of CO; single actuator: N Page 346 of 357 © Getinge Applikon June 27, 2024... - Page 348 • If 100 % < CO < 200 %, the air valve is completely open and the oxygen valve is controlled. AO as a function of CO; two actuators: air and O Page 347 of 357 © Getinge Applikon June 27, 2024...
-
Page 349: Controlled Stirrer Speed
0 % and 100 %, as shown below. AO as a function of CO; single actuator: stirrer speed Page 348 of 357 © Getinge Applikon June 27, 2024... - Page 350 • If –100 % < CO < 0 %, stirrer speed is at its minimum value and nitrogen supply is controlled. • If 0 % < CO < 100 %, stirrer speed is controlled. AO as a function of CO; two actuators: N and stirrer speed Page 349 of 357 © Getinge Applikon June 27, 2024...
- Page 351 • If 100 % < CO < 200 %, stirrer speed is at its maximum and oxygen or air supply is controlled. AO as a function of CO; three actuators: N , stirrer speed, and air or O Page 350 of 357 © Getinge Applikon June 27, 2024...
-
Page 352: Low-Limit Value For Air Supply (Mfc)
For example, if Low Limit = 20 %, then Actuator output range for air supply = 20 % to 100 %. Page 351 of 357 © Getinge Applikon June 27, 2024... -
Page 353: Parameters And Actuators In Bioreactor Control
Actuators for heating Culture Heating blanket Cell Thermo circulator (jacketed reactor) Cell / Microbial Actuators for cooling Cold water valve (jacketed reactor) Exothermic Heat exchangers Jacket Cell Cold finger Microbial Page 352 of 357 © Getinge Applikon June 27, 2024... -
Page 354: Ph Control
Actuators for oxygen dissipation Nitrogen solenoid valve Cell / Microbial Nitrogen mass flow controller Cell / Microbial Aeration Sparging Microbial Sparging with porous diaphragm Cell Head space aeration (overlay) Cell Page 353 of 357 © Getinge Applikon June 27, 2024... -
Page 355: Level Control
In order to optimize the P gain, start control using the default P gain (refer to the section on Default PID Control Settings). Next, increase this parameter value to such extent that the process value is just not oscillating. Page 354 of 357 © Getinge Applikon June 27, 2024... -
Page 356: Integral Time
-control. PID Control Applikon Bioreactor AppliFlex Bioreactor Parameters I (s) D (s) Dead Band 0.10 0.10 I (s) 2700 2700 Temperature D (s) I (s) 1500 1500 D (s) Page 355 of 357 © Getinge Applikon June 27, 2024... -
Page 357: Acronyms
90, 91, 92, 273 Mass Flow Meter 90, 91, 92, 273, 274 outer diameter 88, 97 personal protection equipment USB Type-C Universal Serial Bus Type-C 85, 88, 116, 117 VarioPin8 Page 356 of 357 © Getinge Applikon June 27, 2024... - Page 358 Getinge is a global provider of innovative solutions for operating rooms, intensive care units, sterilization departments and for life science companies and institutions. Based on our firsthand experience and close partnerships with clinical experts, healthcare professionals and medtech specialists, we are improving everyday life for people –...
Need help?
Do you have a question about the Livit Flex and is the answer not in the manual?
Questions and answers