Advertisement
- 1 Overview
- 2 Specifications
- 3 Unpacking and Checking Equipment
- 4 Battery Using Information
- 5 Getting Acquainted
- 6 Basic Operations
- 7 Radio Menu Setting- Main Set
- 8 Channel settings (Band A Set and Band B Set)
- 9 Other Functions
-
10
Detailed functional operations
- 10.1 Save an analog Channel
- 10.2 Save a digital channel
- 10.3 Make an analog repeater channel
- 10.4 Make a digital repeater channel
- 10.5 Frequency Scan and channel Scan operation
- 10.6 Emergency Alarm operation
- 10.7 Import 500.000 DMR contacts operation
- 10.8 Promiscuous Feature
- 10.9 GPS Function
- 10.10 Bluetooth Using
- 10.11 Update firmware upgrade operation
- 10.12 Weather channel receiving operation
- 11 Troubleshooting
- 12 Documents / Resources
![]()
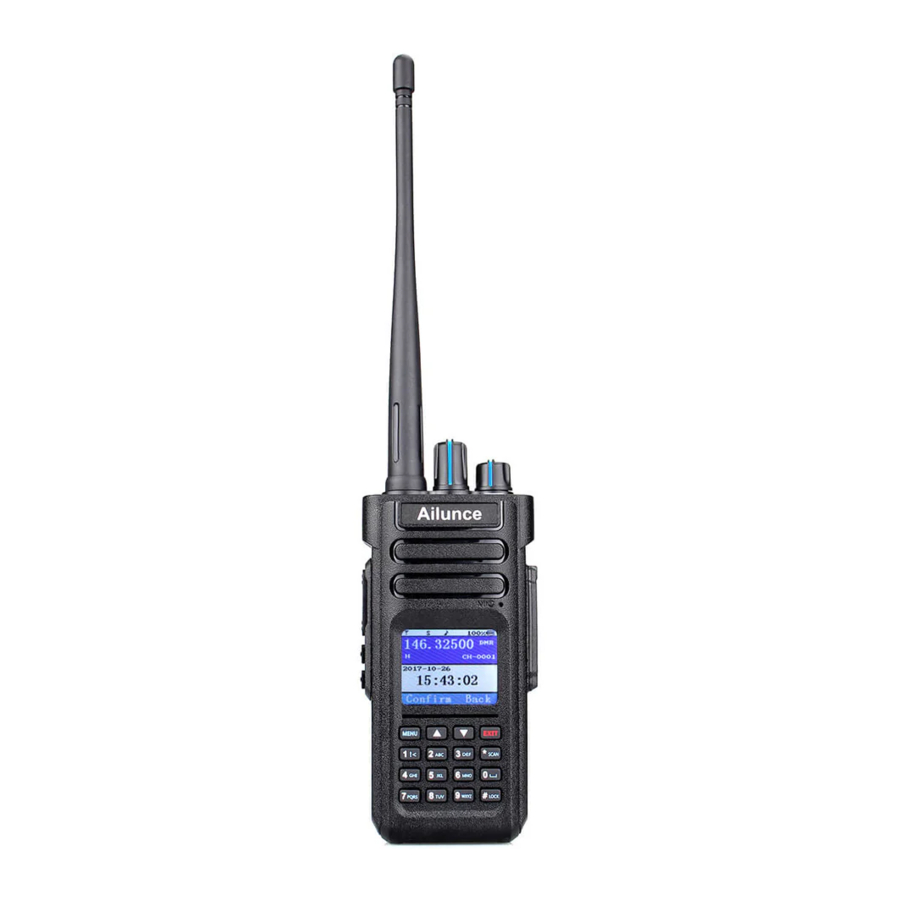
Overview
Features:
- It has a very high strong output power, you can select TX power on the radio directly, and also has a lower power to easy use with a DMR hotspot.
- The HD2 support to import 500,000 DMR Contacts.
- Upgraded USB Type-C charging battery, charge the radio on the desktop charger, or just the battery alone.
- Eye-catching alarm button on top of the radio, easy and quick to request an emergency call in emergencies.
- Almost all the operations can be done via the radio keyboard.
- Support to use a side key as the secondary PTT.
- Support night mode and adjust the brightness.
- Support different keyboard lock mode.
- Support Bluetooth voice transmission.
- Support NOAA function (Only available in America)
Specifications
| General Specifications | Frequency range * | TX: 144-146 MHz & 430-440 MHz RX:136-174 MHz & 400-480 MHz Bluetooth: 2.402~2.480GHz, Max: 6dBm; GPS, L1: 1575.42Mhz/L2: 1227.6Mhz L5: 1176. 45Mhz; |
| Channel Capacity | 3000 Channels | |
| Channel Spacing | 12.5KHz/25Khz | |
| Operating Voltage | 7.4V | |
| Battery Type | Li-ion battery | |
| Operating Temperature | -10°C ~ +45°C | |
| Audio Power Output | 16Ω 1W | |
| Antenna Impedance | 50Ω | |
| Receiver | Sensitivity | (12dB SINAD) ≤-121dBm |
| Adjacent Channel | ≥70dB (25Khz) | |
| Selectivity | ≥60dB (12.5Khz) | |
| Spurious Emissions | ≤-57dB (25Khz) ≤-57dB (12.5Khz) | |
| Spurious Suppression | ≥70dB (25Khz) ≥70dB (12.5Khz) | |
| Signal-to-Noise Ratio | ≥45dB (25Khz) ≥40dB (12.5Khz) | |
| Audio Distortion | ≤5% | |
| Transmitter | TX power | High: 5W Middle: 4W Low: 1W Ultra power: 0.5W |
| Frequency Stability | ±2.5ppm | |
| Modulation Limits | ±5.0KHz@25KHz (25Khz) ±2.5KHz@12.5KHz (12.5Khz) | |
| Adjacent Channel Power | ≤70dB (25Khz) ≤60dB (12.5Khz) | |
| Signal-to-Noise Ratio | 25Khz: 45dBm; 12.5Khz: 40dBm | |
| 4FSK digital modulation | 12.5KHz (Data) 7K60FXD 12.5KHz (Data+Voice) 7K60FXE | |
| Audio Distortion | ≤5% | |
| Bit Error Rate | ≤3% |
* May differ, depending on the transceiver version and specific regulatory requirements.
Unpacking and Checking Equipment
Please check if there is any damage to the package when you receive it. Carefully unpack the transceiver. Recommend that you check the items listed in the following table. If any items are missing or damaged during shipment, please contact your dealer immediately.
Supplied Items:
| Radio Body | Antenna |
| Li-on Battery | Desktop Charger |
| Belt Clip | User's Manual |
| USB Charger Cable | Sling |
Battery Using Information
Battery packs are not charged when they are shipped. Charging them before use.
- Initially charging the battery pack after purchase or extended storage (longer than 2 months) will not bring the battery pack to its greatest capacity or its normal charge, which can be done only after repeated charging and discharging two or three times.
- Do not use the radio during charging. This will affect the normal charging of the battery pack, causing damage to the radio and accidents.
- After the battery pack is fully charged, please take it out of the charger base. Do not charge it again before the battery is completely running out. Or it will destroy the memory effect of the battery.
- Although using the right charging ways, the battery does not gain capacity or use time, which means the battery life is near the end, please change to a new battery pack.
- Please adopt the original factory battery pack and charger. They are available with your local agent.
- If you have questions about non-original factory battery packs and accessories, please do not use them. Or it will cause dangerous accidents.
Desktop Charger Charging instructions:
Use the 5V 1A charging adapter to charge the desktop charger.
- Plug the lithium battery or radio equipped with the lithium battery into the charger base, and ensure that the battery is in normal contact with the charging base.
- The green light is steady on when the charging base is empty; When the red light is on, charging begins; When full, the green light is steady on.
- After the lithium battery pack is fully charged, take it out of the charger.
Type-C Battery Charging instructions:
Use the 5V1A charging adapter to charge the battery directly, the LED light back of the battery will turn red when charging, and change to green when the battery is full.
Note: When the radio is charging, it is forbidden to transmit to avoid damage to the radio and accidental danger.
Getting Acquainted

| LCD Display Icon | LCD Display meaning |
 | Indicates received signal strength; |
 | Keyboard Lock. |
 | Battery Save. |
 | FM Radio is on. |
 | Voice broadcast and Key tone on. |
 | Display the available power. |
 | Display power level. |
 | Means current channel is wide bandwidth. |
 | Means current channel set with CTCSS tone. |
 | Shift Up Plus or Minus. |
 | VOX function is on. |
 | FM means the channel is analog mode, DMR means the channel is DMR mode. |
 | GPS function is on. |
 | Bluetooth function is on. |
Basic Operations
Clockwise to turn on the radio volume knob, there will be a "click" sound, a message sound, and the screen will show up welcome, while the LED indicator lights up.
Clockwise the volume knob to higher the volume or anticlockwise to lower.
Note: If turn off the voice broadcast and key beep function, there is no sound when power on the radio.
| KEYPAD FUNCTIONS | |
| MENU | Confirm button. |
| EXIT | Shortly press to switch VFO and channel mode. Long press to switch analog and digital under VFO mode. |
| *SCAN | Shortly press to switch Band A and Band B. Long press to begin or stop the scan function. |
| #LOCK | Shortly press to switch single band or dual band. Long press to lock or unlock the keyboard. |
Number key quick function
| MENU+1 | Backlight |
| MENU+2 | Save |
| MENU+3 | Step |
| MENU+4 | W/N |
| MENU+5 | Power |
| MENU+6 | Shift Up |
| MENU+7 | VOX |
| MENU+8 | Squelch |
| MENU+9 | Roger beep |
| MENU+0 | Key Beep |
Radio Menu Setting- Main Set
| NO. | Menu | Definition |
| 1 | Squelch | 0~9 levels (As usual, when you set a high squelch level, it can suppress noise, but at the same time it will weaken the signal. You can set the level according to the environment. When the signal is strong, to make listening clearer you can set a high level. But if the signal is weak, you can't set a high level, it will suppress the signal.) |
| 2 | Save | Power saving ratio (It indicates the battery saving rate, the highest rate is 14. the higher you select, the more power saved. at the same time, the receiving will be a little delayed, but normally we don't feel the delay.) |
| 3 | A/B Time | Set Band A or Band B switch time from 01 to 10S. |
| 4 | Double PTT | Choose to use double PTT or not. When double PTT is on, the side key 1 function will not work. |
| 5 | Bluetooth | Turn on or off the Bluetooth function. When connected to Bluetooth voice device, the Bluetooth icon will change to red. |
| 6 | BTRebind | Confirm Bluetooth. |
| 7 | Voice | Voice Announcements. |
| 8 | Zone Name | Turn on the function to display zone name. |
| 9 | VOX Delay | Set VOX delay time. |
| 10 | Mic Gain | Set the mic gain level. |
| 11 | Hang Up | Set the digital hang up time.
|
| 12 | Tx Channel | Busy channel settings. |
| 13 | Key Define | Key1 and Key2 short or long press functions as below: OFF, Power, Scan, radio (FM Radio), Wake up, Relay, Key Call 1-6, VOX, Kill (Remote kill), Zone Plus, Zone Minus, DMR slot, Promiscuous, Manual Dial, CH-Mode, Reverse, Bluetooth, 0.5W Power, FM Call, Voltage, NOAA, Analog Monitor, TX Digital Deviation, 1000Hz, 1450Hz, 1750Hz, 2100Hz; Key 1 or Key 2 long press extra functions as below: TX-DSW, M-MONI, Tx1000, Tx1450, Tx1750, Tx2100. Shortly press [*scan] button to switch SK1 or SK2 short or long press operation. |
| 14 | Backlight | Screen backlight time: 1s-120s; Cont: The backlight stays on. |
| 15 | Brightness | Level 1-10; The higher the number, the higher the brightness. |
| 16 | Key Beep | Keyboard tone. |
| 17 | Key Lock | Choose manual or auto Lock. |
| 18 | Lock Mode | Keyboard, keyboard+CH, keyboard+CH+PTT. |
| 19 | CH-Mode | Frequency: Frequency+Channel number. Name: Channel name. CH: Channel mode. |
| 20 | S/D Mode | Choose single band and dual band standby. |
| 21 | Scan Mode | Carrier, Time, Search. Time mode (TO): When the radio detects a signal it will stop scanning and will pause for 5 seconds before scanning again even if the signal is still present. Carrier mode (CO): When the radio detects a signal it will stop scanning and will stay on the same frequency and will resume scanning after 5 seconds when the signal ends. Search mode (SE): When the radio detects a signal, it will stop on that frequency and will not move on, even if the signal ends. Long press [*scan], it will begin to scan. Up and down key to change the scan direction, Press any key to exit scan. |
| 22 | Save CH | Storage channel: If displays "CH-01", means it already a storage channel. If display "002", means it can save it as a new channel. |
| 23 | Delete CH | Delete channel. Same operation as above. |
| 24 | Roger | Transmit end tone |
| 25 | Time | Set local time. Use *Scan button to switch year, month, day time. |
| 26 | Menu Exit time | Set menu exit time. |
| 27 | Miss Call Set | Choose to check the miss call or not. |
| 28 | Rx Info Bright Set | Choose if the led bright when receiving. |
| 29 | DMR TX Beep | Digital transmit beep ton |
| 30 | FM TX Beep | Analog transmit beep tone |
| 31 | Night Mode | Switch to night mode |
| 32 | Noise Tail | Repeater tail tone elimination. |
Channel settings (Band A Set and Band B Set)
| 1 | Zone | Choose the working zone. |
| 2 | GPS | Switch GPS on or off. (Only GPS version). |
| 3 | RxGPSInfo | Confirm if receive the GPS information. |
| 4 | TxGPSInfo | Confirm if transmit the GPS information. |
| 5 | Step | Frequency step choose for current channel. |
| 6 | Power | Select power level for current channel. |
| 7 | VOX | Turn ON or OFF VOX function. |
| 8 | Vox Level | Choose a VOX working level. |
| 9 | W/N | Choose bandwidth for working channel. |
| 10 | TOT | Time of timer. |
| 11 | DTMF Signal | Choose if use DTMF function. |
| 12 | C-CDC | Same RX and TX CTCSS tone, shortly press [*scan] button to switch CTCSS, DCS tone and inverse DCS tone. |
| 13 | R-CDC | Receive CTCSS tone. |
| 14 | T-CDC | Transmit CTCSS tone. |
| 15 | Ch. Name | Edit the channel name under channel mode. |
| 16 | Busy Lock | Transmit permission settings. Analog mode: Forbid=prohibit transmission; =Code represents prohibit transmission when the frequency and sub audio are the same; Wave represents prohibit transmission as long as there is a channel; Digital Mode: Impolite is impolite to transmit at any time. Police to CC: It is prohibited to transmit when the frequency and color code are the same; Polite to All: It is prohibited to transmit when all the frequency and color code, contacts are all the same; |
| 17 | Shift Up | Set an offset frequency direction for a repeater channel. |
| 18 | Shift Freq | Edit the offset frequency. |
| 19 | Color Code | Choose a color code for a digital channel. |
| 20 | Encrypt Type | Choose an encryption type: off, Normal, Enhanced. |
| 21 | Encrypt NO. | Choose an encryption system. |
| 22 | DMR Mode | Choose the working mode for the current digital channel. |
| 23 | DMR Slot | Choose DMR slot for current digital channel. |
| 24 | Promiscuous | Contacts mismatch can still be received in digital mode. |
| 25 | RxAll CC | Color code mismatch can also be received in digital mode |
| 26 | Radio ID | Choose a Radio ID for the working channel. |
| 27 | Contacts | Choose the communication contacts for the working digital channel. |
| 28 | GPS contacts | Choose the transmit and receive GPS contacts. |
| 29 | Rx List | Receive group list, add or remove contacts from the receive group list. |
Other Functions
Message
This menu is mainly set up with SMS related functions:
- Inbox: Display the received SMS content.
- Write: edit the message. Edit the text message, long press the [*scan] key to switch between uppercase and lowercase letters and numbers.
- Send Items: Outbox. Check the sent messages, and edit it to resend forward again.
- Quick text. Edit the quick message text in the CPS, and then choose them on the radio.
Call Log
Check Missed call, Answered call, Outgoing Call.
Contact: priority contact
It can save 5000 priority contacts on the radio.
- Enter the [Contacts] menu.
- Edit the ID, choose the contact type: group, private, or All.
- Name the contact. Long press[*SCAN] button to switch between ABC, abc, 123.
- Switch channel knob to edit next contact.
- In channel band setting, you can choose one of the contacts as your communication contact.
Radio ID
There can set 32 radio IDs. Edit 32 IDs, and then choose an using ID for a digital channel.
FM radio
32 FM Radio channels can be stored through computer program software;

- Press the [MENU] key to turn off the radio, or turn on the radio, press [EXIT] to exit.
- Long press the Exit button to switch between the VFO channel and MR storage channel in radio mode;
- Long press the [* Scan] button to save the radio frequency as the radio channel;
- Short press the [#] button to turn on or off DW. Dual Watch represents that in FM radio mode, if there is an intercom signal coming in, it will first switch to receiving the intercom signal. If the intercom signal disappears, it will return to the cashier signal. If turn on DW function, the FM radio frequency will display in the sub band as below shown.
Encryption
It support to set normal and 32 bit enhanced encryption in the CPS, but the encryption is only compatible with HD1. Encryption function only work on digital channel.
Version information
Display the Serial number and firmware version.
Detailed functional operations
Save an analog Channel
- Input 144.25000MHz on Band A or Band B;
- Press the Menu key to enter Band A or Band B Set;
- Set the C-CDC analog or digital sub audio. If the digital or received sub audio is different, then set C-CDC and R-CDC separately.
- After completing the above operations, it is currently a temporary channel that can be used for transmission and reception.
- Enter the Main Set– "Save CH" menu again, select an empty channel to save as a new channel.
Save a digital channel
- Input 144.25000MHz on Band A or Band B;
- Long press the Exit button to switch between FM and DMR mode.
- Select a Color Code;
- DMR Mode: Simplex;
- Choose DMR slot;
- Select the Radio ID to be used for the current channel;
- Select the call contact for the current channel. Return to the main interface to edit a temporary channel for communication;
- Enter the Main Set– "Save CH" menu again, select an empty channel to save as new channel.
Make an analog repeater channel
- In VFO mode, input a receiving frequency that is the same as the repeater transmission frequency;
- For example, 439.2000MHz is the transmission frequency of the repeater, it will be the reception frequency of the radio;
- Enter Band A or B to set the frequency difference direction, Shift Up choose "Minus", and Shift Freq edit 08.0000, The transmission frequency of the radio is 439.2000-8.0000 MHz, which is 431.20000 MHz;
![]()
- The repeater generally has sub tone settings, Set the same CTCSS tone with the repeater on the radio;
- After completing the above operations, the standby interface of the radio will display 439.2000Mhz;
- It will display 431.20000Mhz and the CTCSS when transmitting.

Make a digital repeater channel
- In VFO mode, input a receiving frequency that is the same as the repeater transmission frequency;
- For example, 439.2000MHz is the transmission frequency of the repeater, it will be the reception frequency of the radio;
- Enter Band A or B to set the frequency difference direction, Shift Up choose "Minus", and Shift Freq edit 08.0000, The transmission frequency of the radio is 439.2000-8.0000 MHz, which is 431.20000 MHz;
![]()
- Choose a same color code with the repeater color code on the radio Band A or B set.
- Choose DMR mode "repeater" for a repeater channel.
- Choose a communication contact for this repeater channel;
- After completing the above operations, back to the standby interface. It will display the frequency 439.2000Mhz, and DMR icon.

Frequency Scan and channel Scan operation
Frequency Scan

- In the CPS, you can set the start and end scan frequency. When it will scan the frequency range according to your setting.
- Under VFO mode, shortly press [*SCAN] button to begin frequency scan, shortly press [*SCAN] will stop the frequency scan.
Channel scan
- The priority channel can be set in the CPS as above picture shown.
- When operate channel scan, if choose a destination zone, it will scan all the channels in that zone, if choose "ALL Channels" it will scan every channel you programmed for the radio.
Emergency Alarm operation
Choose remote alarm or local alarm in the CPS. the top orange key is default to emergency alarm key.
Shortly press to start emergency function, press again to stop alarm.
Import 500.000 DMR contacts operation
The HD2 supports to upload 500.000 DMR contacts into the radio. Download the digital contacts from Ailunce website https://www.ailunce.com/ResourceCenter/

Upload the contacts CSV sheet to the radio via the CPS.

It will display the transmitter information as below picture shown:

Promiscuous Feature
When work on digital channel, it need to match the same contact and color code. But on HD2, it has contact and color code mix-match.
- The 24th menu [Promiscuous] of Band A/B Set. It means it will receive all the different contacts call in digital channel.
- The 25th menu [RxALLCC] of Band A/B set, it means it will receive all the different color code in digital channel.
- So if turn on [Promiscuous] [RxALLCC] for a digital channel, it will receive signals from other digital channel with different contacts and color code.
GPS Function
GPS function only work on digital channel.
- Basic on one DMR channel, Menu-Band A/B set-GPS: ON/OFF. Turn on the GPS.
![]()
- Go back to turn on" RxGPSInfo" and "TXGPSInfo".
![]()
- Band A/B Set 28th menu: GPS Contacts. choose one Priority group contacts or private contact both OK.
![]()
- All the settings are finished. Next step is to get outside until the GPS icon is activated.
![]()
- Check local radio GPS information under the 9th main menu.
![]()
- When talk to other HD1 or HD2, and they will transmit their GPS information together with the voice data, then it will display their GPS information after voice signal.
![]()


Bluetooth Using
- Turn on the Bluetooth function firstly. The 5th menu of Main Set.
![]()
- Pair the Bluetooth earpiece.

- Press and hold the on/off button for 5 seconds will enter into pairing mode, and you will hear a "di" voice.
- Confirm "BTRebind" the first time connect the Bluetooth earpiece.
- Waiting for several seconds, the radio Bluetooth will be connected to the Bluetooth earpiece.
Next time if you turn on the radio and earpiece, they will pair automatically within several seconds. - If pairing time out of 1 min, please clear the connection memory of the earpiece as follows operations: Press the PTT button 4 times in a row with a Beep sound to clear the Bluetooth connection memory in the power-on state, and then pair the radio and Bluetooth earpiece again.


Update firmware upgrade operation
The firmware can fix bugs found when used, and new features can be added.
There will be two different version firmware, GPS or Non-GPS. So before upgrade the firmware, please double check the radio with GPS or Non-GPS, and use the correct firmware.
Upgrade operation:
- Enter the DFU mode: Press the PTT and SK1 together, and then turn on the radio. The led light red as below.
![]()
- Open the firmware software.
![]()
- Connect the programming cable to the computer, and then choose the correct device com port, Click Connect, then Update. it will display the upgrading progress bar.
![]()
- After 1 min, it will finish the upgrade operation. It will "Upgrade Successfully".
![]()


Weather channel receiving operation
(only use in American)
There are ten weather channels for monitoring the National Oceanographic and Atmospheric Administration (NOAA) weather broadcasts.
Set a side key short or long press to NOAA function. It will display NOAA channel at the sub band.
It will monitor the current NOAA signal. The NOAA channel frequency as below sheet:

| Channel No. | Frequency (MHz) |
| NOAA-1 | 162.550Mhz |
| NOAA-2 | 162.400Mhz |
| NOAA-3 | 162.475Mhz |
| NOAA-4 | 162.425Mhz |
| NOAA-5 | 162.450Mhz |
| NOAA-6 | 162.500Mhz |
| NOAA-7 | 162.525Mhz |
| NOAA-8 | 161.650Mhz |
| NOAA-9 | 161.750Mhz |
| NOAA-10 | 161.775Mhz |
| NOAA-11 | 162.000Mhz |
Troubleshooting
| No power |
|
| Battery lasts a short time after charge |
|
| Can not talk to other members of your group. |
|
| Hearing other conversation on a channel (not group members*) |
|
| Radio keep beeping |
|
| Cant power on the radio after update firmware. |
|
RF Safety
This two-way radio uses electromagnetic energy in the radio frequency (RF) spectrum to provide communications between two or more users over a distance. RF energy, which when used improperly, can cause biological damage. Please refer to the following websites for more information on what RF energy exposure is and how to control your exposure to assure compliance with established RF exposure limits: http://www.who.int/en/
Transmit no more than the rated duty factor 50% of the time. Transmitting necessary information or less, is important because the radio generates measurable RF energy exposure only when transmitting in terms of measuring for standards compliance. For users who wish to further reduce their exposure, some effective measures to reduce RF exposure include:
- Reduce the amount of time spent using your wireless device.
- Use a speakerphone, earpiece, headset, or other hands-free accessory to reduce proximity to the head (and thus head exposure). While wired earpieces may conduct some energy to the head and wireless earpieces also emit a small amount of RF energy, both wired and wireless earpieces remove the greatest source of RF energy (handheld device) from proximity to the head and thus can greatly reduce total exposure to the head.
- Increase the distance between wireless devices and your body.
- This radio is designed for and classified as "Occupational/Controlled Use Only". Occupational/Controlled environments are defined as locations where there is exposure that may be incurred by people who are aware of the potential of exposure, for example, as a result of employment or occupation. It means a radio must be used only by individuals aware of the hazards, and the ways to minimize such hazards; Not intended for use in a General population/uncontrolled environment.
- Hand-held Mode
To control your exposure and ensure compliance with the controlled environment exposure limits, always adhere to the following procedure:
![]()
- To receive calls, release the PTT button.
- To transmit (talk), press the Push-to-Talk (PTT) button in front of the face.
- Hold the radio in a vertical position with the microphone (and other parts of the radio including the antenna) at least one inch (2.5 centimeters) away from the nose or lips.

Electromagnetic Interference/Compatibility
Nearly every electronic device is susceptible to electromagnetic interference (EMI) if inadequately shielded, designed, or otherwise configured for electromagnetic compatibility. During transmissions, your radio generates RF energy that can possibly cause interference with other devices or systems. To avoid such interference, turn off the radio in areas where signs are posted to do so, such as hospitals or healthcare facilities.
- Persons with pacemakers, implantable cardioverter defibrillators (ICDs) or other active implantable medical devices should
- Consult with their physicians regarding the potential risk of interference from radio frequency transmitters, such as portable radios (poorly shielded medical devices may be more susceptible to interference).
- Turn the radio OFF immediately if there is any reason to suspect that interference is taking place.
- Do not carry the radio in a chest pocket or near the implantation site, and carry or use the radio on the opposite side of the body from the implantable device to minimize the potential for interference. Hearing Aids: Some digital wireless radios may interfere with some hearing aids. In the event of such interference, you may want to consult your hearing aid manufacturer to discuss alternatives.
- Other Medical Devices: If you use any other personal medical device, consult the manufacturer of your device to determine if it is adequately shielded from RF energy. Your physician may be able to assist you in obtaining this information.

MODIFICATION OF THIS DEVICE TO RECEIVE CELLULAR RADIOTELEPHONE SERVICE SIGNALS IS PROHIBITED UNDER FCC RULES AND FEDERAL LAW.
Turn off your radio in the following conditions:
- Turn off your radio prior to entering any area with a potentially hazardous or explosive atmosphere. Only radio types that are especially qualified should be used in such areas as "Intrinsically Safe".
Note: the areas with potentially explosive atmosphere referred to above include blasting caps, blasting areas, inflammable gas, dust particles, metallic powders, grain powders, fueling areas such as below decks on boats, fuel or chemical transfer or storage facilities, areas where the air contains chemicals or particles (such as grain, dust or metal powders) and any other area where you would normally be advised to turn off your vehicle engine. Areas with potentially explosive atmospheres are often – but not always posted.
Use of Communication Devices While Driving
- Always check the laws and regulations on the use of radios in the areas where you drive. Use of Communication Devices, for example, mobile radio, may not be allowed.
- Give full attention to driving and to the road.
- Use hands-free operation, if available.
- Pull off the road and park before making or answering a call, if driving conditions or regulations so require.
- Do not place a portable radio in the area over an air bag or in the airbag deployment area. The radio may be propelled with great force and cause serious injury to occupants of the vehicle when the airbag inflates.
Protect your hearing
- Use the lowest volume necessary to do your job. Turn up the volume only if you are in noisy surroundings.
- Limit the amount of time you use headsets or earpieces at high volume.
- When using the radio without a headset or earpiece, do not place the radio's speaker directly against your ear.
- Use carefully with the earphone maybe possible excessive sound pressure from earphones and headphones can cause hearing loss.
![]()
Exposure to loud noises from any source for extended periods of time may temporarily or permanently affect your hearing. The louder the radio's volume, the less time is required before your hearing could be affected. Hearing damage from loud noise is sometimes undetectable at first and can have a cumulative effect.

Batteries Safety
![]()
KEEP NEW OR OLD USED BATTERIES OUT OF REACH OF CHILDREN.- In the event of a battery leaking, do not allow the liquid to come into contact with the skin or eyes. If contact has been made, wash the affected area with copious amounts of water and seek medical advice immediately.
- If a radio or a battery has been submerged in water, please dry and clean it before use. Do not dry the radio or battery with an appliance or heat source, such as a hair dryer or microwave oven. If the radio has been submersed in a corrosive substance (e.g. saltwater), rinse the radio and battery in fresh water, then dry them.
- Since batteries are sensitive to high temperatures when storing them, keep them in a cool and dry place. The recommended temperature should be between +10 ℃ and +25℃ and never exceed +30℃. Batteries should therefore not be stored next to radiators or boilers nor in direct sunlight. Extremes of humidity (below 35% and above 95% relative humidity for sustained periods should be avoided since they are detrimental to both batteries and packing. Although the storage life of batteries at room temperature is good, storage is improved at lower temperatures provided special precautions are taken. Also, accelerated warming is harmful. Leaving a battery in an extremely high temperature surrounding environment that can result in an explosion or the leakage of flammable liquid or gas;
A battery subjected to extremely low air pressure may result in an explosion or the leakage of flammable liquid or gas. - The plug of the adapter is considered a disconnect device. The socket-outlet shall be installed near the equipment and shall be easily accessible.
Product safety and RF exposure for hand held
 Before using this two way radio, please read the manual which contains important operating instructions for safe usage, RF Energy Awareness, control information and operational instructions for compliance with RF Energy Exposure limits in applicable national and international standards. also read the operational instructions for safe use.
Documents / Resources
References
Download manual
Here you can download full pdf version of manual, it may contain additional safety instructions, warranty information, FCC rules, etc.
Advertisement


Need help?
Do you have a question about the Ailunce HD2 and is the answer not in the manual?
Questions and answers