Table of Contents
Advertisement
Available languages
Available languages
Advertisement
Chapters
Table of Contents

Related Manuals for AKG PERCEPTION 820


Summary of Contents for AKG PERCEPTION 820
- Page 1 PERCEPTION 820 TUBE USER INSTRUCTIONS ..Please read the manual before using the equipment! MODE D’EMPLOI ....Veuillez lire cette notice avant d’utiliser le système! p.
-
Page 2: Table Of Contents
4.4.11 Grand and Upright Pianos ...14 4.4.12 Drums ...15 5 Cleaning ...16 6 Troubleshooting ...16 6.1 Replacing the Fuse ...16 6.2 Solving Problems...17 7 Specifications...18 7.1 Microphone...18 7.2 Remote Control Unit ...18 Frequency Response and Polar Patterns...19 Conformity...38 Page PERCEPTION 820 TUBE... -
Page 3: Safety And Environment
2. The packaging of the equipment is recyclable. Dispose of the packaging in an appropriate container provided by the local waste collection/recycling entity and observe all local legislation relating to waste disposal and recycling. PERCEPTION 820 TUBE 1 Safety and Environment 1.1 Symbols Used 1.2 Safety Instructions... -
Page 4: Description
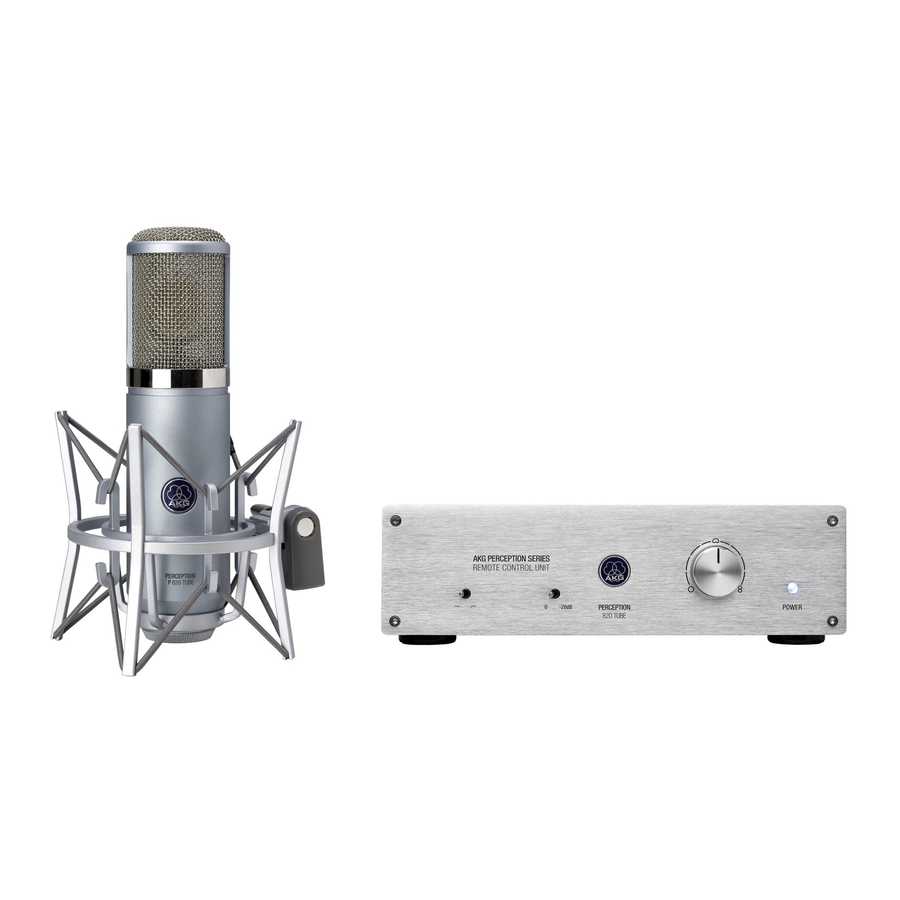
Your dealer will be glad to help. 2.4 Microphone The PERCEPTION 820 TUBE is a high quality, true condenser microphone with a 1-inch dual large-diaphragm transducer. What sets it apart from other condenser microphones is that it uses a vacuum-tube pream- plifier. -
Page 5: Front Panel
H INPUT: 7-pin female XLR connector for connecting the dedicated audio/control cable for the microphone. OUTPUT: This balanced 3-pin XLR connector provides the microphone output signal. PERCEPTION 820 TUBE 2 Description 2.5.1 Front Panel Fig. 1: Controls on the Remote Control Unit front panel. - Page 6 J GROUND LIFT: This pushbutton switch allows you to remove hum caused by ground loops. To open the chassis ground connection, press the GROUND LIFT button OUT (“LIFT” po- sition). To restore the chassis ground connection, press the GROUND LIFT button IN (“GROUND” position). PERCEPTION 820 TUBE...
-
Page 7: Setting Up
• You may not get the full splendor of the tube sound before the electrodes have reached the required operating temperature. Therefore, we recommend powering up at least PERCEPTION 820 TUBE 3 Setting Up Power cord... -
Page 8: Powering Down
The front panel POWER LED will go out. 2. Wait for five minutes to allow the tube to cool down to room temperature before mov- ing the microphone. A hot tube will be more susceptible to mechanical damage than a cold one. PERCEPTION 820 TUBE... -
Page 9: Using The Microphone
Using vacuum-tube electronics and a large-diaphragm transducer, the PERCEPTION 820 TUBE is suited for a wide range of applications. It will add the typical warmth and richness tube microphones are famous for to female and male voices as well as many instruments. -
Page 10: Preattenuation Pad
4 Using the Microphone 4.3 Selecting Each of the PERCEPTION 820 TUBE’s selectable polar patterns is virtually frequency inde- Polar Patterns pendent so that reflected sound, too will be reproduced accurately and uncolored. • Omnidirectional (left-hand setting): This is the preferred setting for “all around the mic”... -
Page 11: Trumpet, Trombone
• In rooms with good acoustics, a pair of PERCEPTION 820 TUBEs will often do the trick. Set each microphone to cardioid ( Use an optional H 50 stereo bar to mount the two mi- crophones on a stand. • Place the stereo pair about 10 feet (3 m) in front of the choir, about 8 feet (2.4 m) -
Page 12: Electric Guitar/Bass
(1.8 to 2.5 m) above the floor. Viola: • Set the polar pattern selector to cardioid ( ) or omnidirectional • Direct the microphone to the f holes from a height of 7 to 10 feet (2.2 to 3 m) above the floor. PERCEPTION 820 TUBE... -
Page 13: Double Bass, Cello
• Set the level of the close-in microphone approx. 20 dB lower than the distant mic level. We recommend using two micro- phones: • Place one PERCEPTION 820 TUBE 8 to 12 inches (20 to 30 cm) away from the guitar and aim at the sound hole. -
Page 14: Clarinet
2 to 3 1/2 feet (50 cm to 1 m). Grand piano: • Aim a single PERCEPTION 820 TUBE or a stereo pair (see section 4.4.2 Choir) at the middle strings from a height of 5 to 7 feet (1.5 to 2 m). -
Page 15: Drums
“peek into the instru- ment” from above. Overhead miking: Refer to fig. 19. • Place two PERCEPTION 820 TUBEs about 31 inches to 4 feet (80 to 120 cm) above the drummer's head. • Set each microphone to car-... -
Page 16: Cleaning
1. Use a flat-blade screwdriver to open the fuse compartment lid. 2. Remove the blown fuse. 3. Insert a new fuse of the same type and rating (125 mA/250 V slow-blow). 4. Close the fuse compartment lid. PERCEPTION 820 TUBE... -
Page 17: Solving Problems
6.2 Solving Problems Problem No sound. Distortion. Crackling noises or low output. PERCEPTION 820 TUBE 6 Troubleshooting Possible Cause 1. Power to mixer and/or recording device is off. 2. Channel or master fader on mixer or recording device is at zero. -
Page 18: Specifications
870 g / 1.9 lbs. dedicated 7-pin female XLR connector standard 3-pin male XLR connector, balanced, pin 2 hot 9-position detented rotary switch 2-position toggle switch 2-position toggle switch 210-240 VAC or 110-120 VAC, selectable 125 mA / 250 V slow-blow PERCEPTION 820 TUBE... -
Page 19: Frequency Response And Polar Patterns
7 Specifications Frequency Response Polar Diagram Omni- directional Cardioid Figure Eight PERCEPTION 820 TUBE... - Page 20 4.4.12 Batterie...33 5 Nettoyage ...34 6 Dépannage ...34 6.1 Remplacement du fusible ...34 6.2 Solutions aux problèmes ...35 7 Caractéristiques techniques...36 7.1 Microphone...36 7.2 Unité de commande à distance ...36 Réponse en fréquence et directivité...37 Conformité ...38 Page PERCEPTION 820 TUBE...
-
Page 21: Symboles Utilisés
2. L’emballage de l’appareil est recyclable. Jetez-le dans un container prévu à cet effet par la dé- chetterie/la société de recyclage locale et respectez la législation locale en matière d’élimi- nation des déchets et de recyclage. PERCEPTION 820 TUBE 1.1 Symboles utilisés 1.2 Consignes de sécurité... -
Page 22: Description
2.4 Microphone Le PERCEPTION 820 TUBE est un microphone à condensateur de grande qualité avec un transducteur à double membrane d’un diamètre de 2,5 cm. Ce qui le distingue des autres microphones à condensateur est le fait qu’il utilise un pré- amplificateur à... -
Page 23: Face Avant
G Sélecteur de tension : il sert à régler la tension d’entrée à une valeur comprise entre 210 et 240 V c.a. (position « 210-240V ») ou 110 et 120 V c.a. (position « 110-120V »). PERCEPTION 820 TUBE 2 Description 2.5.1 Face avant... - Page 24 Pour couper la connexion du boîtier à la terre, appuyez sur le bouton GROUND LIFT pour le mettre en position « LIFT ». Pour rétablir la connexion du boîtier à la terre, appuyez sur le bouton GROUND LIFT pour le mettre en position « GROUND ». PERCEPTION 820 TUBE...
-
Page 25: Remarque Importante
Après 10 secondes environ, la tension de chauffage aura atteint le niveau requis et la LED POWER sur la face avant s’éclairera. Environ 20 secondes plus tard, le microphone sera prêt à fonctionner. PERCEPTION 820 TUBE 3 Réglage Cordon secteur... -
Page 26: Mise Hors Tension
à distance. La LED POWER sur la face avant s’éteindra. 2. Attendez cinq minutes pour permettre au tube de refroidir avant d’enlever le micro- phone. Un tube chaud sera plus sensible aux chocs mécaniques qu’un tube froid. PERCEPTION 820 TUBE... -
Page 27: Utilisation Du Microphone
Utilisant un tube à vide et un transducteur à grande membrane, le PERCEPTION 820 TUBE convient pour toute une série d’applications. Il ajoutera à des voix féminines et masculines ainsi qu’à de nombreux instruments la chaleur et la richesse typiques qui font la réputation des microphones à... -
Page 28: Sélection De La Directivité
4 Utilisation du microphone 4.3 Sélection Chaque directivité pouvant être sélectionnée sur le microphone PERCEPTION 820 TUBE est de la directivité virtuellement indépendante de la fréquence si bien que les sons renvoyés sont eux aussi re- produits avec précision et sans être faussés. -
Page 29: Chorale/Choristes
Sélectionnez la directivité cardioïde ( ) pour chaque PERCEPTION 820 TUBE. Positionnez chaque micro- phone à environ 1,5 m de- vant le groupe de voix respectif et à une hauteur d’environ 1,8 m au-dessus du sol. Placez chaque microphone au centre de son groupe de voix. -
Page 30: Trompette, Trombone
à 2,5 m au-dessus du sol. Alto : • Réglez le sélecteur de directivité sur cardioïde ( ) ou omnidi- rectionnelle ( • Dirigez le microphone vers les ouïes f, à une hauteur de 2,2 m à 3 m au-dessus du sol. PERCEPTION 820 TUBE... -
Page 31: Contrebasse, Violoncelle
Nous recommandons l’utilisation de deux microphones. • Placez, à une distance de 20 à 30 cm de la guitare, un micro- phone PERCEPTION 820 TUBE dirigé vers la rosace. • Placez en outre, à une distance d’environ 1 mètre, un micro- phone à... -
Page 32: Flûte Traversière
• Pour réduire les bruits de clefs, placez le microphone légèrement en biais par rapport à l’instru- ment. • Dirigez le microphone vers le mi- lieu de l’instrument, à une dis- tance d’environ 50 cm à 1 m. PERCEPTION 820 TUBE... -
Page 33: Piano À Queue/Piano Droit
Cymbales : Pour une prise de son de cymbales sur une piste séparée, procédez de la manière suivante : PERCEPTION 820 TUBE 4 Utilisation du microphone 4.4.11 Piano à queue/ Piano droit Fig. 17 : Piano à queue Fig. 18 : Piano droit 4.4.12 Batterie... -
Page 34: Nettoyage
1. Utilisez un tournevis plat pour ouvrir le couvercle du compartiment des fusibles. 2. Retirez le fusible qui a sauté. 3. Insérez un nouveau fusible du même type et du même calibre (125 mA/250 V, à action retardée). 4. Fermez le couvercle du compartiment des fusibles. PERCEPTION 820 TUBE... -
Page 35: Solutions Aux Problèmes
6.2 Solutions aux problèmes Problème Pas de son Distorsions Grésillements ou faible niveau de sortie PERCEPTION 820 TUBE Cause possible 1. La console de mixage et/ou le dis- positif d’enregistrement n’est pas sous tension. 2. Le fader de voie ou fader master de la console de mixage ou du dis- positif d’enregistrement est sur... -
Page 36: Caractéristiques Techniques
XLR mâle 3 broches standard, équilibré bouton rond à crans, 9 positions commutateur à bascule, 2 positions commutateur à bascule, 2 positions 210-240 V c.a. ou 110-120 V c.a., sélectionnable 125 mA / 250 V, à action retardée PERCEPTION 820 TUBE... -
Page 37: Réponse En Fréquence Et Directivité
7 Caractéristiques techniques Réponse en fréquence Diagramme polaire Omnidirec- tionnnelle Cardioïde Huit PERCEPTION 820 TUBE... -
Page 38: Conformity
Esta última está disponible en el sitio http://www.akg.com o puede ser solicitada al co- rreo electrónico sales@akg.com. Português Este produto corresponde às normas citadas na declaração de conformidade, que pode pedir na nossa página da web http://www.akg.com, ou enviando-nos um email para sales@akg.com. PERCEPTION 820 TUBE... - Page 39 Notes | Notes PERCEPTION 820 TUBE...
- Page 40 Micrófonos · Auriculares · Micrófonos inalámbricos · Auriculares inalámbricos · Auriculares con micrófono · Componentes acústicos Microfones · Fones de ouvido · Microfones s/fios · Fones de ouvido s/fios · Microfones de cabeça · Componentes acústicos AKG Acoustics GmbH Lemböckgasse 21–25, A-1230 Vienna/AUSTRIA, phone: (+43-1) 86654-0* e-mail: sales@akg.com...
Need help?
Do you have a question about the PERCEPTION 820 and is the answer not in the manual?
Questions and answers