Table of Contents
Advertisement
Available languages
Available languages
Owner's Manual
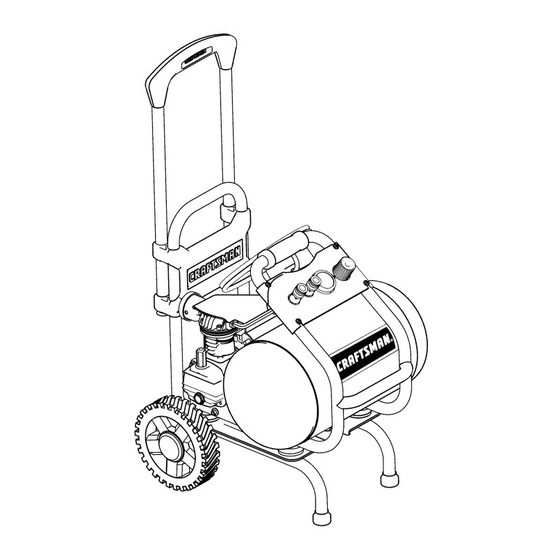
AiR COMPRESSOR
5-gallon
1HP
Oil-Lubricated,
Direct Drive
Model No. 921.1 66360
FILL WITH OIL BEFORE
USE.
CAUTION:
Before using this product,
read this manual
and follow
all its Safety Rules and
Operating Instructions.
,, Safety Instructions
,, Installation
& Assembly
,, Operating
Procedures
,, Maintenance
& Storage
,, Troubleshooting
Guide
,, Parts List
,, Espaffoi,
p. 13
Sears,
Roebuck
and Co., Hoffman
Estates,
IL 60179
U.S.A.
WWW.Seal_S.com
12/14/2006
Part No. E102348
Advertisement
Chapters
Table of Contents

Related Manuals for Craftsman 16636 - 5 Gal. Air Compressor


Summary of Contents for Craftsman 16636 - 5 Gal. Air Compressor
- Page 1 Owner's Manual AiR COMPRESSOR 5-gallon Oil-Lubricated, Direct Drive Model No. 921.1 66360 FILL WITH OIL BEFORE USE. CAUTION: ,, Safety Instructions Before using this product, ,, Installation & Assembly read this manual and follow ,, Operating Procedures all its Safety Rules and ,, Maintenance &...
-
Page 2: Table Of Contents
..............ONE YEAR FULL WARRANTY If this Craftsman product fails due to a defect in material or workmanship within one year from the date of purchase, return it to any Sears store, Sears Service Center, or other Craftsman outlet for free repair (or replacement if repair proves impossible). -
Page 3: Safety Symbols
Safety Symbols The information listed below should be read and understood by the operator. This information is given to protect the user while operating and storing the air compressor. We utilize the symbols below to allow the reader to recognize important information about their safety. -
Page 4: Specifications
Important Safety Instructions & Guidelines Risk of Breathing Avoid using the air compressor in confined areas. Always have adequate space (12 inches) on all sides of the air compressor. Also keep children, pets, and others out of the area of operation. This air compressor does not provide breathable air for anyone or any auxiliary breathing device. -
Page 5: Parts & Features
Parts & Features See figures below for reference. Tank Pressure Gauge When the pump is not in operation the valve closes t Indicates the reserve air pressure in the tank. retain air pressure inside the tank. An internal Check Valve component. -
Page 6: Installation & Assembly
Installation & Assembly all local codes and ordinances. Check with a qualified electrician or service personnel if these instructions are not completely understood or if in doubt as to whether the tool The air compressor should be turned off, unplugged from is properly grounded. -
Page 7: Operating Procedures
Operating Procedures Daily Start=Up Procedures 6. Plug the power cord into the proper receptacle. 1. Set the Auto-On/Off lever to the Off position. 7. Turn the Auto-On/Off lever to the On-Auto position and 2. Inspect the air compressor, air hose, and any the compressor will start and build air pressure in the accessories/tools being used for damage or obstruction. -
Page 8: Detaching Unit From Dolly
Detaching unit from dolly Do not use the dolly for any other means other than transporting this air compressor. Do not move air compressor/dolly combo without tightening the knob that safely secures the compressor to the dolly. Removing the air compressor from the dolly: 1. -
Page 9: Troubleshooting Guide
Troubleshooting Guide The air compressor should be turned off and unplugged from the power source before any maintenance is performed as well as the air bled from the tank and the unit allowed time to cool. Personal injuries could occur from moving parts, electrical sources, compressed air, or hot surfaces. PROBLEM POSSIBLE CORRECTION Air leaks at the check valve... -
Page 10: Exploded View
Air Compressor Model 921.166360 Exploded View _/18 .. - Page 11 Air Compressor Model 921.166360 E×ploded View ®...
-
Page 12: Parts List
Air Compressor Model 921.166360 Parts List Reference Kit Part Description Quantity Reference Kit Part Description Quantity Number Number Number Number Number Number Intake, Filter Housing/Cover, Seal,Oil SightGauge 1/2 NPT(Kunsan) Gauge,Oil Sight E100435 Filter Element(Kunsan) Baffle,Rubber Head BoltM6 x 1.0x 30 Nut,M8 x 1.25 Lock Washer6 mm Washer,Tooth Lock,5/16"... -
Page 13: Parts List
Air Compressor Model 921.166360 Parts List Reference Kit Part Description Quantity Reference Kit Part Description Quantity Number Number Number Number Number Number E102197 OutletTube Male/Female (SS Flex) 1 E102362 Lock Pin Clip Bolt M8 x 1.2x 40 mm CraftsmanPlate FrameAnd Tank E101377 RubberIsolator Flat WasherM8 x 25 mm... - Page 15 Manual de COMPRESOR DE AIRE 18.9 iitros De impuisi6n directa, iubricada con aceite # de Modeio 921.1 66360 DE USARLO. LLENAR CON ACEITE ANTES PRECAUCION: Antes de usar o Instrucciones y pautas de seguridad importantes el producto, lea este manual y siga Instalaci6n y ensamblaje sus reglas e instrucciones...
- Page 16 COMPLETA DE UN ANO Si este compresor de aire Craftsman Ilega a fallar debido a defectos de materiales o de mano de obra dentro de un a_o desde la fecha de compra, devuelvalo a cualquier tienda Sears, un centro de servicio Sears u otro punto de venta Craftsman para obtener una reparaci6n sin ningOn cargo (o un reemplazo, si no se puede reparar).
- Page 17 Sirnbolos cornunes de seguridad El operador debe leer y entender la informacidn descrita a continuacidn. Esta informaci6n se ofrece para proteger al usuario al operar y almacenar el compresor de aire. Los simbolos siguientes son los que se utilizan para indicar al lector informaci6n que es importante para su seguridad.
-
Page 18: Lnstrucciones Y Pautas De Seguridad Importantes
Instrucciones y pautas de seguridad importantes Evite utilizar el compresor de aire en _.reas encerradas. Siempre tenga un espacio Riesgo para la libre adecuado (30 cm.) en todos los lados del compresor. Tambien mantenga fuera respiraci6n del Area de operaci6n alas mascotas, niRos y otras personas. Este compresor de aire no provee aire que pueda ser respirado ni empleado con un dispositivo respiratorio auxiliar. -
Page 19: Partes Y Caracteristicas
Partes y caracteristicas Como referencia, vea las figuras abajo. V&lvula de retenci6n Man6metro de presi6n del tanque Cuando la bomba no est#. en operaci6n, esta vb.lvula lndica la presi6n de ]a reserva de se cierra para retener la presi6n de aire dentro del aire del tanque. - Page 20 Instalaci6n y ensamblaje escape para la corriente electrica. Este producto cuenta con un cable que tiene un alambre de tierra y una clavija Antes de darle cualquier tipo de mantenimiento al compresor con terminal de tierra (ver la figura a continuaci6n). de aire, se debe apagar y desconectar de la fuente de clavija debe enchufarse...
-
Page 21: Lnstalaci6N Y Ensamblaje
Procedirnientos de operaci6n Procedimiento diario de arranque 6. Enchufe el cable de corriente en un tomacorriente 1. Ponga el interruptor Auto-On/Often la posiciOn de apagado (Oft). apropiado. 2. Verifique que el compresor del aire, la manguera de 7. Mueva el interruptor Auto-On/Oft a la posiciOn de aire y todos los accesorios/herramientas... -
Page 22: Para Quitar La Unidad De La Carretilla
Para quitar la unidad de la carretilla No utilice la carretilla con otros fines que no sean los adecuados para transportar este compresor de aire. No mueva el ensamble compresor/carretilla sin apretar el pomo que fija con seguridad el compresor sobre la carretilla. Para quitar el compresor de la carretilla: 1. -
Page 23: Diagn6Stico Y Correcci6N De Fallas
Diagn6stico y correcci6n de fallas Antes de dar mantenimiento al equipo, se debe apagar y desconectar del tomacorriente, asi como purgar el aire del tanque y permitir que la unidad se enfrie. Las partes en movimiento, las fuentes electricas, el aire comprimido y las superficies calientes pueden provocar lesiones. PROBLEMA POSIBLE CORRECCION Fuga de aire en la vb.lvula de... -
Page 24: Vista Esquembtica
Compresor de aire = lVlodelo 921.16636 Vista esquembtica _/18... - Page 25 Compresor de aire = lVlodelo 921.16636 Vista esquem_tica ®...
-
Page 26: Lista De Las Piezas
Compresor de aire = lVlodelo 921.16636 Lista de las piezas I # de . #.de # de descripci6, de parte cant. # de . #.de # de descripci6nde parte cant. I reTerencla Kll pane Carter / tapa defiltro- entrada d elaire, Junta,visor del nivelde aceite 1/2 NPT(Kunsan) Visordel nivelde aceite... - Page 27 Compresor de aire = lVlodelo 921.16636 Lista de las piezas I ,# de . #,.de # de descripci6nde parte cant. # de . #,.de # de descripci6nde parte cant. 1 reTerencla Kll pane reTerencla Kll pane E102197 Tubo de salida, Macho/Hembra E102362 Pasadordefijaci6n (Aceroinox.
- Page 28 Your Home For repair - in your home - of all major brand appliances, lawn and garden equipment, or heating and cooling systems, no matter made it, no matter who sold For the replacement parts, accessories owner's manuals that you need to do-it-yourself. For Sears professional installation of home appliances...
Need help?
Do you have a question about the 16636 - 5 Gal. Air Compressor and is the answer not in the manual?
Questions and answers