Table of Contents
Advertisement
Available languages
Available languages
Owner's
Manual
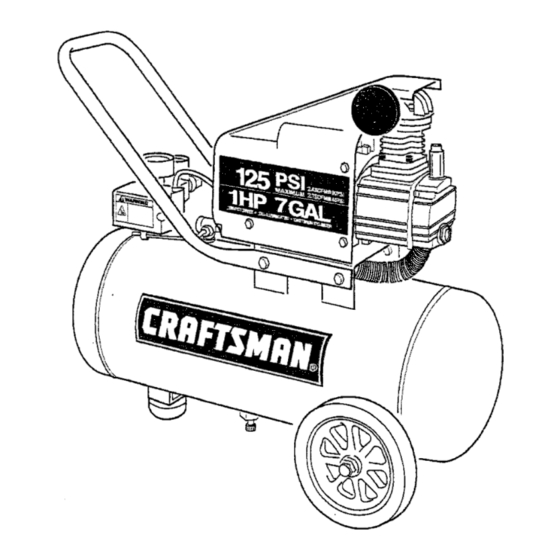
AIR COMPRESSOR
7-gallon
1 HP
Oil Lubricated
Model No. 921.1
CAUTION:
Before using this product,
read this manual and follow
all its Safety Rules and
Operating Instructions.
• Safety Instructions
• Installation & Operation
• Maintenance & Storage
• Troubleshooting
Guide
• Parts List
• EspaSol,
p. 10
Sears,
Roebuck
and Co., Hoffman
Estates,
IL 60179
U.S.A.
www sears
corn
5/2C_2005
Pam NO E101434
Advertisement
Table of Contents

Related Manuals for Craftsman 921.166390


Summary of Contents for Craftsman 921.166390
- Page 1 Owner's Manual AIR COMPRESSOR 7-gallon 1 HP Oil Lubricated Model No. 921.1 CAUTION: Before using this product, read this manual and follow all its Safety Rules and Operating Instructions. Sears, Roebuck and Co., Hoffman www sears corn 5/2C_2005 Pam NO E101434 •...
-
Page 2: Table Of Contents
Espafiol ... ONE YEAR FULL WARRANTY tf this Craftsman Air Compressor fails due to a defect in materiel or workmanship within one year from the date of purchase, RETURN ITTO ANY SEARS STORE OR PARTS AND REPAIR CENTER OR OTHER CRAFTSMAN OUTLET IN THE UNITED STATES FOR FREE REPAIR. -
Page 3: Safety Symbols
The information listed below should be read and understood by the operator. This information is given to protect the u_er while operating and storing the air compressor.We util_e the symbols below to allow the reader to recognize imeortant infermation about their safety... -
Page 4: Specifications
Duty Cycle This is a 50% duty cycle air compressor. Do not run the air compressor more than 30 minutes of one hour. Doing so could damage the air compressor. tank daily or after each use. If the tank develops Never use the air compressor to the tank. -
Page 5: Parts & Features
Parts & Features See figures below for reference. Provides clean air to the pump and must always be kept free of debris. Check on a da!ly basis or Air Intake Filter before each use. Oil Fill Cap Oil Sight Gauge Pressure Relief Tube Outlet... -
Page 6: Installation & Assembly
Estimated AssembtyTime: Approximately5 minutes Getting Started-Location of the Air Compressor The air compressor should always be located in a clean, dry, and well ventilated environment. The unit should have at minimum, 12 inches of space on each side. The air intake filter should be free of any debris or obstructions. -
Page 7: Operating Procedures
PSI settings. 9. The air compressor is now ready for use. The following inflation and cleaning accessories packaged with this unit should only be operated at maximum pressure of 90PSI: blow gun, rubber-tapered nozzle, inflation needles, adapter, and blow gun adapter. -
Page 8: Maintenance
Storage For storing the air compressor, be sure to do the following: 1. Turn the unit off and unplug the power cord from the receptacle. 2. Remove all air hoses, accessories, the air compressor. -
Page 9: Troubleshooting Guide
Guide _The air compressor should be turned off and unplugged from the power source before any maintenance is performed as welt as the air bled from the tank and the unit allowed time to cool Personal injuries could occur from moving parts, electrical sources, compressed air, or hot surfaces. -
Page 10: Exploded View
Air Compressor Model 921,166390 Exploded View... -
Page 11: Parts List
Air Compressor Model 921.166390 PARTDSSCRIP_I_ Screw, socket head, M6 x 1.0 x 34)ram Wash_r,Lock,6rnm E1002271 O_ndar head !E100809 F'_r',9,90 De_,3/8' NPT X 3/8" Compression Housinq.Air intake Rltar,Die Cast EID0435! Elek'_Br_Air Fiitar E101178 Om,erTAJr F ilter Gasket, head Valve plate Valve,Reed... - Page 12 Lista de partes ... GARANTIA AI_O PARA Si este compresor de aire Craftsman !lega a fallar debido a un defecto de manufactura materiales en un plaza de un aSo, desde la fecha de compra, DEVUELVALQ U A OTRO CENTRO CRAFTSMAN...
- Page 13 Sfmbolos comunes de seguridad E! operador debe leer y entander la informaciPn usuario al oparar y almacenar el eompresor informaciPn que es importante pars su seguridad Ir_dica una situaciPn de riesgo inminente que, al no protegerse, proveoara tesiones graves oia muerte. Indies una situaciPn potenclalmeme p_hgrosa qua, al no protegerse,...
-
Page 14: Especificaciones
_nstrucciones y pautas de seguridad importantes Evite utilizer e! compreeor de aire en Areas enoerredas. Siempre tangs un espacio Riesg9 pa.raLa libra adecuado (30 am.) en redes los Iados del compresor. Tambi6n mantenga fuera resplraclon dei Area de eperaci6n a iae mascotas, nifios y otras personas. Este oompresor de aire no proves aire que pueda ser respirado ni empleade con un dispositivo reapiratorio auxiliar. -
Page 15: Partes Y Caracterfsticas
Partes y caracterfsticas Come referencia, yea tas figuras abajo. Filtro del aire Suministra aire iimpio a la bomba. Siempre debe consen_arlo limpio Revfeelo antes de oada use. _Tap6n de Itenado de aceite Visor de aceite Tube de _lrvio de presiSn Tube de satida ©... - Page 16 lnstalaci6n y ensamblaje Antes de reaiizar cuaiquier inetaleci6n y ensamblaje de sire, se to debe apagar y desoonecta.r de purger eT airs del tanque y darle suficiente enfriarse. E×iste el riesgo de qua las partes et6ctrica, el airs com.primido y las superficies tssiones.
-
Page 17: Procedimientos De Operaci6N
Procedimientos de operaci6n Procedimiento diario de arranque 1. Penga el interrupter Auto-On/Often apagado (On. 2. Ver_ique qua el compresor del aire, ia manguera de airey todos bs accesorios/harramientas tengan daSos ni ebstrucci6n. Si algunas de las piezas descritas requieren raparaci6n/reampiazo, tienda autorizada local de servicio, antes de user el oompresor. -
Page 18: Mantenimiento
Mantenimiento NOTA: Cualquier precedimiento de servicio que no est_ cubierto en el programa de mantenimiento que sigue debera ser efectuado el persona! de servicio cs.lificado. Antes de dar mantenimiento al equipo, se debe apagar y desconectar del tomacorriente, as[ come .purger el eire del tanque y permitir que la unidad se enfr[e. - Page 19 Diagn6stico _Antes de Itevare cabo cJalquier correcciSnde problemas o tares, e! compresorde aJrese debe apagar y desconeotardel tomacorriente.Purgue el aire del tanque y permite que la unidad se enfffe. Las partes en movimiente,las fuentes el$ctricas,el sire comprimido y tas superficies calientes pueden provocar lesiones.
- Page 20 Your Home For repair - in your home - of all major brand appfiances, lawn and garden equipment, no matter who made it, no matter who sold it! For the replacement owner's manuals For Sears professional and items like garage door openers and water heaters. 1-800-4-MY-HOME®...
Need help?
Do you have a question about the 921.166390 and is the answer not in the manual?
Questions and answers