Advertisement
- 1 How to use this manual
-
2
Preparation/Basics
- 2.1 General information
- 2.2 Scope of delivery
- 2.3 Replacement parts/Accessories
- 2.4 Names and functions of main parts
- 2.5 About the Memory Card
-
2.6
Quick start guide
- 2.6.1 Attaching the Lens Cap
- 2.6.2 Attaching the Shoulder Strap
- 2.6.3 Attaching the Lens Hood
- 2.6.4 Inserting the battery and/or SD memory card
- 2.6.5 Charging the battery
- 2.6.6 Opening out the monitor
- 2.6.7 Setting the Language, Time and Date
- 2.6.8 [EVF] button (Taking pictures via the viewfinder)
- 2.6.9 Handling the camera correctly
- 2.6.10 Shutter button (Taking pictures)
- 2.7 Basic operations
- 2.8 Menu Settings
- 3 Recording
- 4 Viewing your pictures
- 5 The Wi-Fi/Bluetooth function
- 6 Information for Your Safety
- 7 Documents / Resources
How to use this manual
About the icons in the text

The menu can be selected or configured via the [MENU/SET] button.
[AE/AF LOCK], [DISP], [![]() ], etc. indicate the respectively labeled buttons.
], etc. indicate the respectively labeled buttons.
How to configure a menu item:
→  [Rec] → [Quality] → [
 ]
]
- The directional arrows (
![]() ) are used for illustration purposes.
) are used for illustration purposes.
 ) are used for illustration purposes.
Recording mode:

- The menus and functions offered in picture/recording modes, in which the icons are displayed in black, can be selected and executed.
![]() (Custom mode) The functions offered in custom mode may vary depending on the selected picture/recording mode.
(Custom mode) The functions offered in custom mode may vary depending on the selected picture/recording mode.
Preparation/Basics
General information
Camera handling
Protect the camera against vibration, impact or pressure.
- Avoid using the camera under the following conditions, which may damage the lens, monitor, viewfinder, or camera body. This may also cause the camera to malfunction or prevent recording.
- Dropping or hitting the camera against a hard surface
- Using excessive force when handling the lens or monitor
The camera is not dust resistant, splash resistant, or waterproof.
Avoid using the camera in places with excessive dust or sand, or where water can come into contact with the camera.
If sand, dust, or liquids such as water droplets adhere to the monitor, wipe them off with a dry soft cloth.
- Not doing so may cause the monitor to respond incorrectly to touch operations.
Condensation (When the lens, the monitor, or viewfinder, is fogged up)
- Condensation may occur when the camera is exposed to sudden changes in temperature or humidity. Avoid these conditions, which may make the lens, monitor, or viewfinder dirty, cause mold, or damage the camera.
- Turn off the camera and wait about two hours before using it if condensation occurs. Once the camera adjusts to the surrounding temperature, the fogging will clear naturally.
No compensation for missed shots
- Leica Camera AG shall not accept any liability for missed shots due to technical or memory card malfunctions.
When in use
Do not keep objects such as credit cards that may be influenced magnetically close to this unit. The data on these objects may become corrupted and unusable.
Scope of delivery
Before using your camera for the first time, please check that the accessories supplied are complete.
Rechargeable battery pack
Battery charger/AC adaptor
USB cable
Shoulder strap
Lens cap
Lens cap string
Hot shoe cover
Lens hood
Short instructions
Replacement parts/Accessories
Please visit the Leica Camera AG website for information on the extensive range of Leica replacement parts/accessories: www.leica-camera.com
Only the accessories specified and described in this manual or by Leica Camera AG must be used with the camera (battery, AC adaptor, etc.). These accessories should only be used with this product. Third-party accessories may result in malfunctions or damage to the product.
Removing the Hot Shoe Cover
Remove the hot shoe cover by pulling it in the direction indicated by arrow ![]() while pressing it in the direction indicated by arrow
while pressing it in the direction indicated by arrow ![]() .
.

Notes:
- Memory cards are optional.
- The battery pack is referred to as "battery pack" or "battery" in this manual.
- SD, SDHC and SDXC memory cards are also referred to as "cards" in this manual.
- Depending on the country or area where the camera was purchased, the items and their shape may differ from the descriptions and illustrations in these instructions.
- Always keep small parts in a safe place out of the reach of children.
- Please dispose of all packaging appropriately.
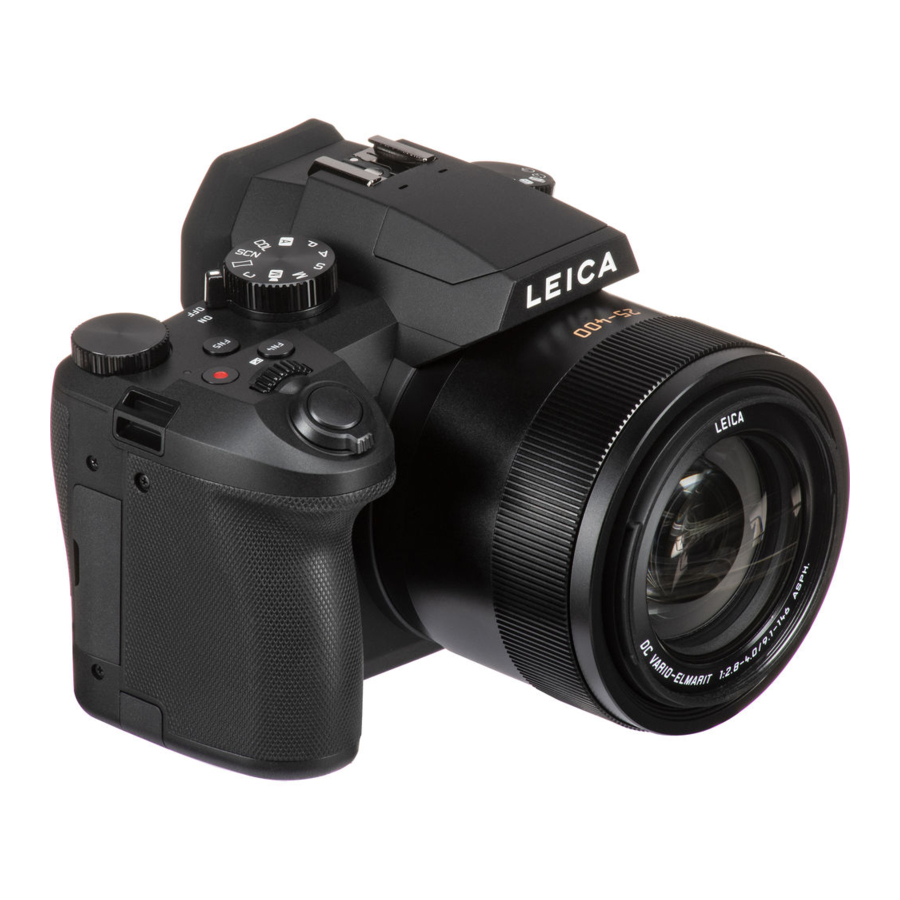
Names and functions of main parts

- Zoom lever
- Shutter button
- Front dial
- Video button
- [FN4] button/[
![]() ] (Exposure Compensation) button
] (Exposure Compensation) button - Battery charge indicator/WIRELESS connection lamp
- Rear dial
- [FN5] button
- Camera [ON/OFF] switch
- Mode dial
- Shoulder strap eyelet
- Self-timer indicator/AF Assist Lamp
- Flash
- Stereo microphone
- Hot shoe (Hot shoe cover)
Keep the hot shoe cover out of reach of children to prevent swallowing. - Flash open lever
- Eye sensor
- Eyecup
- Viewfinder
- Diopter adjustment dial
- [FN8] button/[EVF] button
- Drive mode dial
- Microphone jack
- [FN1] button
- [FN2] button
- [FN3] button/[
![]() ] ([Zoom Compose Assist]) button
] ([Zoom Compose Assist]) button - Control ring
- Lens
- Focal distance indication (as with a 35 mm film camera)
Values assume an aspect ratio of [3:2].
(Check the focal length value displayed when recording video.)
 ] (Exposure Compensation) button
  ] ([Zoom Compose Assist]) button
- [AE/AF LOCK] button
- Focus mode lever
- [FN6] button/[Q MENU] button
- Speaker
- [
![]() ] (Playback) button
] (Playback) button - [DISP] button
- [MENU/SET] button
- Cursor button
[![]() ] (ISO sensitivity) (
] (ISO sensitivity) (![]() )
)
[![]() ] (White balance) (
] (White balance) (![]() )
)
[![]() ] ([Macro Mode]) (
] ([Macro Mode]) (![]() )
)
[![]() ] ([AF Mode]) (
] ([AF Mode]) (![]() )
) - [FN7] button/[
![]() ] (Delete) button/[
] (Delete) button/[![]() ] (Cancel) button
] (Cancel) button - [REMOTE] jack
- [HDMI] jack
You can view pictures on a TV screen by connecting your camera to your TV with the HDMI micro cable. - [USB/CHARGE] jack
- Card/Battery door
- Release lever
- Tripod mount
Do not attach this unit to tripods that have screws with a length of 5.5 mm (0.22 inches) or longer. Doing so could damage the camera and result in an insecure connection. - Touch screen/monitor

 ] (ISO sensitivity) (
 )
) ] (White balance) (
 )
) ] ([Macro Mode]) (
 )
) ] ([AF Mode]) (
 )
)  ] (Delete) button/[
 ] (Cancel) button
Function buttons [FN9] to [FN13] are touch icons.
They can be displayed by touching the [ ![]() ] tab on the recording screen.
] tab on the recording screen.
About the Memory Card
The following SD standard cards can be used.
| Type of Card | Capacity | Notes |
| SD Memory Cards | 512 MB – 2 GB | This camera is compatible with UHS-Ι UHS Speed Class 3 standard SDHC/SDXC memory cards. |
| SDHC Memory Cards | 4 GB – 32 GB | |
| SDXC Memory Cards | 48 GB – 128 GB |
About video/4K photo recording and speed class ratings
Use a card that meets the following ratings of the SD Speed Class or UHS Speed Class.
- SD Speed Class and UHS Speed Class are the speed standards regarding continuous writing. Confirm the SD speed by checking the card label or other card related materials.
[Rec Quality] Speed class Label example [FHD]/[HD] Class 4 or higher ![]()
[4K]/[High Speed Video] UHS Speed Class 3 ![]()
When recording in 4K Photo/[Post Focus] UHS Speed Class 3 ![]()
- Keep the memory card out of reach of children to prevent swallowing.


Formatting the Memory Card (initialization)
Please format memory cards before use in this camera.
Data cannot be recovered after formatting. When reformatting a previously used card, make sure to create a backup of any information on the card you wish to keep.
 →
→  [Setup] → [Format]
Quick start guide
Attaching the Lens Cap
Cover the lens with the lens cap to protect it when you are not taking pictures.
- Do not hang or swing around the camera with the lens cap string.
- Make sure to detach the lens cap when turning this unit on.
- Be careful that the lens cap string does not become entangled with the shoulder strap.
- Use the lens cap string (supplied) to attach the lens cap to the camera

- Attaching the lens cap
![]() Pinch here to attach or detach the cap.
Pinch here to attach or detach the cap.
![]()
- Keep the lens cap string out of reach of children to prevent swallowing.

 Pinch here to attach or detach the cap.
Attaching the Shoulder Strap
We recommend attaching the shoulder strap when using the camera to prevent it from dropping.
- Perform steps
![]() to
to ![]() and then attach the other side of the shoulder strap
and then attach the other side of the shoulder strap
![]() Pull the shoulder strap 2 cm (0.8 inches) or more.
Pull the shoulder strap 2 cm (0.8 inches) or more.

- Use the shoulder strap around your shoulder.
- Do not wrap the strap around your neck. It may result in injury or accident.
- Keep the shoulder strap out of the reach of children as it poses a choking hazard.
- Use the shoulder strap around your shoulder.
 to
to  and then attach the other side of the shoulder strap
Attaching the Lens Hood
- Avoid mechanical pressure on the lens hood that might cause deformation.
![]()
- Make sure that the camera is turned off.
- Fold in the flash unit before attaching the lens hood.

- Align the index point on the lens hood with the index point on the lens with a slight offset as shown in the illustration
![]()
![]() Index point on the lens
Index point on the lens
![]() Alignment point on the lens hood
Alignment point on the lens hood - Turn the lens hood in clockwise direction
![]()
- Keep turning the lens hood (there will be a little resistance at the locking point) until it audibly clicks into place. Make sure the index point on the lens hood is aligned with the index point on the camera
![]() Rotate until the index points are aligned
Rotate until the index points are aligned
![]()
- Make sure the lens hood is secured properly and its reflection does not fall on images.


 Rotate until the index points are aligned
- Attaching the lens hood with the flash unit in use would impede the light of the flash and cause parts of the image taken to be darker than the rest (vignetting). We therefore recommend removing the lens hood before using the flash.
- Storing the lens hood


Inserting the battery and/or SD memory card
Make sure that the camera is turned off.
- Slide the release lever (
![]() ) to the [OPEN] position and open the card/battery compartment
) to the [OPEN] position and open the card/battery compartment

- Insert the battery and card, making sure that their orientation is correct
- Battery: Insert the battery all the way firmly and check that it is locked by lever (
![]() ).
).
![]()
- Card: Insert the card all the way firmly until it clicks audibly into place. Do not touch the terminal.
- Battery: Insert the battery all the way firmly and check that it is locked by lever (
- Close the door
Slide the release lever to the [LOCK] position.


To remove
- Removing the battery
Move lever (![]() ) in direction of arrow.
) in direction of arrow.
![]()
- Removing the memory card
Press down gently on the center of the card.
![]()


- Use only the genuine Leica battery model BP-DC12.
- Leica Camera AG cannot guarantee the quality of any third-party battery.
- Turn the camera off and wait for the "Leica" display on the monitor to clear before removing the card or battery.
Charging the battery
- The battery that can be used with this unit is BP-DC12.
- We recommend charging the battery in ambient temperatures between +10°C and +30°C (+50°F to +86°F) and with the battery at the same temperature.
Insert the battery into the camera.
Make sure that the camera is turned off when inserting the battery.

- Always check the direction of the jack, and hold the plug straight to insert or remove it. (If the cable is inserted in the wrong direction, the jack could become deformed and cause faulty operation.) Also, do not insert into the wrong jack. Doing so may cause damage to this unit.
- Battery charge indicator (Red)
- AC adaptor (supplied)
- To the mains power socket
- USB cable (supplied)
- Computer
- Turn on the computer.
- [USB/CHARGE] jack
- This terminal is located at the bottom when the camera is in an upright position.
Charging time
| When using the AC adaptor (supplied) | Approx. 180 min. |
- The time required for charging through the computer varies depending on the power supply capacity of the computer.
- Do not use any other USB cables except the supplied one.
- Do not use any other AC adaptors except the supplied one.
Opening out the monitor

- Place your finger in the cleft on the right side of the monitor and open the monitor toward the left side (maximum 180°)
- The monitor can be rotated 180° upward to a horizontal position
- Return the monitor to its original position
- Only rotate the monitor after opening it wide enough, and be careful not to use excessive force. Doing so may cause damage to this unit.
- When not using the monitor it is recommended that you close it with the screen facing inward to prevent dirt and scratches.
Setting the Language, Time and Date
The clock is not set when the camera leaves the factory.
- Set the main [ON/OFF] switch of the camera to [ON]
![]()
- Press [MENU/SET]
- Press
![]() to select your language, and press [MENU/SET] to confirm your selection
to select your language, and press [MENU/SET] to confirm your selection - The message [Please set the clock] appears.
- Press [MENU/SET]
- Press
![]() to select the relevant menu item (year, month, day, hour, minute), and press
to select the relevant menu item (year, month, day, hour, minute), and press ![]() to confirm the setting
to confirm the setting
![]()
- Press [MENU/SET]
- Press [MENU/SET] when the message [The clock setting has been completed.] appears on screen
- Press [MENU/SET] when the message [Please set the home area] appears
- Press
![]() to select your time zone and press [MENU/SET]
to select your time zone and press [MENU/SET]
![]()

 to select your language, and press [MENU/SET] to confirm your selection
  to select the relevant menu item (year, month, day, hour, minute), and press

[EVF] button (Taking pictures via the viewfinder)
- Press the [EVF] (
![]() ) button
) button


Automatic switchover between viewfinder and monitor
The eye sensor (![]() ) automatically switches the display to viewfinder when your eye or an object approaches the viewfinder. When the eye or object moves away from the viewfinder, the camera returns to monitor display.
) automatically switches the display to viewfinder when your eye or an object approaches the viewfinder. When the eye or object moves away from the viewfinder, the camera returns to monitor display.

Diopter adjustment
Turn the diopter adjustment dial until you see clearly through the viewfinder.

- If [EVF Display Speed] is set to [ECO 30fps] when the viewfinder is used, the camera can be operated for a longer period since battery drainage is reduced.
Handling the camera correctly
- Do not block the flash, AF Assist Lamp, microphone, or speaker with your fingers or other objects.

- Speaker
- AF Assist Lamp
- Microphone
- Keep your fingers away from the lens barrel while focusing as the retracting lens could trap your fingers.
![]()


Free angle shooting
The monitor can be adjusted to any angle for convenient shooting.
High angle shooting

Low angle shooting

Shutter button (Taking pictures)
- Set mode dial to [
![]() ]
]
![]()
- The camera automatically optimizes the main settings.
- For details on the recording modes.
- Press the shutter button halfway (first pressure point) to focus on the subject

- Shutter speed
- Aperture value
- Focus display (Green)
( When focus is aligned: illuminated
When focus is not aligned: flashing)
- Press the shutter button fully (second pressure point), and take the picture
![]()
 ]
] 


- When [Focus/Release Priority] is set to [FOCUS], a picture can only be taken if the image is focused correctly.
Check the picture you have taken
Press the [![]() ] (Playback) button.
] (Playback) button.

Basic operations
Zoom lever (Use zoom)
- Move the zoom lever

- The zoom speed varies according to how far you rotate the lever.
- You can also perform zoom operations with the control ring by assigning [Zoom] or [Step Zoom] to the control ring.

Optical Zoom:
You can zoom in without degrading the picture quality.
Maximum magnification: 16x
Extended optical zoom:
This function works when picture sizes with [![]() ] have been selected in [Picture Size]. Extended optical zoom allows you to zoom in using a higher zoom ratio than optical zoom, without degrading the picture quality.
] have been selected in [Picture Size]. Extended optical zoom allows you to zoom in using a higher zoom ratio than optical zoom, without degrading the picture quality.
Maximum magnification: 32x*1
- Including the optical zoom ratio. The maximum zoom ratio varies depending on the picture size.
[i. Zoom]:
Set the [i. Zoom] in the [Rec]/[Motion Picture] menu to [ON].
You can use the camera's intelligent resolution technology to increase the zoom ratio up to 2x*2 higher than the original zoom ratio with limited deterioration of picture quality.
- Up to 1.5x the original zoom ratio when [Picture Size] is set to [S]
[Digital Zoom]:
Set the [Digital Zoom] in the [Rec]/[Motion Picture] menu to [ON].
You can zoom in up to 4x the original zoom magnification. When [Digital Zoom] is used simultaneously with [i. Zoom], you can increase the combined zoom ratio up to 4x.
Note that, with Digital Zoom, enlarging will decrease picture quality.
- When [Monitor Display Speed] is set to [ECO 30fps], Digital Zoom is not available (setting at the time of purchase).
- When [EVF Display Speed] is set to [ECO 30fps], Digital Zoom is not available.
[Zoom Compose Assist] button (Using the Zoom Compose Assist function)
If you lose the subject while zoomed in:
- Press and hold [
![]() ] ([Zoom Compose Assist]) button
] ([Zoom Compose Assist]) button
![]()
- A frame indicating the original zoom magnification (angle of view) will appear.

When you find the subject:
- Align the frame with the subject and release your finger from the button
Mode dial (recording mode selection)
- Set to the desired recording mode
- Turn the mode dial slowly to select the desired mode.
![]()
- Turn the mode dial slowly to select the desired mode.

 |  Snapshot Mode Snapshot Mode |
 Snapshot Plus Mode Snapshot Plus Mode | |
 | Program AE Mode Take pictures with automatic shutter speed and aperture value settings. |
 | Aperture-Priority AE Mode Determine aperture, then take pictures. |
 | Shutter-Priority AE Mode Determine shutter speed, then take pictures. |
 | Manual Exposure Mode Determine aperture and shutter speed, then take pictures. |
 | Creative Video Mode Determine aperture, shutter speed and ISO sensitivity, then record video.
|
 | Custom Mode Take pictures using pre-registered settings. |
 | Panorama Shot Mode Take panorama pictures. |
 | Scene Guide Mode Take pictures that match the scene being recorded. |
 | Creative Control Mode Take pictures by selecting your preferred picture effect. |
Cursor button / [MENU/SET] button (Selecting/setting items)
Pressing the cursor button:
Selects menu items/value settings, etc.
Pressing [MENU/SET]:
Confirms settings, etc.

Touch screen (touch functions)
Touch
Brief touch of the desired screen area/menu icon

Drag
Touching and holding the screen in a sideways motion across the touch screen.

Pinch (spread/pinch)
On the touch screen, spread (pinch out) your 2 fingers to zoom in, and pinch (pinch in) your 2 fingers to zoom out.

Taking Pictures Using the Touch Function

- Touch [
![]() ]
] - Touch an icon
Touch AF, Touch Shutter
The icon changes with every touch.
[ ] (Touch AF) ] (Touch AF) | Focuses on the position you touch. |
[ ] (Touch shutter) ] (Touch shutter) | Focuses on the touched position before the picture is taken. |
[ ] (OFF) ] (OFF) | Touch AF and Touch shutter are disabled. |
[Touch AE]
You can easily optimize the brightness for a touched position.
[ ] ([Touch AE]) ] ([Touch AE]) |
|
 ].
].Menu Settings
- Press [MENU/SET] to bring up the menu
- Switch the menu type
![]()
- Press
![]()
- Press
![]() to select a tab, e.g. [
to select a tab, e.g. [![]() ]
] - You can also select the tab by rotating the front dial.
- Press [MENU/SET]
- Press


 to select a tab, e.g. [
Menu types
![]() [Rec]
[Rec] ![]() [Motion Picture]
[Motion Picture] ![]() [Custom]
[Custom] ![]() [Setup]
[Setup] ![]() [My Menu]
[My Menu] ![]() [Playback]
[Playback]


- Press
![]() to select a menu item and press [MENU/SET]
to select a menu item and press [MENU/SET] - The menu item can also be selected by rotating the rear dial.
- You can also switch to the next page by rotating the zoom lever.
- Press
![]() to select a setting and press [MENU/SET]
to select a setting and press [MENU/SET]
![]()
- The setting can also be selected by rotating the rear dial.
- The setting methods vary depending on the menu item.
- Press the [
![]() ] button repeatedly until the recording or playback screen appears
] button repeatedly until the recording or playback screen appears - Alternatively, you can exit the menu screen by pressing the shutter button to the first pressure point.

- You can display an explanation on the menu by pressing the [DISP] button while you select a menu item or setting.
![]()
- Deactivated menu items are grayed out. In some setting conditions, the reason the setting is disabled is displayed when you press [MENU/SET] if you select a grayed out menu item.

Recording
Taking pictures with automatic settings
(Snapshot Modes)
This mode is recommended for those who want to point and shoot as the camera optimizes settings to match the subject and recording environment.
- Set mode dial to [
![]() ]
]
![]()
- By default, the camera is set to Snapshot Plus Mode.
- Point the camera at the subject
![]()
- When the camera identifies the optimal scene, the icon switches to the one for that scene. (Automatic Scene Detection)


Toggling between Snapshot Plus Mode and Snapshot Mode
 →
→ ![]() /
/![]() [Snapshot Mode] → [Snapshot Mode]
[Snapshot Mode] → [Snapshot Mode]
Settings: [![]() ] (Snapshot Mode)/[
] (Snapshot Mode)/[![]() ] (Snapshot Plus Mode)
] (Snapshot Plus Mode)
- [
![]() ] allows you to adjust some settings such as the brightness and color tone while also using [
] allows you to adjust some settings such as the brightness and color tone while also using [![]() ] for other settings so that you can record pictures more suited to your preferences.
] for other settings so that you can record pictures more suited to your preferences.
- When [iHandheld Night Shot] is set to [ON] and [
![]() ] is detected while taking handheld night shots, pictures of the night scenery will be taken at a high burst speed and composed into a single picture.
] is detected while taking handheld night shots, pictures of the night scenery will be taken at a high burst speed and composed into a single picture. - When [iHDR] is set to [ON] and there is, for example, strong contrast between the background and the subject, multiple stills are recorded with differing exposures and combined to create a single still rich in gradation.
 ] is detected while taking handheld night shots, pictures of the night scenery will be taken at a high burst speed and composed into a single picture.
Auto Focus (Face/Eye Detection)
[AF Mode] is set to [ ] by default. Touching the subject on the touch screen will switch the mode to [
 ] and the AF Tracking function activates.

- You can also switch to [
![]() ] by pressing the [
] by pressing the [![]() ] button (
] button (![]() ). Align the AF tracking area with the subject and press the shutter button halfway to operate the AF tracking function.
). Align the AF tracking area with the subject and press the shutter button halfway to operate the AF tracking function.
 ] button (
 ). Align the AF tracking area with the subject and press the shutter button halfway to operate the AF tracking function.
Selecting a Drive Mode
([Burst]/[Self Timer])
Recording mode: 
You can switch the operation to be performed when you press the shutter button.
- Turn the drive mode dial
![]() [Single]
[Single]When the shutter button is pressed, only one picture is recorded. ![]() [Burst]
[Burst] The pictures are recorded in succession while the shutter button is pressed. ![]() [4K PHOTO]/
[4K PHOTO]/![]() [Post Focus]/
[Post Focus]/![]() [Time Lapse/Animation]
[Time Lapse/Animation] ![]() [Self Timer]
[Self Timer] When the shutter button is pressed, recording takes place after the set time has elapsed.
 [Single]
 [Burst]
  [4K PHOTO]/
 [Post Focus]/
 [Time Lapse/Animation]
 Burst function
Setting [Burst Rate]
 →
→  [Rec] → [Burst Rate]
| [H] (High speed) | [M] (Middle speed) | [L] (Low speed) | ||
| Speed (pictures/sec.) | [AFS]/[MF] | 12 | 7 | 2 |
| [AFF]/[AFC] | 7 | |||
| Live View during burst recording | [AFS]/[MF] | None | Available | Available |
| [AFF]/[AFC] | Available | |||
| Number of recordable pictures | With RAW files | 26 or more | ||
| Without RAW files | 100 or more | |||
Taking pictures with self-timer
Setting the self-timer operation
→ [Rec] → [Self Timer]
 | The shutter is activated after 10 seconds. |
 | The shutter is activated after 10 seconds and three pictures are taken at intervals of approximately 2 seconds. |
 | The shutter is activated after 2 seconds. |
Recording with the 4K Photo function
Recording mode:
You can take burst pictures of approximately 8 million pixels with a burst rate of 30 fps.
You can select and save a frame from the burst file.
- To record pictures, use a UHS Speed Class 3 card.
- When recording, the angle of view becomes narrower.
- Set the drive mode dial to [
![]() ]
] - Select the recording method
![]() →
→ ![]() [Rec] → [4K PHOTO]
[Rec] → [4K PHOTO]
![]() [4K Burst]
[4K Burst]
For capturing the best shot of a fast-moving subject
Burst recording is performed while the shutter button is pressed and held.- Recording will start approximately 0.5 seconds after you press the shutter button fully. Therefore, press the button fully slightly in advance.
![]()
- Press and hold
- Recording is performed
- Recording will start approximately 0.5 seconds after you press the shutter button fully. Therefore, press the button fully slightly in advance.


![]() [4K Burst(S/S)]
[4K Burst(S/S)]
"S/S" is an abbreviation of "Start/Stop".
For capturing unpredictable photo opportunities
Burst recording starts when the shutter button is pressed and stops when pressed again.

- Start (First)
- Stop (Second)
- Recording is performed
- When you press the [FN6] button while recording, you can add a marker. (Up to 40 markers for each recording.) When selecting and saving pictures from a 4K burst file, you can skip to the positions where you added markers.
![]() [4K Pre-Burst]
[4K Pre-Burst]
For recording as needed whenever a photo opportunity arises
Burst recording is performed for approximately 1 second before and after the moment that the shutter button is pressed.

- Approximately 1 second
- Recording is performed
- Press the shutter button halfway to exit the menu
- Press the shutter button to perform recording
- Burst pictures are saved as a single 4K burst file in the MP4 format.
- When [Auto Review] is enabled, the picture selection screen will be displayed automatically.
- If the ambient temperature is high or 4K photos are recorded continuously, [
![]() ] may be displayed and recording may be stopped halfway through. Wait until the camera cools down.
] may be displayed and recording may be stopped halfway through. Wait until the camera cools down. - When [
![]() ] ([4K Pre-Burst]) is set, the battery drains faster and the camera temperature rises. (To protect itself, the camera may switch to [
] ([4K Pre-Burst]) is set, the battery drains faster and the camera temperature rises. (To protect itself, the camera may switch to [![]() ] ([4K Burst]).)
] ([4K Burst]).)
Select [![]() ] ([4K Pre-Burst]) only when recording.
] ([4K Pre-Burst]) only when recording. - Recording stops when the continuous recording time exceeds 29 minutes.
When using an SDHC memory card, the burst file is split into smaller files for recording and playback if the file size exceeds 4 GB. (You can continue to record without interruption.)
If using an SDXC memory card, you can record in a single file even if the size is greater than 4 GB.
Selecting pictures from 4K burst file and saving
- Select a picture with the [
![]() ] on the playback screen, and press
] on the playback screen, and press ![]()
![]()
- In the case of recording with [
![]() ] ([4K Pre-Burst]), proceed to step 3.
] ([4K Pre-Burst]), proceed to step 3.
- In the case of recording with [
- Drag the slide bar to perform rough scene selection
![]()
- When [
![]() ] is touched, the marker operation screen appears.
] is touched, the marker operation screen appears.
- When [
- Drag to select the frame you want to save as a picture
![]()
- To continuously rewind/forward the scene or frame-by-frame, touch and hold [
![]() ]/[
]/[![]() ].
].
- To continuously rewind/forward the scene or frame-by-frame, touch and hold [
- Touch [
![]() ] to save the picture
] to save the picture - The selected picture will be saved as a new picture in the JPEG format separate from the 4K burst file.


 ]/[
]/[ ].
].  ] to save the picture
 - If you use [4K PHOTO Bulk Saving] in the [Playback] menu, you can bulk save 5 seconds' worth of 4K recording.
Marker
When selecting and saving pictures from a 4K burst file, you can select pictures easily by skipping between marked positions.

White marker: This is manually set during recording or playback.
Green marker: This is automatically set by the camera during recording. (Auto Marking function*1)
- The camera automatically sets markers on scenes in which a face or the movement of a subject is detected. (Up to 10 markers are displayed for each file.)
(Example: At the scene when a vehicle passes by, a balloon bursts, or a person turns around)
Skip to the marked positions
When [ ] is touched, the marker operation screen appears. You can use
 ![]() to skip to a marked position to select a picture.
to skip to a marked position to select a picture.
Touch [ ] to return to the original operation.
- In the following cases, markers may not be set by the Auto Marking function depending on the recording conditions and the status of subjects.
- The camera is moving because of panning or jitter
- The movement of a subject is slow/small, or the subject is small
- A face is not facing front
Select markers to be displayed
- Touch [
![]() ]
]
Settings: [Auto]/[Face Priority]/[Motion Priority]/[Off]*2- Displays manually set markers only
 ]
]Adjusting the focus after recording
([Post Focus]/[Focus Stacking])
Recording mode:
You can record 4K burst pictures while changing the focus point and then select a focus point after recording. This function is best for still subjects.
- To record pictures, use a UHS Speed Class 3 card.
- We recommend using a tripod to perform [Focus Stacking].
- During recording, the angle of view will be narrower.
- Set the drive mode dial to [
![]() ]
] - Determine the composition and press the shutter button halfway
- Auto Focus activates and automatically detects the focus point on the screen. (While the shutter button is pressed halfway, shaking may be seen on the screen.)
- If there is no focus point on the screen, the Focus indicator (
![]() ) blinks and you cannot record.
) blinks and you cannot record.
![]()

From halfway pressing the shutter button to completion of recording
- Do not change the distance to subject or the composition.
- Press the shutter button fully to start recording
- The focus point changes automatically while recording. When the recording progress bar (
![]() ) disappears, recording automatically ends.
) disappears, recording automatically ends.
![]()
- The data will be saved as a single file in the MP4 format.
- If [Auto Review] is set, a screen will automatically appear that lets you select the focus point.
- The focus point changes automatically while recording. When the recording progress bar (

- If the ambient temperature is high or [Post Focus] recording is performed continuously, [
![]() ] may be displayed and recording may be stopped halfway through. Wait until the camera cools down.
] may be displayed and recording may be stopped halfway through. Wait until the camera cools down.
Select the focus point and save the picture ([Post Focus])
- On the playback screen, select the image with the [
![]() ] icon and press
] icon and press ![]()
![]()
- Touch the focal point
![]()
- If there are no pictures with the focus on the selected point, a red frame will be displayed, and pictures cannot be saved.
- The edge of the screen cannot be selected.
- To switch to the [Focus Stacking] operations screen, touch [
![]() ].
]. - To highlight in-focus portion with color, touch [
![]() ].
]. - To enlarge the display, touch [
![]() ].
]. - You can make fine adjustments to the focus by dragging the slide bar during enlarged display. (The same operation can be performed using
![]() .)
.)
![]()
- Touch [
![]() ] to save the picture
] to save the picture - The selected picture will be saved as a new separate file in the JPEG format.


Select the focus range to combine and create a single picture ([Focus Stacking])
- Touch [
![]() ] on the screen in step 2 of "Select the focus point and save the picture ([Post Focus])"
] on the screen in step 2 of "Select the focus point and save the picture ([Post Focus])" - Choose a stacking method and touch to select it
[Auto Merging] Automatically select photos suitable for stacking and combine them into one picture. - Choose by giving preference to near-focus pictures.
- Perform the focus stacking and save the picture.
[Range Merging] Combine the pictures with the selected focus position into one picture. (When selecting [Range Merging])
- Touch the focal point
- Select positions at two or more points.
- Focus points between the selected two positions will be selected.
- Positions that cannot be selected, or that would produce an unnatural result will be grayed out.
- Touch a position again to deselect it.
![]()
- Touch [
![]() ] to combine and save the picture
] to combine and save the picture - The picture will be saved in JPEG format.
 ] on the screen in step 2 of "Select the focus point and save the picture ([Post Focus])"
 ] to combine and save the picture
 - Only pictures taken using [Post Focus] on this camera are eligible for [Focus Stacking].
Recording Video/4K Video
Recording mode: 
Video and 4K video are recorded in the MP4 format.
- Press the video button to start recording
![]()
- Elapsed recording time
- Remaining recording time
- Recording (lights up in red)
- Recording of video appropriate for each video mode is possible.
- Press the video button briefly.
- If you press the shutter button down fully, you can take stills while recording video. (Except for in Creative Video Mode)
- Press the video button again to end recording

- To record 4K video, use a UHS Speed Class 3 card.
- When you record 4K video, the angle of view will be narrower than video of other sizes.
- To ensure highly accurate focus, 4K video is recorded at reduced Auto Focus speeds. It may be difficult to focus on the subject with Auto Focus, but this is not a malfunction.
- With recording in a quiet environment, the sound of aperture, focus and other actions may be recorded in video. This is not a malfunction.
The focus operation during recording of video can be set to [OFF] in [Continuous AF]. - If the ambient temperature is high, or a video is recorded continuously, [
![]() ] is displayed and recording may be stopped halfway through. Wait until the camera cools down.
] is displayed and recording may be stopped halfway through. Wait until the camera cools down.
[4K/100M/30p]*/[4K/100M/24p]*/[FHD/28M/60p]/[FHD/20M/30p]/[HD/10M/30p]
- MP4 video recording with a [Rec Quality] of [FHD] or [HD]:
Max. continuous video recording time is 29 minutes.
Once the file size of a video recording exceeds 4GB, it is split into smaller video files for playback. (You can continue to record video without interruption.) - MP4 video recording with a [Rec Quality] of [4K]:
Max. continuous video recording time is 29 minutes.
Once the file size of a video recording exceeds 4GB, it is split into smaller video files for playback when an SDHC memory card is used. (You can continue to record video without interruption.) Video recordings with file sizes greater than 4GB can be created if an SDXC memory card is in use.
* 4K video
[4K Live Cropping]
By cropping your video down from the 4K angle of view to Full High Definition, you can record a video that pans and zooms in/out while leaving the camera in a fixed position.

- Hold the camera firmly in place while recording.
- A video will be recorded at [FHD/20M/30p] under [MP4].
- The angle of view narrows.
- Set mode dial to [
![]() ]
] - Set the menu
![]() →
→ ![]() [Creative Video] → [4K Live Cropping]
[Creative Video] → [4K Live Cropping]
Settings: [40SEC]/[20SEC]/[OFF] - Set the crop start frame and press [MENU/SET] to set
![]()
- Set the crop end frame as well.
- When making settings for the first time, a crop start frame of size 1920×1080 is displayed.
- Move the frame by touching it or using the cursor button. You can adjust the frame size by pinching out/pinching in or rotating the rear or front dial.
- Press the video button (or the shutter button) to start recording
![]()
- Elapsed recording time
- Set operating time
- Press the video button (or shutter button) briefly.
- When the set operating time has elapsed, recording automatically ends. To end recording midway, press the video button (or the shutter button) again.


- When you want to zoom in/out, set different angles of view for the cropping start and end frames. For example, to zoom in, set a larger angle of view for the start frame and a smaller angle of view for the end frame.
Changing the position and size of a crop frame
Press the [FN7] button while the recording screen is displayed, and perform step 3.
To cancel [4K Live Cropping] recording
Set [OFF] in step 2.
- [4K Live Cropping] is disabled when [High Speed Video] is set.
- Focus is adjusted and fixed in the crop start frame.
- [Continuous AF] is set to [OFF].
- [Metering Mode] will be [
![]() ] (Multi Metering).
] (Multi Metering). - You cannot zoom in/out during [4K Live Cropping] recording.
Viewing your pictures
- Press the [
![]() ] (Playback) button
] (Playback) button - Press
![]() to select a picture to be displayed
to select a picture to be displayed - When you press and hold
![]() , the pictures are displayed one after another.
, the pictures are displayed one after another.
- When you press and hold
Ending Playback
Press the [![]() ] (Playback) button again or press the shutter button halfway.
] (Playback) button again or press the shutter button halfway.
- The playback screen appears if the camera is turned on while pressing [
![]() ] (Playback) button.
] (Playback) button. - When [Lens Retraction] is set to [ON], the lens barrel is retracted approx. 15 seconds after the camera is switched to the playback screen from the recording screen.
Viewing video
This camera was designed to play video using the MP4 format.
- Video is displayed with the video icon ([
![]() ]).
]).
![]()

- Press
![]() to start playback
to start playback - Touch the [
![]() ] in the middle of the screen to play back video.
] in the middle of the screen to play back video. - If you press [MENU/SET] during a pause, you can create a picture from a video.
- Touch the [
 to start playback
 Deleting pictures
Deleted pictures cannot be recovered.
- Press [
![]() ] to delete displayed picture
] to delete displayed picture - Use
![]() to select [Delete Single] and press [MENU/SET]
to select [Delete Single] and press [MENU/SET]
 ] to delete displayed picture
[Light Composition]
Select multiple frames from 4K burst files that you wish to merge. Parts of the image that are brighter than the preceding frame will be superimposed on the preceding frame to merge the frames into one picture.

 →
→ ![]() [Playback] → [Light Composition]
[Playback] → [Light Composition]
- Use
![]() to select the 4K burst files and press [MENU/SET]
to select the 4K burst files and press [MENU/SET] - Choose the merging method and press [MENU/SET]
[Composite Merging]: Selecting frames to merge- Drag the slide bar or use
![]() to select the frames to merge
to select the frames to merge
![]()
- Press [MENU/SET]
- The selected frames are stored, and the display goes to the preview screen.
- Use
![]() to select items and press [MENU/SET] to perform the following operations.
to select items and press [MENU/SET] to perform the following operations. - [Next]: L ets you select more frames for merging.
- [Reselect]: Discards the frame selected immediately before and lets you select a different image.
- Repeat steps 1 - 2 to select more frames to merge (up to 40 frames)
- Press
![]() to select [Save] and press [MENU/SET]
to select [Save] and press [MENU/SET]
- Drag the slide bar or use
 to select the frames to merge
 to select [Save] and press [MENU/SET]
[Range Merging]: Selecting a range to merge
- Select the frame of the first picture and then press [MENU/SET]
- The selection method is the same as in step 1 of [Composite Merging] setting.
- Select the frame of the last picture and then press [MENU/SET]
- The picture will be saved in JPEG format.
[Sequence Composition]
Select multiple frames from a 4K burst file to create a sequence composition of a moving subject into one picture.

→ ![]() [Playback] → [Sequence Composition]
[Playback] → [Sequence Composition]
- Use
![]() to select the 4K burst files and press [MENU/SET]
to select the 4K burst files and press [MENU/SET] - Select frames to merge
Select the frames so that the moving subject will not overlap on the preceding or subsequent frames. (The sequence composition may not be created properly if the subject overlaps.)- Drag the slide bar or use
![]() to select the frames to merge
to select the frames to merge
![]()
- Press [MENU/SET]
- The selected frames are stored, and the display goes to the preview screen.
- Use
![]() to select items and press [MENU/SET] to perform the following operations.
to select items and press [MENU/SET] to perform the following operations. - [Next]: L ets you select more frames for merging.
- [Reselect]: Discards the frame selected immediately before and lets you select a different image.
- Repeat steps 1 - 2 to select more frames to merge (from 3 to 40 frames)
- Press
![]() to select [Save] and press [MENU/SET]
to select [Save] and press [MENU/SET]
- Drag the slide bar or use
 to select the frames to merge
- We recommend using a tripod to take pictures for Sequence Composition.
- The picture will be saved in JPEG format.
The Wi-Fi®/Bluetooth® function
Using a smartphone as a camera remote control
By installing the "Leica FOTOS" app on your smartphone, you can operate the camera remotely and use the smartphone to record and play back.
Expanding the scope of applications by connecting the camera to a smartphone compatible with Bluetooth Low Energy

- Smartphone/tablet app "Leica FOTOS"
The "Leica FOTOS" app is an application provided by Leica Camera AG.
- For details, refer to the comprehensive instructions (PDF format) available on the Leica Camera AG website.
LEICA FOTOS APP
Experience the new Leica FOTOS app. The Leica FOTOS app is a digital tool with plenty of exciting options and allows the photographer to get more out of his Leica camera than ever before. You can now link all your WLAN-capable Leica cameras via a single app to transfer images easily and instantly, capture the essence of unforgettable moments, manage, optimize and share your photos – anytime, anywhere.


Carefully observe copyright laws.
- Recording of pre-recorded tapes or discs or other published or broadcast material for purposes other than your own private use may infringe copyright laws.
Even for the purpose of private use, recording of certain material may be restricted.
You can find your camera's production date on the stickers in the Guarantee Card and on the packaging. The digits stand for YYYY.MM, or YYYY.MM.DD
Notice:
Please note that the actual controls, components, menu items, menu screen illustrations etc. of your Leica V-LUX 5 may look somewhat different than those shown in the illustrations in these instructions.
Information for Your Safety
To reduce the risk of fire, burns, or shock hazard and annoying interference:
- Use the recommended accessories.
- Do not expose this equipment to rain or moisture, dripping or splashing water and make sure no objects filled with liquids such as vases are placed on the equipment.
- Do not expose to heat above 60°C/140°F.
- Do not remove the cover (back): there are no user serviceable parts inside. Refer servicing to your Leica dealer, an authorized Leica service station/the Leica distributor in your country (for addresses, see Leica Camera AG homepage), or the Leica Customer Care department).
- The connected equipment must be located near the mains outlet and it must be easily accessible.
![]() SMALL BATTERY CHARGER SYSTEM FOR CALIFORNIA
SMALL BATTERY CHARGER SYSTEM FOR CALIFORNIA
During the loading process the equipment should be placed near the socket outlet which must be easily accessible.
About the battery pack

Battery (Lithium ion battery)
- Use only the specified charger to recharge the battery.
- Do not use the battery with equipment other than this camera.
- Do not get dirt, sand, liquids, or other foreign matter on the terminals.
- Do not touch the terminals (+ and −) with metal objects.
- Do not disassemble, remodel, heat or throw into a fire.
If any electrolyte should come into contact with your hands or clothes, wash it off thoroughly with water.
If any electrolyte should come into contact with your eyes, never rub them. Rinse them thoroughly with water, and then consult a doctor.
- Danger of explosion if battery is incorrectly replaced. Replace only with the type recommended by Leica Camera AG.
- When disposing batteries, please contact your local authorities or dealer and ask for the correct method of disposal.
- Do not heat or expose to flames.
- Do not leave batteries in a car exposed to direct sunlight for a long period of time with doors and windows closed.

Risk of fire, explosion and burns. Do not disassemble, heat above 60°C/140°F or incinerate.
About the supplied charger/AC adaptor

To reduce the risk of fire, electric shock or product damage,
- Do not install or place this unit in a bookcase, built-in cabinet or in another confined space. Ensure this unit is well ventilated.
Charger/AC adaptor
This charger/AC adaptor operates on AC between 110V and 240V.
But
- In the U.S.A. and Canada, it must be connected to a 120V AC power supply only.
- When connecting to an AC supply outside of the U.S.A. or Canada, use a plug adaptor to suit the AC outlet configuration.
- The AC adaptor is in the standby condition when the mains plug is connected. The primary circuit is always "live" as long as the mains plug is connected to an electrical outlet.
- To clean your camera, remove the battery and/or the card, or disconnect the power plug from the outlet, and wipe with a soft, dry cloth.
- Do not exert excessive force on the monitor.
- Do not exert excessive force on the lens.
- Do not allow the camera to come into contact with pesticides or volatile substances (can cause surface damage or coating to peel).
- Do not keep rubber or plastic products in contact with the camera for a long period of time.
- Do not use solvents such as benzine, thinner, alcohol, kitchen detergents, etc., to clean the camera, since it may deteriorate the external case or the coating may peel off.
- Do not leave the camera with the lens facing the sun, as rays of light from the sun may cause it to malfunction.
- Always use the supplied cords and cables.
- Do not extend the supplied cord or cable.
- While the camera is accessing the card (for an operation such as picture writing, reading, deletion, or formatting), do not turn off the camera or remove the battery, card or AC adaptor (ACA-DC17).
Furthermore, do not subject the camera to vibration, impact or static electricity. - The data on the card may be damaged or lost due to electromagnetic radiations, static electricity or breakdown of the camera or the card. We recommend storing important data on a PC etc.
- Do not format the card on your PC or other equipment. Format it in the camera only to ensure proper operation.
- The battery is not charged when the camera is shipped. Charge the battery before use.
- The battery is a rechargeable lithium ion battery. If the temperature is too high or too low, the operating time of the battery will become shorter.
- The battery becomes warm after using and during and after charging. The camera also becomes warm during use. This is not a malfunction.
- Do not leave any metal items (such as clips) near the contact areas of the power plug or near the batteries.
- Store the battery in a cool and dry place with a relatively stable temperature.
(Recommended temperature: 15°C to 25°C (59°F to 77°F), Recommended humidity: 40%RH to 60%RH) - Do not store the battery for a long time while fully charged. When storing the battery for a long period of time, we recommend charging it once a year. Remove the battery from the camera and store it again after it has completely discharged.
Documents / Resources
References
Download manual
Here you can download full pdf version of manual, it may contain additional safety instructions, warranty information, FCC rules, etc.
Advertisement


Need help?
Do you have a question about the V-LUX 5 and is the answer not in the manual?
Questions and answers