Table of Contents
Advertisement
Quick Links
Advertisement
Table of Contents

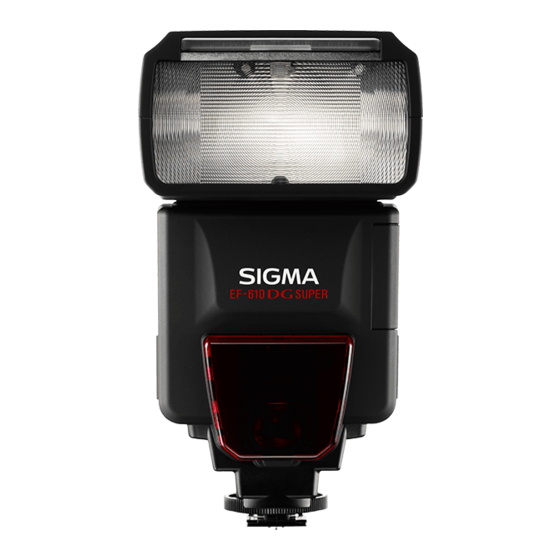
Summary of Contents for Sigma EF-610 - EO-ETTL II
- Page 1 F18E10081 E L E C T R O N I C F L A S H EF-610 DG SUPER INSTRUCTIONS EO-ETTL II...
- Page 2 CE-mærket er i overensstemmelse med de gældende regler i EU. PORTUGUÊS A marca CE garante a conformidade com as normas estabelecidas pela Comunidade Europeia. SIGMA (Deutschland) GmbH Carl-Zeiss-Str. 10/2, D-63322 Rödermark, F.R.GERMANY Verkauf: 01805-90 90 85-0 Service: 01805-90 90 85-85 Fax: 01805-90 90 85-35...
- Page 3 ENGLISH Thank you very much for purchasing the Sigma EF-610 DG SUPER EO-TTL II Electronic Flash. This product is specifically developed for the Canon EOS series SLR cameras. Depending on the camera model, functions and operation may vary. Please read this instruction booklet carefully. To add to your enjoyment of photography, the flash has a variety of features.
-
Page 4: Description Of The Parts
DESCRIPTION OF THE PARTS 1.Flash Head 2.AF Auxiliary Light 3.Bounce Angle; Up and Down 4.Bounce Angle; Right and Left 5.Bounce Lock and Release Button; Up and Down EXTERNAL 6.Swivel Lock and Release Button; Right and Left 7.LCD Panel 8.Battery Cover PARTS 9.Shoe Ring 10.Shoe... -
Page 5: Auto Power Off
5. Please press the “Test Button” to be sure that the flash is working properly. AUTO POWER OFF To conserve battery power, the flash unit automatically turns itself off when the flash is not used within approximately 90 seconds. To turn the flash on again, depress the TEST button or the camera shutter button halfway. -
Page 6: Wide Panel
In this case please ZOOM contact the store where the flash was purchased or a Sigma service station. LCD PANEL ILLUMINATION When you press the LIGHT button, the LCD panel will illuminate for about 8 seconds. The illumination stays on longer than 8 seconds if you press the LIGHT button once again. -
Page 7: Limits Of Continuous Shooting
the background may become under or over exposed. Aperture Priority Setting By selecting the Av mode of your camera, the camera will select the appropriate shutter speed for the scene. If the subject is too bright or too dark, the shutter speed indicator will blink and show the limit (highest or slowest shutter speed) value. -
Page 8: High Speed Sync (Fp) Flash
behind the subject. This is a more natural effect. ◆ This mode cannot be used with EOS 700, 750, 850 cameras. 1. Set the desired picture-taking mode of the camera. 2. Press + or - button mark will be displayed on the LCD panel. -
Page 9: Modeling Flash
5. After composing the picture, press the shutter button. ◆ This function may vary depending on camera model. For more details please refer to “FE lock” instructions of your camera manual. MODELING FLASH If useing the Modeling flash, you can check the lighting and shadow effects before taking the picture. (This function is limited to cameras which are compatible with modeling flash. -
Page 10: Bounce Flash
page). ◆ This function cannot be used with EOS 700, 750, 850 cameras. 1. Set the camera’s exposure mode to M mode and set the F number. 2. Press the MODE button until the Multi-flash mode appears. 3. Press the SEL button until the flash firing frequency starts to blink. 4. - Page 11 functions only. The EOS750 and EOS850 cannot be used with “Wireless Flash”. In this instruction we call the flash unit which is attached to the camera body the “Master unit ” and ◆ we call a flash unit at a remote position a “Slave unit”. When setting a slave unit at the desired position, you can use the mini-stand provided.
- Page 12 Wireless ETTL Autoflash with Flash Ratio OFF If you require an equal power ratio for each flash unit, the slave ID setting is not necessary. You can set 1, 2 or 3 for each Slave Unit in use. All the Slave flash units will fire at the same flash output and the ETTL autoflash system controls the total flash amount automatically, to obtain a correct flash exposure.
- Page 13 11. Confirm that both the master and slave units are charged. 12. Focus on the subject and take the picture. ◆ If you want to change the settings or cancel the flash ratio settings, you can start from step 3. Wireless High-Speed Sync (FP Flash) 1.
-
Page 14: Wireless Multi Flash
You can set a different flash output for each slave unit(s) (the following explains the procedure for using three slave flash units). Set the slave units to normal Wireless Flash mode. Please set the master flash unit as follows. 1. Please follow the procedure for Changing the Wireless Mode and set to the M/ mark. -
Page 15: Designated Slave Flash
press the SEL button to stop the display blinking. b. To change the film speed: Press MODE to select the ISO, then press the SEL button to make the indicator for the aperture value blink. Press the + or – button and set the desired film speed, then press the SEL button once again. -
Page 16: Specifications
SPECIFICATIONS TYPE : Clip-on type serial-controlled TTL auto zoom electric flash GUIDE NUMBER : 61 (ISO 100/m, 105mm head position) POWER SOURCE : Four AA type alkaline batteries or Four AA type Ni-Cd batteries or, : Four AA type Ni-MH Nickel-Metal Hydride batteries RECYCLING TIME : about 7.0 sec. - Page 17 [Table1] GN (ISO100・m) 17mm 24mm 28mm 35mm 50mm 70mm 85mm 105mm 23.0 34.0 35.0 36.0 46.0 52.0 56.0 61.0 16.3 24.0 24.7 25.5 32.5 36.8 39.6 43.1 11.5 17.0 17.5 18.0 23.0 26.0 28.0 30.5 12.0 12.4 12.7 16.3 18.4 19.8 21.6 1/16...


Need help?
Do you have a question about the EF-610 - EO-ETTL II and is the answer not in the manual?
Questions and answers