Table of Contents
Advertisement
Quick Links
Advertisement
Table of Contents

Related Manuals for Asus Z801


Summary of Contents for Asus Z801
- Page 1 ASUS Z801 User Manual...
-
Page 2: Table Of Contents
Contents Preface Call logs Call Time/Cost Welcome SMS Counter Package contents GPRS Counter Overview Options during a call Specifications Other call options Menu Map Contacts Getting started Adding contacts Front view (flip open) Searching for a contact Function keys Shortcut to contact entries Front view Copying contacts Rear/Left view Deleting contacts Inserting the SIM card, Caller Group microSD... - Page 3 Contents Tone Settings Voice Recorder Call Settings AB Repeater Network Settings Schedule FM Record Bluetooth Settings Stopwatch Security Settings Countdown Factory Settings Units Converter Currency Converter Camera Health Taking photos Network Viewing and managing photos Photo capture settings SIM Tool Kit Recording videos Viewing and managing videos Data Account Video capture settings Handset Manager...
-
Page 4: Preface
Preface Congratulations on your purchase of an ASUS Z801 mobile phone. Read this manual carefully and keep it in a safe place for future reference. About this manual Every effort has been made to ensure that the contents of this manual are correct and up to date. However, the manufacturer makes no guarantee regarding the accuracy of the contents, and reserves the right to make changes without notice. Copyright statement No part of this manual, including the products and software described within, may be reproduced, transmitted, transcribed, stored in a retrieval system, or translated into any language in any form or by any means, without the express written permission of ASUSTeK COMPUTER, INC. (“ASUS”). Product names mentioned in this manual are for identification purposes only, and these names may be the registered trademark or copyright of some other companies. Copyright© ASUS 2006... -
Page 5: Welcome
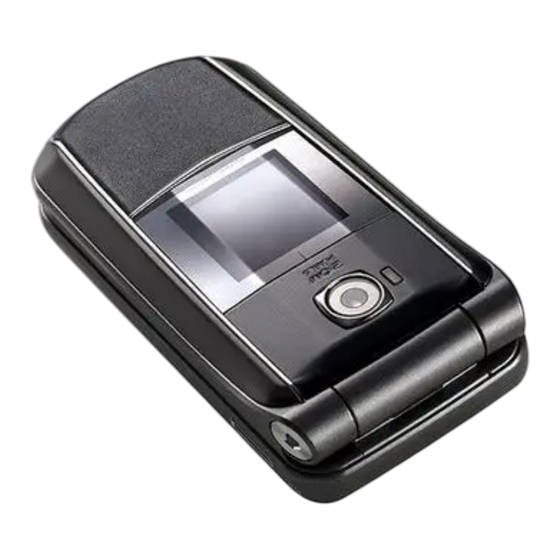
Welcome Congratulations on your purchase of an ASUS Z801 cell phone. The following illustration displays the package contents of your new phone. Package contents Travel charger Z801 handset 750 mAh Li-ion Stereo headset Desktop charger USB cable battery x2 User manual Quick start guide Warranty card Handset Manager CD-ROM... -
Page 6: Overview
Overview The Z801 is a stylish and fashionable new phone from ASUS, with all the functions and utilities to make it a useful tool in today’s mobile world. The Z801 comes equipped with a built-in camera, MMS/SMS messaging capability, organizer, Java games, audio player, Bluetooth capability, WAP, GPRS, and a microSD card slot. In addition to the internal 64 MB phone memory, the ™ microSD card* provides additional memory where you can store your graphics, and audio files. ™ The Z801’s audio player enables you to play back your favorite music. To enjoy powerful media file management with ease, avail of the Music Manager’s advanced features and functions. The Z801 features a voice recognition program that allows you to perform verbal commands to the phone, such as call, find a contact, open a shortcut, and others. Features • Wide variety of calling and messaging functions • Built-in camera • Media center with audio player and games for your entertainment • MMS and SMS messaging capability • Personal information organizer with alarm, calendar, calculator and other useful tools to manage your time • WAP and GPRS capability to check e-mail or browse web services • Bluetooth capability • Voice recognition * NOte: The microSD ™... -
Page 7: Specifications
Specifications System supported Triband GSM900/1800/1900; GPRS Class 10 Dimensions 92 (L) x 46 (W) 23.5 (T) mm Weight 110g Battery 750 mAh Li-ion Standby time 200 ~ 300 hours* Talk time 2 ~ 5 hours* Main display 2” TFT, 262 K colors, 240 x 320 pixels Sub Display 1” TFT, 262 K colors, 128 x 128 pixels Phonebook 1,000 sets Messaging Supports SMS, EMS, MMS, Email Camera 2 Megapixel / CMOS Video recording Records an unlimited number of files, depending on internal and exernal memory status Supports MPEG4 video recording Ringtone 64 chord polyphonic ring tones Supports MP3 / AAC / AMR / WAV Voice recording... -
Page 8: Menu Map
Menu Map • Greeting Text Greeting Text Network • Auto Date/Time Update Auto Date/Time Update Auto Date/Time Update • LED Data Account • Firmware Version Display Settings Messages • Themes Unified Inbox • Main Wallpaper • Sub Wallpaper • Power On Animation Chatting Rooms •... - Page 9 • Call Time Reminder • Effect • Call Time Display • LED Highlight • Auto Redial • Frame • Closed User Group • Capture Timer • Call Filter • Shooting Mode Network Settings • Storage • Network Selection • Advance Settings • Preferred Networks Video Recorder • GPRS Connection • My Video Bluetooth Settings •...
- Page 10 Organizer • Caller Group • Extra number Alarm - My Phone Number Power On/off Timer - Service Number Calendar - SOS Number Tasks List • Memory Status Calculator • Basic • Default Storage • Scientific • Fields World Clock • My vCard Voice Recorder • Speed Dial AB Repeater •...
-
Page 11: Getting Started
Getting started Front view (flip open) earpiece Main screen Navigation/Quicklaunch keys Left soft key Right soft key enter key Call key Power/end key Alphanumeric keypad Headset port Charger/Mini-USB socket NOte: Refer to the next page for function key descriptions. -
Page 12: Function Keys
Function keys The following table lists the phone keys and their functions. Power/end key Up navigation/quicklaunch key • Hold to turn the phone on or off. • Press to scroll up through menu items. • Press to stop an incoming call or cancel a call you are dialing. • Press to enter Unified Inbox menu. • Press to return to the standby mode. Down navigation/quicklaunch key • Press to erase the screen texts. • Press to scroll down through menu items. Call key • Press to enter Shortcut List menu. • Press to dial or answer calls. • Press to display the call logs or to Left navigation/quicklaunch key redial the last number called. • Press to scroll left through menu items. Left soft key • Press to enter Camera menu. -
Page 13: Front View
Front view Inserting the SIM card, microSD card, and battery ™ When you register with a service provider, you Flash receive a Subscriber Identity Module (SIM) Loudspeaker card. Your phone must have a SIM card in order to make calls. The SIM card is a computer chip Camera lens that contains your phone number, phonebook information, and service provider information. Sub screen Handle it with care and do not bend it or expose it to static electricity or dirt. Be sure the power to your phone is off before you insert your SIM card. -
Page 14: Removting The Sim Card, Microsd ™ Card, And Battery
Removing the SIM card, 3. Insert the microSD ™ card and slide it into microSD card, and battery ™ the holder until it fits. The gold contacts of 1. Slide the cover in the the card should face direction of the arrow. down with the notched Lift and set it aside. edge on the left side. 4. Place the battery into the battery 2. Pull the protruding compartment noting film on top of the the correct polarity. battery in the Carefully press down direction of the the battery until it arrow, then carefully... -
Page 15: Charging The Battery
• Flip open the phone. inserted one way. • Hold down the power/end Hold down the power/end key until the screen lights up. If needed, enter your SIM card PIN code CAUtION: and press the Enter key. • Use only the batteries and chargers approved by ASUS or else damage may occur to the mobile phone. To turn the phone off: • You can also charge the battery by connecting the phone to • Press the power/end key and hold a computer using the supplied USB cable. until the phone shuts down. NOte: If you set an alarm using the Organizer menu, then turn In charging off the phone, the phone will turn itself on when the alarm is activated. After you disable the alarm, the phone prompts you if... -
Page 16: Standby Mode
Standby mode Keypad is locked. When your phone is on, but not in use, it is in Alarm has been set. standby mode. During standby mode, the upper part of the display screen shows various icons. A text message has been received. The time and date are displayed at the lower A multimedia message has been center of the screen. Under the date and time received. are Menu on the left corner and Names on the An email has been received. right corner. Press the left soft key to view the main menu, and the right soft key to view A WAP message has been received. -
Page 17: Using The Menu
Using the menu 3. Press the left soft key or the enter key to select the Missed Calls option. A list of To view the main menu, go to standby mode, missed calls opens. then press the left soft key or enter key. The following table provides a list of all the Follow these tips to navigate through the menu main menu items: and menu options. • Use the up, down, left, and right Network: Enables you to specify the navigation keys to move through the WAP and data settings and set up various menu items. -
Page 18: Text Entry
Basics Media Center: Consists of an audio • Use the alphanumeric keypad to enter player, FM radio, and games. You letters and numbers. Each key is can manage all your data using a file assigned multiple characters. manager • Press the right soft key to select Clear Organizer: Contains useful tools on the lower right corner of the screen to such as an alarm, a calendar for delete a letter if you make a mistake. scheduling appointments, a to-do-list, • To enter spaces or symbols, press the a stopwatch, a countdown function, key. The symbol table is displayed. and a calculator. You can also record Use the navigation keys to highlight a memos and radio programs, enable a symbol and press the enter key to select language-learning tool, convert units or currency, and manage your health. it. The character represents a space. You may also enter a space by pressing Contacts: Enables you to manage the right navigation key or the key. -
Page 19: Choosing Text Entry Methods
Choosing text entry methods correct word by pressing the keys repetitively and scrolling through the words suggested From any text entry screen, such as a text by the phone. By reducing the number of message window, select Options > Input keystrokes, the smart Abc helps some users to Method. type messages more quickly. ABC input Whenever you press a key, a list of possible characters or character combinations is ABC input enables you to enter individual created. To enter text, use the up and letters one by one. This is ideal for adding a down navigation keys to find the character phonebook entry or entering a WAP address. combination you want. Press the right When you press a key, the characters assigned navigation key or # key to proceed entering the to the key appear on the screen. Press the key next character. If you make a mistake, press... -
Page 20: Transferring Files To A Computer
Upgrading the firmware With this method, you can enter various types To upgrade the firmware version: of symbols. Select Options > Input Method > 1. Turn off the handset and disconnect the Insert Symbols. A list of symbols is displayed. USB cable. Use the navigation keys to select the desired 2. Visit the ASUS website (www.asus. symbol and press OK when done. com) for the latest firmware version. Switch text input method In the General Download section, click Search. A list of download items Select Options > Input Method, or long press * appears. Download the firmware to your key in full screen editor. - Page 21 5. After installing the latest firmware version, go to Settings > Factory Settings to restore all settings to factory default in order to activate the latest WAP/MMS settings. NOte: • Make sure the battery has sufficient charge before executing the firmware upgrade. • Do not interrupt the upgrade procedure. If the procedure terminates for any reason, remove the battery and reinsert it, then restart the fireware upgrade. • The upgrade program is supported by Windows ® 2000/XP.
-
Page 22: Calls
Calls Answering a call Making a call When you receive a call, the phone alerts To place a call: you by sounding the ring tone and vibration 1. Enter the number you want to dial using according to the specified ring tone and the keypad. If you make a mistake, select vibration settings. To answer the call, do the Clear to delete at any time. The right soft following: is just under the word Clear on the 1. Flip open the phone to answer the call. lower right screen; select this key to clear a number. 2. Press the power/end key to end the call and disconnect. -
Page 23: Returning A Missed Call
Rejecting an incoming call You can also access dialed numbers from Calls > Dialed Calls. To reject an incoming call, press the power/end key; or, press the right soft key twice to Call logs select the Reject option. Depending on your service provider, the caller may be transferred Call logs consist of information about missed, to your voice mail or hear a busy signal. dialed, and received calls. To view lists of missed, dialed calls or received calls, select Diverting a call Calls from the main menu. Then select Missed Calls, Dialed Calls, or Received Calls to view To divert an incoming call to another number: the type of calls you require. The number of 1. When you receive the call, press calls in a list is limited to 20 entries. Older Options and then select the Deflect calls are dropped from the list when the limit is item. -
Page 24: Deleting Call Logs
2. Select the list you want to delete: the number, press the call key or select Missed Calls Options > Dial. Dialed Calls To dial a number from the received or dialed call Received Calls logs, follow the same procedure in the previous Delete All section “Returning a missed call.” Call time/Cost Call log options While viewing a number from the dialed, Depending on the type of service package you received or missed call logs, you can select have, you may pay according to the length Options to view other functions as follows: of your calls. Some users want to monitor • Delete: Deletes the number from the the length of their calls. Your phone offers a list. Deleting can create space for other convenient and accurate way to keep track of... -
Page 25: Sms Counter
SMS Counter Options during a call There is an SMS counter which can keep a When a call is in progress, the following options log of the number of SMS messages sent and are available: received. • Hold: Puts a current call on hold. • end: Ends a call. To view the SMS counter: • New Call: Places a new call. 1. From the main menu, select Calls > SMS • Contacts: Displays the contacts menu. Counter. You can use this function to check a 2. Use the navigation keys to highlight the contact phone number during a call. -
Page 26: Contacts
Contacts Adding contacts contacts NOte: You can control which fields are available for contact entries in Contacts > Settings > Fields. See the section “Contacts Settings” in this chapter for more information. Read this section to learn how to add new contacts to your phonebook Searching for a contact Adding a new entry Read this section to learn how to search for Use the Add function to add a new contact to contacts in your phonebook. your phonebook. Quick Find To add a new entry: Follow these steps to perform a Quick Find 1. From the main menu, select Contacts >... -
Page 27: Shortcut To Contact Entries
Copying contacts Press the call key to call the contact; press the power/end key to You can copy contacts from your SIM card to end the call. phone memory or from phone memory to SIM 4. Select Back to return to the previous card. screen. To copy all contacts: 1. From the main menu, select Contacts > Search entry Copy All. Use the Search entry function to search for 2. Use the navigation keys to highlight from a specific entry. Follow these steps to use the SIM to copy contacts from the SIM card,... -
Page 28: Deleting Contacts
Deleting contacts Custom1~5. You can change the name of any caller group. You can add contacts from your You can delete all contacts from the phone or phonebook to a caller group and you can define SIM using the Delete All function. To delete all ringtones, pictures, etc. contacts: To change the name of a caller group: 1. From the main menu, select Contacts > 1. From the main menu, select Contacts > Delete All. Settings > Caller Group. 2. You are prompted to select a location. 2. Use the navigation keys to highlight a Select From SIM to delete all contacts caller group, then select OK or press the stored on the SIM. enter key. -
Page 29: Extra Number
To change the incoming picture: 3. Select edit > Add. 1. Select the caller group to modify as 4. Use the navigation keys to highlight a described in the previous procedure. contact saved in the handset, then select 2. Use the navigation keys to highlight the Add > Yes to confirm. Incoming Picture option (third in the list). 5. To add more members or to delete, 3. Select edit. Choose either Default or select Option. Custom. This option determines which 6. Use the navigation keys to highlight the picture is displayed when someone from Add or Delete option. the chosen caller group calls. If you 7. Press OK > Yes to confirm. chose Custom, you will be prompted to browse the location of the picture you extra Number... -
Page 30: Contacts Settings
NOte: SOS numbers vary according to region and service A list of fields is displayed. provider. Contact your service provider for details about SOS 2. Highlight a field and use the enter key to numbers. check or uncheck it. When done, select Save. Contacts settings The phonebook settings menu enables you My vCard to view memory status, set the preferred A vCard is a virtual calling card that you can storage media, determine which fields appear send to people. It can contain your name, cell in the phonebook, edit/send a vCard, activate phone number, home number, office number, functions such as speed dial and password fax number, company name, and e-mail protection, and set caller videos. -
Page 31: Password Protection
correspond to the keypad number 2~9. • Caller Group: Enter this option and select a caller group. The video will be 3. Set the enable Speed Dial item to On played when someone from this group before using this function. call. Password Protection If you want to protect your phonebook information from being accessed, go to go to Contacts > Settings > Password Protection. Select On/Off to enable/disable this function. -
Page 32: Messages
Messages Read this section to learn how to use the SMS 3. Press the left soft key to display the and MMS messaging features of your new Options menu, which includes: phone. You can even send e-mail and use text • Send • Send chat. • Save This section also covers voice mail features, • Send to Many broadcasting messages, and setting the • Common Words preferred text input. • Insert Object • Text Format Unified Inbox •... -
Page 33: Common Words
Sending an SMS message common words phrase to an SMS: 1. Begin an SMS message as described To send an SMS message: in the previous section, “Composing an 1. From the text entry screen, select the text entry screen, select SMS Message.” Options > Send or press either the call 2. Before typing any text, press the left soft key or the enter key. to display the Options menu. 2. The Send to options require that you The Send to options require that you 3. Use the navigation keys to highlight the type in a telephone number, search for a... - Page 34 message received through Messages > 1. From the main menu, go to Messages > Unified Inbox or Messages > SMS > Inbox. SMS > Inbox/Outbox/Drafts > OK. Select a message to view, then press Options 2. Use the navigation keys to highlight the to display the following items: message you want to move. • Reply 3. Select Option. • Delete 4. Scroll down to highlight Move > OK. • Forward 5. Highlight to Secret SMS > OK. When •...
-
Page 35: Mms
to enable/disable the features. contains a combination of text, image, or audio. 3. When finished, select Save > Yes. To create an MMS message: 1. From the main menu, select Messages > To check the memory status: MMS > edit MMS. 1. From the main menu, select Messages > 2. Select the to field then select edit. SMS > Settings > Memory Status. 3. Use the navigation keys to highlight the 2. Press OK to display the Memory Status. Add Number or Add e-mail option then The Messages >... -
Page 36: Chatting Rooms
4. When your message is complete, select 3. Edit the to, Cc, Bcc, and Subject fields Options > Done. as described in the previous procedure. You have just created one slide. Repeat 4. Edit the content if required as described the process to add more slides. in the previous procedure. 5. Send the completed message as To send the MMS message: described in the previous procedure. 1. From the Options menu, highlight a Send Only or Save and Send option. Settings 2. Press OK to confirm. This menu enables you to configure your MMS NOte: The Save to Drafts option saves a copy of the message message settings. -
Page 37: Email
To enter a Remote Number (the 4. Use the navigation keys to highlight destination number), select Search. The the Profiles option, then press OK to phonebook opens. Choose the contact confirm. entry, then press OK. The Profiles menu is displayed. 5. When finished, press the left soft key 5. Use the navigation keys to highlight each to press OK > Yes to save your new field and select edit to change any field, settings. or use the left/right navigation key to 6. Use the navigation keys to select scroll through available choices. -
Page 38: Cell Broadcast
3. Type in the voice mail name and number. You can also connect to a voice mail account here. NOte: Voice mail is a service provider feature. Contact your service provider for voice mail numbers and settings or other voice mail assistance. Cell Broadcast Use the Cell Broadcast option to set cell broadcast parameters. To set broadcast message parameters: 1. From the main menu, select Messages > Cell Broadcast. 2. Use the navigation keys to highlight the Activate option, then press the left soft to toggle the setting on or off. 3. Highlight the Read topic option then press OK to read stored broadcast messages. 4. Highlight the Languages option then press OK to display the language menu. -
Page 39: Profiles
Profiles The phone can be set to behave in a number 4. Select a feature to customize from the list of profiles. Each is saved as a profile and and press OK. is designed to be used in a particular The feature submenu is displayed. environment. For instance, if you are in a For example, for Ring Mode, you can meeting you may want your phone to alert you select Ring Only, Vibrate, Vib. and Ring, silently when a call comes in. Vib. then Ring, or Silent. 5. Highlight a feature from the submenu and To select a profile: press OK to confirm changes. 1. From the main menu, select Profiles. 6. To use a profile, highlight the profile A list of profiles appears. you want to use, then select Option > 2. Highlight a profile from the list, then press Activate. the enter key to activate. -
Page 40: Settings
Settings Phone Settings Language The Settings > Phone Settings > Language The Phone Settings menu enables you to option enables you to set the default language configure handset features including time used in menus. and date, preferred input method, language, preferred input method, language, language, shortcuts, voice command, flight mode, greeting Shortcut text, automatic update of date and time, LED, and firmware version. firmware version. To edit the shortcut list: 1. From the main menu, select Settings > To access the Phone Settings menu: Phone Settings >... -
Page 41: Flight Mode
Highlight enable Recognition and press OK. The Digit Adaptation item in the Voice Use the up/down navigation key to select Command menu allows you to improve the between On and Off. phone’s recognition rate. Say a command string to enable the phone to recognize your voice While on the main idle screen, you may also and the manner by which you utter commands. enable voice command by pressing and holding the right soft key for at least three seconds, The Preferred Digit Length option allows you or until you are prompted to “Say Command.” to turn on/off the digit length settings and select Say “Detail” or press the left soft key the digit lengths you prefer using the enter key. display a list of commands you can use. Flight Mode NOte. To call a contact using voice command, say the name exactly as it is listed in the phonebook. For example, to call an Setting the phone to flight mode disables all call entry named Michael Philip, simply say “Call Michael Philip.”... -
Page 42: Display Settings
You can enable this feature by selecting 3. Select Option to activate the theme, set Settings > Phone Settings > Auto Datetime the theme timer, or set the theme order. Update to take advantage of this service, if Use the touchpad to highlight an option offered by your service provider. and press OK to confirm. The Activate option activates the To enable this option, enter the Auto Datetime selected theme. The theme timer Update option and select On using the up/down option defines how often the theme is navigation key. Press OK to confirm. -
Page 43: Tone Settings
Idle Screen Sleep timer This item allows you to choose what you want To set the sleep timer, press Settings > to display on the main idle screen. Use the Display Settings > Sleep timer. Use the navigation keys to highlight any of the following navigaiton keys to highlight your preference. items, and use the enter key to check/uncheck Press OK. them: Show Date and Time, Show Owner tone Settings Number, Show Operator Name, and Show Profiles. Press Save to confirm your settings. -
Page 44: Hide My Number
Hide My Number answered, if busy, or divert all data calls. Select Cancel to deactivate call forwarding. Go to Settings > Call Settings > Hide My No. to withhold your number, so that when you call Call Barring someone, your number is not shown. Call barring is a service available through your You can choose to activate or deactivate this service provider. This service restricts different option, or let the network set the option. types of incoming and outgoing calls. Go to Call Waiting Settings > Call Settings > Call Barring to bar outgoing calls, incoming calls, cancel all bars, If your service provider offers call waiting, you or change the barring password. first need to enable this feature. Options for Outgoing Calls include All Calls, To enable call waiting: International Calls, and International Except... -
Page 45: Call Time Reminder
Call time Reminder fails to connect when you call the first time. To activate this feature, go to Settings > Call Use this feature if you want to limit the length Settings > Auto Redial. Use the navigaiton of your calls. After the time limit specified, your keys to highlight your choice between On and phone sounds a reminder for you. Off, then press OK to set. To set a call time reminder: Closed User Group 1. Go to Settings > Call Settings > Call time Reminder. A closed user group is a service provided by 2. Select Single if you want to use a some service providers that permits network reminder just once at a specific time. -
Page 46: Preferred Networks
in the Ignore List menu. Select Option > edit. available networks manually from various Key in a phone number or select Search to service providers, or you can set the network open the phonebook. Choose the contact you selection option to Automatic and the phone will want to block, then press OK. select a network for you automatically. To unblock the contact’s number, select the Preferred Networks entry in the Ignore List, then select Option > Delete > OK. When prompted to confirm the To select a preferred network: action, select Yes. Select the Delete All option 1. Highlight the Preferred Networks option, if you want to unblock all the numbers. then press OK. 2. Press Options > Add from List to To enter numbers that you do not want the choose the desired network, then press phone to block, select Privileged List. -
Page 47: Bluetooth Settings
Bluetooth Settings Yes or No. 4. After that, you will be asked if you want With the Bluetooth function you can exchange to connect with the device. Press Yes or information between your phone and other No. Now the connection is established. Bluetooth devices. If you add a device to your trust list, you will not The Bluetooth Settings menu features include have to go through this pairing process again. Power on Bluetooth, Search New Device, My Merely highlight the device from the list shown Device, Active Device, Settings, and About. under Bluetooth Settings > My Device, and To connect a Bluetooth device to your phone for select Options > Connect. the first time: To disconnect a Bluetooth device from your 1. Turn on the Bluetooth device through phone, go to Bluetooth Settings > My Device Settings >... -
Page 48: Security Settings
will pair with. For headset, the default For headset, the default Send to > Bluetooth > My Device to select the password is usually 0000 or 1234. Check device then select Send to send it. your headset documentation to verify. Receiving an item First make sure that you have turned on the My Device visibility, so that the other device can detect With this option, you can connect other devices your phone, and enter the same password in to your phone, for example a Bluetooth headset. -
Page 49: Phone Lock Code
Phone Lock Code Barred Dial Go to Settings > Security Settings > Phone This function enables you to block dialing of Lock Code to provide additional security by certain numbers. Barred dialing is a service locking the handset. Even if the SIM card is offered by some service providers. changed, the phone cannot be used until a To enable the option, highlight the Barred Dial password is entered to unlock it. option from the Security Settings menu and press the left soft key to toggle the option to NOte: The default password is 1234. See the section ”Change On or Off. Password” in this chapter for information on setting your own password. NOte: This option requires a password. Consult your service provider if you do not know your password. Not all service Auto Keypad Lock providers support this function. - Page 50 To restore factory default settings: Highlight the Restore Factory Default option from the Security Settings menu and press the enter key. All factory default settings are then restored. NOte: This option requires a password. Use the default password, 1234, to access this setting.
-
Page 51: Camera
Camera Zoom function The phone is equipped with a high quality camera for capturing still pictures and video. The phone has an easy-to-use zoom function. taking photos To zoom in on an object, press the up navigation key. To zoom out, press the down To capture still pictures with your phone: navigation key. 1. The fastest way to take a photo is to press the capture button while on idle You can preview the zoom effect on the phone’s mode. screen. In addition, a slide bar on the right of the screen moves you zoom in and out. You may also use any of the following methods to take a photo: Brightness • From the idle screen, press the left navigation key to display the Camera While in capture mode, adjust the brightness menu, or of the display by pressing the right and left • Press the left soft key to open the navigation keys. main menu. Use the navigation keys to highlight the Camera icon and press Viewing and managing Select to confirm. -
Page 52: Photo Capture Settings
2. To view an enlarged thumbnail, highlight 2. Use the up/down navigation key to scroll an image and press the enter key. You through the available choices, then press can browse photos in this enlarged view OK to apply the setting. using the left and right navigation keys. effect 3. Press the left soft key to display the Options menu. You can view, send, Use the Effect option to apply photo effects rename, delete, edit, sort, and hide as you capture photos. For example, you can photos. You can also set the default capture photos with a photo negative effect, storage to handset or memory card or alter colors, or make the photo look like a change the browse style. You can set the sketched drawing. image as the main/sub wallpaper, power To apply photo effects: on/off animation, or set to a phonebook 1. While in capture mode, select Options >... -
Page 53: Shooting Mode
To apply frames to photos: To enable the multi-capture function: 1. While in capture mode, select Options > 1. While in capture mode, select Options > Frame. Shooting Mode. 2. Highlight a frame from the list. 2. Select Off for standard single shots. For multi-capture shots, choose from 4 Shot, You can use the up and down touchpad 6 Shot, or 9 Shot. keys to scroll through the other frames to view them all. Default Storage 3. To select a frame, press OK. The selected frame is then displayed on the Use the default storage option to set where capture screen. captured pictures are stored. You can store 4. To remove a frame, select Options > captured pictures either in the handset (internal) Frame > No Frame. memory, or on a microSD ™... -
Page 54: Recording Videos
Capture Timer You can preview the zoom effect on the phone’s screen. A slide bar at the top of the screen Shooting Mode moves as zoom is applied. Night Mode 7 Image Quality White balance function 8 Image Size The phone’s video recorder has a white balance Press the key repeatedly to change a given function. setting. For example, if you press 5 for Shooting Mode, pressing again enables you to apply Off, To adjust the white balance while recording a 4 Shot, 6 Shot or 9 Shot to the setting. video, press the up/down navigation key. You can preview the white balance effect on Recording videos the phone’s screen. A slide bar at the left of the screen moves as white balance is applied. Follow these instructions for shooting video: 1. From the main menu, highlight the Viewing and managing Camera icon, then press Select. 2. Select the Video Recorder option, then videos press OK to enter video capture mode. -
Page 55: Video Capture Settings
Capturing a still photo 3. To edit files, select Options. You can play, send, rename, delete, sort, or hide You can capture a still photo from a video by files. You can also set the default storage selecting the Snap option using the left soft key location. while the video is playing. Some video playing features are explained in the following sections. Video capture settings The camera can be configured to capture Rewind and fast forward videos of different size and quality. You can also To rewind, press and hold the up navigation capture videos with special effects, or set the key. default storage location to handset or memory To fast forward, press and hold the down card. navigation key. To access camcorder settings: Put the camera into video recorder capture Video playback speed mode, as described in the “Recording videos”... -
Page 56: Record Audio
Record Audio also restore all factory default video setings. While in video recorder capture mode, select NOte: EV stands for exposure value. The EV option enables Options > Record Audio. Use the navigation you to manually raise or lower the exposure value. keys to select between On and Off to determine The AC Frequency option adjusts for lighting flicker. Select the frequency of electrical current in your area. whether to record sounds and images simultaneously or not. Restore Default Use the Restore Default option to restore all LeD Highlight factory default video settings. Use the LED highlight option to turn on/off the To restore default settings: flash as you record videos. 1. While in video recorder capture mode, To apply the LED highlight: select Options > Restore Default. 1. While in video recorder capture mode, 2. A message asking you to confirm the select Options >... -
Page 57: Qr Code Decoder
QR Code decoder My Secret Album My Secret Video The Camera > QR Code Decoder option allows you to conveniently obtain information My Secret Album and My Secret Video allow by capturing the bar-codes. For example, when you to store image and video files safely and you see a movie post on the streets, you may securely, preventing unwanted viewers from capture a photo of the bar-code on the post accessing confidential media files. using your phone. When decoded, the photo tells you information about the movie. NOte: The default password is 1234. Refer to the Settings chapter, Change Password section of this user guide for To capture a bar-code: information about changing passwords. - Page 58 a different text input method. the position of the text, then press the enter key to apply. Press Done when Add effect: Highlight an effect from the finished, or Cancel to discard. list using the navigaiton keys and press the enter key to view the effect on the Adjustment: You can choose either to picture. Press the left and right navigation adjust the image or the color. Highlight keys to toggle between effects, and press one of the two choices from the list and press OK. Adjust your image’s the left soft key to apply the setting, or brightness, contrast, saturation, and hue. the right soft key to discard. Press Done or Cancel, then press the Frame: Highlight a frame from the list left soft key to apply the setting, or the...
-
Page 59: Media Center
Media Center Audio Player Key assignments are as follows: • Up navigaiton key: Open the current The phone is equipped with a high quality audio playlist player for digital music files. • Down navigaiton key: Stop navigaiton key: Stop : Stop To start the audio player: • Left navigaiton key: Previous song navigaiton key: Previous song : Previous song 1. From the main idle screen, press the left •... -
Page 60: Creating A New Playlist
to folders other than these, you will not songs in the playlist. Select Off to play be able to play them with the phone’s the songs in order. audio player. • Background Play. Select Background Play to continue listening to music files Creating a new playlist even if you leave the media center to use other menu functions. Music stops, To create a new playlist: however, for playing games or for making 1. From the main menu, select Media phone calls. Center > Audio Player > Options > • MP3 equalizer Settings. Select from Play List. The Play List menu opens. eight audio modes including Normal, 2. Select Options > Create New Playlist. Bass, Dance, Classical, Treble, Party, 3. Use the keypad to enter the new playlist Pop, and Rock. -
Page 61: Fm Radio
To edit lyrics: channel 1. Choose a song from the list, then press • Right navigaiton key: Press to jump Options > edit Lyrics. The lyric file of to the next channel; Hold to that song opens. Refer to “Lyric Sync” in automatically tune to the next the previous section for more details. channel 2. Press the capture button on the left side • enter key: Turn on/off the radio of the handset to play/pause the song. NOteS: 3. When the song is played, use the • You need to plug an earphone to the earphone socket on the enter key to insert/remove time stamps bottom of the phone to listen to the radio. -
Page 62: Java
NOte: When entering a frequency, use the # key to insert a the Media Center > FM Radio > Options > Settings option allows you to change the decimal point. following items: Background Play, Skin, Record If the channel you are listening to is not on you are listening to is not on Format, Record Storage, and Audio Device. the channel list, you may add it to the list by you may add it to the list by With the the Media Center > FM Radio > long-pressing a number key that has not been Options >... -
Page 63: File Manager
Viewing drive contents To open the Java Settings menu: 1. From the main menu, select Media You can view the files stored in the memory of Center > Java Settings. the phone or on microSD ™ card using the file 2. Highlight an option to change. manager. 3. Use the right and left touchpad keys to To view the contents of a drive: change the setting. 1. Open the file manager as described in NOteS: the “File Manager” section of this chapter. • Not all settings can be changed. Some fields only display 2. Use the navigation keys to highlight a resources available. -
Page 64: Organizer
Organizer Power On/Off timer The organizer menu gives you access to a number of features including alarms, power The phone can be set to turn on or off on/off timer, calendar, task list, calculator, world automatically. The Organizer > Power On/Off clock, sound recorder, AB repeater, schedule timer option enables you to schedule times to FM record, stopwatch, countdown, units/ turn power on or off. currency converter, and health manager. You can define up to four power on/off times. Highlight a number from the list using the Alarm navigation keys and select edit. The phone can function as an alarm clock. You Use the right/left navigaiton key to change can set up to three alarm events. settings for each field. To program an alarm. The Status field sets the status of the phone to 1. From the main menu, select Organizer >... -
Page 65: Tasks List
2. The calendar is displayed. Use the To access the Tasks List: volumn key on the left side of the 1. From the main menu, select Organizer > handset to scroll the calendar by month. tasks List. Dates with tasks appear marked with a red Stored tasks are then displayed. triangle. 2. Select Options > Add to add a new task. There are fields for date, time, content, To select a date on the calendar: and alarms. 1. Use the navigation keys to highlight a Select date and time fields using the specific date on the calendar, OR navigation keys, and modify the fields Select Options > Go to Date and enter using the keypad. -
Page 66: Calculator
2. In the date field, enter the date you would • m- Select m- to subtract the number like the recurring task to begin. stored in memory. 3. In the Alarm Notify field, select • mc Select mc then press OK to clear Activate. memory. 4. In the Alarm type field, select Hourly, • mr Select mr to retrieve and enter the Every Day, Days (Monday through number in memory. Friday), Weekly, or Monthly. Note that most of the functions are selected The task is then recorded for all relevant with the navigaiton keys alone, with no need to dates after the starting date. These dates press OK. For example, compute appear marked with a red triangle in the 239 + 1,238 + 439 as follows: calendar. 1. Enter 239 with the number keys. 2. Press the up navigation key once to Calculator select the + function. -
Page 67: World Clock
2. Enter values to compute using the Sounds to display a list of saved keypad. recordings. Press Options to play/ append/rename/send/delete the current 3. Use the navigaiton keys to choose the recording, or delete all recordings. function you want to perform, then press Select. Select Settings to set the default storage location and the file format. Files can be 4. When done, press the right soft key stored in AMR or WAV formats. clear. 3. Highlight an item from the Options menu and press OK to confirm. World Clock The world clock function enables you to see the AB Repeater time in various major cities of the world. To start the AB Repeater: To open the world clock: 1. From the main menu, select Organizer > From the main menu, select Organizer > AB Repeater. -
Page 68: Stopwatch
NOte: displayed. 2. Select the type of stopwatch you want to • Plug the earphone to your handset before recording. use and press OK to confirm. • The scheduled recording does not start in USB mass storage mode. 3. Press the enter key to Start/Stop timing. 4. Select Reset to reset the stopwatch. To schedule FM recordings: 5. Select Back to exit. A message asks if 1. From the main menu, select Organizer > you would like to save the timing. Select Schedule FM Record. You can make up Yes or No. to four recordings. Press edit to set. 6. If you select Yes to save the timing, enter 2. Use the up/down navigation key to a name for the file. After entering a file highlight a field to set. You can choose name, select Options >... -
Page 69: Countdown
To enter a lap time: 3. To start the countdown timer, press the enter key. Press the left soft key to select Mark. The lap 4. When the specified time lapses, the time is then added to a list of lap times. timout window opens, and a tone/ Select Record to view saved stopwatch vibration signifies that the time is up. records. Press OK or select Back to stop. nWay stopwatch Units Converter The nWay stopwatch enables you to track up to The Units converter is a useful tool to convert four individual times simultaneously. weights and measures from imperial (pounds, To use the nWay stopwatch: feet, and inches) to metric or metric to imperial. 1. Press the enter key to start/stop the nWay stopwatch. -
Page 70: Currency Converter
convert kilometers to miles, complete the To use the BMI calculator: Km field and leave the Mile field blank. 1. From the main menu, select Organizer > Health > Calculate BMI. 5. Input a number using the keypad. 2. Highlight the top field, then use the left 6. Press the OK to confirm. and right navigaiton keys to enter your The measure is converted and displayed. sex, Male or Female. 3. Highlight the height and weight fields and Currency Converter enter a value for each using the number The currency exchange is a useful tool to help keys. you convert one currency to another or back 4. Press OK to calculate your BMI. The again. -
Page 71: Network
Network To open the WAP menu: The Network menu gives you access to 1. From the main menu, select Network > wireless services, such as WAP web browsing or WAP push. WAP. 2. Highlight an option to change. SIM tool Kit 3. Press OK to change the highlighted setting. The SIM Tool Kit (STK) list allows you to view and use value-added services offered by your Browsing WAP pages phone operator. Browsing WAP pages is much like browsing To open the STK list: web pages with your computer. However, rather 1. From the main menu, select Network > than using a mouse, you navigate with the StK. -
Page 72: Data Account
Data Account Changing the WAP proxy IP address One or more WAP profiles should already be The Network > Data Account option displays a set up before changing the IP address. list of available network services. 1. Select WAP > Settings > Profiles. A list To view data account information: of available profiles appears. 1. Select a network type, GSM Data or 2. Select a profile, then press OK. GPRS, to view a list of available data The selected profile is activated. accounts for each type of network. These You can also highlight a profile then select data accounts contain access details for Options. You can then either select Activate, available service providers in your area. edit, or Delete. If you select edit, you can view 2. Highlight a data account from the list, and edit the profile settings. -
Page 73: Handset Manager
• Make sure the mobile phone is switched on and correctly files included with the Handset Manager. connected with the USB data cable before installation. • Most systems already support USB. However, if your system does not, install a USB driver before installing the Installing the Handset Manager Handset Manager software. • To uninstall software, click the Add/Remove Programs icon Ensure that the following system requirements in the control panel. Select the Asus Z801 are met: USB-Handset Manager from the list. Click the Remove button and follow the instructions on screen. Software: • Microsoft Windows 2000 or above ® ® Starting the Handset Manager system To start the Handset Manager: Hardware: 1. Connect your handset to a USB port on... -
Page 74: Main Panel
3. Select Asus Z801 USB-Handset Manager Access the Handset Manager tools by clicking > Asus Z801 USB-Handset Manager on the icons at the bottom of the screen. Each from the computer’s program list, OR tool has its own interface, which opens when you click on the icon. Right click the phone icon in the system tray in the lower right corner of Phonebook Message Album the screen. Select Handset Manager. 4. An animation in the Handset Manager File Manager Video main panel shows your connection status. Sound Music Manager Sync Manager NOteS: • Be sure to unplug the USB cable after use. The computer Clicking the three buttons in the upper right may not boot as usual if you start the computer with the corner of the main Handset Manager panel phone’s USB cable connected. does the following: • When disconnecting the mobile phone from the computer... -
Page 75: Navigating The Handset Manager Tools
port, handset model, and interface type When you move the mouse over an icon, a manually here. pop-up window tells you the name of the button. • Select Handset Version to see the model NOte: You must exit one tool before launching another. name and firmware version of the phone, when the phone is connected. Select Navigating Media Files About Handset Manager to see the The interfaces for media tools—MMS, Sound, version of Handset Manager installed in or Album and Video —are quite similar. The your computer. Preview pane Navigating the Handset Icons for functions Preview Manager tools File path/ pane browse... - Page 76 • Thumbnail views of computer files in the NOte: To locate handset files using the handset screen, go to Media Center > File Manager. selected location are shown in the lower right pane. Handset Manager Icon A Handset Manager icon appears in the transferring Files to system tray, even when the Handset Manager and from the Handset is minimized. By right-clicking the Handset • To edit a file in your handset, download Manager icon in the system tray, you can select the file to your computer by clicking on the following Handset Manager functions: Download icon in the upper right. Handset Manager, SyncManager, SyncManager The download function does not save the Settings, and Exit.
-
Page 77: Music Manager
Music Manager Control panel columns The Music Manager allows you to transfer and Add playlist organize media files conveniently. You can Add smart playlist Browse by Genre/ create playlists, upload, maintain, and playback Delete playlist Artist/Album digital music through an easy-to-use interface. To launch the Music Manager, simply launch the Handset Manager from your desktop and on this column the main panel, click the Music Manager icon. displays the Library and these columns display the playlists/smart available media files and playlists you... -
Page 78: Important Notes
Uploading files to the handset the Local Folder. Messages to be moved to the mobile phone should be placed in To upload files to the handset: the Unsent folder. NOte: Make sure the handset is turned on and the device • Use Insert Objects to add the MIDI ring drivers are installed. tones or animations to the message. 1. Launch Music Manager. • If you have performed phonebook 2. Plug one end (type A) of the USB cable Plug one end (type A) of the USB cable download, when editing the message, to the PC, then plug the other end (type... - Page 79 File Manager • When installing Java games, download “Java Game.jar” from the Internet to • You need to select the appropriate folder the handset’s Java installation folder. for the file type. For example, if you want When the installation is successful, a to transfer a video file to the handset, message indicates that the installation is you need to select the Video folder in the successful. handset. When transferring to the phone, a file transfer will not be completed if the Video location does not match the file type. • You can select storage devices for the • The default folder for Handset Manager phone in the Video folder from the left of files in the computer is in the My the window. Documents folder: My Documents > • Right-clicking on the window of the Mobile Action > Handset Manager. phone and selecting Download is just to •...
- Page 80 Sound • The handset must be connected to the computer in order to save an MP3 clip or update an MP3 clip to the handset. • You may save MP3 ringtone files in any location on your computer, though saving to the assigned Handset Manager folders may be a convenient way to keep files organized. When you update MP3 files, the files are automatically assigned to the correct location in your handset. • The file will be transferred to a folder called “Audio.
-
Page 81: Appendix
Appendix Additional Information which may alter the conformity of the product with the mark. The use of this equipment may be subject to local rules and regulations. The following rules Certification Information and regulations may be relevant in some or all areas where your handset will be in operation. (SAR) this mobile phone meets eU requirements european Notice for exposure to radio waves. Products with the mark comply with the Radio Your mobile phone is a radio transmitter & Telecommunication Terminal Equipment and receiver, designed and manufactured to Directive (1999/5/EEC), the Electromagnetic meet limits of exposure to radio frequency Compatibility Directive (89/336/EEC) and (RF) based on international guidelines and the Low Voltage Directive (73/23/EEC) - as recommendations of The Council of the amended by Directive 93/68/ECC - issued by European Union. These limits are part of the Commission of the European Community. -
Page 82: Proper Disposal
Proper Disposal bands. Although the SAR is determined at the highest certified power level, the actual SAR of The symbol of the crossed out bin indicates that the device while operating may be below the the product (electrical and electronic equip- maximum value. This is because the device is ment) should not be placed in municipal waste. designed to operate at multiple power levels to Please check local regulations for disposal of use only enough power required to reach the electronic products. network. The closer you are to a base station, the lower the device power output. The highest SAR value for this mobile phone when tested for use and compliance to international standards is 0.931 W/kg. SAR values may vary depending on national reporting and testing requirements, as well as the network band. SAR values may also vary depending on device accessories and enhancements used. * For publicly used mobile phones, the SAR limit is 2.0 W/kg averaged over 10 grams of body tissue. A substantial margin of safety gives the public additional protection and takes into consideration any measurement variations. -
Page 83: Safety Warnings
Safety Warnings You MUST exercise proper control of your vehicle at all times. Observe the following Read the following safety warnings carefully safety precautions when driving: before using your cell phone. • This equipment is intended for use with power supplied from supplied • Do not use a hand-held telephone or microphone while you are driving. battery charger(s) and/or power supply unit(s). Other usage will invalidate any • When driving, find a safe place to stop certification given to this apparatus and the vehicle before using the phone. may be dangerous. • Do not speak into a hands-free • Switch off your cellular telephone when in microphone if it will distract you from an aircraft. The use of cellular telephones driving. in an aircraft may be dangerous to the • You MUST NOT stop on the hard operation of the aircraft, disrupt cellular shoulder of a motorway to answer or networks, and may be illegal. Failure...
Need help?
Do you have a question about the Z801 and is the answer not in the manual?
Questions and answers