
Related Manuals for Klarstein MONTEVERDE


Summary of Contents for Klarstein MONTEVERDE
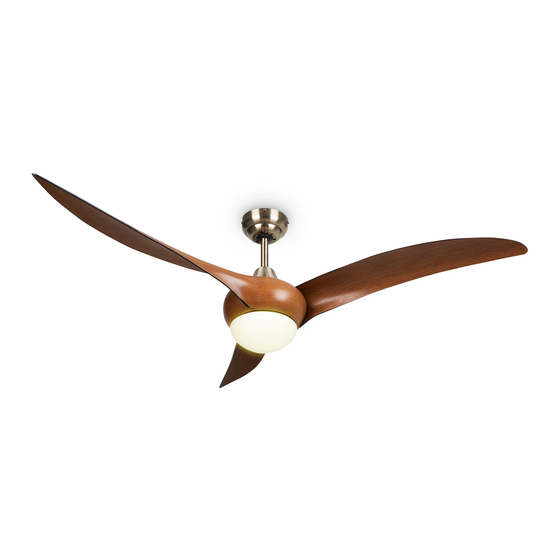
- Page 1 MONTEVERDE Deckenventilator Ceiling Fan Ventilateur de plafond Ventilador de techo Ventilatore a soffitto 10035788 www.klarstein.com...
-
Page 3: Table Of Contents
Sehr geehrter Kunde, wir gratulieren Ihnen zum Erwerb Ihres Gerätes. Lesen Sie die folgenden Hinweise sorgfältig durch und befolgen Sie diese, um möglichen Schäden vorzubeugen. Für Schäden, die durch Missachtung der Hinweise und unsachgemäßen Gebrauch entstehen, übernehmen wir keine Haftung. Scannen Sie den folgenden QR-Code, um Zugriff auf die aktuellste Bedienungsanleitung und weitere Informationen rund um das Produkt zu erhalten. -
Page 4: Sicherheitshinweise
SICHERHEITSHINWEISE • Befestigen Sie den Ventilator niemals an einer Steckdose, sondern an der Decke selbst. • Achten Sie darauf, dass Sie einen allpoligen Trennschalter mit einem Kontaktabstand von mindestens 3 mm zwischen den Polen in der Zuleitung zum Deckenventilator installieren. •... -
Page 5: Installation
INSTALLATION Tragbolzen Entfernen Sie den Tragbolzen aus Stecken Sie die Hängestange durch die obere der Hängestange. und untere Kappe. Führen Sie die Motordrähte durch die Hängestange. Setzen Sie den Tragbolzen wieder ein. Befestigen Sie die Stange und den Motor, wie abgebildet, mit der Schraube, den zwei Unterlegscheiben und der Mutter. - Page 6 Signalkabel Verbinden Sie die Drähte von Empfänger und Motor. Befestigen Sie die Deckenplatte mit 4 Dübeln und Schrauben an der Decke.
- Page 7 Stecken Sie den Empfänger und die Drähte in die obere Kappe. Befestigen Sie die obere Kappe und die Deckenplatte mit 4 Schrauben. Befestigen Sie die Rotorblätter mit jeweils 2 Schrauben.
- Page 8 Lösen Sie die Schrauben von der Dreiecksplatte und befestigen Sie damit die Lampenhalterplatte. Drehen Sie die Glühbirne in die Drehen Sie den Glasaufsatz auf die Lampenfassung. Lampenhalterplatte. Der Ventilator ist nun fertig zusammengebaut und kann benutzt werden.
-
Page 9: Fernbedienungstasten
FERNBEDIENUNGSTASTEN Geschwindigkeit und Licht Drücken Sie auf eine der Tasten im oberen Kreis, um die Geschwindigkeit einzustellen und das Licht ein- oder auszuschalten. Hohe Geschwindigkeit Mittlere Geschwindigkeit Niedrige Geschwindigkeit Ventilator ist aus Licht ein/aus... - Page 10 Timer Drücken Sie auf eine der Tasten im unteren Kreis, um den Timer einzustellen. Nachdem die eingestellte Zeit abgelaufen ist, geht der Ventilator automatisch aus.
-
Page 11: Reinigung Und Pflege 1
REINIGUNG UND PFLEGE • Trennen Sie das Gerät immer vom Netz, bevor Sie das Gerät reinigen oder Wartungsarbeiten durchführen. • Verwenden Sie zum Reinigen des Geräts niemals einen nassen Schwamm. • Um das Produkt nicht zu beschädigen, ist es ratsam, eine den empfindlichen Oberflächen und Produkten angepasste Ausrüstung zu verwenden, die den Verschleiß... -
Page 12: Hinweise Zur Entsorgung
HINWEISE ZUR ENTSORGUNG Wenn es in Ihrem Land eine gesetzliche Regelung zur Entsorgung von elektrischen und elektronischen Geräten gibt, weist dieses Symbol auf dem Produkt oder auf der Verpackung darauf hin, dass dieses Produkt nicht im Hausmüll entsorgt werden darf. Stattdessen muss es zu einer Sammelstelle für das Recycling von elektrischen und elektronischen Geräten gebracht werden. - Page 13 Dear Customer, Congratulations on purchasing this device. Please read the following instructions carefully and follow them to prevent possible damages. We assume no liability for damage caused by disregard of the instructions and improper use. Scan the QR code to get access to the latest user manual and more product information.
-
Page 14: Safety Instructions
SAFETY INSTRUCTIONS • Never attach the fan to a power point,but to the ceiling itself. • The minimum distance between the blades of the fan and the floor must be more than 2.3 m. The minimum carrying capacity of the hook from which the fan is hung must be 100 kg. -
Page 15: Installation
INSTALLATION Carrier bolt Remove the carrier bolt from the Put the hanging rod through the upper and hanging rod. lower cap. Feed the motor wires through the hanging rod. Reinsert the carrier bolt. Fasten the rod and the motor as shown with the screw, the two washers and the nut. - Page 16 Signal cable Connect the wires from receiver and motor. Fasten the ceiling plate to the ceiling with 4 dowels and screws.
- Page 17 Insert the receiver and wires into the top cap. Fasten the top cap and ceiling plate with 4 screws. Fasten the rotor blades with 2 screws each.
- Page 18 Loosen the screws from the triangular plate and fix the lamp holder plate. Turn the bulb into the lamp socket. Turn the glass attachment onto the lamp holder plate. The fan is now completely assembled and ready for use.
-
Page 19: Remote Control Buttons
REMOTE CONTROL BUTTONS Speed and light Press one of the buttons in the upper circle to adjust the speed and switch the light on or off. High speed Medium speed Low speed Fan is off Light on/off... - Page 20 Timer Press one of the buttons in the lower circle to set the timer. After the set time has elapsed, the fan will turn off automatically.
-
Page 21: Cleaning And Care
CLEANING AND CARE • Always disconnect the appliance from the power supply before cleaning the appliance or carrying out maintenance work. • Never use a wet sponge to clean the appliance. • In order not to damage the product, it is advisable to use equipment adapted to the sensitive surfaces and products, which will slow down the wear of the device. -
Page 22: Disposal Considerations
DISPOSAL CONSIDERATIONS If there is a legal regulation for the disposal of electrical and electronic devices in your country, this symbol on the product or on the packaging indicates that this product must not be disposed of with household waste. Instead, it must be taken to a collection point for the recycling of electrical and electronic equipment. - Page 23 Estimado cliente, Le felicitamos por la adquisición de este producto. Lea atentamente el siguiente manual y siga cuidadosamente las instrucciones de uso con el fin de evitar posibles daños. La empresa no se responsabiliza de los daños ocasionados por un uso indebido del producto o por haber desatendido las indicaciones de seguridad.
-
Page 24: Indicaciones De Seguridad
INDICACIONES DE SEGURIDAD • Nunca fije el ventilador a una toma de corriente, sino al propio techo. • Asegúrese de instalar un disyuntor bipolar con una distancia de contacto de al menos 3 mm entre los polos en el cableado del ventilador de techo. •... -
Page 25: Instalación
INSTALACIÓN Perno de soporte Retire los pernos de soporte de la Introduzca la barra de instalación en la tapa barra de instalación. superior e inferior. Introduzca los cables del motor por la barra de instalación. Vuelva a colocar los pernos de soporte. Fije la barra y el motor, como se indica en la imagen, con el tornillo, dos arandelas y la tuerca. - Page 26 Cable de señal Conecte los cables del receptor y motor. Fije la placa del techo con 4 tacos y tornillos al techo.
- Page 27 Conecte el receptor y los cables a la tapa superior. Fije la tapa superior y la placa para el techo con 4 tornillos. Fije con 2 tornillos las hojas del rotor.
- Page 28 Suelte los tornillos de la placa triangular y fije la placa del portalámparas con ellos. Enrosque la bombilla en el Enrosque el accesorio de cristal en la portalámparas. placa del portalámparas. Ha finalizado el montaje del ventilador y puede utilizarlo.
-
Page 29: Teclas Del Mando A Distancia
TECLAS DEL MANDO A DISTANCIA Velocidad y luz Pulse una de las teclas del círculo superior para regular la velocidad y encender o apagar la luz. Velocidad alta Velocidad media Velocidad baja Ventilador apagado Luz on/off... - Page 30 Temporizador Pulse una de las teclas del círculo inferior para programar el temporizador. Cuando haya transcurrido el tiempo seleccionado, el aparato se apaga automáticamente.
-
Page 31: Limpieza Y Cuidado
LIMPIEZA Y CUIDADO • Desconecte el aparato de la red eléctrica antes de limpiarlo o de realizar trabajos de mantenimiento. • Para limpiar el aparato, nunca utilice una esponja mojada. • Para no dañar el producto, se recomienda utilizar utensilios apropiados para las superficies y productos sensibles que minimicen el desgaste del aparato. -
Page 32: Indicaciones Sobre La Retirada Del Aparato
INDICACIONES SOBRE LA RETIRADA DEL APARATO Si en su país existe una disposición legal relativa a la eliminación de aparatos eléctricos y electrónicos, este símbolo estampado en el producto o en el embalaje advierte que no debe eliminarse como residuo doméstico. En lugar de ello, debe depositarse en un punto de recogida de reciclaje de aparatos eléctricos y electrónicos. - Page 33 Chère cliente, cher client, Toutes nos félicitations pour l’acquisition de ce nouvel appareil. Veuillez lire attentivement et respecter les instructions de ce mode d’emploi afin d’éviter d’éventuels dommages. Nous ne saurions être tenus pour responsables des dommages dus au non-respect des consignes et à...
-
Page 34: Consignes De Sécurité
CONSIGNES DE SÉCURITÉ • Ne connectez jamais le ventilateur à une prise, mais plutôt au plafond lui-même. • Veillez à installer un disjoncteur omnipolaire avec une distance de contact d‘au moins 3 mm entre les pôles du câble d‘alimentation du ventilateur de plafond. •... -
Page 35: Installation
INSTALLATION Boulons de support Retirez les boulons de support de la Insérez la tige de suspension à travers les tige de suspension. capuchons supérieur et inférieur. Faites passer les fils du moteur à travers la tige de suspension. Réinstaller le boulon de support. - Page 36 Câble de signal Connectez les fils du récepteur et du moteur. Fixez la platine de plafond au plafond avec 4 chevilles et vis.
- Page 37 Branchez le récepteur et les fils dans le capuchon supérieur. Fixez le capuchon supérieur et la platine de plafond avec 4 vis. Fixez les pales du rotor avec 2 vis chacune.
- Page 38 Desserrez les vis de la plaque triangulaire et utilisez-les pour fixer la platine porte- lampe. Vissez l'ampoule dans le support de Vissez la fixation en verre sur la lampe. plaque porte-lampe. Le ventilateur est maintenant complètement assemblé et prêt à être utilisé.
-
Page 39: Touches De Commande À Distance
TOUCHES DE COMMANDE À DISTANCE Vitesse et éclairage Appuyez sur l‘un des boutons dans le cercle supérieur pour régler la vitesse et allumer ou éteindre l‘éclairage. Grande vitesse Vitesse moyenne Vitesse lente Ventilateur éteint Allumer / éteindre l‘éclairage... - Page 40 Minuterie Appuyez sur l‘un des boutons du cercle inférieur pour régler la minuterie. Une fois la durée définie écoulée, le ventilateur s‘arrête automatiquement.
-
Page 41: Nettoyage Et Entretien
NETTOYAGE ET ENTRETIEN • Débranchez toujours l‘appareil du secteur avant de le nettoyer ou d‘effectuer des travaux de maintenance. • N‘utilisez jamais d‘éponge humide pour nettoyer l‘appareil. • Afin de ne pas endommager le produit, il est conseillé d‘utiliser des équipements adaptés aux surfaces sensibles et des produits qui ralentissent l‘usure de l‘appareil. -
Page 42: Informations Sur Le Recyclage
INFORMATIONS SUR LE RECYCLAGE S‘il existe une réglementation pour l‘élimination ou le recyclage des appareils électriques et électroniques dans votre pays, ce symbole sur le produit ou sur l‘emballage indique que cet appareil ne doit pas être jeté avec les ordures ménagères. - Page 43 Gentile Cliente, La ringraziamo per aver acquistato il dispositivo. La preghiamo di leggere attentamente le seguenti istruzioni per l’uso e di seguirle per evitare possibili danni tecnici. Non ci assumiamo alcuna responsabilità per danni scaturiti da una mancata osservazione delle avvertenze di sicurezza e da un uso improprio del dispositivo.
-
Page 44: Avvertenze Di Sicurezza
AVVERTENZE DI SICUREZZA • Non collegare il ventilatore alla presa di corrente, bensì al soffitto. • Collegare il cavo d’alimentazione a un interruttore bipolare con distanza tra i contatti di apertura di almeno 3 mm. • Staccare la corrente prima di installare il ventilatore. •... -
Page 45: Installazione
INSTALLAZIONE Tragbolzen Rimuovere il perno di sollevamento Far passare l’asta di sospensione attraverso il dall’asta di sospensione. cappuccio superiore e inferiore del ventilatore. Far passare i fili del motore attraverso l’asta e reinserire il perno di sollevamento. Fissare l’asta e il motore con la vite, le due rondelle e il dado come da figura. - Page 46 cavo elettrico Collegare i fili del ricevitore e del motore. Fissare il pannello al soffitto con 4 tasselli e viti.
- Page 47 Inserire il ricevitore e i fili nel cappuccio superiore. Fissare il pannello e il cappuccio superiore con 4 viti. Avvitare ogni pala con 2 viti.
- Page 48 Svitare le viti dal pannello triangolare e usanrle per fissare il pannello portalampada. Avvitare la lampadina nel portalampada. Avvitare il paralume nel pannello portalampada. Ora il ventilatore è montato e pronto per essere usato.
-
Page 49: Tasti Del Telecomando
TASTI DEL TELECOMANDO Velocità e luce Premere uno dei tasti nel cerchio superiore per impostare la velocità e per accendere o spegnere la luce. Velocità elevata Velocità media Velocità bassa Il ventilatore è spento Luce accesa/spenta... - Page 50 Timer Premere uno dei tasti nel cerchio sottostante per impostare il timer. Allo scadere del tempo il ventilatore si spegne automaticamente.
-
Page 51: Pulizia E Manutenzione
PULIZIA E MANUTENZIONE • Scollegare sempre il dispositivo dall’alimentazione prima di eseguire lavori di manutenzione e di pulizia. • Non utilizzare mai una spugna bagnata per pulire il dispositivo. • Per non danneggiare il dispositivo si consiglia di utilizzare prodotti appositi per rallentare il deterioramento delle superfici e dei prodotti. -
Page 52: Avviso Di Smaltimento
AVVISO DI SMALTIMENTO Se nel proprio paese si applicano le regolamentazioni inerenti lo smaltimento di dispositivi elettrici ed elettronici, questo simbolo sul prodotto o sulla confezione segnala che questi prodotti non possono essere smaltiti con i rifiuti normali e devono essere portati a un punto di raccolta di dispositivi elettrici ed elettronici.
Need help?
Do you have a question about the MONTEVERDE and is the answer not in the manual?
Questions and answers