Advertisement
- 1 GETTING TO KNOW YOUR COFFEE MAKER
- 2 BEFORE FIRST USE
- 3 PRODUCT OPERATION – SINGLE SERVE MODE
- 4 SELECTING MODE – CARAFE OR SINGLE SERVE
- 5 OPERATION INSTRUCTIONS
- 6 USE OF FILTER BASKET HOLDER/ADAPTER
- 7 INSTALLING THE REMOVABLE PUNCTURE NEEDLE FOR POD SINGLE SERVE MODE
- 8 SETTING UP THE COFFEE MAKER TO BREW SINGLE SERVE
- 9 BREWING MODES
- 10 CARAFE BREWING MODE
- 11 SINGLE SERVE BREWING MODE
- 12 BREWING SINGLE SERVE OVER ICE
- 13 DESCALING REMINDER
- 14 CLEANING THE PUNCTURE NEEDLES
- 15 CLEANING
- 16 IMPORTANT SAFEGUARDS
- 17 Documents / Resources
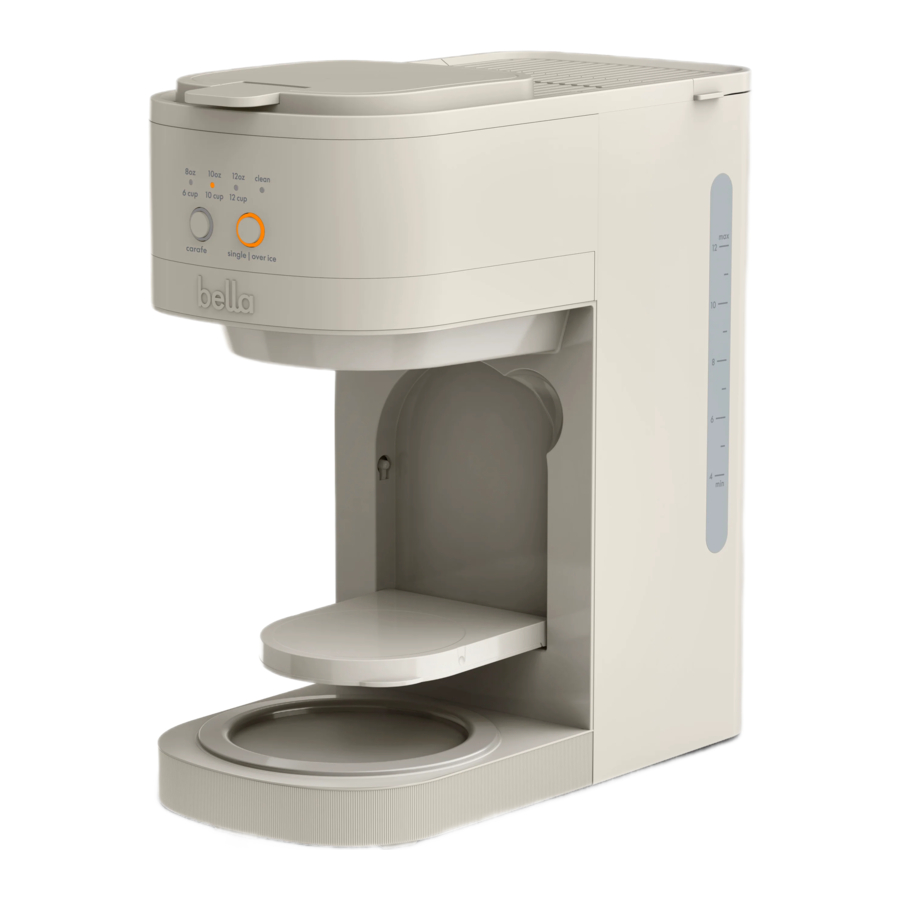
GETTING TO KNOW YOUR COFFEE MAKER
Product may vary slightly from illustration.

- Measuring Scoop
- Permanent Filter
- Filter Basket Lid
- Filter Basket Holder
- Carafe Lid
- Carafe Handle
- Carafe
- Flavor Infusion Tube
- Reusable ground coffee filter (single serve)
- Pod Adapter
- Pod Adapter Attachment
- Flip Down Drip Tray
- Buttons
- Warming Plate
- Handle
- Top Lid
- Water Tank Lid
- Water Tank
- Water Window
- Cord Storage(not shown)
BEFORE FIRST USE
Before first use, clean this product for optimal operation.
Please refer to the "Getting to know your coffee maker" section for information about this product and all parts included.
- Remove stickers and labels from this product.
- Remove the funnel, small coffee basket and coffee spoon, then wash them thoroughly in clean water with mild detergent and install them back.
- For the removal and installation of the funnel and small coffee basket, please refer to the instructions in the section "Use of Filter Basket Holder/Adapter".

PRODUCT OPERATION - CARAFE
- Add water to the water tank, the water level must be within the "MAX" 1.8L water mark.
- Place the filter basket holder and close the top lid.
- Place the provided carafe and choose the desired carafe size.
- Insert the power plug into a power outlet that matches the voltage frequency.
- After placing the filter basket holder press the carafe button. The default 12 cup LED light will turn on and the carafe button will flash. After 5 seconds, if there is no operation, the carafe button will become solid and the unit will begin brewing coffee.
- To brew other carafe sizes, press the carafe button. The default size or last size brewed will illuminate, and the carafe button will flash. Press the carafe button again to adjust the carafe size, and then wait for 5 seconds to select it.
- The carafe indicator light and the selected carafe size indicator light will stay on, and the coffee machine will start to brew. After the coffee is finished brewing the unit will enter a 2hour keep warm mode. When the 2 hour time is over, all indicators lights will shut off.
PRODUCT OPERATION – SINGLE SERVE MODE
- Add water to the water tank, the water level must be within the "MAX" line. Place the pod adapter and close the top lid.
- Make sure the drip tray has been flipped down over the warming plate.
- Place a mug/travel cup on the drip tray, and choose the desired cup size.
- Insert the power plug into a power outlet that matches the voltage frequency.
- Press the single/over ice button. The default size 10 oz LED indicator light will illuminate solid and the single/over ice button will flash. After 5 seconds if there is no operation the single/over ice button will become solid and unit begin brewing coffee.
- To brew other single serve sizes press the single/over ice button. The default or last setting cup size will come on and the single button will flash. While the single button is flashing press it again to change the cup size, and then wait for 5 seconds to confirm your selection.
- The single orange indicator light and the selected cup size indicator light will stay on, and the coffee machine will start brewing. Once the coffee is finished brewing, all indicator lights will turn off.
All indicator lights turn off after brewing and unit enters standby mode after the following operations (the function indicators remain on, and the last selected cup size indicator flashes):- Opening the top lid.
- Adding or removing the ground coffee filter (single serve).
- Pressing the single/over ice button.
SELECTING MODE – CARAFE OR SINGLE SERVE
- Carafe for drip brewing mode.
- Prepare a mug or travel cup according to different cup sizes of single serve brewing mode.
OPERATION INSTRUCTIONS
Fill the water tank-Maximum capacity is 1.8L/60oz
- Fill a pitcher with cool water and pour it into the water tank. Please ensure that the added water does not exceed "MAX"-1.8L/60oz.
NOTE: Never add warm or hot water.
- Close the water tank lid.

Place a carafe for brewing in carafe mode and cup or travel mug when brewing in single serve mode


If the carafe mode is selected, the drip tray should be flipped up to make space for the carafe. If the K-CUP single serve mode is selected, the drip tray should be flipped down before placing the mug/travel cup.
USE OF FILTER BASKET HOLDER/ADAPTER

Use the correct attachment for the brewing mode. Filter Basket Holder for carafe mode and single serve pod adapter Single Serve mode.

- Place the Filter Basket Holder in the coffee machine when preparing drip brewed coffee, as shown on the left figure.
- Place the single serve pod adapter with magnet in the coffee machine when preparing pod single serve brewed coffee, as shown on the right figure.
INSTALLING THE REMOVABLE PUNCTURE NEEDLE FOR POD SINGLE SERVE MODE
NOTE: There are sharp coffee capsule puncture needles. One is inside the pod adapter, and the other one in on the top lower side of the adapter compartment. To avoid injury, do not touch fingers or hands on any of the needles and be careful when cleaning parts.

SETTING UP THE COFFEE MAKER TO BREW SINGLE SERVE
- Make sure the coffee machine is plugged into an AC 120V 60Hz socket.
- When brewing pod coffee, ensure that the pod adapter with single serve coffee filter is installed and the drip tray is flipped down.
- Make sure the top lid is firmly closed.
BREWING MODES

CARAFE BREWING MODE
- Insert the drip filter basket holder and close the filter basket lid and the top lid.
- To select the carafe size, press the Carafe button to cycle through the indicator lights for 6 CUP/10 CUP/12 CUP.
- 5 seconds after selecting the carafe size, the coffee maker will begin to brew automatically. During that time The carafe indicator light and size indicator light will remain on until the brewing has finished.
- The machine will enter 2-hour Keep Warm mode after the brewing is finished. Cup size indicator light will shut off.
- When the keep warm time is finished, all indicator lights will turn off.
SINGLE SERVE BREWING MODE
- Insert the single serve adapter with magnet, put in a coffee capsule and close the top lid. Flip the drip tray down so it is parallel to the warming plate.
- To adjust the cup size press the single/over ice button. The indicator lights of 8 oz/10 oz/12 oz will flash.
- 5 seconds after selecting the cup size, the coffee maker will begin to brew automatically. During this time the single indicator light and cup size indicator light will remain on until the coffee maker has finished brewing. When the brewing has stopped all indicator light will turn off.
BREWING SINGLE SERVE OVER ICE
- Follow the above step 1 for Brewing Single Serve.
- Add ice to your glass or travel mug before brewing.
- To select the oz size, press and hold the single/over ice button for 3 seconds to enter the over ice function, the default 10oz indicator light will illuminate.
- Press the single/over ice button again to cycle through the sizes for 8 oz/10 oz/12 oz.
- 5 seconds after selecting the oz size, the coffee maker will begin to brew automatically.
- During this time the single indicator will slowly pulse on and off and the cup size indicator light will remain on until the coffee maker has finished brewing.
- When the brewing has stopped all indicator lights will turn off and the machine will automatically shut off.
DESCALING REMINDER
When the CLEAN indicator light begins to flash on the Coffee Maker it indicates descaling is necessary.
- Fill the glass carafe with 1 part white vinegar to 3 parts cold water and add to the coffee tank.
- Make sure the coffee filter is inserted into the removable filter holder.
- Remove the pod Adapter Attachment (puncture needle) in the pod adapter and reinstall it after descaling.
- Plug the power cord into a 120V AC electrical outlet.
- Press and hold both the carafe and single/over ice buttons for 5 seconds. The CLEAN icon will light up and enter cleaning mode.
- Rinse thoroughly by brewing 2 to 3 carafes full of clean, cold water.
- Allow the Coffee Maker to cool for 15 minutes before next use.
CLEANING THE PUNCTURE NEEDLES
Take out the pod Adapter Attachment and rinse it under running water. This part is also dishwasher safe. NOTE: Be careful not to touch the sharp puncture needles.
CLEANING
- Wipe the housing with a damp soft cloth and never use abrasive cleaners or scouring pads as they may scratch the topcoat.
- The carafe and single serve filters, single serve Adapter Attachment (puncture needle), and other detachable accessories can be rinsed under water or are dishwasher safe.
NOTE: Do not immerse this product in water.
IMPORTANT SAFEGUARDS
When using electrical appliances, basic safety precautions should always be followed to reduce the risk of fire, electric shock, and/or injury to persons, including the following:
- READ ALL INSTRUCTIONS.
- This appliance is not intended for use by persons (including children) with reduced physical, sensory, or mental capabilties, or lack of experience and knowledge, unless they are closely supervised and instructed concerning use of the appliance by a person responsible for their safety.
- Close supervision is necessary when any appliance is used by or near children. Children should be supervised to ensure that they do not play with the appliance.
- Do not touch hot surfaces. Use handles or knobs. Care must be taken, as burns can occur from touching hot parts or from spilled, hot liquid.
- To protect against electric shock, do not place cord, plug, or coffee maker in water or other liquid.
- Unplug from outlet when the coffee maker is not in use and before cleaning. Allow to cool before putting on or taking off parts and before cleaning the appliance.
- Coffee maker must be operated on a flat surface away from the edge of counter to prevent accidental tipping.
- Do not operate any appliance with a damaged supply cord or plug, or after the appliance malfunctions or has been dropped or damaged in any manner. Supply cord replacement and repairs must be conducted by the manufacturer, its service agent, or similarly qualified persons in order to avoid a hazard. Call the provided customer service number for information on examination, repair, or adjustment.
- The use of accessory attachments not recommended by the appliance manufacturer may cause injuries.
- Do not use outdoors.
- Do not let cord hang over edge of table or counter or touch hot surfaces, including stove.
- Do not place on or near a hot gas or electric burner, or in a heated oven.
- Avoid contacting moving parts.
- Be certain lid is securely in place during frothing or warming.
- To disconnect appliance, press control button(s) until power indicator light is no longer glowing and then remove plug from wall outlet.
- To unplug, grasp the plug and pull from the outlet. Never pull from the power cord.
- Do not place coffee maker in a cabinet when in use.
![]()
To avoid hot water spraying from the piercing needle, do not lift the lid during the brew process.- Do not use appliance for other than intended use.
![]()
To reduce the risk of fire or electric shock, do not remove the bottom cover of the coffee maker. There are no user-serviceable parts inside.![]()
Cut Hazard: Removable single-serve pod holder contains a sharp needle. Use caution when handling.![]()
Cut Hazard: Piercing needle is sharp. Use caution when cleaning.- To reduce the risk of fire do not store angthing directly on top of the appliance surface when the appliance is operating.
![]()
There are two sharp needles that puncture the capsules.
One is located inside the capsule adaptor and the other is located on the top underside of the adaptor compartment. To avoid risk of injury do not place fingers inside either parts. Also exercise caution when cleaning the parts.
![]()
There are boiling water in the front tab lid section during the brew process. Do not open the lid at any time for risk of injury. - The container is designed for use with this appliance. It must never be used on a range top. (Unless specific instructions for use on a range top are provided and include the precautions to be observed.)
- Only use capsules intended for this appliance. If the capsule does not fit, do not force the capsule into the appliance.
![]()
To avoid the risk of injury, do not open the brew chamber during the brew process.- Do not use a cracked container or a container having a loose or weakened handle.
- Do not clean container with cleansers, steel wool pads, or other abrasive material.
- Do not set a hot container on a wet or cold surface.
- Be careful that the heating element surface is subject to residual heat after use.

FOR HOUSEHOLD USE ONLY
NOTES ON THE PLUG
This appliance has a polarized plug (one blade is wider than the other). To reduce the risk of electric shock, this plug will fit in a polarized outlet only one way. If the plug does not fit fully into the outlet, reverse the plug. If it still does not fit, contact a qualified electrician. Do not modify the plug in any way.
NOTES ON THE CORD
- A short power-supply cord (or detachable power-supply cord) is to be provided to reduce risks resulting from becoming entangled in or tripping over a longer cord.
- Longer detachable power-supply cords or extension cords are available and may be used if care is exercised in their use.
- If a long detachable power-supply cord or extension cord is used:
- The marked electrical rating of the cord set, or extension cord should be at least as great as the electrical rating of the appliance.
- If the appliance is of the grounded type, the extension cord should be a grounding-type3-wire cord.
- The longer cord should be arranged so that it will not drape over the countertop or tabletop where it can be pulled on by children or tripped over.
SAVE THESE INSTRUCTIONS
PLASTICIZER WARNING

To prevent plasticizers from migrating to the finish of the countertop or tabletop or other furniture, place NON-PLASTIC coasters or place mats between the appliance and the finish of the countertop or tabletop.
Failure to do so may cause the finish to darken, permanent blemishes may occur, or stains can appear.
ELECTRIC POWER
If the electrical circuit is overloaded with other appliances, your appliance may not operate properly. It should be operated on a separate electrical circuit from other appliances.

To reduce the risk of fire or electrical shock, do not remove this cover. No user serviceable parts inside. Repair should be done by authorized service personnel only.
Documents / ResourcesDownload manual
Here you can download full pdf version of manual, it may contain additional safety instructions, warranty information, FCC rules, etc.
Advertisement


Need help?
Do you have a question about the VersaBrew and is the answer not in the manual?
Questions and answers