Table of Contents
Advertisement
Available languages
Available languages
Quick Links
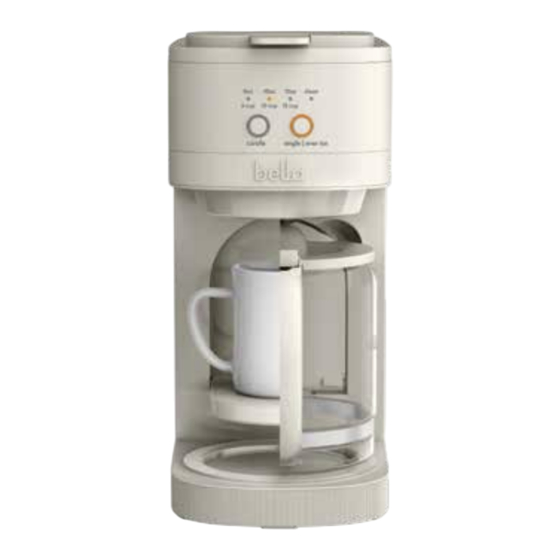
VersaBrew
2-in-1 Coffee System
Instruction Manual
VersaBrew
Sistema de café 2 en 1
Manual de instrucciones
35104_35147_35148_35149_35221_Bella_2in1 Coffee Maker_IM_V9_R5.indd 1
35104_35147_35148_35149_35221_Bella_2in1 Coffee Maker_IM_V9_R5.indd 1
Scan to register
bellakitchenware.com
2024-09-17 11:58 AM
2024-09-17 11:58 AM
Advertisement
Table of Contents

Related Manuals for Bella VersaBrew


Summary of Contents for Bella VersaBrew
- Page 1 VersaBrew 2-in-1 Coffee System Instruction Manual VersaBrew Sistema de café 2 en 1 Manual de instrucciones Scan to register bellakitchenware.com 35104_35147_35148_35149_35221_Bella_2in1 Coffee Maker_IM_V9_R5.indd 1 35104_35147_35148_35149_35221_Bella_2in1 Coffee Maker_IM_V9_R5.indd 1 2024-09-17 11:58 AM 2024-09-17 11:58 AM...
- Page 2 35104_35147_35148_35149_35221_Bella_2in1 Coffee Maker_IM_V9_R5.indd 2 35104_35147_35148_35149_35221_Bella_2in1 Coffee Maker_IM_V9_R5.indd 2 2024-09-17 11:58 AM 2024-09-17 11:58 AM...
-
Page 3: Table Of Contents
TABLE OF CONTENTS IMPORTANT SAFEGUARDS ..............................2 NOTES ON THE PLUG ................................3 NOTES ON THE CORD................................3 PLASTICIZER WARNING .................................4 ELECTRIC POWER ..................................4 GETTING TO KNOW YOUR COFFEE MAKER ........................4 BEFORE FIRST USE ..................................5 IMPORTANT: PRODUCT OPERATION - CARAFE ......................5 PRODUCT OPERATION – SINGLE SERVE MODE ......................5 SELECTING MODE –... -
Page 4: Important Safeguards
IMPORTANT SAFEGUARDS When using electrical appliances, basic safety precautions should always be followed to reduce the risk of fire, electric shock, and/or injury to persons, including the following: READ ALL INSTRUCTIONS. 2. This appliance is not intended for use by persons (including children) with reduced physical, sensory, or mental capabilties,or lack of experience and knowledge, unless they are closely supervised and instructed concerning use of the appliance by a person responsible for their safety. -
Page 5: Notes On The Plug
22. CAUTION! Cut Hazard: Piercing needle is sharp. Use caution when cleaning. 23. To reduce the risk of fire do not store angthing directly on top of the appliance surface when the appliance is operating. CAUTION: There are two sharp needles that puncture the capsules. One is located inside the capsule adaptor and the other is located on the top underside of the adaptor compartment. -
Page 6: Plasticizer Warning
PLASTICIZER WARNING CAUTION: To prevent plasticizers from migrating to the finish of the countertop or tabletop or other furniture, place NON-PLASTIC coasters or place mats between the appliance and the finish of the countertop or tabletop. Failure to do so may cause the finish to darken, permanent blemishes may occur, or stains can appear. -
Page 7: Before First Use
BEFORE FIRST USE Before first use, clean this product for optimal operation. Please refer to the “Getting to know your coffee maker” section for information about this product and all parts included. Remove stickers and labels from this product. 2. Remove the funnel, small coffee basket and coffee spoon, then wash them thoroughly in clean water with mild detergent and install them back. - Page 8 OPERATION INSTRUCTIONS Fill the water tank-Maximum capacity is 1.8L/60oz Fill a pitcher with cool water and pour it into the water tank. Please ensure that the added water does not exceed “MAX”-1.8L/60oz. NOTE: Never add warm or hot water. 2. Close the water tank lid. Place a carafe for brewing in carafe mode and cup or travel mug when brewing in single serve mode Carafe brewing mode Single serve mode...
-
Page 9: Use Of Filter Basket Holder/Adapter
USE OF FILTER BASKET HOLDER/ADAPTER Filter basket holder Pod adapter Use the correct attachment for the brewing mode. Filter Basket Holder for carafe mode and single serve pod adapter Single Serve mode. Carafe brewing mode Single serve brewing mode Place the Filter Basket Holder in the coffee machine when preparing drip brewed coffee, as shown on the left figure. -
Page 10: Installing The Removable Puncture Needle For Pod Single Serve Mode
INSTALLING THE REMOVABLE PUNCTURE NEEDLE FOR POD SINGLE SERVE MODE NOTE: There are sharp coffee capsule puncture needles. One is inside the pod adapter, and the other one in on the top lower side of the adapter compartment. To avoid injury, do not touch fingers or hands on any of the needles and be careful when cleaning parts. -
Page 11: Carafe Brewing Mode
CARAFE BREWING MODE Insert the drip filter basket holder and close the filter basket lid and the top lid. 2. To select the carafe size, press the Carafe button to cycle through the indicator lights for 6 CUP/10 CUP/12 CUP. 3. -
Page 12: Limited Two-Year Warranty
LIMITED TWO-YEAR WARRANTY SENSIO Inc. hereby warrants that for a period of TWO YEARS from the date of purchase, this product will be free from mechanical defects in material and workmanship, and for 90 days in respect to non-mechanical parts. At its sole discretion, SENSIO Inc. will either repair or replace the product found to be defective, or issue a refund on the product during the warranty period. -
Page 13: Medidas Importantes De Seguridad
MEDIDAS IMPORTANTES DE SEGURIDAD Al utilizar aparatos eléctricos, deben seguirse siempre las precauciones básicas de seguridad para reducir el riesgo de incendio, descarga eléctrica y/o lesiones, incluidas las siguientes: Lea todas las instrucciones. 2. Este aparato no está diseñado para que lo utilicen personas (incluidos niños) con capacidades físicas, sensoriales o mentales limitadas, ni con falta de experiencia o conocimiento, a menos que hayan recibido supervisión o instrucciones sobre el uso del aparato por parte de una persona responsable... -
Page 14: Notas Sobre El Enchufe
17. No coloque la cafetera en un gabinete mientras la usa. 18. ¡ADVERTENCIA! Para evitar que rocíe agua caliente de la aguja perforadora, no levante la tapa durante el proceso de preparación. 19. No utilice el aparato para un uso que no sea el previsto. 20. -
Page 15: Notas Sobre El Cable
NOTAS SOBRE EL CABLE a) Se debe brindar un cable de alimentación corto (o un cable de alimentación desconectable) para reducir los riesgos de enredarse o tropezarse con un cable largo. b) Hay disponibles cables eléctricos desconectables más largos o cables de extensión, y estos se pueden utilizar si se tiene cuidado al usarlos. -
Page 16: Conozca Su Cafetera
CONOZCA SU CAFETERA El producto puede diferir ligeramente del que aparece en la ilustración. Cuchara de medición 2. Filtro permanente 3. Tapa de la canasta del filtro 4. Soporte de la canasta del filtro 5. Tapa de la jarra 6. Asa de la jarra 7. -
Page 17: Antes Del Primer Uso
ANTES DEL PRIMER USO Antes del primer uso, limpie este producto para un funcionamiento óptimo. Consulte la sección “Conozca su cafetera” para obtener información sobre este producto y todas las piezas incluidas. Quite los adhesivos y etiquetas del producto. 2. Quite el embudo, la canasta pequeña de café y la cuchara de café, luego lávelas bien con agua limpia y detergente suave, y vuelva a instalarlos. -
Page 18: Instrucciones De Funcionamiento
INSTRUCCIONES DE FUNCIONAMIENTO Llene el depósito de agua. La capacidad máxima es de 1.8 L/60 oz Llene una jarra con agua fría y viértala en el depósito de agua. Asegúrese de que el agua agregada no supere la marca “MAX” de 1.8 L/60 oz. NOTA: Nunca agregue agua tibia o caliente. 2. -
Page 19: Uso Del Soporte De La Canasta Del Filtro/Adaptador
USO DEL SOPORTE DE LA CANASTA DEL FILTRO/ADAPTADOR Soporte de la canasta del filtror Adaptador simple Use el accesorio correcto para el modo de preparación. Soporte de la canasta del filtro para el modo jarra y monodosis. Carafe brewing mode Single serve brewing mode Coloque el soporte de la canasta del filtro en la cafetera al preparar café... -
Page 20: Instalación De La Aguja Perforadora Desmontable Para Cápsulas
INSTALACIÓN DE LA AGUJA PERFORADORA DESMONTABLE PARA CÁPSULAS NOTA: Hay agujas perforadoras de cápsulas de café que son filosas. Una está ubicada dentro del adaptador de cápsulas y la otra está ubicada encima de la parte inferior del compartimiento del adaptador. Para evitar lesiones, no toque las agujas con los dedos o manos y tenga cuidado al limpiar las piezas. -
Page 21: Modo De Preparación Jarra
MODO DE PREPARACIÓN JARRA Inserte el soporte de la canasta del filtro de goteo y cierre la tapa de la canasta del filtro y la tapa superior. 2. Para seleccionar el tamaño de jarra, presione el botón Carafe para pasar por las luces indicadoras de 6, 10 y 12 tazas. -
Page 22: Garantía Limitada De Dos Años
GARANTÍA LIMITADA DE DOS AÑOS Mediante la presente, SENSIO Inc. garantiza que, durante el plazo de DOS AÑOS a partir de la fecha de compra, este producto no presentará defectos mecánicos en el material ni en la mano de obra, y durante 90 días, no los presentará en las piezas no mecánicas. A su entera discreción, SENSIO Inc. - Page 23 35104_35147_35148_35149_35221_Bella_2in1 Coffee Maker_IM_V9_R5.indd 21 35104_35147_35148_35149_35221_Bella_2in1 Coffee Maker_IM_V9_R5.indd 21 2024-09-17 11:58 AM 2024-09-17 11:58 AM...
- Page 24 For customer service questions or comments Para preguntas o comentarios sobre servicio al cliente 1-866-832-4843 / help@bellahousewares.com Made in China / Hecho en China Sensio Inc. dba Made by Gather New York, NY 10016/USA 35104_35147_35148_35149_35221_Bella_2in1 Coffee Maker_IM_V9_R5.indd 22 35104_35147_35148_35149_35221_Bella_2in1 Coffee Maker_IM_V9_R5.indd 22 2024-09-17 11:58 AM 2024-09-17 11:58 AM...
Need help?
Do you have a question about the VersaBrew and is the answer not in the manual?
Questions and answers