Advertisement
Contents of the box

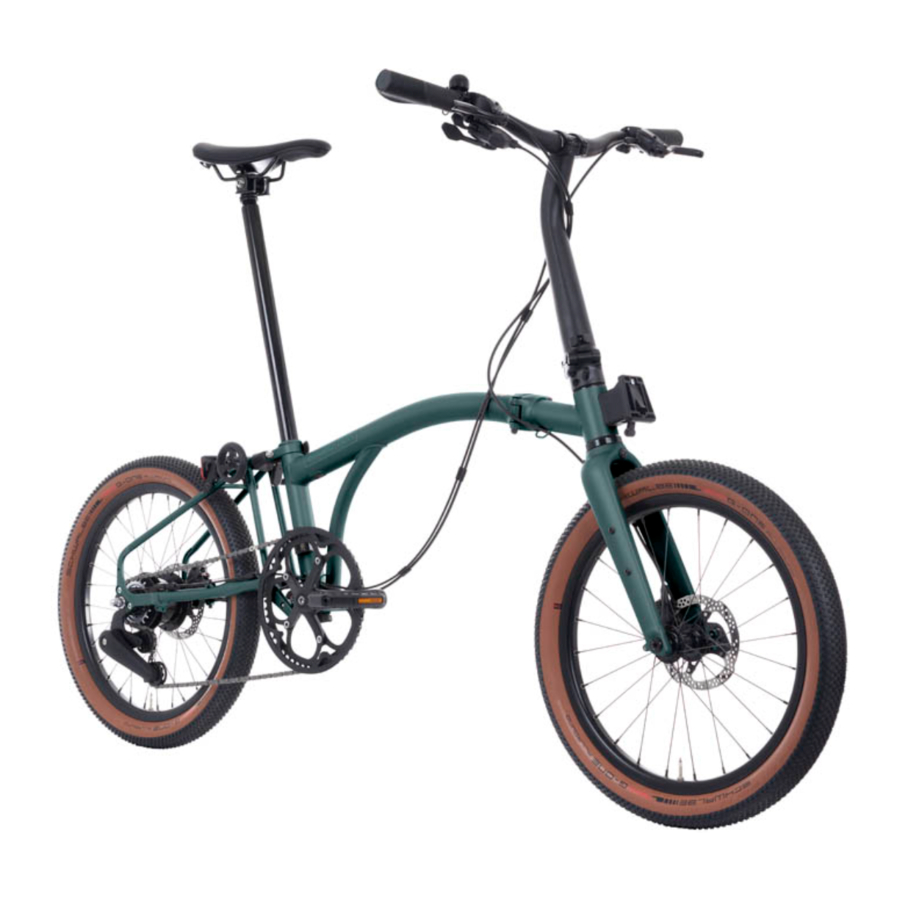
Components name

INTRODUCTION
Before using your Brompton, please read all the instructions in the owner's manual.
To activate your 7 year extended warranty you must register your bike in the My Brompton section of our website to record the details of your bike(s); that way, if your bike is stolen or we have any need to contact you, we will have a record to refer to. You will be asked to enter your serial and frame numbers: the serial number is located on a plate at the back of the main frame; the frame number is stamped on the main frame near the bottom bracket. The information remains on the Brompton database and will not be passed on to third parties https://www.brompton.com
If you wish to carry out any adjustments or maintenance work yourself, please read the relevant sections of the full owner's manual first, as it's quite easy to get things wrong, and to impair the folding process or damage your bike. The full owner's manual contains some tips and advice for using your Brompton but if you are ever unsure of how to maintain your bike, visit an authorised Brompton dealer for expert advice. For a list of dealers, please visit our website: https://www.brompton.com/Find-a-Store
FITTING THE PEDAL
To insert the DP back into the QRPM, push the hex shaped axle A into the QRPM while twisting to line up the hex shaped axle to the inside of the mount (fig. 1).
Apply pressure until there is a click to indicate that the DP is fully inserted.
Pull on the pedal to insure that it is fully inserted.
To remove the detachable pedal DP when the bike is folded, squeeze both buttons on the QRPM while simultaneously pulling the DP away from the crank arm (fig. 1).
Apply anti seize or regular grease to the inside of the QRPM once fitted.

FITTING THE SADDLE
Required

The saddle and the pentaclip comes pre-assembled.
Slide the assembled saddle onto the seatpost, positioning it about halfway up the small top section of the seatpost (fig. 2) above the O-rings, to ensure enough clearance from the saddle to the seatpost.
The Pentaclip allows two saddle heights (fig. 2). In the upper position you gain about 20mm

SADDLE POSITION
Moving the saddle back and forth from the neutral middle position will not only affect the reach (to the handlebar) but also your position relative to the pedals. By moving the saddle back you will increase the reach to the bars and make the bike a little more stretched out. Moving the saddle forward will make the bike feel shorter and more upright (fig. 3).
Once you have adjusted the saddle, spend some time riding and readjust if necessary. When adjusting the saddle position, make sure you securely tighten the Pentaclip to 15Nm.

UNFOLD
- Raise saddle

- Undo the seat clamp lever
- Pull the seatpost up and re-clamp to secure the seatpost.
- Unfold handlebar

- To release the handlebar, firmly push down on the end of the grip nearest to you. Swing the handlebar up until the hinge closes.
- Once the hinge is closed, the black clamp lever can be closed firmly.
- Unfold front wheel

- To Unhook, lift the handlebar stem with your left hand, to lift the hook above the tube it is resting on.
- Swing your left hand away from you in an arc to push the fork and front wheel away from you, push until the hinge on the main frame is closed.
- Tighten hinge

- The hinge on the main frame should now be closed by tightening the black clamp lever firmly.
- Unfold rear wheel

- To complete the unfold, hold the handlebar with your left hand,
- Swiftly lift the rear of the bike up by the saddle and swing the rear wheel backwards into position. Listen for the click of the rear frame locking into position


FOLDING THE BIKE
- Spin cranks
Stand on the left (non-driveside) of the bike. Spin the cranks so the right-hand pedal is pointing towards the back of the bike.

- Fold rear wheel
Turn the handlebar slightly to the left so it is not parallel with the rear wheel.

- There is a lever directly below the seat clamp. Press it forward.
- Lift the rear of the bike swiftly
- Allowing the rear wheel to swing under the main frame.
- Fold front frame

- Undo the hinge clamp lever on the main frame by 4-6 turns.
- Hold the handlebar stem below the handlebar. Swing the front wheel away and to the right, bring the handlebar stem round in a clockwise stirring motion. When doing this, make sure to keep the front wheel pointing in the forward direction, the hook must remain on your side of the bike.
- Lower the hook over the chain stay located on the rear frame.
- Fold handlebar

- Undo the hinge clamp lever on the main frame by 4-6 turns.
- Let the handlebar stem fall down. The nipple will secure it in place.
- Lower saddle

- Undo the seatclamp and
- lower the saddle fully.
- Close the seatclamp. This locks the bike together, so it won't open up when carrying.
- Remove pedal

- Push the two buttons on the QR socket with one hand to release the pedal. Pull out the pedal with the other hand.
- Insert the pedal in the pedal holder in the rear of the fork.


SADDLE HEIGHT
Adjust the saddle height so that when the pedal is at the bottom of the stroke and the heel of the shoe is on the pedal, your leg is straight.

When pedalling with the front of the foot, your leg will be slightly bent at maximum extension
Once you are happy with the saddle height, mark the seatpost with a marker pen or tape at the top of the seat-slide tube

The minimum height of the seatpost is reached when the seatpost extends out of the seat tube, below the bottom of the frame; the bike should not be ridden with the seatpost protruding from the bottom of the seat tube
If you are unsure about the fitting process, your Brompton dealer will be able to assist you
Once you have the correct saddle position you can fit the saddle height insert. This should be fitted in cases where the saddle height is too high at maximum extension. The saddle height insert will allow you to set the saddle at the correct height each time the bike is unfolded.
FITTING THE INSERT
MEASURING AND CUTTING THE INSERT
- Raise the seatpost to maximum height
- Place the insert upside down against the post at the top of the seat-slide tube as shown (fig. 17) and mark the groove in the insert, closest to the mark on the seatpost

- Carefully cut the insert along this groove with scissors
![]()
- Mark the Pentaclip to show the saddle angle and position on the Pentaclip using a marker pen or tape
- Loosen the Pentaclip with a 5mm hex key and remove the saddle and O-rings from the top of the seatpost
- Remove the seatpost by sliding it out from the underside of the frame
- Squeeze the saddle height insert and insert it into the top of the seat-tube, aligning the key with the slot

- Engage the key with the base of the slot (fig. 19)
- Refit the seatpost into the underside of the frame (fig. 19), making sure the post is clean
- Refit the O-rings and saddle, align the setting marks on the Pentaclip and tighten (15Nm)
- Check the saddle height is correct at full extension, small adjustments can be made by moving the Pentaclip position up or down slightly on the post (fig. 14), for more information see https://www.brompton.com


WHEELING IT FOLDED
Raise saddle
Undo the seat clamp lever, pull the seatpost roughly half way up and reclamp to secure the seatpost.

PUSHING/PULLING THE BIKE WHILST FOLDED
The bike can be pushed/pulled whilst folded, as an alternative to picking up and carrying the bike. In the folded position, raise the saddle until the bottom of the seatpost comes into contact with the locking block (fig. 21). Because the locking block still contacts the seatpost, the bike is still secured in the folding position, but with the saddle slightly raised. The raised saddle can be used as a handle to push/pull the bike.

ADJUSTMENT
When you pick up the folded bike, the bike cannot unfold because the locking block LB contacts the seatpost SP to stop the rear frame from moving.
The LB can be adjusted to obtain the correct gap between itself and the SP. If the gap is too small the post will catch on it when folding the bike, too large and the folded bike may partially unfold when picked up.
It is easiest to make adjustments to the LB with the bike fully folded with the seatpost raised. When the seatpost is raised, make sure it is locked in place using the seat clamp.
To decrease the gap between the LB and the SP (fig. 21), using a 4mm hex key, unscrew the cap head socket screw inside the LB half a turn at a time and then lower the seatpost to check if it has clearance. If the gap is still too wide, unscrew another half turn, and check the seat post again. Repeat this process until the correct size gap is obtained.
ADJUSTING THE GEARS
Set the shifter to gear 4.

Check to be sure that the yellow setting lines on the cassette joint bracket and pulley are aligned.

If the yellow setting lines are not aligned, turn the cable adjustment barrel of the shifter to align the setting lines.

After this, move the shifter from 4 to 8 then back to 4 and re-check that the yellow setting lines are aligned (fig. 24.5).
FOR REGISTERING INFO

Documents / Resources
References
![www.brompton.com]() Brompton - The Foldable City Bike | Brompton Bicycle UK
Brompton - The Foldable City Bike | Brompton Bicycle UK![www.brompton.com]() Brompton Junction | Retail Stores | Brompton Bicycle UK
Brompton Junction | Retail Stores | Brompton Bicycle UK
Download manual
Here you can download full pdf version of manual, it may contain additional safety instructions, warranty information, FCC rules, etc.
Advertisement


Need help?
Do you have a question about the G Line and is the answer not in the manual?
Questions and answers