Table of Contents
Advertisement
Advertisement
Table of Contents

Related Manuals for Brompton Brompton Electric Mk.1


Summary of Contents for Brompton Brompton Electric Mk.1
- Page 1 OWNERS M A N U A L EN15194:2017...
-
Page 3: Table Of Contents
DECLARATION OF CONFORMITY ITEMS SUPPLIED WITH THE BIKE THE ELECTRIC ASSIST SYSTEM USING THE LIGHTING BATTERY CARE UNFOLDING FOLDING USING THE BROMPTON ELECTRIC GEARS BRAKES FRONT LUGGAGE REAR LUGGAGE CLEANING & LUBRICATION ADJUSTING THE SADDLE POSITION SADDLE HEIGHT INSERT FITTING... -
Page 4: Introduction
After purchasing your Brompton Electric bicycle, it is important to register your bike & battery in the My Brompton section of our website to record the details of your bike(s); that way, if your bike is stolen or we have any need to contact you, we will have a record to refer to. You will be asked to enter your serial and frame numbers: the serial number is located on a plate at the back of the main frame;... - Page 5 Misuse may lead to failure of some components and void your Brompton Electric warranty. We do not recommend fitting a child seat or trailer to the Brompton Electric, doing so will invalidate the Brompton Electric warranty. The Brompton Electric is not compatible with indoor trainers or rollers, do not attempt to use the Brompton Electric in conjunction with these.
-
Page 6: Safety
Once you have read the manual, please consult your Brompton Electric dealer who will be able to assist with any further questions you may have • Do not use the Brompton Electric if there is any problem with the power assist system, take the bike to an authorised Brompton Electric Dealer for inspection •... -
Page 7: Replacement Parts
Brompton Electric dealer. If the Brompton Electric is modified in any way it may not then conform to the relevant safety standards. Using the bike in a modified state may be dangerous and could cause injury and damage to property. -
Page 8: Declaration Of Conformity
Ockham Drive, Greenford, U.K Middlesex, UB6 0FD Herby confirms that the following product: Product Description: Foldable E-Bike Model Designation: Brompton Electric Mk.1 Year of Manufacture: 2018 Conforms with the following directives: Machinery - 2006/42/EC Electromagnetic Compatibility- 2014/30/EU The following harmonising norms were applied to the product Cycles - Electrically power assisted cycles –... -
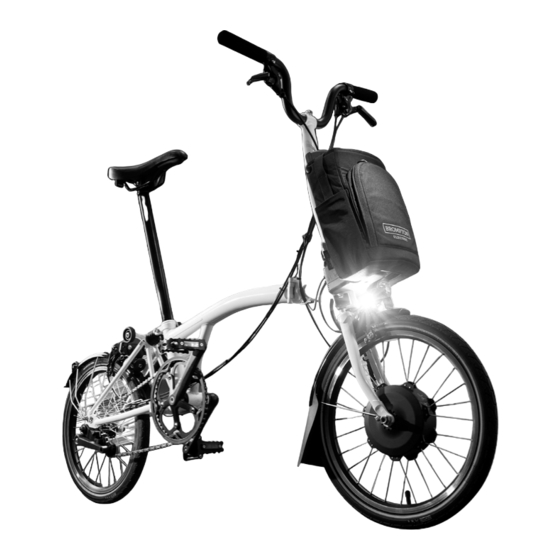
Page 9: Items Supplied With The Bike
BAG - This bag is designed to house the battery and fits to the mounting block on the front of the bike. CHARGER & MAINS ADAPTOR - The standard 2A charger is supplied with each Brompton Electric, along with the appropriate mains adaptor for the region the bike is sold in. -
Page 10: The Electric Assist System
THE ELECTRIC ASSIST SYSTEM The Brompton Electric gives motor assistance to support the pedaling input from the rider. A sensor in the bottom bracket measures the rider’s cadence* and power, a sensor within the hub motor measures the speed of the bike. The system analyses this data to determine how much assistance the hub motor gives. - Page 11 BATTERY LEVEL The battery level indicator has 5 lights which show the level of charge (fig. 2). When the battery is switched on and connected to the bike the battery indicator will be illuminated. 1 Flashing 10% or less Fig. 2 10-27% 28-47% 48-66%...
- Page 12 WEIGHT The weight of the rider and luggage will have an effect on the battery range, decreasing the load by carrying less nonessential items of luggage will allow you to improve the battery range. CHARGING THE BATTERY Fig. 3 CHARGER DISPLAY KEYWAY CHARGER BATTERY CONNECTOR CABLE...
- Page 13 • If the red warning light is flashing, there may be a problem with the charger, try turning off the mains power, unplug the charger and then plug the charger in and turn on the mains • If the red warning light continues to flash, unplug the charger and stop using it, contact your Brompton Electric dealer for further assistance •...
- Page 14 Depending on the error code you may be able to take steps to remedy the problem; otherwise the bike will need to be returned to your Brompton Electric dealer for diagnosis. If the battery is too low to power the motor, you will need to recharge the battery. This will be shown by the left hand light flashing.
-
Page 15: Using The Lighting
USING THE LIGHTING LIGHTING BUTTON Fig. 9 LIGHTS AUTO ON LIGHTS • Pressing the lighting button (fig. 9) will turn the lighting system on in the last selected mode, shown by the blue light above either the ON or Automatic position on the display •... -
Page 16: Battery Care
Brompton Electric bag, do not attempt to use the Brompton Electric without the front luggage. The bicycle is designed to work in a temperature range of 0-40 °C, outside of this temperature range the product may not function correctly. - Page 17 Doing so may cause leaking, overheating ignition or bursting of the battery, which could result in serious injury or damage to property. If the battery is damaged in any way, do not attempt to use or charge the battery, contact your Brompton Electric dealer immediately.
-
Page 18: Unfolding
UNFOLDING THE BIKE Take some time to look at the bike folded; it helps when you come to fold it again. Stand on the left (non-driveside) of the bike. Unfold the left-hand pedal by pulling the toothed metal cage towards you. As you do this note how the black catch operates as this will help you when folding. - Page 19 • Undo the seat clamp lever, pull the seatpost up and re-clamp • Place your right hand on the saddle & hold the handlebar stem with your left hand, near the hinge • Look down where the chain runs between the two wheels and you will see the black hook holding the front wheel to the rest of the bike •...
- Page 20 • Swing your left hand away from you in an arc to push the fork and front wheel away from you, push until the hinge on the main frame is closed • When doing this do not twist your wrist; make sure to keep the front wheel pointing in the same direction, the hook must remain on your side of the bike and the...
- Page 21 • To complete the unfold, hold the handlebar with your left hand, with your right hand lift the bike up swiftly by the saddle and swing the rear wheel will backwards and into position • Push down on the saddle to ensure the suspension block pushes against the mainframe;...
-
Page 22: Folding
FOLDING THE BIKE • Remove the front luggage and battery from the bike • Turn the handlebar slightly to the left so it is not parallel with the rear wheel & spin the cranks so the right-hand pedal is pointing backwards •... - Page 23 • With your left hand hold the handlebar stem above the plastic nipple, swing the front wheel away & to the right • Bring the stem round in a clockwise stirring motion, don’t twist your wrist & keep the hook facing you, till the front wheel is alongside the rear; you may need to lift the front of the bike a little •...
- Page 24 • If you can’t lift the plate, turn the pedal over & try again The bike is now folded and ready to be picked up and carried. Brompton saddles have a tailored grip plate underneath the ‘nose’ of the saddle.
-
Page 25: Using The Brompton Electric
You can also use a hand-pump, or an air-line found at petrol/gas service stations. All Brompton Electric Bicycles use a 37 x 349mm tyre (16 x 1-3/8”) and corresponding inner tube. -
Page 26: Gears
USING THE SHIFTERS A Brompton can be fitted with either 1, 2, 3 or 6 gears. 2-speed bikes feature a left hand shifter, 3-speed bikes a right hand shifter and 6-speed bikes use both a left and right hand shifter. - Page 27 3-SPEED GEAR SHIFTER ƒ 3-speed shifters are used on 3 and 6-speed bikes ƒ If you are unsure about any fitting or operation instructions please contact a Brompton dealer USING THE SHIFTER The 3-speed shifter uses a self-returning lever to change between the three gears. Pushing it down with your thumb will shift into an easier gear and flicking the lever upwards with the back of the thumb will shift into a harder gear (fig.
- Page 28 REMOVING THE GEAR CABLE • Select gear 3 on the shifter, backpedal to engage the hub CABLE HOUSING • Unscrew the indicator chain locknut (fig. 14) • Unscrew the indicator chain from the gear cable anchor CABLE PULLEY • Undo the gear cable anchor clamp nut and INNER CABLE release the inner gear cable •...
- Page 29 2-SPEED GEAR SHIFTER ƒ 2-speed shifters are used on 2 and 6-speed bikes ƒ If you are unsure about any fitting or operation instructions please contact a Brompton dealer USING THE SHIFTER The 2-speed shifter uses a self-returning lever to change between the two gears. Pushing it down with your thumb will shift into an easier gear and flicking the lever upwards with the back of the thumb will shift into a harder gear (fig.
- Page 30 FITTING THE SHIFTER Fig. 19 The shifter mounts to the right hand brake lever, it TORQUE 0.35Nm is held in place by two M3 screws, these should SHIFTER be tightened to 0.35Nm. Do not overtighten the screws as this can reduce the performance of the shifter and damage the parts.
- Page 31 FITTING A NEW CABLE • Screw the barrel adjuster (fig. 21) fully clockwise so that it is at its shortest setting, then unscrew by 2 turns • Select the lowest gear (-) and then press the shift lever downward so it does not obscure the cable entry hole •...
-
Page 32: Brakes
You should adjust your brakes on a regular basis as they are critical to your safety. The time between adjustments will vary depending on how often you use your Brompton; if your brake lever touches the handle bar when you pull on it, your brakes need urgent adjustment. The brakes should be set so that the brake pads are as close to the rims as possible without interfering with the rotation of the wheels. - Page 33 Correct cable routing and cable housing length is essential; cables must pass in front of the handlebar, to the left of the handlebar support and to the right of the main frame tube. IF YOU ARE UNSURE ABOUT ANY OF THESE ADJUSTMENTS CONSULT YOUR BROMPTON DEALER, DO NOT ATTEMPT TO USE THE BIKE WITH POORLY ADJUSTED BRAKES Fig.
- Page 34 LIGHTING A Lighting system is available for the Brompton Electric; a front and rear lamp, powered by the battery. These can be added to bikes not originally equipped with a lighting system, this work can be carried out by an authorised Brompton Electric Dealer.
-
Page 35: Front Luggage
• When the front luggage is loaded, the steering and braking may behave differently • The Brompton Electric luggage is compatible with all handlebar configurations • Do not attempt to use the Brompton Electric luggage, or Brompton Electric front carrier with any other bicycle EFCB Fig. -
Page 36: Rear Luggage
REAR CARRIER PLATFORM The rear carrier platform has a load capacity of 10kg. It mounts to the rear frame in two points, the brake tube (fig. 29) and the dropouts (fig. 30). The rear mudguard mounts to the rack (fig 29, 31) in two positions. Before starting it is worth removing the rear wheel from the bike in order to make it easier to fit or remove the rack, information on this can be found on page 38. -
Page 37: Cleaning & Lubrication
When lubricating your Brompton, avoid getting oil or grease on the seatpost or the wheel rims. Any good quality general purpose grease is satisfactory. For the chain, ‘dry’ chain lubricants with good penetrating properties give the best results. - Page 38 Do not submerge the bike, hub motor or battery in water; this can allow water to enter the motor, battery and electrical systems. This could cause overheating bursting or ignition. Do not place the battery or bag down on a wet floor, this could allow water onto the battery connector. Do not use the bike if it has been submerged in water.
- Page 39 The notch in the side of the Brompton Electric battery is for strain relief (fig. 33) for the USB cable. This may be used to control the cables in the bag and prevent damage if the battery is attempted to be removed with the usb cable still attached.
-
Page 40: Adjusting The Saddle Position
(fig. 37). The Brompton Electric is not compatible with the saddle adaptor pin; part QSAPA. ADDITIONAL SADDLE HEIGHT If you can’t gain enough height by re-positioning the saddle, there are two Brompton options which give more height: a telescopic seat pillar and a longer pillar extended by 60mm. The telescopic pillar can accommodate... -
Page 41: Saddle Height Insert Fitting
If you are unsure about the fitting process, your Brompton dealer will be able to assist you ƒ... - Page 42 MEASURING AND CUTTING THE INSERT Raise the seatpost to maximum height ƒ Place the insert upside down against the post at the top of the seat-slide tube as shown (fig. 41) and ƒ mark the groove in the insert, closest to the mark on the seatpost ƒ...
- Page 43 Check the saddle height is correct at full extension, small adjustments can be made by ƒ moving the Pentaclip position up or down slightly on the post (fig. 44), for more information see brompton.com Fig. 43 Seat slide tube Seatpost Fig.
-
Page 44: Rear Wheel - Removal And Fitting
REAR WHEEL – REMOVAL AND REFITTING When removing the rear wheel it is easiest to do with the bike in a workstand to lift it from the floor, or with the bike in the parked position (see folding instructions) so that the bike can support itself. If the tyre is deflated it can pass through the brake pads more easily. - Page 45 STURMEY ARCHER 3 SPEED ADJUSTMENT Fig. 47 Adjustment is carried out by slackening the lock nut N, turning the barrel B (fig. 45) to obtain correct setting, and relocking the nut N. Ensure the indicator rod is the correct length for the hub-type.
-
Page 46: Front Wheel - Removal And Fitting
FRONT WHEEL – REMOVAL AND REFITTING When removing the front wheel it is easiest to do with the bike in a workstand to lift it from the floor, or with the bike in the parked position so that the bike can support itself. If the tyre is deflated it can pass through the brake pads more easily. - Page 47 FITTING THE WHEEL Make sure the wheel is in the correct orientation with the motor cable on the left hand side of the fork (fig. 48), next to the plastic hook. Fig. 49 Push the axle into the dropouts, ensuring that the washer is on the inside of the dropout and that the wheel is fully inserted on both sides.
-
Page 48: Routine Replacements
ALUMINIUM COMPONENTS As on other lightweight machines, aluminium alloy is used in the construction of the Brompton, and this material has a finite design life before failure. In normal use, the risk of aluminium fatigue failure is remote, even after many thousands of miles. However, the risk of failure increases with use, especially with hard riding or other severe loading. - Page 49 The worn sleeve can eventually cause damage to the frame itself if not replaced. Replacing the sleeve requires specialist tools and should be done by an authorised Brompton dealer. REAR HINGE Over time the bushes in the rear frame pivot can wear, slight play will become detectable. In order to remove the play the bushes need to be replaced.
-
Page 50: Warranty
(in the case of the frame) or two years (in the case of other parts) of the date of first purchase of the bicycle. The Brompton is for use on roads and well-made paths. It is not designed for cross-country riding: this can overstress the frame, and the tyres and wheels are unsuitable. - Page 51 8. Defects caused by faulty adjustment, or repairs and alterations performed by a non-authorised Brompton Electric Dealer, are not covered by this warranty. 9. Defects caused by the use of parts and accessories not authorised by Brompton Bicycle Ltd are not covered by this warranty.
- Page 52 Register your bike online at brompton.com/login BROMPTON BICYCLE LTD Unit 1 Greenford Park, Ockham Drive Greenford, Middlesex, UB6 0FD © Brompton Bicycle Ltd 2018...
Need help?
Do you have a question about the Brompton Electric Mk.1 and is the answer not in the manual?
Questions and answers
Electric charger flashes RED. How I fix?
If the red warning light on the charger is flashing, follow these steps:
1. Turn off the mains power.
2. Unplug the charger.
3. Plug the charger back in and turn on the mains power.
If the red warning light continues to flash, unplug the charger and stop using it. Contact your Brompton Electric dealer for further assistance.
This answer is automatically generated