Table of Contents
Advertisement
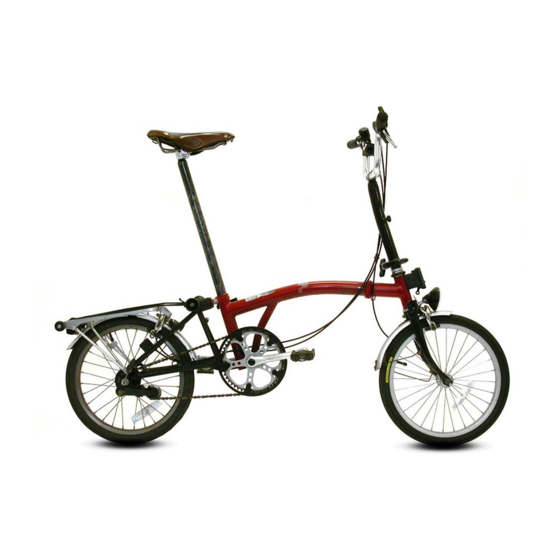
BROMPTON BICYCLE - OWNER'S MANUAL
INTRODUCTION:
Before using your Brompton, we recommend you read the sections on
Safety and folding. You should also be aware how important it is to keep
your tyres well pumped-up: soft tyres make for a lot more pedalling effort
(which takes much of the fun out of riding), wear out quickly, and also have
an adverse effect on handling. We cannot over-emphasise the need to
keep tyres well inflated.
If you carry out any adjustments or maintenance work yourself, do read the
relevant section of this manual first, as it's quite easy to get things wrong,
and to impair the folding process or damage the machine. If you take your
bike to a dealer for any servicing work, wherever possible use an
authorised Brompton stockist.
Serial and Frame Numbers. The label at the back of the seat tube on the
main frame carries the serial number. The frame number is stamped on the
main frame just forward of the rear suspension pivot: it's a good idea to
keep a record of both numbers. The serial number will be useful if you have
any maintenance or technical queries.
CONTENTS
Section
A
Section
B
Section
C
Section
D
Section
E
Section
F
Section
G
Section
H
Section
J
Section
K
Section
L
Section
M
Safety
(tyres, gears, luggage, lights, etc.)
Handlebar and control positions
Running adjustments and checks
Maintenance diagram
(front hook, handlebar catch,
lower stop disc, cables)
Lubrication and diagram
page 2
page 3
page 8
page 11
page 12
page 13
page 16
page 20
page 23
page 26
page 28
page 29
page 30
Advertisement
Table of Contents

Subscribe to Our Youtube Channel
Related Manuals for Brompton BROMPTON


Summary of Contents for Brompton BROMPTON
- Page 1 BROMPTON BICYCLE - OWNER'S MANUAL INTRODUCTION: Before using your Brompton, we recommend you read the sections on safety and folding. You should also be aware how important it is to keep your tyres well pumped-up: soft tyres make for a lot more pedalling effort (which takes much of the fun out of riding), wear out quickly, and also have an adverse effect on handling.
- Page 2 8. When riding a P-type, remember you have no brakes to hand when using the lower grips. Also, take care when changing your hand-position. 9. The Brompton is designed a) for loads not exceeding 110kgs, and b) for use on roads and well made paths. It is not designed for cross country riding or for higher loads: this can overstress the frame, and the tyres and wheels are unsuitable.
- Page 3 So, if the seat pillar is projecting below the main frame, DON'T try to park or unpark the Brompton: also DON'T try to latch or unlatch the front wheel from the rear frame, as this requires that the rear frame rotates relative the main frame.
- Page 4 Part 3: UNFOLDING AND FOLDING EXPLAINED IN DETAIL. If you have not seen the Brompton being folded, you may get the impression on reading this section that the process is difficult: it involves in practice only a few easy movements.
- Page 5 UNFOLDING stage 2 - Front wheel, figures FS4 & 5: Do not attempt to unfold the front wheel assembly if either the saddle or the handlebar is still folded. Unfolding or folding the front wheel requires only a single action, described below: however, it's a help to understand what goes on.
- Page 6 The bicycle is now parked, in effect ready for use: to unpark (fig FS6), lift the bike by the saddle (keeping the front wheel turned slightly leftwards) and allow the rear frame/wheel to rotate fig FS6 down and back into its unfolded position.
- Page 7 However, if you frequently fold and unfold your Brompton, you'll become aware of other, easier, techniques for this stage of folding.
- Page 8 KEEP YOUR TYRES WELL INFLATED. A car-type valve is used, allowing various methods of inflation. The Brompton HP pump is well suited, and can be kept on the rear frame (unless it’s titanium). You can also use a standard car foot- or hand-pump, or an air line.
- Page 9 This is a great convenience, and many users value this Brompton feature, but you may find it disconcerting. • In latch-mode, the clip engages automatically every time you unfold, and...
- Page 10 park or fold the bike, you have to release this clip. In latch mode, the clip is released by pushing lever L forwards The latching facility comes into its own when wheeling the bike around with luggage on, and for those who feel more comfortable riding a bike with rear- frame attached.
- Page 11 If you can’t win enough height by re- positioning the saddle, there are three Brompton options which allow more height, a telescopic seat pillar, a plain pillar extended 60mm, or a saddle adaptor pin pointing "up".
- Page 12 SECTION E: HANDLEBAR & CONTROL POSITIONS The handlebars and control levers on the Brompton are factory set to provide a compromise between compactness and riding comfort. For most users the ri ding position should be fine. There is no vertical adjustm...
- Page 13 SECTION F: RUNNING ADJUSTMENTS & CHECKS. It is important that certain of the jobs listed here are carried out at least once, if not two or three times, during the first few hundred miles of use when parts are bedding in (see chart on centre page). Thereafter, except for brake adjustment, they need to be carried out less and less frequently.
- Page 14 any movement of the indicator chain back into the axle where it enters it, then the setting is too tight). • with the trigger in low, the indicator chain (where it enters the end o the axle) should either move not at all, or perhaps up to 0.5mm, when you pull the cable adjustor A towards the CPULA (if it moves more than this, then the setting is probably too loose: on the other hand, if, while back-pedalling and moving the trigger slowly from position 2 to 1...
- Page 15 ailleur maintenance and adjustment. or atisfactory gear changes and smooth running, two stops need correc ett g, and two key elements of the system have to move freely: the actu ator (or "chain-pusher"), and both idlers on the chain tensioner. in pusher adju stment.
- Page 16 ROUTINE CHECKS RUNNING IN: after the first few hours SEAT CLAMP: & ADJUSTMENTS of use, the items in the bold boxes SADDLE CLIP BOLT Action firm, but torque:- MUST be checked. Thereafter, not overtight More info in text of Manual nylon frame 12-13NM continue checking, but less often.
- Page 17 (torque 13NM). On a rail saddle, with the Brompton Pentaclip, if you adjust the saddle, use the correct torque on re-clamping, 15-20NM: if the bolt is too loose, the...
- Page 18 Handlebar clip bolt: Check that this is properly secured, torque 18NM. If it is loose, the handlebars may slip without warning. Brakes: The brakes should be set so that the pads are as close to the rim as practical without actually interfering with the free running of the wheel. Adjustment is carried out using the threaded cable stop on the brake lever (or, on a C-type, at the caliper).
-
Page 19: Front Wheel
SECTION G: WHEELS, REMOVING AND REFITTING. If the brakes are properly adjusted and the tyre is well inflated when removing or fitting a wheel, you won't be able to move the tyre past the brake pads. One way round this is to deflate the tyre: alternatively, loosen the cable adjustor (if it's possible) or remove a brake pad. - Page 20 Removing the chain tens ioner, figs AR3 and AR7. For a hub gear, the control cable has to be disconnected: a) for Sram (fig AR3) - press the spring clip C on the adjustor A, and withdraw it from end B of the gear indicator; b) for Sturm ey Archer (fig AR7) –...
- Page 21 Fitting the rear wheel. Make sure that the chain passes round the rear sprocket. Drop the axle into the slots: for hub-gears, the tab-washers TA must be in place, an d the correct way round (i.e. tabs marked “TOP” aligned with slots SL2). Ma sure that each end of the axle is seated against the end of the slot, SL1, and do up the wheel nuts, torque 22NM.
- Page 22 SECTION H: OTHER DESIGN POINTS TO DO WITH FOLDING Hook: Correct function of the hook is important for satisfactory folding: it retains the front wheel in place when the bike is folded. It is attached to the front mudguard stay (or, if there are no mudguards, to a special wire form, not illustrated).
- Page 23 Handlebar catch an d nipple: The "body" of the handlebar catch acts as a stop to align the front wheel correctly during folding. The correct torque for the securing screw is 9NM. Operation of catch and nipple: keep these correctly set, for, if wrong, the handlebar catch will loose its spring effec t, with the irritating result that the andlebars unlatch too easily from the folded package.
- Page 24 ower stop disc: When you pick up the folded bike, the rear frame cannot unfold because the lower stop disc , LSD, butts against the "folded" se at pillar, SP. The LSD can be adjusted to give the correct gap between its elf and the SP: if the gap is too small, then the SP may foul,...
- Page 25 SECTION J: LUBRICATION. When lubricating your Brompton, avoid getting oil or grease on the seat pillar or the wheel rims. Grease is the right lubricant for all wearing parts (oil does not last as well) and where it is practical to dismantle an assembly and apply grease, it's best to do so.
- Page 26 LUBRICATION SEAT CLAMP se GREASE in preference quick release: o oil wherever possible (see NEVER allow oil only ext of Manual). lubricant onto A void excess lubrication, a seat pillar ipe off any surplus. Frequency of lubrication depends on conditions and on whether you use oil or grease, but the frequency is rated, roughly, on a scale of...
- Page 27 1. ALUMINIUM COMPONENTS: as on other lightweight machines, aluminium alloy is used in the construction of the Brompton, and this material has a finite design life before failure. In normal use, the risk of...
- Page 28 Rear sprockets for 1- & 2-speeds: use special Brompton sprockets, 12T, and for 2-spd, 16T as well. Chainset. Best to use the Stronglight set specified for the Brompton. If you use an alternative, make sure that it suits the BB axle (ISO 6695), that it gives the correct chainline (fig HK4), and that the end of the crank does not clash with any part of the rear frame when the bicycle is parked.
- Page 29 SECTION M: OPTIONS AND ACCESSORIES. Here is a brief overview of Brompton accessories. For full details, visit our website, www.brompton.co.uk. LUGGAGE, the front carrier system. The Brompton system provides a highly convenient method for taking luggage on the bike as it only takes a moment to attach or release it.
- Page 30 BIKE COVER, BIKE-BAG. In many situations, say on trains, or when the bike is dirty, a co ver is useful. The Brompton Cover is quick to fit or remove, and it can be drawn tight around the base of the bike by using its draw-cord.
- Page 31 The tyres available from Brompton are • Brompton HP standard, “yellow”...
Need help?
Do you have a question about the BROMPTON and is the answer not in the manual?
Questions and answers