Table of Contents
Advertisement
Quick Links
USER MANUAL
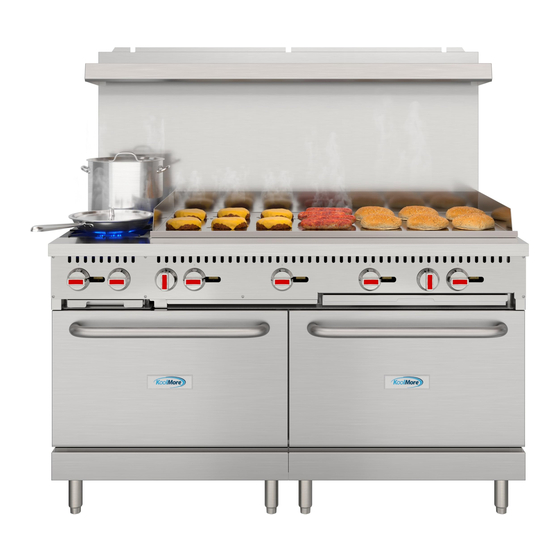
KoolMore Commercial Range with
Griddle & Burners
Models: KM-CR24-NG, KM-CR24-LP, KM-CR36-NG, KM-CR36-LP,
KM-CR60-NG, KM-CR60-LP
KM-CRG36-NG, KM-CRG36-LP, KM-CRG60-NG, KM-CRG60-LP,
KM-CRG364-NG, KM-CRG482-NG
KM-CRGB60-NG, KM-CRGB60-LP
KM-CRG364-NG
KM-CRG482-NG
Before using, please read the operating instructions carefully to
ensure proper application and achieve satisfactory results.
Advertisement
Table of Contents

Related Manuals for KoolMore KM-CR24-NG


Summary of Contents for KoolMore KM-CR24-NG
- Page 1 USER MANUAL KoolMore Commercial Range with Griddle & Burners Models: KM-CR24-NG, KM-CR24-LP, KM-CR36-NG, KM-CR36-LP, KM-CR60-NG, KM-CR60-LP KM-CRG36-NG, KM-CRG36-LP, KM-CRG60-NG, KM-CRG60-LP, KM-CRG364-NG, KM-CRG482-NG KM-CRGB60-NG, KM-CRGB60-LP KM-CRG364-NG KM-CRG482-NG Before using, please read the operating instructions carefully to ensure proper application and achieve satisfactory results.
- Page 2 Stay informed with the latest information for your KoolMore Range. If you need any assistance or have questions, our customer support team is here to help.
-
Page 3: Table Of Contents
Content Safety ..............4 Product Features ..........5 Set up ..............6 Backsplash Assembly .......... 8 Operation ...............9 Maintenance ............11 Troubleshooting ..........13 Warranty .............. 14... -
Page 4: Safety
Safety • Any self-modification, incorrect installation, adjustment, or maintenance may result in property loss or injury. Please contact the manufacturer for any adjustments or maintenance, and ensure that the work is done by a trained and quali- fied person. • For your safety, keep the machine away from any liquids, gases, or other objects that are flammable or explosive. -
Page 5: Product Features
Product features • The bracket, exterior finish, and adjustable feet are all stainless steel. • The control panel features a convenient design with a knob control switch for operating the device. • The device is equipped with cast-iron burners. If the burner accidentally goes out, the safety valve will shut off automatically. -
Page 6: Set Up
Set up Transportation and Storage Transportation: Handle the machine carefully and do not turn it upside down to avoid damaging the exterior and internal parts. Store the packaged machine in a well-ventilated warehouse away from corrosive gases. If storing outside, protect it from rain. - Page 7 • Clearance: Keep at least 4 inches away from combustible objects on the sides and 8 inches at the back. Ensure there’s enough space around the motor for ventilation, especially if installed near walls or other enclosures. • Weight and Stability: Install on a stable, level floor. Use adjustable feet to level the device if necessary. •...
-
Page 8: Backsplash Assembly
Backsplash Assembly 1. Open the package and remove the backsplash components. 2. Assemble the required components according to the above image. 3. Slide the back panel into the front panel from the bottom of the front panel. 4. Align the holes and use four #10 sheet metal screws to fasten the front and back panels together firmly from the backside. -
Page 9: Operation
Operation Control Panel: Using the Gas Range: Turning on the Gas: Turn on the gas valve and light the pilot flame with an igniter. If the appliance has been idle for an extended period or is used for the first time, the ignition process might take longer (about 2-3 minutes). - Page 10 Initial Cleaning and Preparation: Before first use, thoroughly clean the oven to remove any packaging materials and manufacturing residues. Also, clean the stainless steel surfaces with a suitable detergent, then dry the device com- pletely to avoid any moisture inside. •...
-
Page 11: Maintenance
Maintenance Routine Inspection Daily Checks: • Regular Maintenance: It's crucial to inspect the machine daily to prevent accidents or unexpected issues. • Stop Use: Immediately stop using the machine if any abnormalities are detected or if there are unusual vibrations. Before and After Use: •... - Page 12 ventilated space • Spillage: Clean spills immediately to prevent staining or damage to the device. Use a scraper for solid food but avoid metal tools that could scratch surfaces. • Long-term Storage: If storing the device for a long time, ensure it’s completely dry to avoid rust. Consider using a protective cover.
-
Page 13: Troubleshooting
Troubleshooting Please note: • The troubleshooting guide provided here is for informational purposes only. • If you encounter any issues or failures with your appliance, stop using it immediately. Contact pro- fessional technicians to diagnose and repair the problem. • Always prioritize safety. -
Page 14: Warranty
At its sole discretion, Koolmore Supply Inc. may decide to replace the product. In such an event, your replace- ment appliance will carry the warranty for the remaining term of the original unit's warranty period.
Need help?
Do you have a question about the KM-CR24-NG and is the answer not in the manual?
Questions and answers