Advertisement
Introduction
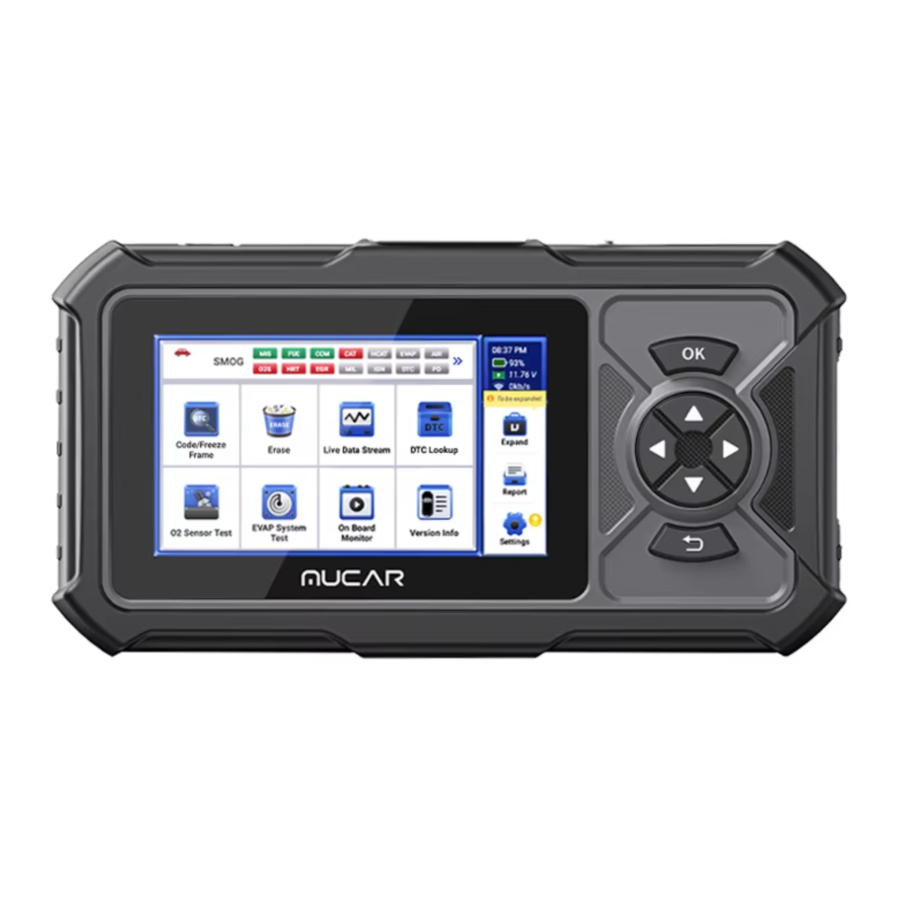
MUCAR CDE900 PRO is developed by the most distinguished mind of the industry. It is specially designed to support all 10 OBDII service modes, including live data, O2 sensor test and more, on OBDII/EOBD compliant cars, SUVs, light-duty truck and mini-vans sold worldwide since 1996.
Product Description

- Power/Screen Lock Button: Long press for 5 seconds to turn on or off.
- Touch Screen: 5 inches (480*854 resolution).
- Diagnostic cable interface: Diagnostic cable interface: plug in the diagnostic cable to connect to the car OBD connector.
- OK Button: Confirm button.
- Selection Buttons: Up, down, left and right direction selection.
- TF Card Slot: Support expandable SD memory card (please purchase by yourself).
- TYPE-C interface: Support 5V-1.2A charging voltage (please do not exceed this range).
- Reset Button: Power on and off reset.
- Return Button: Return to the previous step.
Technical Specifications
Display: 5" display.
Working Environment: 0~50℃ (32~122℉ ).
Storage Environment: -20~60℃ (-4~140℉ ).
Working voltage: input 5V2A (2.5A max).
Supported Protocols: ISO 14230-4 KWP,ISO 15765-4 CAN,ISO 9141-2 ISO,SAE J1850 VPW,SAE J1850 PWM
How To Use
Data Link Connector (DLC) Location
The DLC (Data Link Connector or Diagnostic Link Connector) is typically a 16pin connector where diagnostic code readers interface with the vehicle's onboard computer. The DLC is usually located 12 inches from the center of the instrument panel (dash), under or around the driver's side for most vehicles. If Data Link Connector is not located under dashboard, a label should be there telling location. For some Asian and European vehicles, the DLC is located behind the ashtray and the ashtray must be removed to access the connector. If the DLC cannot be found, refer to the vehicle's service manual for the location.

Usually, the OBD port is located under the dashboard, above the pedal on the driver's side. The five locations shown lite the picture are common OBDII port locations.
Turn on the MUCAR CDE900 PRO
Hold the Power button for 5 seconds to turn the MUCAR CDE900 PRO on. The tablet will start initializing and enter the following interface.

*Note: Don't connect or disconnect any test equipment with the ignition on or engine running.
Language Setting

Used to select the tool language.
Choose Time

Choose the time zone where you are in. The system will automatically configure the time according to the time zone you selected.
Connect Wi-Fi

The system will automatically search for all available Wi-Fi networks. You can select the desired Wi-Fi.
Function Description

MUCAR CDE900 PRO has 12 main modules, Code/Freeze Frame, Erase, Live Data Stream, O2 Sensor Test, EVAP System Test, On Board Monitor, Version info, DTC Lookup, Expand, Report, Settings.
- Plug in the OBD diagnostic cable after the car is turned on, and the device will automatically scan for OBD protocols (wait while scanning).
Note: You can click "SMOG" to see the corresponding supported protocols, gray protocols are not supported, green without fault codes, red with fault codes.

- Select "Code/Freeze Frame" to view fault codes and freeze pins. Select "Read Codes", and select vehicle model to view dtc. Select "View Freeze Frames" monitor status since DTCs cleared, view the engine's current power system diagnostics.
Read Codes: Quick View Engine DTCs.

- Select View Freeze Frames, monitor status since DTCs cleared, View the engine's current power train diagnostics.

- Combine: The graphs can be merged for easier comparisons.

- Record: To record the diagnostic data for further analysis.
- Report: To save the number of current data streams.
- Compare Sample: Contrast data flow functions. ·Save Sample: Record the sample data stream.
- Combine: The graphs can be merged for easier comparisons.
- Select "Erase" and click "YES" to clear the fault code.
- Select "Live Data Stream" and click "OK" to view all data streams.

- Combine: The graphs can be merged for easier comparisons.

- Record: To record the diagnostic data for further analysis.
- Report: To save the number of current data streams.
- Compare Sample: Contrast data flow functions.
- Save Sample: Record the sample data stream.
- Combine: The graphs can be merged for easier comparisons.
- Select "O2 Sensor Test" and click "OK" to view the O2 Sensor data flow.
- Select "EVAP System Test" and click "OK" to view EVAP data streams.
- Select "On Board Monitor" and click "OK" to view On Board Monitor data streams.

- Select "Vehicle Info"function retrieves a list of information (provided by the vehicle manufacturer) from the vehicle's on-board computer.
Tip: This information may include: VIN (Vehicle Identification Number), CID (Calibration ID), CVN (Calibration ID Number).

- Select "DTC Lookup" to query fault code analysis.

- Select "Expand" to expand the 28 reset functions and related model software:
4 in 1 package: (ECM/TCM/ABS/SRS), it has Autosearch automatic diagnosis function, related diagnosis demonstration, engine related exhaust function and car model diagnosis function.
Full system: Enhance diagnostic functions for all modules, such as TCM, BCM, ABS, SRS, AC, IC etc.
Basic functions: Support fault codes reading/clearing, data stream and version number reading.
Maintenance function introduction: Car maintenance refers to the regular inspection and maintenance of the car to ensure the normal operation and prolong the life of the car.
Full function: read version number, read DTC, clear DTC, read data stream, code setting, Action test action test.

- Select "Report" and click "OK" to view the diagnostic record. Report view data flow reports, PDF documents generated by product diagnostic reports.

- Select "Settings" to set the basic settings, there are functions such as feedback, repair info, upgrade, order, setting language, etc. Click update to upg demos and auto search function modules. Click on the app to enter the app application update, which can update the application app and the local firmware.


Customer Service

Pull down the task bar, find the customer service icon, click on it, and then online customer service will appear to answer the questions you encounter during the use of the product.
Extended Function Description

Tip: Please click "Expand" to purchase the following extensions.
Diagnose
The module has a demo (demonstrates the diagnostic process) and model software.

- Health Report
This function can quickly reveal the vehicle's health status.
Tap "Health Report". The system will start scanning DTCs and show the test results.

The DTC will be displayed on the screen in red font, with a specific definition.
* Note: Follow the prompts to proceed if the communication failure occurs.

- System Scan
This function will automatically scan all systems of the vehicle.

- System Selection
This function allows you to manually choose the automotive electronic control system. Tap "PCM" (e.g.). The screen will show the selection interface.

Choose the system to be tested. The following screen may vary by vehicle's make, model, and year.


Version Information
This function reads the current version information of ECU.
Read Fault Code
This function can read the Diagnostic Trouble Codes (DTCs) in the ECU memory, helping quickly identify the cause of the vehicle breakdown.
Tap "Read Fault Code". The screen will display diagnostic results.

* Explanation of terms:
- Freeze Frame: Records specific data streams for verification when the car breaks down.
- Report: Saves the current diagnosis result as a diagnosis report, which can be sent to a specific E-Mail address.
Clear Fault Code
This function can clear the DTC of the ECU memory of the tested system.
Read Data Stream
This function can read and display the real-time data and parameters of the ECU.
Reset: Car reset refers to the regular inspection and maintenance of the car to ensure the normal operation and prolong the life of the car. MUCAR CDE900 PRO has 28 common maintenance and reset functions: (AIRFUEL, BLEED, AFS, ADBLUE, SUS, AIRBAG, BMS, BRAKE, COOLANT, DPF, EGR, ETS, GEAR, BOX, IMMO, INJEC, LANGUAGE
Auto Search: Automatically scan the model VIN and model list (not including all models).

History: This feature includes diagnostic logging

Settings

You can modify or add related information in this module, or make settings after the initial setting is completed.
Feedback
This module can record and establish the file of the diagnosed vehicles, including all diagnostic-related data such as diagnostic reports, and data stream records.
Consuit
This module includes four sections:

- Instruction: View Product Brochure.
- Coverage List: The supported vehicles' information.
- Videos: Contains table usage tips, maintenance, and diagnostic guides.
- Learning: Demonstrates how to operate the tool.
Update
This module allows you to update the diagnostic software & App to the latest version.
A pop-up message will indicate newer software is available if you don't update the software in the process of registration.

- Browser: Built-in Google Chrome.
- Clear Data: Clear user data.
- Firmware Fix: Used to update the firmware.
- Automatically Send Reports: Automatically send diagnostic reports to designated email addresses.
- Report Receiving Email: Fill in an email address for receiving reports.
- Help: Equipment FAQ.
- About: Basic information about this device.
- Screen Shots: Use this switch to take a screen capture.
- Photo Album: Screenshot storage.
- Screen Floating Window: Turn on this switch to record the screen operation video.
- Screen Record: Screen recording video storage.
- File Manager: System file manager.
- WI-FI: Set the connectable Wi-Fi network.
- Language: Select the tool language.
- Time zone: Choose the time zone of the current location, then the system will automatically configure the time 7.19 according to the time zone you chose.
- Sleep Time: Set sleep time to save battery power.
- Unit Of Measure: Metric/imperial.
- Customer Service: Customer Service Icon Switch.
- Use 24-Hour Format: Time format switching.
- Brightness: Set screen brightness.
FAQ
Why does MUCAR CDE900 PRO have no responses when it is connected to a car?
Check if the connection with the vehicle diagnostic socket is solid, or check if the ignition switch is on, or if the tool supports the car.
Why does the system stop when reading the data stream?
It may be caused by a slackened connector. Please turn off the scanner, firmly connect the connector, and switch it on again.
Communication error with vehicle ECU?
Please confirm the following cases:
- Whether diagnostic connector is correctly connected.
- ·Whether ignition switch is ON.
Or, send your vehicle's year, make, model and VIN number to us using Feedback feature for timely technical assistance.
Why does the screen flash when the engine ignition starts?
It is normal and caused by electromagnetic interference.
How to upgrade the system software?
- Power on the tool and ensure a stable Internet connection.
- Go to "Settings" → "Update"→ "App", tap "OTA" and then tap "check version" to enter the system upgrade interface.
- Complete the process by following the instructions on the screen step by step. It may take a few minutes depending on the status of your network.
After the upgrade is finished, the tool will automatically restart and display the main interface.
How to capture the screenshot?
Pull down the taskbar and click on the screenshot icon to capture the current screen, it will be saved in the Photo Album module.
What should I do when it prompts that the network is unavailable?
Pull down the task bar, click the WIFI icon to connect to the available network.
Documents / ResourcesDownload manual
Here you can download full pdf version of manual, it may contain additional safety instructions, warranty information, FCC rules, etc.
Advertisement


Need help?
Do you have a question about the CDE900 PRO and is the answer not in the manual?
Questions and answers