Advertisement
Overview
Introduction
Thank you for purchasing the PreSonus R65 or R80 active AMT studio monitor. PreSonus Audio Electronics has designed the R65 and R80 utilizing high-grade components to ensure optimum performance that will last a lifetime.
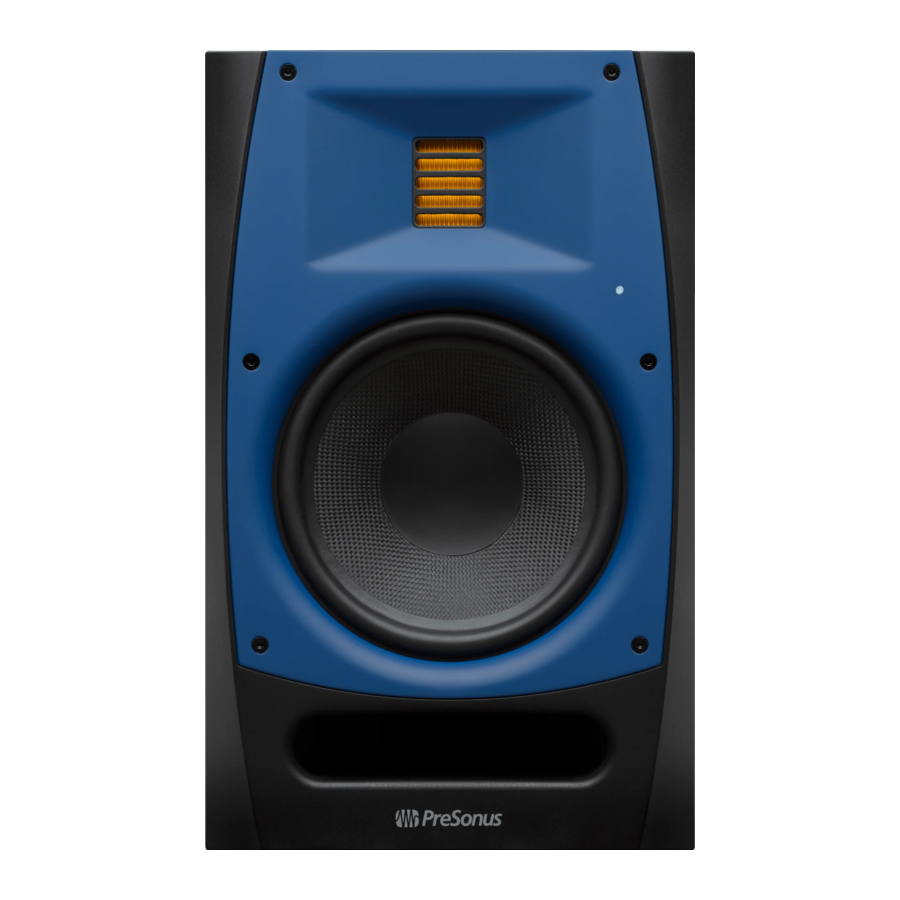
The R65 and R80 self-powered near-field monitors differ in cabinet and driver size, crossover frequency, low-frequency extension, and maximum sound-pressure level; all other specs are identical. Both models utilize a custom AMT tweeter. This design affords an ultra-fast transient response and consistent high-frequency response. The 6.8-inch2 AMT tweeter reproduces subtle ultra-high harmonics, adding air and sense of space not possible with traditional dome tweeters. The result is that you hear every nuance of your mix with astonishing clarity and coherence.

We encourage you to contact us at +1-225-216-7887 (9 a.m. to 5 p.m. Central Time) with questions or comments regarding your PreSonus R65/R80. PreSonus Audio Electronics is committed to constant product improvement, and we value your suggestions highly. We believe the best way to achieve our goal of constant product improvement is by listening to the real experts: our valued customers. We appreciate the support you have shown us through the purchase of this product and are confident that you will enjoy your R65/R80!
Summary of Product Features
- 2-way active AMT studio monitor with DSP
- 6.8-inch2 AMT Tweeter (equivalent to a 3" diaphragm)
- Class D biamped power configuration: 100W LF, 50W HF
- Power-conservation mode
- Balanced XLR and 1/4" TRS, and Unbalanced RCA inputs
- Input-level control with 10 dB of gain above unity
- High-frequency driver adjust (linear, +1 dB, -1.5 dB, -4 dB) above 2 kHz
- High-pass filter switch (linear, 60 Hz, 80 Hz, 100 Hz) with -24 dB/octave slope
- Acoustic Space switch (linear, -1.5 dB, -3 dB, -6 dB) to compensate for bass boost near a wall
What is in the Box
In addition to this manual, your R65/R80 package contains the following:
- (1) PreSonus R65 or R80 active studio monitor
![]()
- (1) IEC power cable
![]()
- (4) Foam feet to be placed on the bottom of the speaker to improve isolation
![]()


Hookup
Rear Panel Connections and Controls
Inputs

Line-level Inputs. The R65/R80 provides a choice of three inputs: two balanced (XLR and 1/4" TRS) and one unbalanced (RCA). These inputs accept a line-level signal from your audio source and feed that signal to the monitor's built-in power amplifiers. When both balanced connections are in use, the TRS input supersedes the XLR input.
Note: Make sure your audio source's XLR or ¼" TRS wiring corresponds to that of the R65/R80.


Input Level: Sets the amount of gain applied to the input signal. This is not a volume control in the traditional sense; instead, it sets the level of the input signal before it is amplified.
Power

IEC Power Connection: Your R65/R80 accepts a standard IEC power cord.

Do not remove the center grounding prong or use a ground-lift adapter, as this could result in electric shock

Power Switch: This is the On/Off switch. The power status is indicated by an LED on the front of the cabinet.
Note: The input-power voltage is set internally at the factory to correspond with the country to which your monitor was shipped. Do not use your monitor in a country 100-120V~,50-60Hz, T2AL that uses a different standard voltage than is used in 220-240V~,50-60Hz, T1AL 150W the country where you purchased your R65/R80.
Acoustic Tuning Controls

Acoustic Space: Cuts the level of all frequencies below 250 Hz by the specified amount (-1.5, -3, or -6 dB) to compensate for the bass boost that occurs when the monitor is placed near a wall or corner. Can be defeated by setting it to Linear. Repeatedly pushing the corresponding button cycles through the available settings.

HF Driver: Boosts or cuts all frequencies above 2 kHz by the specified amount (+1, -1.5, or -4 dB). Can be defeated by setting it to Linear. Repeatedly pushing the corresponding button cycles through the available settings.

HP Filter: Rolls off the level of all frequencies below the specified frequency (60, 80, or 100 Hz), with a slope of -24 dB/ octave. Can be defeated by setting it to Linear, in which case, the monitor's natural rolloff takes over (45 Hz for R65, 40 Hz for R80). Repeatedly pushing the corresponding button cycles through the available settings.
Hookup Diagrams
Basic Setup

Advanced Setup with Speaker Switching

Tutorials
Unit Placement
Ideally, near-field monitors should be placed so that the tweeters are at the same height as your ears when you are mixing.
NOTE: The unique design of the R65 and R80 monitors requires that they be placed vertically. Positioning R65 or R80 monitors horizontally will result in reduced fidelity and potential phase problems.

The speakers should be separated so that the AMT tweeters form an equilateral triangle with your head. The monitors should be "toed in," or angled, so that they are pointed at you, not pointed straight ahead.

Connections

If your audio source has balanced XLR or ¼" TRS outputs, make sure the wiring of those outputs corresponds with the wiring of the R65/R80's inputs as illustrated above. If it doesn't, you'll need "crossover" cables that reverse the two signal conductors.
It is recommended that you use the shortest possible cables in order to minimize the chance of picking up electromagnetic or radio-frequency interference (EMI or RFI).
Input Level Setting
The Input Gain control determines the level of the input signal before it is sent to the built-in power amp. This lets you attenuate or amplify the signal's level at the monitor's input, providing the flexibility to adapt to various audio source output levels.

Set the Input Gain so that all other level controls in the system needn't be turned way up or way down to achieve a comfortable listening volume. If you set it too low, you'll have to crank your audio source's output level way up, which will increase the audible noise from the source signal. If you set it too high, any noise in the signal will be amplified, which you don't want, either!
The best place to start is to set the control at its 12 o'clock position, which is labeled "U" for "unity gain." That means the level of the signal reaching the amplifier is the same as the level of the signal entering the monitor's input. This ensures a good, strong signal level without amplifying any noise that might be in the signal. Of course, you should make sure that the gain controls in your audio source have been optimized for maximum signal level and minimum noise. This process is called "gain staging," and you can learn about it from many online sources.
If setting the input gain to Unity is unsatisfactory, you can try different settings, but remember that it's better to avoid settings above U if possible. If the volume is too loud at unity gain, feel free to turn the Input Level control down a bit—but not so far that you have to crank your audio source's output level to its maximum setting. Again, if you properly gain-stage your audio source, setting Input Level to U or slightly lower should work fine.
Once the monitor's Input Level control is set, leave it alone; don't use it as a system-volume control. Leave that job to the source signal's output-level control.
Equalizer Setting Suggestions

The R65/R80 provides two EQ controls in its Acoustic Tuning section: HF Driver and HP Filter. (There's also an Acoustic Space control, which is covered in the next section.) The HF Driver control is a high-frequency shelving filter that boosts or cuts all frequencies above 2 kHz by +1 dB, -1.5 dB, or -4 dB. Use this control to fine-tune the reproduction of high frequencies, depending on your room's acoustic characteristics.
In general, setting the HF Driver control to Linear (no boost or cut) will produce the best results. However, if the sound is generally too bright or shrill, try the -1.5 dB setting or, in extreme cases, the -4 dB setting; if the sound is too dull and lifeless, try the +1 dB setting. (In either case, check your source signal's EQ settings to see if anything's amiss.) Keep in mind that the +1 dB setting will also emphasize any high-frequency noise in the signal. It's always better to cut than to boost, if possible, and it's best to use the least cut or boost needed to get the job done.
The HP Filter control rolls off the low frequencies below the specified frequency (60, 80, or 100 Hz) at a slope of -24 dB/ octave. Engage this control if you are using a subwoofer in conjunction with the R65/R80 monitors, and set it to the same frequency as the crossover to the subwoofer. If you're not using a subwoofer, set the control to Linear.
Acoustic Space Setting Suggestions
When a monitor is placed close to a wall, or in a corner, the low frequencies tend to be emphasized more than if the monitor is far from any room boundary; this effect is called "boundary bass boost." It is most pronounced if the monitor is in a corner and less pronounced, but still present, if the monitor is near one wall.
To compensate for this bass boost, the R65/R80 provides an Acoustic Space switch that cuts all frequencies below 250 Hz by a fixed amount.

If the monitors are close to the corners of the room, start by setting the Acoustic Space switch to -6 dB, which provides the most bass attenuation.

If the monitors are close to the back wall, try setting the Acoustic Space switch to -3 dB or -1.5 dB for less attenuation.

If the monitors are far from any wall, there will be no bass boost, so set the switch to 0 dB.
These are merely starting suggestions; use your ears, experiment, and go with what works best for your listening environment.
Energy Conservation Mode
Your R65/R80 features an Energy Conservation mode. When Energy Conservation mode is active, the onboard amplifier will enter low-power mode after thirty minutes of inactivity. Once signal is detected again, the amplifier will take three seconds to return to full power.
By default, this mode is disabled but can be enabled by pressing and holding the Acoustic Space and HF Driver buttons simultaneously for 3 seconds. The mode can be disabled by repeating this procedure.

When Energy Conservation mode is active, all four HF Driver LEDs will illuminate green.

When Energy Conservation mode is disabled, all four Acoustic Space LEDs will illuminate red.
The Energy Conservation mode status can be querried by simply pressing the Acoustic Space and HF Driver buttons simultaneously.
Power User Tip: Because querying or changing Energy Conservation Mode may inadvertently change your Acoustic Space or HF Driver setting, it is recommended that you double-check these settings afterwards.

Technical Specifications
| INPUTS (R65 and R80) | |
| 1 - Balanced XLR | |
| 1 - Balanced ¼" TRS | |
| 1 - Unbalanced RCA | |
| PERFORMANCE | |
| Frequency Response (-3 dB) | |
| R65 | 45 Hz – 22 kHz |
| R80 | 40 Hz – 22 kHz |
| Crossover Frequency | |
| R65 | 2.7 kHz |
| R80 | 2.6 kHz |
| LF Amplifier Power | |
| R65 and R80 | Class D, 100W |
| HF Amplifier Power | |
| R65 and R80 | Class D, 50W |
| Peak SPL at 1M | |
| R65 | 104 dB |
| R80 | 107 dB |
| LF Driver | |
| R65 | 6.5" Woven composite |
| R80 | 8" Woven composite |
| HF Driver (R65 and R80) | |
| Type | AMT |
| Diaphragm | 6.8 in2 (4400 mm2) |
| Equivalent Diaphragm ø | 3" (76 mm) |
| Input Impedance (R65 and R80) | |
| Balanced | 20 kΩ |
| Unbalanced | 10 kΩ |
| USER CONTROLS (R65 and R80) | |
| Volume Range | |
| Type | A-type taper |
| HF Control | |
| Settings | Linear, +1, -3, -6 dB |
| Low Cut | |
| Settings | Linear, 60 Hz, 80 Hz, 100 Hz |
| Acoustic Space | |
| Settings | Linear, -1.5, -3, -6 dB |
| PROTECTION (R65 and R80) | |
| RF interference | |
| Output-current limiting | |
| Over-temperature | |
| Turn-on/off transient | |
| Subsonic filter | |
| Internal mains fuse | |
| POWER | |
| R65 and R80 | 100-120V ~50/60 Hz or 220-240V ~50/60 Hz |
| Energy Conservation Mode | <0.5W |
| CABINET | |
| R65 and R80 | Vinyl-laminated MDF |
| PHYSICAL | |
| (Width/Height/Depth) | |
| R65 | 8" (203 mm)/ 13" (328 mm)/ 10.3" (261 mm) |
| R80 | 9.5" (241 mm)/ 15" (379 mm)/ 12" (309 mm) |
| Weight | |
| R65 | 14.7 lbs (6.65 kg) |
| R80 | 19.8 lbs (9 kg) |
Troubleshooting
No power
First ensure that your R65/R80 is plugged in. If it's connected to a power conditioner, verify that the power conditioner is turned on and functioning. If so, yet there is still no power to the monitor, contact PreSonus for a repair.
No audio
If your R65/R80 appears to power on but you hear no sound when playing audio from the source signal (the lights are on but nobody's home), first make sure that the cable connecting the source signal to the monitor is working correctly. Also, verify that the Input Gain control is set to provide enough amplitude for the signal.
Hum
Usually, hum is caused by a ground loop. Verify that all audio equipment is connected to the same power source. If you are not using a power conditioner, we highly recommend that you add one. Not only will this help to minimize hum, it will better protect your equipment from power surges, brownouts, etc.
Use balanced cables whenever possible. If your audio device does not offer a balanced output, you can connect it to a DI (direct-injection) box, which will provide a ground-lift switch and a balanced output.
Finally, make sure that your audio cables are not run near power cables, and use cables that are the appropriate length for your application. Using cables that are too long not only increases the risk of noise, it increases the likelihood that the cables are coiled, which will essentially create an antenna that picks up all kinds of audio interference
Warranty
How to Get Warranty Service (USA):
- You must have an active user account with PreSonus and your hardware must be on file with your account. If you do not have an account, please go to:http://www.presonus.com/registration and complete the registration process.
- Contact our Technical Support Department at (225) 216-7887 or log a support ticket at: http://support.presonus.com. TO AVOID THE POSSIBILITY OF SENDING IN A PRODUCT THAT DOES NOT HAVE A PROBLEM, ALL SERVICE REQUESTS SHALL BE CONFIRMED BY OUR TECH SUPPORT DEPARTMENT.
How to Get Warranty Service (outside of USA):
- You must have an active user account with PreSonus and your hardware must be on file with your account. If you do not have an account, please go to:http://www.presonus.com/registration and complete the registration process.
- Contact the Technical Support/Service Department for your region athttp://www.presonus.com/buy/international_distributors and follow procedures provided by your PreSonus contact.
If you have any questions about this warranty or service received, please contact PreSonus (USA) at (225) 216-7887 or one of our authorized international distributors at: http://www.presonus.com/buy/international_distributors.
Product features, design, and specifications are subject to change without notice.
PreSonus' previously Top Secret recipe for Rice Dressing
Ingredients:
1lb ground beef
1 lb chopped chicken liver
1 onion (diced)
2 green peppers (diced)
4-6 celery stalks (diced)
2 garlic cloves (minced)
¼ C. chopped fresh parsley
3 C. chicken stock
6 C. cooked rice
1 Tbs. oil
Salt and pepper to taste
Cayenne pepper to taste
Cooking Instructions:
- In a large pot, heat oil on medium high and add meat, salt, and pepper to taste. Stir until meat begins to brown.
- Lower heat and add all vegetables. Cook until onions are transparent and celery is very tender. Add stock as necessary to prevent burning.
- Stir in cooked rice. Add remaining stock and simmer on low until ready to serve.
Documents / Resources
References
Download manual
Here you can download full pdf version of manual, it may contain additional safety instructions, warranty information, FCC rules, etc.
Advertisement


Need help?
Do you have a question about the R65 and is the answer not in the manual?
Questions and answers