Advertisement
Overview
Introduction
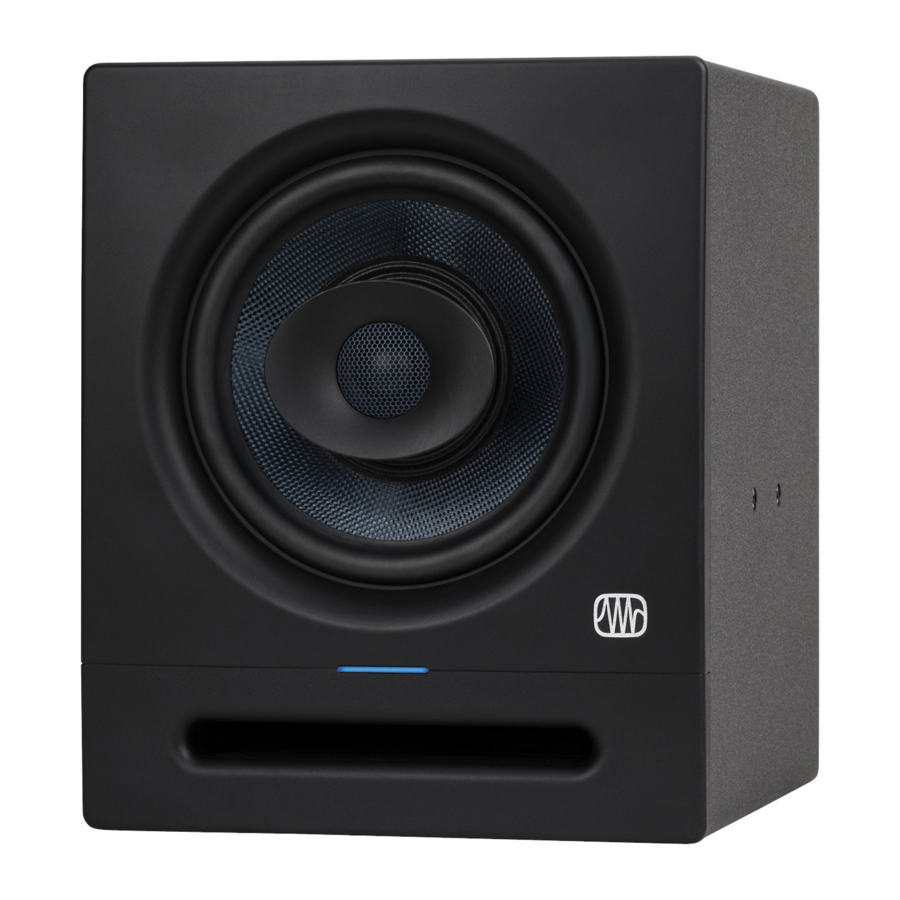
Thank you for purchasing Eris Pro-Series studio monitors. With their single point-source coaxial design for superior phase alignment and stereo imaging, Eris Pro-Series monitors ensure your mix translates accurately whether mixing in stereo or surround configurations.

Throughout this manual you will find Power User Tips that can quickly make you an Eris expert so you can get the most out of your investment. If this is your first pair of studio monitors, please take a look at Section "Tutorials" for details on setting them up properly in your mix environment. More information is available at My.PreSonus.com.
Product Registration
PreSonus is committed to delivering the best experience for our customers. MyPreSonus is a one-stop portal for all our registered customers' needs. From your MyPreSonus account, you can view all your PreSonus hardware and software registrations; contact support; track orders and more.

To register your Eris studio reference monitors, go to My.PreSonus.com and follow the onscreen instructions.
OR

Download the MyPreSonus app from the Apple App Store or Google Play.


What's in the Box
Your Eris Pro-Series package contains the following:

(1) Eris Pro 4, Pro 6, or Pro 8 monitor

(4) Foam feet to be placed on the bottom of the speaker to improve isolation

Eris Pro-Series Quick Start Guide

IEC Power Cable
Hookup
Rear Panel Connections and Controls
Inputs

Line-level Inputs. The Eris Pro-Series monitors provide a choice of three linelevel input types: balanced XLR, balanced ¼" TRS, and unbalanced RCA. Do not connect more than one source to your Pro-Series monitors simultaneously.
Power User Tip: Whenever possible, it is recommended that you utilize the balanced line-level inputs on your Eris Pro-Series monitors. Balanced cables and connections are resistant to induced noise from radio frequencies and electromagnetic interference (RMI and EMI). If your audio source has only unbalanced connections (either ¼" TS or RCA), it is recommended that the RCA input be used. ¼" TS-to-RCA cables and adapters are readily available at most music supply stores. Whether utilizing the balanced or unbalanced inputs, always use the shortest cable length possible to minimize the risk of induced noise in your studio monitors.

Input Gain. Sets the level of the input signal before it is amplified.
Power

IEC Power Connection. This is the power inlet for your Eris Pro-Series monitor.

Do not remove the center grounding prong or use a ground-lift adapter, as this could result in electric shock

Power Switch. This is the On/Off switch for your Eris Pro-Series monitor. When your Eris Pro-Series monitor is powered On, the blue LED on the front panel will illuminate

AC Select Switch. The input-power voltage is set at the factory to correspond with the country to which the Eris Pro-Series monitor was shipped. Use this switch only if you are using your Eris monitor in a country that uses a different standard voltage than is used in the country where you purchased your monitor originally

Standby. When standby is engaged, Eris monitors go into power save mode when there is no audio playing for more than 40 minutes. Once audio resumes, the power save mode turns off.

Power LED. The LED in the center of the speaker indicates power status as follows:
- Solid White: Eris speaker is powered on and in standby mode.
- Solid Blue: Eris speaker is powered on and not in standby mode.
User Controls
High Frequency. Boosts or cuts all frequencies above 10 kHz by ±6 dB.


Power User Tip: The High control on the Eris Pro-Series monitors is a high-shelf EQ and raises or lowers all frequencies above 10 kHz. This EQ is much like the treble control on a car stereo and likewise can make big changes to the sound very quickly. If you find your mixes are translating too dark on other speaker systems, try lowering this control. Too bright? Raise this control a bit. In either case, anomalies in your room may be negatively impacting your Eris Pro-Series monitors' performance. See Section "Tutorials" for set-up and calibration tips.
Mid Frequency. Boosts or cuts frequencies around 1 kHz by ±6 dB.


Power User Tip: The Mid control is a peak EQ that lets you raise or lower the level of a two-octave-wide frequency band centered at 1 kHz that can make subtle changes to the frequency response of your Eris Pro-Series monitors. In general, you will not want to alter this control as it will change the flat frequency response of your Eris Pro-Series monitors. However, if you would like to quickly emulate the performance of consumer speakers, lowering this control will mimic the mid-range scoop that is the hallmark of consumer designs.
Low Cutoff. Rolls off the level of all frequencies below the specified frequency (80 or 100 Hz) at a slope of -12 dB / octave. Setting this control to Flat allows the Eris Pro-Series' natural roll off to take over.


Power User Tip: If you are using a subwoofer that doesn't feature a variable low pass filter, like the PreSonus Eris Pro Sub 10 provides, you will use this control to set the crossover point for your 2.1 system. For information on configuring a 2.1 system in the studio, please visit My. PreSonus.com.
Acoustic Space. Cuts the level of all frequencies below 800 Hz by either -4 dB or -2 dB to compensate for the bass boost that naturally occurs when a speaker is placed near a wall or a corner. If your Eris Pro-Series monitors can be placed away from the walls in your mix space, leave this control set to 0 dB.

Power User Tip: The closer your studio monitors are to a wall or a corner, the more the boundary bass will be boosted. If you notice your mixes lack low end when played away from your mix environment, try adjusting the Acoustic Space to create a more even frequency response and help to mitigate a compact mix position. For more information on studio monitor placement, please review Section "Tutorials".
Hookup Diagrams
Basic Setup

Advanced Setup with Monitor Controller and Speaker Switching

Tutorials
Unit Placement and Acoustic Space Settings

Before placing your studio monitors in your mixing environment, position your desk or monitor stands so that your speakers will be at least 8 to 12 inches away from walls and corners. This will be adequate to prevent sound waves from hitting the wall and reflecting back to you, causing phase cancellation and other potentially harmful acoustic interactions. This might not always be possible, and there are some ways to mitigate cramped mixing spaces.
When a monitor is placed close to a wall, or in a corner, the low frequencies tend to be emphasized more than if the monitor is some distance away from any room boundary. Commonly referred to as "boundary bass boost," it is most pronounced if the monitor is in a corner and less pronounced, but still present, if the monitor is near one wall. While an increased bass response may be desirable in a listening environment, for studio mixing this can cause mixing to sound too bright when played on consumer stereo systems because the audio engineer will instinctively reduce the bass content in the mix to counterbalance for what they are hearing in the studio.
To compensate for this phenomenon, Eris Pro-Series monitors are equipped with an Acoustic Space control that cuts all frequencies below 800 Hz by a specified amount:
- If your Eris Pro-Series monitors are close to the corners of the room, start by setting the Acoustic Space switch to -4 dB. This will provide the most bass attenuation.
- When Eris Pro-Series monitors are placed closer to the back wall, set the Acoustic space switch to -2 dB.
- If your mix environment affords enough space for your studio monitors to be placed away from the room's boundaries, leave the Acoustic Space switch at 0 dB as no bass attenuation should be necessary.

If possible, your mix position should be placed on the center of a wall as this will provide a more balanced listening position. Place your speakers so that they are the same distance from the sides of the room. That is, if your left speaker is six feet from the wall to the left and two feet from the wall behind, your right speaker should be six feet from the wall to the right and two feet from the wall behind. By centering your mix position, your monitor system will provide more reliable low-frequency intelligibility. In a rectangular room, it is best to set up along one of the long walls, especially in a smaller room. This will minimize problems caused by side wall reflections.

Just like it's not a good idea to set up your mix position in a corner, it's not a good idea to create a corner with your mix position. Make sure the distance from the speaker to the wall behind it is different than the distance from the side wall closest to it. For example, if your left speaker is one foot from the wall to its left, it shouldn't also be one foot from the wall behind it.
The Eris Pro-Series' unique coaxial driver is designed to deliver symmetric audio coverage. Because of their unique configuration, PreSonus recommends only placing them in a vertical orientation.
Whenever people talk about listening to speaker systems, they talk about the "sweet spot." As mentioned earlier, this is the middle position between the two sides of a stereo system, where the speakers overlap, and it is where the stereo image will be the best.

Creating the sweet spot is relatively easy. Simply angle, or "toe-in," each speaker so that the tweeters form an equilateral triangle with your head—that is, the speakers are the same distance from each other as they are from you. The monitors should be angled, or "toed in," so that they are each directed to an ear, rather than pointed straight ahead.
Ideally, near-field studio monitors like the Eris Pro-Series should be placed so that the high-frequency drivers (commonly known as 'tweeters') are at the same height as your ears when you are seated in the mix position.

High-frequency content is much more directional than low frequency content. Because of this, you can more accurately hear what is happening if the high frequencies are directed at your ear. Once you have created the sweet spot, sit down and make sure that your ears are level with the center of tweeter.
Calibrating Using 85 dB SPL Standard Reference
After you have properly positioned your studio monitors and listening position, it is helpful to set all the levels in your studio so that you are optimizing every component. Taking the time to properly calibrate your speakers can be very valuable in this respect and will also give you a great starting point to troubleshoot or fine-tune your mixing environment.
The main purpose of speaker calibration is to ensure that a specific metered audio level in your DAW or on your mixer equals a predetermined SPL in your studio environment. Depending upon the method and reference levels used during calibration, proper calibration can help reduce unwanted noise, minimize the risk of damage to your studio monitors and to your ears, maximize the reference capabilities of different speaker types, and ensure you hear the audio as accurately as possible.
When calibrating reference monitors in a studio, the acoustic level or sound pressure level (SPL) should be measured from the mix position at seated ear height. There are an assortment of great SPL metering apps on the market for smartphones, and many are free! You can also find accurate SPL meters at your favorite local electronics-supply store.
The SPL meter should be held at arm's length, with the microphone pointed at the center point between the left and right speakers (where your head will be), angled at 45 degrees to ensure an accurate reading. If your SPL meter is also your cell phone, make sure your finger or cell phone case isn't covering the mic!

You should calibrate the right and left monitors independently to ensure that both monitors are set to the same acoustic level. This will ensure that your stereo mixes are balanced and will translate well across different speaker systems.
The goal of this Standard Reference Calibration is to ensure that when the output meters in your DAW or mixer register 0 dB, the SPL at your mix position is 85 dB.
- Connect the main outputs of your audio source to your studio monitors. The left output should be connected to the speaker on your left. The right output should be connected to the speaker on your right.
- Begin by turning the input sensitivity of your Eris Pro-Series monitors to the lowest setting.
![]()
- Turn the output of your audio source (audio interface, mixer, or speakermanagement device) to its lowest setting.
Note: If you have any outboard processors (EQs, limiter, etc.) connected between the audio source and your monitors, disconnect or bypass them. If your audio source is a mixer, make sure that it is zeroed out.
![]()
- Play 20 Hz to 20 kHz full-bandwidth pink noise at 0 dB through the outputs of your primary audio source.
- Turn up the outputs of your primary audio source to the unity gain setting. "Unity gain" is the setting at which the signal level is neither boosted nor attenuated. It is usually marked by a "0" or a "U" on the audio device's level fader or knob. In many digital interfaces and digital devices, the device's maximum level is also its unity gain setting. Please consult your audio device's user's manual or the manufacturer's Web site for more information on its levels and adjustments. You should not hear the pink noise. If you do, repeat step 2.
![]()
- While measuring the output level with an SPL meter, begin slowly increasing the input sensitivity (volume) of your left speaker until the acoustic level of the test tone playing reaches 82 dB SPL. When both speakers play simultaneously, the overall SPL will increase by about +3 dB (85 dB).
![]()
- Power down your left speaker.
- Slowly increase the input sensitivity (volume) of your right speaker until the acoustic level of the test tone playing reaches 82 dB SPL.
- Stop the pink noise and turn your left speaker back on. Play some program music you are familiar with through your speakers and sit down in your mix position. You may need to fine-tune your speaker placement until the sound is balanced and you have a nice, wide sweet spot from which to mix.


Note: If 85 dB is too loud for your room, either because of noise constraints or because the room is too small, you can redo the above calibration steps and dial in each speaker to 79 dB instead. The important thing is that both speakers are set to the same SPL level, not the level itself.
Technical Specifications
| Pro 4 | Pro 6 | Pro 8 | |
| Frequency Response | 50 Hz to 20 kHz | 35 Hz to 20 kHz | 35 Hz to 20 kHz |
| Peak SPL | 99 dB (@ 1M) | 106 dB (@ 1M) | 108 dB (@ 1M) |
| LF Amplifier Power | 45W, Class AB | 75W, Class AB | 75W, Class AB |
| HF Amplifier Power | 35W, Class AB | 65W, Class AB | 65W, Class AB |
| LF Driver | 4.5-inch woven composite | 6.5-inch woven composite | 8-inch woven composite |
| HF Driver | 1-inch, silk-dome | 1.25-inch, silk-dome | 1.25-inch, silk-dome |
| Inputs (1 each) | Balanced XLR Balanced ¼-inch TRS Unbalanced RCA | Balanced XLR Balanced ¼-inch TRS Unbalanced RCA | Balanced XLR Balanced ¼-inch TRS Unbalanced RCA |
| Controls | Volume High Frequency Low Frequency Acoustic Space Low Cut Power Saver | Volume High Frequency Mid Frequency Acoustic Space Low Cut Power Saver | Volume High Frequency Mid Frequency Acoustic Space Low Cut Power Saver |
| Dims (H x W x D) | 9.02" x 7.47" x 8.57" (229.1mm x 189.6mm x 217.6mm) | 11.42" x 9.45" x 11.18" (290mm x 240mm x 284mm) | 12.83" x 10.63" x 12.20" (326mm x 270mm x 310mm) |
| Weight | 9.48 lbs (4.30 kg) | 16.98 lbs (7.7 kg) | 20.94 lbs (9.5 kg) |
Setting up your Product for Best Performance
- Use balanced cables to connect your monitors to your audio device. A balanced cable is a type of audio cable that uses three conductors (two signal conductors and a ground conductor) to transmit audio signals. Balanced cables help to cancel out any noise or interference picked up along the cable length. Unbalanced cables are more susceptible to noise and interference and should be avoided.
- Make sure that your monitors are plugged into a good power source. Unstable or noisy power sources can cause unwanted noise in your audio signal. Use a surge protector or power conditioner if necessary.
- Keep your cables away from power sources and other electronic devices to avoid electromagnetic interference that can cause buzzing, humming, or other noise in your audio signal.
- Position your monitors correctly to minimize noise. Keep them at a reasonable distance from other electronic devices to avoid interference.
- Proper gain staging can help you avoid noise in your audio signal. Gain staging refers to the process of setting the input and output levels of audio signals in a recording or mixing system to achieve optimal sound quality and avoid distortion. Make sure that your input levels are not too low or too high. Keep your levels within a reasonable range and avoid overdriving your audio interface or mixer.
Troubleshooting
No Power
First ensure that your Eris Pro-Series monitor is plugged in. If it's connected to a power conditioner, verify that the power conditioner is turned on and functioning. If problem still exists, disconnect the power cable from your studio monitor and check the fuse on the back panel. The type of fuse needed for your monitor is listed below the power inlet. Be sure to use the correct fuse for the set input-power voltage. If the fuse blows again, you will need to contact PreSonus for a repair.
No audio
If your Eris Pro monitor appears to power on but you hear no sound when playing audio from your audio source (the lights are on but nobody's home), first make sure that the cable connecting your audio source to the monitor is working correctly. Also, verify that the Input Gain control is set to provide enough amplitude for the signal.
Hum
Usually, hum is caused by a ground loop. Verify that all audio equipment is connected to the same power source. If you are not using a power conditioner, we highly recommend that you add one. Not only will this help to minimize hum, it will better protect your equipment from power surges, brownouts, etc. Use balanced cables whenever possible. If your audio device does not offer a balanced output, you can connect it to a direct box, which will provide a ground-lift switch and a balanced output. Finally, make sure that your audio cables are not run near power cables, and use cables that are the appropriate length for your application. Using cables that are too long not only increases the risk of noise, it increases the likelihood that the cables are coiled, which will essentially create an antenna that picks up all kinds of audio interference.
PreSonus' previously Top Secret recipe for Red Beans and Rice
Ingredients:
- 1 lb dried Red Kidney Beans
- 1 large onion (diced)
- 3 celery stalks (diced)
- 1 large green bell pepper (diced)
- 6-8 C vegetable stock
- 1 Tbs. Old Bay seasoning
- ½ fresh parsley
- 2 tsp. kosher salt
- 2 Tbs. olive oil
- 1 smoked ham hock (optional)
Cooking instructions:
- Rinse red beans in cold water.
- In a pressure cooker, heat olive oil on medium high. Sauté onion, celery, bell pepper, beans, and ham hock (if using) until onions are translucent.
- Stir in Old Bay, parsley, and salt.
- Add vegetable stock until beans and vegetables are covered.
- Close pressure cooker and bring to full pressure on high heat.
- Reduce heat to low while maintaining full pressure. Cook for 40 minutes.
- Allow pressure to drop naturally (20-30 minutes).
- Remove lid and crush with a potato masher until creamy.
- Correct seasoning with salt and pepper if necessary.
- Serve over rice with hot sauce and grilled Andouille sausage (optional).
Baton Rouge • USA
www.presonus.com
Documents / Resources
References
Download manual
Here you can download full pdf version of manual, it may contain additional safety instructions, warranty information, FCC rules, etc.
Advertisement


Need help?
Do you have a question about the Eris Pro Series and is the answer not in the manual?
Questions and answers