Table of Contents
Advertisement
IMPORTANT INSTRUCTIONS
SAVE THESE INSTRUCTIONS
MODE D'EMPLOI IMPORTANT
CONSERVEZ LES PRESENTES INSTRUCTIONS
INSTRUCIONES IMPORTANTES
REPASE Y GUARDE ESTAS INSTRUCCIONES
LEA ESTE INSTRUCTIVO ANTES DE UTILIZAR EL APARATO
ISTRUZIONI IMPORTANTI
CONSERVARE LE ISTRUZIONI
COFFEE MAKER TYPE EAM3500/CAFETERIE MODÈLE EAM3500/
CAFETERA ELECTRICA MODELO EAM3500/ MACCHINA DA CAFFÈ EAM3500
Register this product on-line and receive a free trial issue of Cook's Illustrated. Visit www.prodregister.com/delonghi.
Visit www.delonghi.com for a list of service centers near you. (U.S. and Canada)
Enregistrez ce produit en ligne et recevez un numéro gratuit de Cook's Illustrated. Visitez www.prodregister.com/delon-
ghi.
Visitez www.delonghi.com pour y voir une liste des centres de réparation proches de chez vous. (É.-U. et Canada).
Registre este producto en línea y reciba un ejemplar gratis de Cook's Illustrated. Visite www.prodregister.com/delonghi.
Visite www.delonghi.com para ver la lista de centros de servicios cercanos a usted. (Estados Unidos y Canada)
Registra questo prodotto "on-line" per ricevere una copia omaggio della rivista. Visita www.prodregister.com/delonghi.
Visita www.delonghi.com per una lista dei centri di servizio a te piu vicini. (Stati Uniti e Canada)
ELECTRONIC CHARACTERISTICS: CARACTÉRISTIQUES ÉLECTRIQUES: CARACTERISTICAS ELECTRICAS:
CARATTERISTICHE ELETTRICHE: 120V ˜ 60HZ 1100W
Advertisement
Table of Contents

Related Manuals for DeLonghi EAM3500


Summary of Contents for DeLonghi EAM3500
-
Page 1: Save These Instructions
Enregistrez ce produit en ligne et recevez un numéro gratuit de Cook's Illustrated. Visitez www.prodregister.com/delon- ghi. Visitez www.delonghi.com pour y voir une liste des centres de réparation proches de chez vous. (É.-U. et Canada). Registre este producto en línea y reciba un ejemplar gratis de Cook's Illustrated. Visite www.prodregister.com/delonghi. -
Page 6: Table Of Contents
Coffee has been used to factory test the appliance and it is therefore completely normal for there to be traces of coffee in the mill. This appliance is however guaranteed to be new. INDEX IMPORTANT SAFEGUARDS ........7 1 DESCRIPTION OF THE APPLIANCE (see page 3) . -
Page 7: Important Safeguards
IMPORTANT SAFEGUARDS When using electrical appliances, basic safety precautions should always be followed, including the fol- lowing: • Read all instructions. • Do not touch hot surfaces. Use handles and knobs. • To protect against fire, electrical shock and personal injury, do not immerse cord, plug or appliance in water or other liquid. -
Page 8: Description Of The Appliance
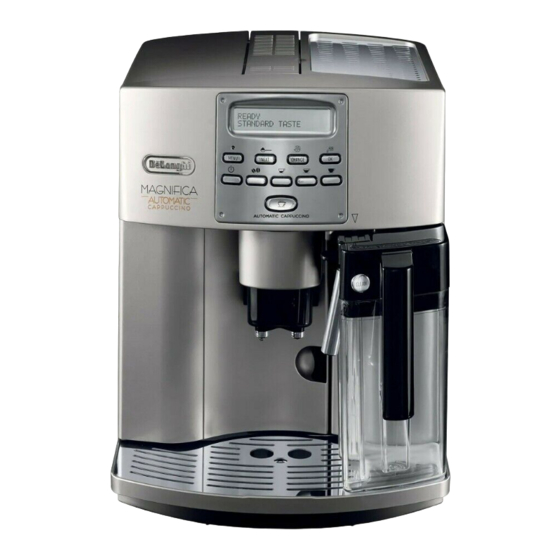
1 DESCRIPTION OF THE APPLIANCE (SEE PAGE 3) A. Grinding coarseness regulator B. Coffee beans container C. Bean container lid D. Central lid for ground coffee E. Compartment for measuring scoop F. Cup warmer tray G. Ground coffee funnel H. Milk container lid with the wording "FROTHED MILK - CAPPUCCINO"... -
Page 9: Installation
3 INSTALLATION • After unpacking, make sure the appliance is complete and undamaged. If in doubt, do not use it. Contact professionally qualified personnel. • The packing elements (plastic bags, polystyrene foam, etc.) should be kept out of the reach of children as they are a safety hazard. -
Page 10: Turning On And Preheating
5. The appliance displays: and it goes off. 6. Fill the container with coffee beans (fig. 5). IMPORTANT: to prevent malfunction, never fill with ground coffee, freeze dried coffee, caramelized beans or anything else which could damage the appliance. 5 TURNING ON AND PREHEATING 1. - Page 11 NOTE 2: If the coffee is delivered too fast and is not creamy enough, turn the grinding coarseness regulator (fig. 12) one click counterclockwise (see section 8). Avoid turning the grinding coarseness regulator excessively otherwise when you select 2 cups, the coffee may run out in drips.
-
Page 12: Changing The Quantity Of Coffee In The Cup
If this is not the case, or for further explanations, contact the customer service by calling the number listed in the warranty or visit www.delonghi.com for a list of service centers near you. (U.S. and Canada) 7 CHANGING THE QUANTITY OF COFFEE IN THE CUP The appliance is factory preset to automatically deliver the following quantities of coffee: short coffee (1.35 oz) (when the... -
Page 13: Preparing Espresso Coffee With Pre-Ground Coffee (Instead Of Beans)
9 PREPARING ESPRESSO/COFFEE WITH PRE-GROUND COFFEE (INSTEAD OF BEANS) • Press the button (fig. 16) to select the ground coffee function. This disables the coffee mill function. The appliance displays: • Lift the lid in the center, place one measuring scoop of ground coffee in the funnel (see fig. -
Page 14: Changing The Quantity Of Hot Water
11 CHANGING THE QUANTITY OF HOT WATER The appliance is factory preset to automatically deliver 8.5 oz of hot water. To change these quantities, proceed as follows: • Attach the water spout (fig. 4). • Position a container under the spout (fig. 3). •... -
Page 15: Preparing Frothed Milk (Without Coffee)
NOTE 4: To change the quantity of coffee or milk delivered automatically into the cup, follow the instructions in section 14. 13 PREPARING FROTHED MILK (WITHOUT COFFEE) • Remove the lid of the milk container. • Fill the container with the quantity of milk you want to prepare (fig.19). •... -
Page 16: Cleaning The Infuser
Clean the nozzle regularly with a sponge as shown in fig. 26. 15.2 Cleaning the infuser The infuser must be cleaned regularly to avoid the build-up of coffee encrustations which could cause mal- function. Proceed as follows: • turn the appliance off by pressing the •... -
Page 17: Cleaning The Milk Container
NOTE 2: If it is hard to insert the infuser, before inserting it, squeeze to size by pressing it vigorously from above and below at the same time, as shown in Figure 31. NOTE 3: If it is still hard to insert the infuser, leave it out of the appliance, close the service door, unplug from the outlet, then plug in again. -
Page 18: Descaling
• Press the button to set the auto-start time. (If you hold the changed rapidly). • Press the button to confirm the value; • Press once and the appliance displays the message: Press the button to modify the function (the appliance displays: AUTO-START Yes) •... -
Page 19: Changing Coffee Temperature
• Empty the full container and then put it back under the hot water spout. • Press the OK button. Hot water is run off from the spout into the container below and the appliance displays: • When the water tank is empty, the appliance displays the message: •... -
Page 20: Resetting Factory Default Settings
16.7 Resetting factory default settings (reset) If you change the original values, the factory default values can be reset as follows: • Press the button then press • Press the button and the appliance displays "RESET TO DEFAULT YES: • Press the button to reset the factory default values;... -
Page 21: Problems To Be Resolved Before Calling The Service Center
MESSAGE PRESS NEXT CHANGE CLOSE DOOR INSERT INFUSER ASSEMBLY LESS COFFEE GENERIC ALARM 19 PROBLEMS TO BE RESOLVED BEFORE CALLING THE SERVICE CENTER If the appliance is not working and an alarm light is on, the causes of the malfunction can be identified and resolved by referring to section 18. - Page 22 PROBLEM When the • The ground coffee may be blocked in buttons are pressed, the the funnel. appliance does not deliver coffee, but only water. When the button is • The appliance is not plugged in. pressed, the appliance does not come on. •...
-
Page 23: Limited Warranty
If repairs become necessary, see contact information below: U.S. Residents: Please contact our toll free hotline at 1-800-322-3848 or log onto our website at www.delonghi.com. For all accessories, spare parts or replacement parts, please contact our parts division at 1-800-865- 6330.
Need help?
Do you have a question about the EAM3500 and is the answer not in the manual?
Questions and answers