Table of Contents
Advertisement
Available languages
Available languages
De'Longhi America, Inc.
Park 80 West, Plaza One
Saddle Brook, NJ 07663
#1-866-Latte-Best
1-866-528-8323
De'Longhi Canada, Inc.
6150 McLaughlin Road
Mississauga, Ontario
L5R 4E1 Canada
#1-866-Latte-Best
1-866-528-8323
FIDUCIA ITALIANA S.A DE C.V
Pestalozzi #814
Col. Narvarte
Del. Benito Juarez
C.P. 03100
Mexico
tels: 5543 1447
lada sin costo: 01 800 711 8805
www.delonghi.com
5732157800/
05.07
Advertisement
Chapters
Table of Contents

Related Manuals for DeLonghi Coffee Maker ESAM4400


Summary of Contents for DeLonghi Coffee Maker ESAM4400
- Page 1 De’Longhi Canada, Inc. 6150 McLaughlin Road Mississauga, Ontario L5R 4E1 Canada #1-866-Latte-Best 1-866-528-8323 FIDUCIA ITALIANA S.A DE C.V Pestalozzi #814 Col. Narvarte Del. Benito Juarez C.P. 03100 Mexico tels: 5543 1447 lada sin costo: 01 800 711 8805 www.delonghi.com 5732157800/ 05.07...
-
Page 2: Save These Instructions
Enregistrez ce produit en ligne et recevez un numéro gratuit de Cook's Illustrated. Visitez http://registration.delonghi-csser- vice.com. Visitez www.delonghi.com pour y voir une liste des centres de réparation proches de chez vous. (É.-U. et Canada). Registre este producto en línea y reciba un ejemplar gratis de Cook's Illustrated. Visite http://registration.delonghi-csser- vice.com. -
Page 7: Table Of Contents
Coffee has been used to factory test the appliance and it is therefore completely normal for there to be traces of coffee in the mill. This appliance is however guaranteed to be new. The grinding coarseness regulator should only be turned when the coffee mill is on. INDEX IMPORTANT SAFEGUARDS . -
Page 8: Important Safeguards
IMPORTANT SAFEGUARDS When using electrical appliances, basic safety precautions should always be followed, including the fol- lowing: • Read all instructions. • Do not touch hot surfaces. Use handles and knobs. • To protect against fire, electrical shock and personal injury, do not immerse cord, plug or appliance in water or other liquid. -
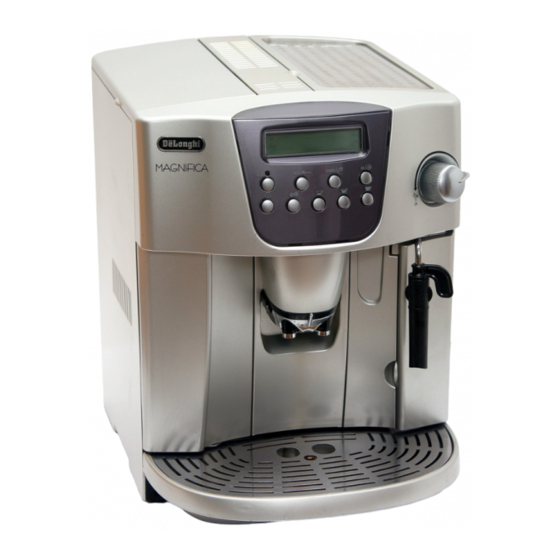
Page 9: Description (See Page 3)
1 DESCRIPTION (SEE PAGE 3) A. Cup warmer tray B. Steam knob C. Steam spout D. Cappuccino frother E. Water tank (removable) F. Cup tray G. Drip tray (removable) H. Service door I. Coffee spout (adjustable in height) J. Control panel K. -
Page 10: Using For The First Time
3 INSTALLATION • After removing the packaging, make sure the product is complete and undamaged. If in doubt, do not use the appliance and contact a qualified professional. • Packing elements (plastic bags, polystyrene etc) must not be left within reach of children as they may represent a hazard. -
Page 11: Preparing Coffee (Using Coffee Beans)
Move the cappuccino frother outwards (fig. 2) and place a cup underneath it. Turn the steam knob counterclockwise as far as it will go (fig. 3). After a few seconds, a little water runs out of the cappuccino frother. When the cup contains about 1 oz of water, turn the steam knob clockwise (fig. - Page 12 NOTE 1: If the coffee is delivered a drop at a time or not at all, turn the grinding coarseness regulator (fig. 15) one click clockwise (see section 7). Turn one click at a time until the coffee is delivered adequately. The grinding coarseness regulator must only be turned when the coffee mill is on.
-
Page 13: Changing The Quantity Of Coffee In The Cup
If this is not the case, or for further explanations, contact customer service by calling the number listed in the warranty or visit www.delonghi.com for a list of service centers near you. (U.S. and Canada) 6 CHANGING THE QUANTITY OF COFFEE IN THE CUP... -
Page 14: Preparing Espresso/Coffee Using Ground Coffee (Instead Of Beans)
8 PREPARING ESPRESSO/COFFEE USING GROUND COFFEE (INSTEAD OF BEANS) • Press the button (fig. 16) to select the ground coffee function. This disables the coffee mill function. The appliance displays • Lift the central lid, place one level measure of ground coffee in the funnel (see fig. -
Page 15: Preparing Cappuccinos (Using Steam)
10 PREPARING CAPPUCCINOS (USING STEAM) • Move the cappuccino frother outwards (fig. 2). • Place an empty container under the cappuccino frother. Turn the steam knob a half turn counterclockwi- se as far as it will go (fig. 3). The appliance displays: Allow the steam mixed with water to run off for a few seconds until steam only is given off. -
Page 16: Cleaning The Coffee Maker
11.1 Cleaning the coffee maker Clean the grounds container (as described in section 5, note 7) whenever it requires emptying. The water tank should also be cleaned regularly. The drip tray is fitted with a level indicator (red) showing the level of water it contains. When the indicator starts to become visible (a few millimeters under the drip tray), the drip tray must be emp- tied and cleaned. -
Page 17: Changing And Setting The Menu Parameters
Check that the two red buttons have snapped out, otherwise the door cannot be closed. The two red buttons have snapped out CORRECTLY NOTE 1: If the infuser is not inserted correctly until it clicks into place and the two red buttons have not snap- ped out, the service door cannot be closed. -
Page 18: Descaling
• Press the button to set the auto-start time. (If you hold the changed rapidly). • Press the button to confirm the value, • Press once and the appliance displays the message: Press the button to modify the function (the appliance displays AUTO-START YES); •... -
Page 19: Changing The Length Of Time The Appliance Remains On
Hot water will run off from the cappuccino frother into the container below and the appliance displays: • When the water tank is empty, the appliance displays the message: • Turn the steam knob clockwise as far as it will go (fig. 4) and refill the water tank with clean water. •... -
Page 20: Resetting Factory Default Settings
• Press the button repeatedly until the number coincides with the number of squares on the test strip (for example, if there are 3 squares on the test strip, press the button until WATER HARDNESS 3 is displayed). • Press the button to confirm the value. - Page 21 MESSAGE ADD PRE-GROUND COFFEE FILL BEANs CONTAINER DESCALE PRESS NEXT+ CHANGE CLOSE DOOR INSERT brewing unit generica alarm MEANING • With the ground coffee function selec- ted, ground coffee has not been poured into the funnel. • The coffee beans have run out. •...
-
Page 22: Problems That Can Be Resolved Before Calling The Service Center
15 PROBLEMS THAT CAN BE RESOLVED BEFORE CALLING THE SERVICE CENTER If the appliance is not working, the causes of the malfunction can be identified and resolved by referring to section 14. If, on the other hand, no message is displayed, run the following checks before calling the servi- ce center. - Page 23 PROBLEM • Too much ground coffee has been Ground coffee is being added. • The used (not beans) and the sed and the appliance has used both appliance does not deli- the ground coffee added and the cof- ver the coffee. fee ground by the mill •...
-
Page 24: Limited Warranty
If repairs become necessary, see contact information below: U.S. Residents: Please contact our toll free hotline at #1-866-Latte-Best or log onto our website at www.delonghi.com. For all accessories, spare parts or replacement parts, please contact our parts division at 1-866-528- 8323. - Page 25 L’appareil est testée en usine pour le café il est donc normal de trouver des traces de café dans la machine. Il est malgré tout garanti que cette machine soit neuve. Le bouton de réglage doit être tourné seulement quand le moulin à café est en marche. TABLE DES MATIÈRES MESURES DE SECURITÉ...
-
Page 26: Conservez Ces Instructions
MESURES DE SECURITE IMPORTANTES Lors de l’utilisation d’un appareil électroménager, il faut toujours prendre certaines précautions de base: Lire toutes les instructions. • Ne pas toucher les surfaces chaudes; se servir des poignées ou des boutons. • Afin d’éviter les incendies, les chocs électriques et les blessures aux personnes, ne pas •... -
Page 27: Description De L'appareil (Voir
DESCRIPTION DE L’APPAREIL (VOIR PAGE 3) A. Appui chauffe-tasses B. Manette vapeur C. Tube vapeur D. Buse à cappuccino E. Réservoir d’eau (amovible) F. Plateau appui tasses G. Égouttoir (amovible) H. Volet de service I. Sortie café (réglable en hauteur) J. -
Page 28: Installation
3 INSTALLATION • Après avoir déballé l'appareil, assurez-vous qu'il est intact. Si vous avez des doutes, ne l’utilisez pas et adressez-vous à un spécialiste. • Les emballages de cet appareil (sacs en plastique, polystyrène expansé, etc.) sont des sources potentiel- les de danger. -
Page 29: Préparation Du Café (Avec Du Café En Grains)
Poussez la buse à cappuccino vers l’extérieur (fig. 2) et posez une tasse dessous. Tournez complètement le bouton vapeur en sens inverse des aiguilles d’une montre (fig. 3). Au bout de quelques secondes, de l’eau sortira de la buse à cappuccino. Dès que la tasse contient envi- ron 30 cc d’eau, tournez complètement la commande vapeur dans le sens des aiguilles d’une montre (fig. - Page 30 4. Au bout de quelques secondes, la machine affichera à nouveau le message indiquant qu’elle est prête et vous pourrez faire un autre café. 5. Pour arrêter la machine, appuyez sur la touche Avant de s’arrêter, la machine exécute automatiquement un rinçage : un peu d’eau chaude sortira des buses et coulera dans l’égouttoir.
-
Page 31: Modification De La Quantité De Café En Tasse
NOTA 8: Vous ne devez jamais extraire le réservoir d’eau pendant que le café coule car la machine ne parviendrait plus à faire de café. Pour redémarrer la machine, tournez la manette vapeur en sens inverse des aiguilles d’une montre jusqu’au bout et laissez sortir l’eau par la buse à... -
Page 32: Préparation Du Café Expresso Avec Du Café Prémoulu (À La Place Des Grains)
8 PRÉPARATION DU CAFÉ EXPRESSO AVEC DU CAFÉ PRÉMOULU (À LA PLACE DES GRAINS) • Appuyez sur la touche fonctionnement du moulin à café). La machine affiche le message • Soulevez le couvercle central, versez dans l’entonnoir un doseur de café... -
Page 33: Préparation Du Cappuccino (Avec La Vapeur)
10 PRÉPARATION DU CAPPUCCINO (AVEC LA VAPEUR) • Poussez vers l’extérieur la buse à cappuccino (fig. 2) • Posez un pichet vide sous la buse à cappuccino. Tournez le robinet vapeur d’un demi-tour en sens inver- se des aiguilles d’une montre (fig. 3) : La machine affichera le message: Laissez couler pendant quelques secondes l’eau mélangée à... -
Page 34: Nettoyage De La Machine
11.1 Nettoyage de la machine - Nettoyez le tiroir à marc (voir chapitre 5, note 7) chaque fois qu'il doit être vidé. Il est recommandé de nettoyer fréquemment aussi le réservoir d’eau. L'égouttoir est doté d'un indicateur (rouge) de niveau d’eau. Quand l'indicateur commence à... -
Page 35: Modification Et Programmation Des Paramètres Du Menu
Assurez-vous que les deux touches rouges sont ressorties, autrement, le volet ne pourra pas se fermer. Les deux touches rouges sont ressorties CORRECTEMENT NOTA 1: Si l'infuseur n’est pas inséré correctement jusqu’au déclic de blocage et si les touches rouges ne sont pas ressorties correctement, le volet de service ne se refermera pas NOTA 2: si l'infuseur est difficile à... -
Page 36: Détartrage
• Appuyez sur la touche maintenez la pression, l’heure sera modifiée rapidement). • Appuyez sur la touche • Appuyez une fois sur la touche • Appuyez sur la touche AUTOMATIQUE OUI”) ; • Appuyez sur la touche • Appuyez sur la touche d’autres paramètres. -
Page 37: Modification De La Température Du Café
• retirez le réservoir d’eau, rincez-le et remplissez-le d’eau claire. • Remettez le réservoir à sa place. • Videz le récipient (sous la buse à cappuccino) plein de liquide et remettez-le sous la buse. • Tournez la manette vapeur d’un demi-tour en sens inverse des aiguilles d’une montre (fig. 3) De l’eau chaude sort de la buse et va remplir le récipient. -
Page 38: Retour Aux Programmations D'usine
• Appuyez sur la touche ne affiche le message : • Appuyez sur le nombre de fois correspondant au nombre de carrés rouges qui se sont formés sur la bande réactive (exemple : si 3 carrés rouges se sont formés sur la bande réactive, il faudra appuyer trois fois sur la touche pour que s’affiche le message "DURETÉ... - Page 39 MESSAGE INTRODUIRE LA MOUTURE REMPLIR LE RÉSERVOIR DE GRAINS DÉTARTRER APPUYER NEXT + CHANGE REFERMER LE VOLET INSÉRER GROUPE INFUSEUR ALARME GÉNÉRIQUE EXPLICATION • La fonction a été sélectionnée mais la mouture n’a pas été versée dans l’en- tonnoir. • Il n’y a plus de café...
-
Page 40: Problèmes Solubles Avant D'appeler L'assistance Technique
15 PROBLÈMES SOLUBLES AVANT D’APPELER L’ASSISTANCE TECHNIQUE Si la machine ne fonctionne pas, vous pouvez facilement identifier la cause en consultant le chap. 14. Si, en revanche, la machine n’affiche aucun message, contrôlez les points suivants avant d’appeler l’assistance technique. PROBLÈM •... - Page 41 PROBLÈM • Vous avez versé trop de café prémou- Vous avez utilisé du café • Vous n’avez pas appuyé sur la touche prémoulu ( à la place des grains) et la machine ne prémoulu et du café en grains moulu fait pas de café.
- Page 42 Résidents des États-Unis : Veuillez appeler notre ligne d’assistance sans frais au #1-866-Latte-Best ou connectez-vous à notre site Web à www.delonghi.com. Pour tous les accessoires, les pièces détachées et les pièces de rechange, veuillez contacter notre service des pièces détachées au 1-800-865-6330.
-
Page 43: Pag. 55
La cafetera se ha probado en fábrica utilizando café por lo que es del todo normal encontrar rastros de café en ésta. Se garantiza, sea como fuere, que esta máquina es nueva. El regulador debe girarse solamente mientras el molinillo de café está funcionando. ÍNDICE ADVERTENCIAS DE SEGURIDAD . -
Page 44: Instrucciones Para El Cable Corto
A D V E RT E N C I A S D E S E G U R I D A D Para el manejo de artefactos eléctricos, se deben tomar ciertas precauciones elementales para disminuir el ries- go de incendio, electrocución y/o lesiones personales. •... -
Page 45: Descripción Del Aparato (Véase La Pág. 3)
1 DESCRIPCIÓN DEL APARATO (VÉASE LA PÁG. 3) A. Superficie calientatazas B. Mando de vapor C. Tubo de vapor D. Emulsionador E. Depósito de agua (extraíble) F. Bandeja apoyatazas G. Bandeja recogegotas (extraíble) H. Portezuela de servicio I. Dispositivo de erogación de café (regulable en altura) J. -
Page 46: Instalación
3 INSTALACIÓN • Tras haber desembalado la cafetera, asegúrese de la integridad del aparato. Si tuviera dudas, no utili- ce el aparato y póngase en contacto con personal cualificado. • Los elementos que componen el embalaje (bolsas de plástico, espuma de poliestireno, etc.) no deben dejarse al alcance de los niños, porque son fuentes potenciales de peligro. -
Page 47: Preparación Del Café (Utilizando Los Granos De Café)
Desplace el emulsionador hacia afuera (fig.2) y coloque una taza debajo. Gire el mando de vapor en el sentido contrario de las agujas del reloj hasta el tope (fig.3). Transcurridos algunos segundos, saldrá agua por el emulsionador. Cuando la taza se haya llenado con alrededor 30cc de agua, gire el mando de vapor en el sentido de las agujas del reloj (fig. -
Page 48: Pag
NOTA 1: si el café gotea o no sale, gire el regulador de molienda (fig. 15) una posición en el sentido de las agujas del reloj (véase el cap. 7). Proceda moviéndolo de una posición a la vez hasta obtener una erogación satisfactoria. NOTA 2: si el café... -
Page 49: Modificar La Cantidad De Café En La Taza
El problema casi siempre puede resolverse siguiendo las instrucciones indicadas en los párrafos 14 y 15. Si dichas soluciones fueran ineficaces, o para obtener informaciones más detalladas, se aconseja llamar a la asistencia clientes al número de teléfono indicado en la garantia obueno visite www.delonghi.com para listado de centros de asistencia. -
Page 50: Preparación Del Café Exprés Con El Café Premolido (En Lugar De Los Granos)
8 PREPARACIÓN DEL CAFÉ EXPRESO CON EL CAFÉ PREMOLIDO (EN LUGAR DE LOS GRANOS) • Presione el botón (fig. 16) para seleccionar la función café premolido (así se inhabilita el funcio- namiento del molinillo de café). En la cafetera aparece el mensaje •... -
Page 51: Preparación Del Capuchino (Utilizando El Vapor)
10 PREPARACIÓN DEL CAPUCHINO (UTILIZANDO VAPOR) • Desplace hacia afuera el emulsionador (fig. 2). • Sitúe un recipiente vacío bajo el emulsionador. Gire el mando de vapor media vuelta en el sentido con- trario de las agujas del reloj hasta el tope (fig. 3). La cafetera muestra el mensaje: Deje salir durante unos segundos el agua mezclada con vapor hasta que salga únicamente vapor. -
Page 52: Limpieza Y Mantenimiento
11 LIMPIEZA Y MANTENIMIENTO Antes de efectuar cualquier operación de limpieza en la cafetera, debe dejarla enfriar y desenchufarla de la corriente. No sumerja nunca la cafetera en el agua: es un aparato eléctrico. Para la limpieza de la cafetera no use disolventes ni detergentes abrasivos. Es suficiente utilizar un paño húmedo y suave. -
Page 53: Odificar Y Configurar Los Parámetros Del Menú
Controle que los botones rojos hayan salido hacia afuera, porque en caso contrario la portezuela no se cie- rra. Los dos botones rojos han salido CORRECTAMENTE hacia afuera. NOTA 1: si el grupo de infusión no se coloca correctamente hasta oír el clic de enganche y los botones no han salido hacia afuera correctamente, no se puede cerrar la portezuela. -
Page 54: Descalcificación
• Presione el botón el botón , la hora cambia rápidamente). • Presione el botón para validar el dato; • Presione una vez el botón Presione el botón DO SÍ”); • Presione el botón para activar la función de encendido automático; •... -
Page 55: Modificar La Temperatura Del Café
• Cuando la cafetera haya vaciado el depósito de agua, aparecerá el mensaje: • Gire el mando de vapor en el sentido de las agujas del reloj hasta el tope (fig. 4) y llene de nuevo el depósito de agua con agua limpia. •... -
Page 56: Retorno A Las Configuraciones De Fábrica
• presione el botón dos que se han formado en la tira reactiva (ejemplo, si en la tira reactiva se han formado 3 cuadrados hay que presionar tres veces el botón para que aparezca el mensaje “DUREZA AGUA 3”). • Presione el botón para validar el dato. - Page 57 MENSAJE ECHAR CAFÉ PREMOLIDO LLENAR CAFÉ EN GRANOS DESCALCIFICACIÓN PULSAR NEXT+ CHANGE CERRAR PORTEZUELA COLOCAR GRUPO DE INFUSIÓN ALARMA GENÉRICA SIGNIFICADO • Con la función seleccionada, no se ha podido verter el café molido en el embudo. • Los granos de café se han acabado. •...
-
Page 58: Problemas Que Pueden Resolverse Antes De Llamara La Asistencia Técnica
15 PROBLEMAS QUE PUEDEN RESOLVERSE ANTES DE LLAMAR A LA ASISTENCIA TÉCNICA Si la cafetera no funciona, se puede localizar fácilmente la causa y resolverla consultando el cap. 14. Pero si en la cafetera no aparece ningún mensaje, efectúe los siguientes controles antes de contactar a la asis- tencia técnica. - Page 59 PROBLEMA • Se ha echado demasiado café premo- Se ha utilizado el café lido. • No se ha presionado el botón premolido (en lugar de la cafetera ha utilizado el café premo- los granos) y no sale café lido y además el café molido por el por la cafetera.
- Page 60 Residentes de los Estados Unidos: Por favor contactar a nuestra línea telefónica gratuita, al #1-866- Latte-Best o ingrese a nuestro sitio en el Internet www.delonghi.com. Para todos los accesorios, piezas de repuesto o de reemplazo, por favor contactar a nuestra división de piezas, al 1-866-528-8323.
- Page 61 866-528-8323 o ingrese a nuestro sitio en el Internet www.delonghi.com <http://www.delonghi.com/>. Residentes de México: Por favor contactar a nuestra línea telefónica gratuita, al 01-800-711-88-05 (lada sin costo) o ingrese a nuestro sitio en el Internet www.delonghi.com <http://www.delonghi.com/>. FIDUCIA ITALIANA S.A DE C.V Pestalozzi #814, Col.
- Page 62 La macchina è stata controllata in fabbrica utilizzando del caffè per cui è del tutto normale trovare qual- che traccia di caffè nel macinino. È garantito comunque che questa macchina è nuova. La manopola di regolazione deve essere ruotata solo mentre il macinacaffè è in funzione. INDICE AVVERTENZE IMPORTANTI .
-
Page 63: Cavo Di Alimentazione Corto
AV V E RT E N Z E I M P O RTA N T I L’uso di qualsiasi apparecchio elettrico comporta l’osservanza di alcune regole fondamentali. In particolare: • Leggere attentamente le istruzioni • Assicurarsi che il voltaggio del vostro impianto elettrico corrisponda a quello indicato sul fondo della macchina. -
Page 64: Descrizione Dell'apparecchio (Vedere Pag. 3)
1 DESCRIZIONE DELL’APPARECCHIO (VEDERE PAG. 3) A. Ripiano scaldatazze B. Manopola vapore C. Tubo vapore D. Cappuccinatore E. Serbatoio dell'acqua (estraibile) F. Vassoio poggia tazze G. Vaschetta raccogli gocce (estraibile) H. Sportello di servizio I. Erogatore di caffè (regolabile in altezza) J. -
Page 65: Installazione
3 INSTALLAZIONE • Dopo aver tolto l’imballo, assicurarsi dell’integrità dell’apparecchio. In caso di dubbio, non utilizzare l’apparecchio e rivolgersi a personale professionalmente qualificato. • Gli elementi dell’imballo (sacchetti di plastica, polistirolo espanso, ecc.) non devono essere lasciati alla portata dei bambini in quanto potenziali fonti di pericolo. •... -
Page 66: Pag
Spostare il cappuccinatore verso l’esterno (fig. 2) e posizionarvi sotto una tazza. Ruotare la manopola vapore in senso antiorario fino a fine corsa (fig. 3). Dopo pochi secondi, un po’ di acqua fuoriesce dal cappuccinatore. Quando la tazza si è riempita di circa 30cc di acqua, ruotare la manopola vapore in senso orario (fig. - Page 67 (Prima di spegnersi, la macchina esegue automaticamente un risciacquo: un po’ di acqua calda fuorie- sce dai beccucci ed è raccolta nella vaschetta raccogligocce sottostante. Attenzione a non scottarsi). NOTA 1: Se il caffè fuoriesce a gocce oppure non esce del tutto, è necessario ruotare la manopola di rego- lazione macinatura (fig.
-
Page 68: Modifica Della Quantità Di Caffè In Tazza
NOTA 8: mentre la macchina sta erogando caffè, non si deve mai estrarre il serbatoio dell’acqua. Infatti se questo venisse estratto, la macchina poi non riesce più a fare il caffè. Per riavviare la macchina è necessario ruotare la manopola vapore in senso antiorario fino a fine corsa e far defluire l’acqua dal cappuccinatore per qualche secondo. -
Page 69: Preparazione Del Caffè Espresso Con Il Caffè Pre-Macinato (Al Posto Dei Chicchi)
8 PREPARAZIONE DEL CAFFÈ ESPRESSO CON IL CAFFÈ PRE-MACINATO (AL POSTO DEI CHICCHI) • Premere il tasto (fig. 16) per selezionare la funzione caffè pre-macinato (così facendo si esclude il funzionamento del macinacaffè). La macchina visualizza il messaggio • Sollevare il coperchietto al centro, inserire nell’imbuto un misurino di caffè... -
Page 70: Preparazione Del Cappuccino (Utilizzando Il Vapore)
10 PREPARAZIONE DEL CAPPUCCINO (UTILIZZANDO IL VAPORE) • Spostare all’esterno il cappuccinatore (fig. 2). • Posizionare un contenitore vuoto sotto il cappuccinatore. Ruotare la manopola vapore di mezzo giro in senso antiorario fino a fine corsa (fig. 3). La macchina visualizza il messaggio : Far defluire per qualche secondo l’acqua mista a vapore finché... -
Page 71: Pulizia Della Macchina
11.1 Pulizia della macchina Eseguire la pulizia del contenitore dei fondi (descritta nel capitolo 5 nota 7) ogni volta che deve essere svuo- tato. Si raccomanda di pulire frequentemente anche il serbatoio dell'acqua. La vaschetta raccogli gocce è provvista di un indicatore (di colore rosso) di livello dell'acqua contenutavi. Quando questo indicatore comincia ad essere visibile (qualche millimetro sotto il vassoio raccogli gocce), è... -
Page 72: Modifica E Impostazione Dei Parametri Del Menu
Assicurarsi che i due tasti di color rosso siano scattati verso l'esterno, altrimenti poi la porta non si chiude. I due tasti rossi sono scattati CORRETTAMENTE verso l’esterno NOTA 1: Se l'infusore non è inserito correttamente fino a sentire il clic di aggancio e i tasti rossi non sono scattati bene verso l’esterno, non è... -
Page 73: Decalcificazione
• Premere il tasto per impostare l’ora di accensione automatica. (Se si tiene premuto il tasto l’ora è modificata velocemente). • Premere il tasto per confermare il dato; • Premere una volta il tasto Premere il tasto SIONE SI”); • Premere il tasto per attivare la funzione di accensione automatica;... -
Page 74: Modifica Della Temperatura Del Caffè
• Ruotare la manopola vapore in senso antiorario (fig. 3) di mezzo giro. Dal cappuccinatore esce acqua calda che riempie il contenitore sottostante ed la macchina visualizza il messaggio: • Quando la macchina ha svuotato il serbatoio acqua, visualizza il messaggio: RISCIACQUO COMPLETo RUOTARE MANOPOLA •... -
Page 75: Ritorno Alle Impostazioni Di Fabbrica
• Premere tante volte fino a che il numero indichi quanti sono i quadratini rossi che si sono for- mati sulla striscia reattiva (esempio, se sulla striscia reattiva si sono formati 3 quadratini rossi è necessa- rio premere tre volte il tasto in modo da far visualizzare il messaggio “DUREZZA ACQUA 3”). •... -
Page 76: Pag
MESSAGGIO INTRODURRE CAFFÈ pre-MACINATO RIEMPIRE CONTENITORE CHICCHI DECALCIFICARE PREMERE NEXT +CHANGE CHIUDERE SPORTELLO INSERIRE gruppo INFUSORE ALLARME GENERICO SIGNIFICATO • Con la funzione selezionata, non è stata versato il caffè pre-macinato nell'imbu- • I chicchi di caffè sono finiti. • Se il macinacaffè... -
Page 77: Problemi Risolvibili Prima Di Chiamare L'assistenza Tecnica
15 PROBLEMI RISOLVIBILI PRIMA DI CHIAMARE L'ASSISTENZA TECNICA Se la macchina non funziona, si può facilmente individuare e risolvere la causa della mal-funzione control- lando il cap. 14. Se, invece la macchina non visualizza nessun messaggio, fare le seguenti verifiche prima di chiamare l'assistenza tecnica. - Page 78 PROBLEMA • È stato introdotto troppo caffè pre- Si è utilizzato il caffè macinato. • Non è stato premuto il tasto premacinato (al posto la macchina ha utilizzato oltre al caffè dei chicchi) e la macchi- pre-macinato anche quello macinato na non eroga il caffè.
- Page 79 Nel caso occorra fare delle riparazioni, rivolgersi al servizio informazioni: Residenti negli USA: Contattare il servizio di assistenza telefonica gratuito al numero #1-866-Latte-Best oppure collegarsi all’indirizzo internet www.delonghi.com. Per tutti gli accessori, i componenti o i pezzi di ricambio, contattare il reparto componenti al numero 1-866-528-8323.
Need help?
Do you have a question about the Coffee Maker ESAM4400 and is the answer not in the manual?
Questions and answers