Advertisement
Introduction

- For purposes of this Repair Manual, "Nikon" means Nikon Corporation, and all direct and indirect affiliated companies, including without limitation, Nikon Inc.
- This Repair Manual is solely intended for Nikon products imported into and sold in the United States by Nikon Inc.
- This Repair Manual includes technical instructions for replacing Nikon parts for the above-mentioned product (the "Product") and is intended for individuals with the knowledge, experience, and tools required to repair electronic devices. Read this entire Repair Manual first. If you are not comfortable performing the repairs as instructed in this Repair Manual, do not proceed.
- Please note that, if you repair the Product on your own, we will not provide customer support or assistance regarding this Repair Manual or how to repair the Product. Please note that an incorrect repair may affect the Product's limited warranty and/or cause an increase in the fee if you request service from an authorized Nikon service center if you have repaired the Product on your own. This Repair Manual is subject to revision without notice.
- Failure to follow the repair instructions or to use appropriate Nikon parts or tools may cause fire or other safety issues and lead to personal injury or death. Failure to follow the repair instructions or to use appropriate parts or tools may damage the Product or other property, or compromise the Product's functionality or water resistance (if applicable).
- NIKON SHALL NOT BE LIABLE FOR ANY DAMAGES, INJURIES OR OTHER LIABILITIES TO THE PRODUCT, OR ANY PERSON, OR PROPERTY WHICH OCCURS AS A RESULT OF REPAIR, DIAGNOSIS, MAINTENANCE, OR MODIFICATION PERFORMED BY YOU OR AN UNAUTHORIZED REPAIR PROVIDER, INCLUDING BUT NOT LIMITED TO, ANY INDIRECT, INCIDENTAL, SPECIAL OR CONSEQUENTIAL DAMAGES; ANY LOSS OF DATA, PRIVACY OR PROFITS; OR ANY INABILITY TO USE, OR REDUCED FUNCTIONALITY OF, THE PRODUCT.
Notations used in this Repair Manual
In this guide, important information is indicated by the following icons.
 | This indicates that improper use by ignoring the contents described herein can result in potential death or serious injury. |
 | This indicates that improper use by ignoring the contents described herein can result in potential injury or material loss. |
| | This symbol indicates important information in this manual. |
Product identification information
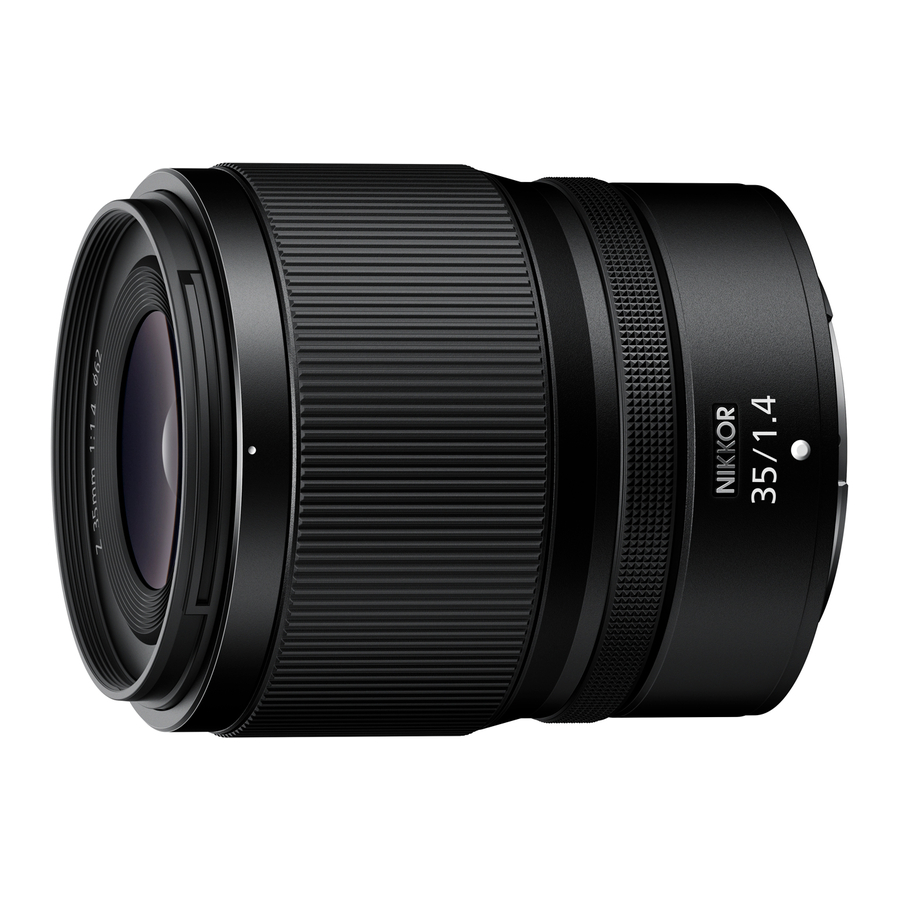
The NIKKOR Z 35mm f/1.4 serial number is written on the opposite side of the Product name as illustrated below.

- The serial number may be required when you contact Nikon with regards to the Product. Make sure not to lose the serial numbered part of the Product.
Service tools
This section shows the tools used to repair products. The standard service tools are commercially available and can be purchased from third party retailers. Nikon hereby disclaims all responsibility and liability for any tools or other items purchased from third party retailers.
Nikon service tools
- Cleaning stick (EIZ0163)
- Lubricant (PL-1016EL)
- Lubricant (LEN317A)
- Lubricant (FT-900P)
- Lubricant (OS-20P)
- Lubricant (FG-3X)
- Lubricant (MDF-225P)
Standard service tools
- Electrostatic discharge (ESD) mat
- Anti-ESD wrist strap (1 MΩ resistance)
- Anti-ESD gloves
- Protective eyewear
- Isopropyl alcohol
- Isopropyl alcohol dispenser bottle
- Anti-ESD tweezers
- Phillips screwdriver (2.0 mm)
- Small flathead screwdriver
- Small pry bar (plastic)
- Torque screwdriver
(Use a product with a torque range of 0.06 N·m to 0.18 N·m.) - Brush for lubricant
- Front cap (LC-67B)
- Rear cap (LF-N1)
- Glue (LOCTITE 263)
Illustrated Service Parts List
- The parts marked in red in the illustration cannot be replaced individually as replacing them will affect the optical performance. If you need to replace these parts, use the No.19 LENS UNIT (JMA11251-0950).
- When disassembling and reassembling the Product, be careful not to damage or lose the parts.


| No. | Item code | Parts name | Q'ty |
| 1 | JMA11251-0241 | FRONT LABEL UNIT | 1 |
| 2 | 9747-1750-07 | SCREW | 4 |
| 3 | JMA11251-0251 | FILTER RING | 1 |
| 4 | JMA11251-1431 | MF RUBBER RING | 1 |
| 5 | JMA11251-1510 | WASHER | 0 to 1 |
| 5 | JMA11251-1511 | WASHER | 0 to 1 |
| 5 | JMA11251-1512 | WASHER | 0 to 1 |
| 6 | JMA11251-0236 | MF RING UNIT | 1 |
| 7 | JMA11251-0238 | MIDDLE RING UNIT | 1 |
| 8 | 9747-1435-07 | SCREW | 5 |
| 9 | JMA11251-0903 | CONTROL RING UNIT | 1 |
| 10 | JMA11251-0640 | CONTACT UNIT | 1 |
| 11 | 6A-14030FA | SCREW | 1 |
| 12 | JMA11251-0902 | NAME RING UNIT | 1 |
| 13 | 127FD | WATERPROOF RUBBER | 1 |
| 14 | 1K120-012 | SCREW | 1 |
| 15 | 127EC | MOUNT | 1 |
| 16 | JMA72251-1496 | SCREW | 4 |
| 17 | 9761-1435-04 | SCREW | 3 |
| 18 | JMA11251-1242 | REAR COVER RING | 1 |
| 19 | JMA11251-0950 | LENS UNIT | 1 |
Parts Removal and Replacement Procedures
Before disassembling the Product
- As for the Product powered on by the power switch, before disassembling the Product, be sure to check that the Product is powered off and that the battery has been removed.
- Check that all the lenses, camera, and accessories attached to the Product are removed before disassembling the Product.
- Always cover the workbench's surface with a soft, non-scratch material suitable for ESD protection.
- Frequently clean the surfaces you use to work and keep them free of debris/abrasive particles.
- Always follow the work steps described in each process section.
During the repairing
- If there is this kind of indication, apply the specified grease or adhesive by a small brush.
Example:
![]()
- If there is a specified torque, use an appropriate torque driver for tightening screw.
Example: 0.1 N·m - If the parts are associated with circled numbers, please work in that numerical order.
- Example:
![]() means to work in the order of
means to work in the order of ![]() to
to ![]() .
. - Do not pinch FPCs or cords during reassembly.
- Be careful not to damage or lose parts.

 means to work in the order of
  to
to  .
.Disassembly
FRONT LABEL UNIT

- Insert a small flathead screwdriver or plastic pry bar into the gap between the edges of the FRONT LABEL UNIT, and lift the FRONT LABEL UNIT.
- If it is difficult to peel it off, apply isopropyl alcohol into the gap around the outer periphery.
FILTER RING

MF RUBBER RING

MF RING UNIT

| Item code | Parts name |
| JMA11251-1510 | WASHER |
| JMA11251-1511 | WASHER |
| JMA11251-1512 | WASHER |
REAR COVER RING

MOUNT


NAME RING UNIT

MAIN PCB UNIT

CONTROL RING UNIT

| Item code | Parts name |
| JMA11251-1510 | WASHER |
| JMA11251-1511 | WASHER |
| JMA11251-1512 | WASHER |
MIDDLE RING UNIT

Assembly
MIDDLE RING UNIT

CONTROL RING UNIT

| Item code | Parts name | Thickness * |
| JMA11251-1510 | WASHER | A |
| JMA11251-1511 | WASHER | B |
| JMA11251-1512 | WASHER | C |
* Thickness increases in order from A (thinnest) to C (thickest).
- If you replace the CONTROL RING UNIT, you will need to adjust the WASHER size. To adjust the operation after assembling, use intermediate-size WASHER (JMA11251-1511) when assembling.
- When replacing the WASHER, select one that does not cause backlash.
- There is 1 or n item(s) in this part.
MAIN PCB UNIT

NAME RING UNIT

MOUNT


- Rotate the CONTROL RING UNIT to check its operating characteristics. If the operation is heavy, replace the washer with a thinner one. If the operation is lightly, replace the washer with a thicker one.
REAR COVER RING

MF RING UNIT

| Item code | Parts name | Thickness * |
| JMA11251-1510 | WASHER | A |
| JMA11251-1511 | WASHER | B |
| JMA11251-1512 | WASHER | C |
* Thickness increases in order from A (thinnest) to C (thickest).
- If you replace the MF RING UNIT, you will need to adjust the WASHER size. To adjust the operation after assembling, use intermediate-size WASHER (JMA11251-1511) when assembling.
- When replacing the WASHER, select one that does not cause backlash.
- There is 1 or n item(s) in this part.
MF RUBBER RING

FILTER RING

- Rotate the MF ring unit to check its operating characteristics. If the operation is heavy, replace the washer with a thinner one. If the operation is lightly, replace the washer with a thicker one.
FRONT LABEL UNIT

- The letters, "NIKKOR", are on the index side.
- Perform the following inspection after repairs involving disassembly and assembly.
- AF Accuracy Inspection Process
- Control Ring Inspection Process
- MF Ring Inspection Process
AF Accuracy Inspection Process
When performing repairs that involve disassembling and reassembling the mount, check the AF accuracy before and after disassembling.
Tools and parts required:
- Your mirrorless camera
- Tripod
- Indoor lighting (Use the flickerless light.)
- Commercially available focus chart that can measure the focus position
- Focus charts can be purchased at stores that sell camera-related products or online stores that sell camera-related products.
- Nikon hereby disclaims all responsibility and liability for any focus charts or other items purchased from third party retailers.
Camera settings
- The AF accuracy is inspected using your own mirrorless camera, so please make sure that there are no abnormalities in the operation of your camera before starting the inspection.
- When performing an inspection, change the camera settings as shown below.
- Be sure to turn OFF "AF Fine Adjustment" as it affects the inspection results.
Set the camera as follows.
For details on the camera settings, refer to the instruction manual of the camera.
Camera settings
- Shooting mode: A mode
- Image quality mode: FINE
- Image size: L
- Aperture: Full open
- ISO sensitivity: 100 to 800 (Automatic sensitivity control OFF)
- White balance: Auto (White priority)
- Picture control: SD (All parameters 0, or clarity 1 or 2)
- AF mode: AF-S
- AF area: Single point AF
- Active D-Lighting: OFF
- Diffraction correction: ON
- Automatic distortion correction: ON
- Vignette control: Standard
- Body VR: OFF
- Exposure delay mode: one to two seconds
- AF fine adjustment: OFF
Shooting environment
Install the camera/lens and chart, referring to the figure below.
Shoot in a location that meets the following requirements:
- Place that is not affected by vibrations
- Place where the brightness can be ensured under indoor lighting.
(Please use flickerless lights.)
Example of shooting environment
The measurement method with a focus chart differs depending on the focus chart you use, so please check the instruction manual for the focus chart you are using.

AF accuracy inspection
Follow the steps below to inspect the AF accuracy.
Inspection procedure
- Adjust the camera position
- Adjust the shooting distance so that the entire focus chart is displayed on the screen as shown in the image below.
- Adjust the position so that the AF area in the center of the camera is aligned with the center of the target chart.

- Adjust the position so that the AF area in the center of the camera is aligned with the center of the target chart.
- Adjust the shooting distance so that the entire focus chart is displayed on the screen as shown in the image below.
- Check the focus
- Turn the lens control ring clockwise viewed from the camera to change the focus to the infinity position.
- Press the release button halfway and check that the chart is in focus.

- Shoot the chart
- Press the release button to shoot the target chart.
- When checking before disassembling, check the inside of the red frame in the image, and record the focus position.

- When checking after disassembling, confirm that there is no difference from the focus position recorded before disassembling.
![]()
- If the focus position is significantly different from what it was before disassembling, we recommend that you disassemble and repair the Product again.


Control Ring Inspection Process
When performing repairs that involve disassembling or reassembling the mount, inspect the control ring.
Tools and parts required:
- Your mirrorless camera
Control ring inspection
Follow the steps below to perform a control ring inspection.
Inspection procedure
- Check the functions assigned to the control ring
- From the camera MENU, select [Custom Menu] - [f Operation] - [f2 Custom controls (shooting)].
- The setting names may differ depending on the camera model.
- Check the functions assigned to the control ring.
- In the example below, confirm that "Aperture" is set.

- If no function is set on the control ring, set one of the following functions.
![]()
The setting names may differ depending on the camera model.
- In the example below, confirm that "Aperture" is set.
- From the camera MENU, select [Custom Menu] - [f Operation] - [f2 Custom controls (shooting)].
- Check the operation of the control ring
- Rotate the lens control ring and check whether the assigned function is working.
- Focus (M/A):Check that the focus operation is performed.
- Aperture: Set the exposure mode to A mode or M mode, and check that the aperture changes.
- Exposure compensation: Check that the exposure compensation changes.
- ISO sensitivity: Check that the ISO sensitivity changes.
- Rotate the lens control ring and check whether the assigned function is working.


MF Ring Inspection Process
When performing repairs that involve disassembling or assembling the mount, inspect the MF ring.
Tools and parts required:
- Your mirrorless camera
MF ring inspection
Inspection procedure
- Attach the lens to your mirrorless camera.
- Rotate the MF ring and check that the focus function works.
While watching the camera monitor, check that focus positions change.


Safety precautions
Strictly observe the guidelines contained in this Repair Manual in order to use this Product safely and prevent possible injury or property damage to you and others. Understand the contents thoroughly for correct use of the Product.
General safety precautions
Always observe the following general safety precautions.
- If you disassemble or repair the Product, it may involve risks of electric shock, Product damage, fire, and/or personal injury, or other hazards. Be careful when disassembling or repairing the Product as described in this Repair Manual.
- If you disassemble or repair the Product, the flange back or the back focus may shift, which may affect the focus when shooting. Check the focus position before disassembling or repairing the Product. Then, ensure that the focus position has not changed after re-assembling the Product. If the focus changes after re-assembling the Product, we recommend that you disassemble and repair the Product again.
- If the Product is dropped or has been subjected to an impact due to dropping, or weight or stress has been placed on it, the camera and lens attachment parts may become deformed, which will prevent the Product from being able to be attached and will cause problems when shooting. In such cases, accurate adjustments and repair will be required and it is recommended that you contact Nikon for service repairs.
- If the Product contains a lithium-ion battery, then inappropriate use, transportation, recycling, reuse, or disposal of the lithium-ion battery may cause a fire, explosion or other damage or injury. Lithium-ion batteries should be handled in accordance with local laws, rules, and regulations. Do not heat, create holes in, disassemble, or incinerate the Product or the lithium-ion battery. Do not leave the Product or the lithium-ion battery in direct sunlight or other hot places for long periods of time, and do not charge the Product in such an environment as doing so may damage the lithium-ion battery or cause it to melt, which may cause a fire, explosion or other damage or injury.
- Do not dispose of your old Product or its lithium-ion battery (if any) and the replaced parts in your household trash or recycling bin. When disposing of the lithium-ion battery, follow your local area laws, rules, and regulations.
Repair-specific precautions and warnings
- As for the Product powered on by the power switch, before disassembling the Product, ensure that the Product is powered off and that the battery has been removed.
- As a safety measure, we recommend that you wear protective eyewear when disassembling or reassembling the Product.
- Always check the following points before and while disassembling the Product.
- Wear an anti-static wrist strap.
- The work area is appropriately grounded, and an environment in which electrostatic discharge (ESD) has been provided with safety measures is ensured.
- Before starting work, check that you are following the general guidelines and ESD compliance steps. For details, refer to "Before disassembling the Product''.
- When removing any parts from the Product, place all the attached parts and screws away from the work area to prevent the Product and parts from being damaged or lost.
Safety policy and procedure
- All Product safety issues must be managed according to the following points.
If any of the following conditions are visible, stop repairing the Product and contact Nikon's customer service at www.nikonproductsupport.com.- There are burnt or melted components or traces on the outside of the Product, or other heatrelated damage (including scorching on charging terminals or other connection terminals).
- The Product has burnt or melted parts or traces on the inside, or contains damage from overheating.
- Products that appear to have problems such as having been forcibly detached or disassembled for reasons other than misuse by the user or unauthorized repair (those that have been damaged by being subjected to an impact due to dropping, those that have evidence of tampering, or those with damage or separation caused by dilatation of the battery).
- Plastic parts with sharp edges that may pose an injury risk to the user.
- When contacting Nikon's customer service, please have the following information ready to enable us to check the situation:
- Model, model number, and serial number of the affected Nikon Product and any third-party product used together with the Nikon Product, if any.
- Description of the damage found.
- Clear photos that show the damage.
Documents / Resources
References
Download manual
Here you can download full pdf version of manual, it may contain additional safety instructions, warranty information, FCC rules, etc.
Advertisement


Need help?
Do you have a question about the NIKKOR Z 35mm f/1.4 and is the answer not in the manual?
Questions and answers