
Related Manuals for SPORTNOW A91-337V00


Summary of Contents for SPORTNOW A91-337V00
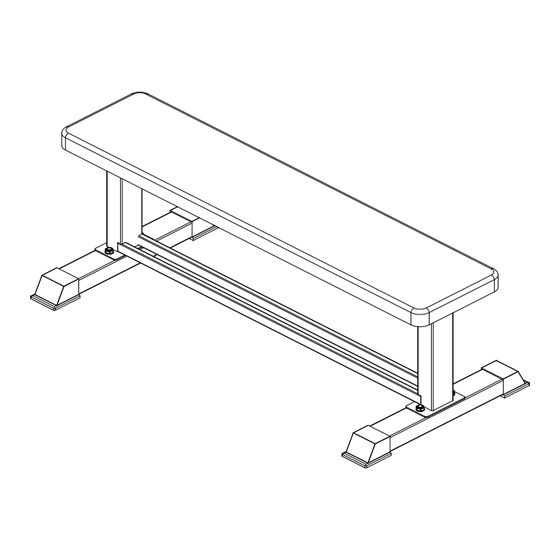
- Page 1 IN240300039V01_UK A91-337V00 Flat weight bench Max weight: 300 kg IMPORTANT, RETAIN FOR FUTURE REFERENCE: READ CAREFULLY ASSEMBLY INSTRUCTIONS...
-
Page 2: Safety Information
SAFETY INFORMATION IMPORTANT – Please read fully before assembly or use. This exercise equipment is built for optimum safety. However, certain precautions apply whenever you operate a piece of exercise equipment. Be sure to read the entire manual before you assemble, operate, or use this equipment, note the following safety precautions. - Page 3 ●Any damage must be reported to the seller immediately after delivery, and before use or installation. Later complaints will not be considered. ●Use only suitable tools for assembly. ●The installation must ONLY be carried out by adults. Children should not be present in the immediate environment where the assembly is taking place.
-
Page 4: Cleaning And Maintenance
CLEANING AND MAINTENANCE 1. Regularly examine the equipment to detect any damage to wear which may have occurred. The safety level of the equipment can be maintained only if it is examined regularly for damage and wear and tear on ropes, pulleys, and connection points. - Page 5 Parts List Please check all accessories carefully Sequence number Seat pad Flat bench support Foot tube Screw Package List Sequence Name Specification Units Quantity Number Carriage screw M10*65 Inner hexagon screw M6*37 Lock nut Washers Ø10.5*Ø20*1.5 Open wrench Opposite side 17 L-wrench Opposite side 5mm...
- Page 6 Installation Steps Step 1: - Remove all parts from the box, take out the plastic bag and place them on a clean and flat surface. - Put the seat pad in place as shown in the picture. - Take out the long horizontal tube surface of the flat bench support and place it on the seat pad.
- Page 7 Step 3: - Take out four M10 lock nuts and washers. - Place the washers onto the nuts. - Tighten the nuts with a wrench. Step 4: - Flip the installed flat bench over, placing it on a flat ground. - It is now ready for use.
Need help?
Do you have a question about the A91-337V00 and is the answer not in the manual?
Questions and answers