Advertisement
Quick Links
Download this manual
See also:
User Manual
•
Take precautions when handling all battery types.
•
Remove the batteries whenever you are planning to
store the product for a long period of time.
•
When replacing batteries, use new batteries as specified
in this user manual.
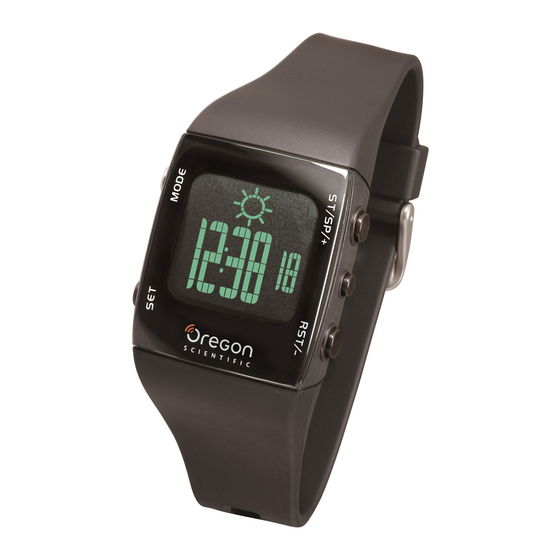
METEO
•
The product is a precision instrument. Never attempt
Weather Forecast Watch
to take this device apart. Contact the retailer or our
customer service department if the product requires
Model: RA121
servicing.
•
Do not touch the exposed electronic circuitry, as there is
USER MANUAL
a danger of electric shock.
•
Check all major functions if the device has not been
used for a long time. Maintain regular internal testing
EN
and cleaning of your device. Have your watch serviced
INTRODUCTION
by an approved service center annually.
Thank you for selecting the Oregon Scientific™ METEO
•
When disposing of this product, ensure it is collected
Weather Forecast Watch (RA121). Equipped with real-
separately for special treatment and not as normal
time clock, stopwatch, alarm, backlight and keypad lock
TIME MODE
household waste.
functions, this watch can also be used for providing daily
•
Due to printing limitations, the displays shown in this
This mode is used for viewing the current time and weather
weather forecast.
manual may differ from the actual display.
forecast, and for setting the time and date.
•
The contents of this manual may not be reproduced
IMPORTANT
without the permission of the manufacturer.
TO SET TIME AND DATE
•
The measurement functions built into the RA121 are
1.
Press MODE to navigate to Time Mode.
not meant to substitute professional measurement
NOTE The technical specifications for this product and the
or industrial precision devices. Values produced
2.
Press and hold SET to enter settings.
contents of the user manual are subject to change without
by this device should be considered as reasonable
3.
Press ST/SP/+ or RST/- to change values of the setting.
notice.
representations only.
Press and hold ST/SP/+ or RST/- to rapidly change
values.
•
Oregon Scientific™ assumes no responsibility for
ABOUT OREGON SCIENTIFIC
4.
Press SET to confirm and move to the next setting.
any loss, or any claims by third parties that may arise
Visit our website (www.oregonscientific.com) to learn more
Repeat steps 3-4 for each setting option. The setting
through the use of this device.
about Oregon Scientific products. If you're in the US and
options are as follows: 12 / 24-hour time; hour; minute;
would like to contact our Customer Care department directly,
year; month-day / day-month; month; day; beep on/off.
CONTROL BUTTONS
please visit: www2.oregonscientific.com/service/support
5.
Press MODE anytime to confirm and exit settings.
OR
Call 1-800-853-8883.
DATE MODE
For international inquiries, please visit:
This mode is used for viewing the current date and weather
www2.oregonscientific.com/about/international
forecast. Press MODE to navigate to Date Mode.
EU-DECLARATION OF CONFORMITY
1
3
STOPWATCH MODE (CHRONO)
Hereby, Oregon Scientific, declares that this METEO
Weather Forecast Watch (Model RA121) is in compliance
TO START / STOP STOPWATCH
with EMC directive 89/336/CE. A copy of the signed and
1.
Press MODE to navigate to Chrono Mode.
4
dated Declaration of Conformity is available on request via
2.
Press ST/SP/+ to start / stop stopwatch.
our Oregon Scientific Customer Service.
2
5
TO RESET STOPWATCH
Press RST/- to reset stopwatch.
NOTE Stopwatch can be reset to 00:00:00 only if it has been
stopped or paused.
ALARM MODE
TO SET ALARM
1.
MODE: Switch to another display; quick exit during any
1.
Press MODE to navigate to Alarm Mode.
setting mode
2.
Press and hold SET to enter settings.
2.
SET: Enter setting mode; confirm setting value
3.
Press ST/SP/+ or RST/- to change values of the setting.
3.
ST / SP / + : Increase value of the setting; start / stop
stopwatch
Press and hold ST/SP/+ or RST/- to rapidly change
values.
4.
/
: Activate backlight; lock keypad
4.
Press SET to confirm and move to the next setting.
5.
RST / -: Decrease value of the setting; reset stopwatch
Repeat steps 3-4 for each setting option. The setting
options are as follows: hour; minute.
LCD
5.
Press MODE anytime to confirm and exit settings.
TO ACTIVATE / DEACTIVATE ALARM
1
1.
Press MODE to navigate to Alarm Mode.
2.
Press ST/SP/+ or RST/- to activate / deactivate alarm.
2
indicates that the alarm has been activated.
3
5
3.
Press MODE to confirm and exit.
6
4
TO SILENCE ALARM
When the alarm clock is activated, it will sound at the set time
every day. Press any button to stop the alarm for that day.
7
8
NOTE The alarm clock is still active and will set off again the
following day.
1.
Displays weather forecast
2.
: Indicates keypad is locked
BACKLIGHT AND KEYPAD LOCK
3.
: Indicates beep tone is turned Off
To activate backlight:
4.
Displays clock, calendar, stop watch, alarm time or
Press
/
to turn backlight On for 5 seconds.
mode banners
5.
: Indicates alarm is On
NOTE The backlight function will not operate if "
" or
6.
: Indicates stopwatch is displayed or running
"
" is displayed.
7.
: 12 hour clock
To toggle keypad lock On or Off:
8.
or
: Indicates battery power is low
Press and hold
/
for 2 seconds.
indicates keypad
is locked.
GETTING STARTED
WEATHER FORECAST
TURN ON DEVICE (FIRST-TIME USE ONLY)
This watch forecasts the next 12 to 24 hours of weather.
Press any key for 2 seconds to activate the LCD display.
BATTERY REPLACEMENT
The RA121 uses a CR2032 3V battery, which has already
Partially
Sunny
Cloudy
Rainy
been installed. See below for battery warnings.
Cloudy
INDICATION
DESCRIPTION
USE IN THE WATER
The battery is low.
The RA121 is water-resistant up to 30 meters (98 feet).
The battery is too low to operate.
The weather icon is cleared.
NOTE While the low battery icon is displayed, weather
forecast, alarm beeping and backlight are disabled. It will
RAIN
SHOWERING
LIGHT
SHALLOW
SNORKELING/
return to normal once battery has been replaced.
SPLASHES
(WARM /
SWIMMING /
DIVING /
DEEP
ETC
COOL
SHALLOW
SURFING /
WATER
NOTE If you need to replace the battery, we highly
WATER
WATER
WATER
DIVING
recommend you to contact the retailer or our customer
service department.
ONLY)
SPORTS
30M /
OK
NO
NO
98 FEET
NO
NO
To replace the battery:
NOTE Set the watch before exposing it to excessive water.
Pressing the keys while in the water or during heavy
rainstorms may cause water to enter the watch.
SPECIFICATIONS
12/24 format with hour / minute /
Real time clock
second
Stopwatch
00:00:00 to 99:59:59 (hr:min:sec)
Power
1 x CR2032 3V battery
Operating temperature
0°C to 40°C (32°F to 104°F)
1.
Use a small Phillips screwdriver to remove battery
Storage temperature
-20°C to 60°C (-4°F to 140°F)
compartment lid. Once opened, please keep the screws
in a safe place to avoid losing them.
PRECAUTIONS
2.
Remove the old battery and insert the new one, matching
To ensure you use your product correctly and safely, read
the polarities.
these warnings and the entire user manual before using the
3.
Replace the lid by screwing it back into place using a
product:
Phillips screwdriver.
•
Use a soft, slightly moistened cloth. Do not use abrasive
or corrosive cleaning agents, as these may cause
OPERATING MODES
damage. Use lukewarm water and mild soap to clean
the watch. Never use the products in hot water or store
Press MODE to switch between:
them when wet.
•
Time Mode
•
Do not subject the product to excessive force, shock,
•
Date Mode
dust, temperature changes, or humidity. Never expose
•
Chrono (Stopwatch) Mode
the product to direct sunlight for extended periods. Such
•
Alarm Mode
treatment may result in malfunction.
•
Do not tamper with the internal components. Doing
so will terminate the product warranty and may cause
damage. The main unit contains no user-serviceable
parts.
•
Do not scratch hard objects against the LCD display as
this may cause damage.
RA121_EU_OP.indd 1
METEO
quanto potrebbero causare danni. Non utilizzare mai i
prodotti in acqua calda né riporli se bagnati.
Orologio con previsioni
•
Non sottoporre il prodotto a forza eccessiva, urti,
meteorologiche
polvere, variazioni di temperatura o umidità. Non esporre
MODELLO: RA121
il prodotto a luce solare diretta per lunghi periodi. Un
simile trattamento può comportare il malfunzionamento
MANUALE PER L'UTENTE
del prodotto.
•
Non manomettere i componenti interni. In questo modo si
invalida la garanzia del prodotto e si possono provocare
IT
danni. L'unità principale non contiene componenti che
possono essere riparati dall'utente.
INTRODUZIONE
•
Non graffiare il display LCD con oggetti duri in quanto si
Grazie per aver scelto l'orologio l'METEO orologio con
potrebbero causare danni.
previsioni meteorologiche di Oregon Scientific™(RA121).
•
Manipolare le batterie con attenzione.
Questo apparecchio è dotato di orologio, cronometro, sveglia,
•
Togliere le batterie ogni volta che si prevede di lasciare
retroilluminazione e blocco dei tasti, e può essere usato per
inutilizzato il prodotto per un lungo periodo di tempo.
avere costantemente previsoni del tempo aggiornate.
•
Al momento della sostituzione delle batterie, utilizzare
MODALITÀ ORA
IMPORTANTE
batterie nuove come indicato in questo manuale per
Questa modalità viene utilizzata per visualizzare l'ora
l'utente.
•
Le funzioni di rilevazione dell'unità RA121 non
corrente e le previsioni meteorologiche e per impostare ora
•
Il prodotto è uno strumento di precisione. Non tentare
sostituiscono quelle di dispositivi professionali e
e data.
mai di aprirlo. Contattare il proprio rivenditore o il nostro
industriali di misurazione o di precisione. Le informazioni
servizio clienti se il prodotto necessita di riparazioni.
visualizzate da questo dispositivo devono essere
IMPOSTAZIONE DI ORA E DATA
considerate puramente indicative.
•
Non toccare il circuito elettrico esposto, poiché questo
1.
Premere MODE per navigare fino alla Modalità ora.
può provocare scosse elettriche.
•
Oregon Scientific™ declina qualsiasi responsabilità
2.
Tenere premuto SET per accedere alle impostazioni.
per qualsiasi perdita o per eventuali richieste di danni
•
Controllare tutte le funzioni più importanti se il prodotto
da parti di terzi che possono sorgere dall'uso di questo
3.
Premere ST/SP/+ o RST/- per cambiare i valori
non è stato utilizzato per un lungo periodo di tempo.
dispositivo.
dell'impostazione. Tenere premuto ST/SP/+ o RST/- per
Controllare e pulire l'apparecchio regolarmente.
modificare rapidamente i valori.
•
Al momento dello smaltimento di questo prodotto, agire
PULSANTI DI CONTROLLO
4.
Premere SET per confermare e passare all'impostazione
in conformità con i regolamenti locali sullo smaltimento
successiva. Ripetere i passaggi 3-4 per ciascuna
dei rifiuti.
opzione di impostazione. Le opzioni di impostazione
•
A causa di limitazioni di stampa, le immagini di questo
sono: formato ora 12 / 24, ore, minuti, anno, mese-
manuale possono differire dalla realtà.
giorno / giorno-mese, mese, giorno, segnale acustico
•
Il contenuto di questo manuale non può essere
attivato/disattivato.
ristampato senza l'autorizzazione del fabbricante.
5.
Premere MODE per confermare e abbandonare le
impostazioni in qualsiasi momento.
NOTA Le specifiche tecniche del prodotto e il contenuto
1
3
del manuale per l'utente possono essere modificati senza
MODALITÀ DATA
preavviso.
Questa modalità viene usata per visualizzare la data corrente
4
INFORMAZIONI AGLI UTENTI DEI PRODOTTI DI
e le previsioni meteorologiche. Premere MODE per passare
alla Modalità data.
TIPO "DOMESTICO"
2
5
MODALITÀ CRONOMETRO (CHRONO)
INFORMAZIONE AGLI UTENTI
AVVIO/INTERRUZIONE DEL CRONOMETRO
1.
Premere MODE per passare alla Modalità chrono.
2.
Premere ST/SP/+ per avviare e interrompere il
cronometro.
ai sensi dell'art. 13 del Decreto Legislativo 25 luglio 2005,
n. 151"Attuazione delle Direttive 2002/95/CE, 2002/96/CE
AZZERAMENTO DEL CRONOMETRO
e 2003/108/CE, relative alla riduzione dell'uso di sostanze
1.
MODE: consente di passare ad un'altra visualizzazione
Premere RST/- per azzerare il cronometro.
pericolose nelle apparecchiature elettriche ed elettroniche,
e di abbandonare rapidamente una modalità di
nonché allo smaltimento dei rifiuti"
impostazione
NOTA Il cronometro può essere riportato a 00:00:00 solo se
Il simbolo del cassonetto barrato riportato sull'apparecchiatura
2.
SET: consente di accedere alla modalità di impostazione
è stato interrotto o messo in pausa.
o sulla sua confezione indica che il prodotto alla fine della
e di confermare le impostazioni
propria vita utile deve essere raccolto separatamente dagli
altri rifiuti.
3.
ST / SP/ + : consente di aumentare il valore
MODALITÀ SVEGLIA
L'utente dovrà, pertanto, conferire l'apparecchiatura giunta
dell'impostazione
e
di
avviare/interrompere
il
cronometro.
IMPOSTAZIONE DELLA SVEGLIA
a fine vita agli idonei centri di raccolta differenziata dei
rifiuti elettronici ed elettrotecnici, oppure riconsegnarla
4.
/
: consente di attivare la retroilluminazione e il
1.
Premere MODE per passare alla Modalità sveglia.
al rivenditore al momento dell'acquisto di una nuova
blocco dei tasti
2.
Tenere premuto SET per accedere alle impostazioni.
apparecchiatura di tipo equivalente, in ragione di uno a uno.
5.
RST / -: consente di diminuire il valore dell'impostazione
3.
Premere ST/SP/+ o RST/- per cambiare i valori
L'adeguata raccolta differenziata per l'avvio successivo
e di azzerare il cronometro
dell'impostazione. Tenere premuto ST/SP/+ o RST/- per
dell'apparecchiatura dismessa al riciclaggio, al trattamento
e allo smaltimento ambientalmente compatibile contribuisce
modificare rapidamente i valori.
ad evitare possibili effetti negativi sull'ambiente e sulla
LCD
4.
Premere SET per confermare e passare all'impostazione
salute e favorisce il reimpiego e/o riciclo dei materiali di cui è
successiva. Ripetere i passaggi 3-4 per ciascuna
composta l'apparecchiatura.
opzione di impostazione. Le opzioni di impostazione
Lo smaltimento abusivo del prodotto da parte dell'utente
sono: ore, minuti.
1
comporta l'applicazione delle sanzioni amministrative previste
5.
Premere MODE per confermare e abbandonare le
dalla normativa vigente
2
impostazioni in qualsiasi momento.
3
5
INFORMAZIONI SU OREGON SCIENTIFIC
6
ATTIVAZIONE / DISATTIVAZIONE DELLA SVEGLIA
Per avere maggiori informazioni sui nuovi prodotti Oregon
1.
Premere MODE per passare alla Modalità sveglia.
4
Scientific visita il nostro sito internet www.oregonscientific.it,
2.
Premere ST/SP/+ oppure RST/- per attivare o disattivare
dove potrai trovare tutte le informazioni di cui hai bisogno.
la sveglia. L'icona
indica che la sveglia è stata
Per ricerche di tipo internazionale puoi visitare invece il sito
7
attivata.
www2.oregonscientific.com/about/international.asp.
8
3.
Premere MODE per confermare e uscire.
DICHIARAZIONE DI CONFORMITA' UE
1.
Visualizza le previsioni meteorologiche
SILENZIAMENTO DELLA SVEGLIA
Oregon Scientific dichiara che questo prodotto RA121 è conforme
Quando la sveglia è attiva, suonerà ogni giorno all'ora
2.
: indica che il blocco dei tasti è attivo
alla direttiva EMC 89/336/CE. Una copia firmata e datata della
impostata. Premere un tasto qualsiasi per interrompere la
3.
: indica che il segnale acustico è disattivato
Dichiarazione di Conformità è disponibile, su richiesta, tramite il
sveglia.
servizio clienti della Oregon Scientific.
4.
Visualizza orologio, calendario, cronometro, ora della
sveglia o banner delle modalità
NOTA La sveglia è ancora attiva e suonerà nuovamente il
5.
: indica che la sveglia è attiva
giorno successivo.
6.
: indica che il cronometro viene visualizzato o che è
in funzione
RETROILLUMINAZIONE E BLOCCO DEI TASTI
7.
: orologio in formato 12 ore
Attivazione della retroilluminazione:
8.
oppure
: indica che la batteria è in
Premere
/
per attivare la retroilluminazione per
esaurimento
5 secondi.
OPERAZIONI PRELIMINARI
La retroilluminazione non funziona se sul display
NOTA
ACCENSIONE DEL DISPOSITIVO (SOLO LA PRIMA
sono visualizzate le icone "
"o "
".
VOLTA)
Attivazione / disattivazione del blocco dei tasti:
Per attivare il display LCD, premere un tasto qualsiasi per
Tenere premuto
/
per 2 secondi. L'icona
indica
2 secondi.
che i tasti sono bloccati.
SOSTITUZIONE DELLE BATTERIE
PREVISIONI METEOROLOGICHE
L'unità RA121 funziona con una batteria di tipo CR2032,
già inserita. Fate riferimento alla tabella sottostante per le
Questo orologio mostra le previsioni meteorologiche delle
informazioni relative alla batteria.
successive 12-24 ore.
INDICAZIONE
DESCRIZIONE
La batteria è in esaurimento.
Parzialmente
La carica è troppo debole per
Sereno
Nuvoloso
Pioggia
nuvoloso
mettere in funzione l'unità. L'icona
delle previsioni scompare.
USO IN ACQUA
NOTA Mentre viene visualizzata l'icona della batteria in
L'orologio RA121 è resistente all'acqua fino a 30 metri.
esaurimento, la funzione delle previsioni meteorologiche, il
segnale acustico della sveglia e la retroilluminazione sono
disattivati. La visualizzazione ritornerà alla normalità dopo
aver sostituito la batteria.
DOCCIA
NUOTATE
TUFFI
IMMERSIONI /
PIOGGIA
NOTA Se è necessario sostituire la batteria, si consiglia
TUFFI IN
SPRUZZI
NON
IN ACQUA
di contattare il proprio rivenditore o il nostro servizio di
IMPEGNATIVE /
BASSA /
ACQUA
assistenza clienti.
ETC
PROFONDA
ACQUA
SURF/SPORT
Sostituzione delle batterie:
BASSA
ACQUATICI
30M / 98
SI
NO
NO
NO
NO
PEDI
NOTA Impostare l'orologio prima di esporlo ad acqua
eccessiva. Se i pulsanti vengono premuti mentre si è in
acqua o durante forti temporali, l'acqua potrebbe entrare
nell'unità.
SPECIFICHE TECNICHE
Formato
12/24 ore con ore / minuti / secondi
orologio
1.
Con un piccolo cacciavite Phillips, togliere la copertura
Cronometro
Da 00:00:00 a 99:59:59 (ore:min:sec)
del vano batterie. Una volta aperto, mettere le viti in un
Alimentazione
1 batteria CR2032 da 3 V
luogo sicuro per evitare di perderle.
Temperatura di
da 0°C a 40°C
2.
Togliere la batteria vecchia ed inserire quella nuova
esercizio
rispettando le polarità.
Temperatura di
da -20°C a 60°C
3.
Riavvitare la copertura con il cacciavite Phillips.
stoccaggio
MODALITÀ DI FUNZIONAMENTO
AVVERTENZE
Premere MODE per scorrere tra:
Per utilizzare il prodotto in modo sicuro e corretto, leggere
•
Modalità ora
queste avvertenze e tutto il manuale prima dell'uso.
•
Modalità data
•
Utilizzare un panno morbido, leggermente inumidito.
•
Modalità Chrono (cronometro)
Non utilizzare prodotti di pulizia abrasivi o corrosivi, in
•
Modalità Sveglia
METEO
CARACTERISTIQUES
Montre Station Météo
Horloge en temps
MODELE : RA121
réel
MANUEL DE L'UTILISATEUR
Chronomètre
Alimentation
Température de
FR
fonctionnement
Température de
INTRODUCTION
rangement
Nous vous remercions d'avoir choisi la METEO montre
station météo (RA121) de Oregon Scientific. Equipée des
PRECAUTIONS
fonctions horloge, chronomètre, alarme; rétro-éclairage et
Pour vous assurer d'utiliser correctement et en toute sécurité
verrouillage des touches, vous pouvez également utiliser
ce produit, veuillez lire les mises en garde et l'ensemble de
cette montre pour obtenir les prévisions météo.
ce manuel avant toute utilisation :
•
Utilisez un tissu doux. Ne pas utiliser de produits de
IMPORTANT
nettoyage abrasifs ou corrosifs pouvant endommager
•
Les fonctions de mesure de l'appareil RA121 ne doivent
MODE HEURE
l'appareil. Nettoyez la montre avec de l'eau tiède
pas se substituer aux dispositifs de précision industriels
Vous pouvez utiliser ce mode pour visualiser l'heure, les
et un savon non agressif après chaque séance
ni aux mesures effectuées par des professionnels.
prévisions météo et pour régler l'heure et la date.
d'entraînement. Ne jamais utiliser d'eau chaude et ne
Les relevés enregistrés par cet appareil doivent être
pas le ranger s'il est toujours humide.
considérés uniquement comme des représentations
•
Ne pas soumettre le produit à une force excessive, au
POUR RÉGLER L'HEURE ET LA DATE
plus ou moins précises.
choc, à la poussière, aux changements de températures
1.
Appuyez sur MODE pour naviguer dans le Mode Heure.
•
Oregon Scientific ™ ne peut être tenu responsable de la
ou à l'humidité. Ne pas exposer longtemps ce produit au
perte de la montre ni des réclamations de tierces parties
2.
Appuyez et maintenez la touche SET pour avoir accès
soleil. De telles actions peuvent endommager l'appareil.
aux réglages.
relatives à son utilisation.
•
Ne pas trafiquer les composants internes. Cela pourrait
3.
Appuyez sur ST/SP/+ ou RST/- pour modifier les réglages.
annuler votre garantie et endommager l'appareil.
Appuyez et maintenez ST/SP/+ ou RST/- pour modifier
L'appareil principal est composé de parties non
TOUCHES DE COMMANDE
rapidement les valeurs.
accessibles aux utilisateurs.
4.
Appuyez sur SET pour confirmer le réglage et passer au
•
Ne pas érafler l'écran LCD avec des objets durs, il
suivant. Recommencez les étapes 3 et 4 pour chaque
pourra être endommagé.
option de réglage. Les options de réglage se présentent
•
Soyez prudent lors de la manipulation des piles.
de la manière suivante : Heure : format 12 ou 24 h ;
•
Retirez les piles à chaque fois que vous rangez le
heure ; minute ; année ; mois-jour / jour-mois; mois ;
produit pour une période indéterminée.
jour ; bip on/off.
•
Lors du changement de piles, veuillez utiliser des piles
1
3
neuves comme indiqué dans ce manuel.
5.
Appuyez sur MODE pour confirmer et sortir.
•
Ce produit est un instrument de précision. Ne jamais le
démonter. Veuillez contacter votre revendeur ou le service
MODE DATE
après-vente si le produit nécessite une réparation.
4
Utilisez ce mode pour visualiser la date actuelle et les
•
Ne jamais toucher les circuits électriques, et ce pour
prévisions météo. Appuyez sur MODE pour naviguer dans
éviter toute électrocution.
le Mode Date.
•
Vérifiez toutes les fonctions importances si l'appareil n'a
2
5
pas été utilisé depuis un moment. Testez et nettoyez
MODE CHRONOMETRE (CHRONO)
régulièrement l'appareil. Faîtes réviser une fois par an
votre montre par un service d'entretien autorisé.
POUR LANCER / ARRÊTER LE CHRONOMÈTRE
•
Quand vous désirez vous débarrassez de ce produit,
1.
Appuyez sur MODE pour naviguer dans le Mode
jetez le selon les lois relatives aux déchets de votre pays
Chronomètre.
de résidence.
2.
Appuyez sur ST/SP/+ pour mettre en marche le
•
En raison des limitations d'impressions, les images de ce
chronomètre.
manuel peuvent être différentes de l'affichage actuel.
1.
MODE : Permet de passer à un autre mode, de sortir
•
Le contenu du présent manuel ne peut être reproduit
rapidement du mode de réglage
sans la permission du fabriquant.
REINITIALISER LE CHRONOMETRE
2.
SET : Permet d'entrer dans le mode réglage ou de
Appuyez sur RST/- pour réinitialiser le chronomètre.
confirmer les valeurs d'un réglage
REMARQUE Les caractéristiques techniques de ce
3.
ST/SP/ + : Permet d'augmenter la valeur d'un réglage,
REMARQUE
Vous pouvez seulement réinitialiser le chronomètre
produit et le contenu de ce manuel peuvent être soumis à
de lancer/arrêter le chronomètre
à
00:00:00 si vous l'avez arrêté ou mis en pause.
modifications sans préavis.
4.
/
: Active le rétro-éclairage et le verrouillage des
touches
À PROPOS D'OREGON SCIENTIFIC
MODE ALARME
5.
RST / -: Permet de diminuer la valeur d'un réglage, de
POUR RÉGLER L'ALARME
Pour plus d'informations sur les produits Oregon Scientific
réinitialiser le chronomètre
France, rendez-vous sur notre site:www.oregonscientific.fr.
1.
Appuyez sur MODE pour naviguer dans le Mode
Si vous êtes aux Etats-Unis, vous pouvez contacter notre
ECRAN LCD
Alarme.
support consommateur directement sur le site:
2.
Appuyez et maintenez la touche SET pour avoir accès
www2.oregonscientific.com/service/support.asp
aux réglages.
OU par téléphone au: 1-800-853-8883
3.
Appuyez sur ST/SP/+ ou RST/- pour modifier les réglages.
Pour des renseignements internationaux, rendez vous sur le
1
Appuyez et maintenez ST/SP/+ ou RST/- pour modifier
site: www2.oregonscientific.com/about/international.asp.
2
rapidement les valeurs.
4.
Appuyez sur SET pour confirmer le réglage et passer au
3
5
EUROPE - DÉCLARATION DE CONFORMITÉ
suivant. Recommencez les étapes 3 et 4 pour chaque
6
Par la présente, Oregon Scientific déclare que METEO
option de réglage. Les options de réglage se présentent
4
Montre station météo (Modèle: RA121) est conforme à la
de la manière suivante : heure, minute.
directive européenne 89/336/CE. Une copie signée et datée
5.
Appuyez sur MODE pour confirmer et sortir.
de la déclaration de conformité est disponible sur demande
7
auprès de notre Service Client.
POUR ACTIVER/ DÉSACTIVER L'ALARME
8
1.
Appuyez sur MODE pour naviguer dans le Mode
Alarme.
1.
Affichage des prévisions météo
2.
Appuyez sur ST/SP/+ ou RST/- pour activer / désactiver
2.
: Indique que les touches sont verrouillées
l'alarme.
indique que l'alarme est activée.
3.
: Indique que le bip est désactivé
3.
Appuyez sur MODE pour confirmer et sortir.
4.
Affiche l'horloge, le calendrier, le chronomètre, l'heure
de l'alarme ou les bannières des modes
COUPER LE SON DE L'ALARME
5.
: Indique que l'alarme est activée
Lorsque l'alarme est activée, elle sonnera chaque jour
6.
: Indique si le chronomètre s'affiche ou est en
à l'heure préprogrammée. Appuyez sur n'importe quelle
fonctionnement
touche pour arrêter l'alarme.
7.
: Horloge format 12 H
REMARQUE L'alarme est encore activée et se déclenchera
8.
ou
: Indique que la pile est faible
à nouveau le jour suivant.
AU COMMENCEMENT
RETRO-ECLAIRAGE ET VERROUILLAGE
METTRE EN MARCHE
L'APPAREIL
(UNIQUEMENT
DES TOUCHES
LORS DE LA PREMIÈRE UTILISATION)
Pour activer le rétro-éclairage :
Appuyez sur n'importe quel bouton pendant 2 secondes
pour activer l'écran LCD.
Appuyez sur
/
pendant 5 secondes, pour activer
le rétro-éclairage.
REMPLACER LA PILE
REMARQUE
La fonction rétro-éclairage ne fonctionnera
Le modèle fonctionne avec une pile au lithium CR2032,
pas si "
"ou "
" sont affichés.
d'ores et déjà installée. Voir ci-dessous pour toute
recommandation relative à la pile.
Pour alterner entre le verrouillage ou le déverrouillage
INDICATION
DESCRIPTION
des touches :
La pile de la montre est faible.
Appuyez et maintenez
/
pendant 2 secondes.
indique que les boutons sont verrouillés.
S'affiche lorsque la pile est trop
faible pour fonctionner.
Les icônes de prévisions météo
PRÉVISIONS MÉTÉOROLOGIQUES
ne s'affichent pas.
La montre vous fournit les prévisions météo pour les
prochaines 12 à 24 heures.
REMARQUE Si l'icône de faiblesse des piles s'affiche, les
fonctions de prévisions météo, de bip de l'alarme et du rétro-
éclairage seront désactivées. Elles reviendront en mode
normal une fois les piles remplacées.
Partiellement
Ensoleillé
Nuageux
Pluvieux
nuageux
REMARQUE Si vous devez remplacer la pile, nous vous
recommandons de contacter le distributeur ou le service
UTILISATION DANS L'EAU
clientèle.
Le modèle RA121 est étanche, jusqu'à 30 mètres de
Pour remplacer la pile :
profondeur (98 pieds).
PLONGEON
PLONGEE
PLUIE
DOUCHE
NATATION /
ECLABOUS
(EAU TIEDE
EAU PEU
EN EAU PEU
AVEC TUBA
PROFONDE
PROFONDE
EAU
SURES
ET FROIDE)
ETC
SURF / SPORTS
PROFONDE
NAUTIQUES
30 M / 98
OK
NON
NON
NON
NON
PIEDS
1.
Utilisez un petit tournevis pour retirer le couvercle du
compartiment des piles. Une fois ouvert, placez les vis
REMARQUE Réglez la montre avant de l'exposer à un
dans un endroit où vous êtes certain de les récupérer.
volume d'eau trop important. Appuyer sur les touches
2.
Remplacez la pile usagée et insérez la nouvelle en
lorsque vous êtes dans l'eau ou lorsque vous êtes exposé
respectant les signes de polarité.
à de fortes pluies peut provoquer des infiltrations d'eau à
3.
Replacez le couvercle en serrant les vis à l'aide du
l'intérieur de la montre.
tournevis.
MODES DE FONCTIONNEMENT
Appuyez sur MODE pour alterner entre :
•
Mode Heure
•
Mode Date
•
Mode Chronomètre (Chrono)
•
Mode Alarme
METEO
Wettervorhersage-Uhr
Format 12 ou 24 h avec heure /
Modell: RA121
minute / seconde
00:00:00 à 99:59:59 (hr:min:sec)
BEDIENUNGSANLEITUNG
1 pile CR2032 3 V
0°C à 40°C
DE
(32°F à 104°F)
-20°C à 60°C
EINLEITUNG
(-40°F à 140°F)
Wir danken Ihnen, dass Sie sich für die METEO
Wettervorhersage-Uhr von Oregon Scientific™ (RA121)
entschieden haben. Diese Armbanduhr ist mit einer
Echtzeituhr, Stoppuhr, Alarm, Hintergrundbeleuchtung und
Tastensperre ausgestattet und kann darüber hinaus zur
Erstellung der täglichen Wettervorhersage benutzt werden.
UHRZEITMODUS
WICHTIG
•
Die in der RA121 integrierten Messfunktionen sind nicht
Dieser Modus wird verwendet, um die aktuelle Zeit und die
dafür vorgesehen, professionelle Messinstrumente
Wettervorhersage anzuzeigen, sowie zur Einstellung von
oder industrielle Präzisionsgeräte zu ersetzen. Die
Uhrzeit und Datum.
von diesem Gerät erzeugten Werte sollten lediglich als
Richtwerte angesehen werden.
SO STELLEN SIE ZEIT UND DATUM EIN
•
Oregon Scientific™ übernimmt keine Haftung für
1.
Drücken Sie auf MODE, um zum Uhrzeitmodus zu
Verluste oder andere Ansprüche Dritter, die durch die
navigieren.
Verwendung dieser Uhr entstehen könnten.
2.
Halten Sie SET gedrückt, um die Einstellungen
aufzurufen.
BEDIENTASTEN
3.
Drücken Sie auf ST/SP/+ oder RST/-, um die Werte der
Einstellung zu ändern. Halten Sie ST/SP/+ oder RST/-
gedrückt, um die Werte rasch zu ändern.
4.
Drücken Sie auf SET, um die Einstellung zu bestätigen
und
zur
nächsten
überzugehen.
Sie die Schritte 3-4 für jede Einstellungsoption.
Die Einstellungsoptionen lauten wie folgt: 12- / 24-
Stundenzeit; Stunde; Minute; Jahr; Monat-Tag / Tag-
1
3
Monat; Monat; Tag; Signalton Ein/Aus.
5.
Drücken Sie zu einem beliebigen Zeitpunkt auf MODE,
4
um die Einstellungen zu bestätigen und zu beenden.
DATUMSMODUS
2
5
Dieser Modus wird verwendet, um das aktuelle Datum und
die Wettervorhersage anzuzeigen. Drücken Sie auf MODE,
um zum Datumsmodus zu navigieren.
STOPPUHR-MODUS (CHRONO)
SO STARTEN / BEENDEN SIE DIE STOPPUHR
1.
Drücken Sie auf MODE, um zum Chronomodus zu
1.
MODE: Auf andere Anzeige wechseln; rasches Beenden
navigieren.
eines beliebigen Einstellungsmodus
2.
Drücken Sie auf ST/SP/+, um die Stoppuhr zu starten /
2.
SET: Einstellungsmodus aufrufen; Einstellungswert
zu beenden.
bestätigen
3.
ST / SP/ + : Wert der Einstellung erhöhen; Stoppuhr
SO SETZEN SIE DIE STOPPUHR ZURÜCK
starten / beenden
Drücken Sie auf RST/-, um die Stoppuhr zurückzusetzen.
4.
/
: Hintergrundbeleuchtung aktivieren; Tasten
sperren
HINWEIS Die Stoppuhr kann nur auf 00:00:00 zurückgesetzt
werden, wenn sie beendet oder unterbrochen wurde.
5.
RST / -: Wert der Einstellung verringern; Stoppuhr
zurücksetzen
ALARMMODUS
LCD-ANZEIGE
SO STELLEN SIE DEN ALARM EIN
1.
Drücken Sie auf MODE, um zum Alarmmodus zu
navigieren.
1
2.
Halten Sie SET gedrückt, um die Einstellungen
2
aufzurufen.
3
5
3.
Drücken Sie auf ST/SP/+ oder RST/-, um die Werte der
Einstellung zu ändern. Halten Sie ST/SP/+ oder RST/-
6
gedrückt, um die Werte rasch zu ändern.
4
4.
Drücken Sie auf SET, um die Einstellung zu bestätigen
und zur nächsten überzugehen. Wiederholen Sie
die Schritte 3-4 für jede Einstellungsoption. Die
7
Einstellungsoptionen lauten wie folgt: Stunde; Minute.
8
5.
Drücken Sie zu einem beliebigen Zeitpunkt auf MODE,
um die Einstellungen zu bestätigen und zu beenden.
1.
Wettervorhersage anzeigen
2.
: Gibt an, dass die Tasten gesperrt sind
SO AKTIVIEREN / DEAKTIVIEREN SIE DEN ALARM
3.
: Gibt an, dass der Signalton ausgeschaltet ist
1.
Drücken Sie auf MODE, um zum Alarmmodus zu
4.
Uhr, Kalender, Stoppuhr, Alarmzeit oder Modusbanner
navigieren.
anzeigen
2.
Drücken Sie auf ST/SP/+ oder RST/-, um den Alarm zu
5.
: Gibt an, dass der Alarm aktiviert ist
aktivieren / zu deaktivieren.
gibt an, dass der Alarm
aktiviert wurde.
6.
: Gibt an, dass die Stoppuhr angezeigt oder
3.
Drücken Sie zur Bestätigung und zum Beenden auf
ausgeführt wird
MODE.
7.
: 12-Stundenuhr
8.
oder
: Gibt an, dass die Ladung der Batterie
SO SCHALTEN SIE DEN ALARM STUMM
niedrig ist
Wenn die Alarmuhr aktiviert wurde, ertönt sie täglich zur
eingestellten Zeit. Drücken Sie eine beliebige Taste, um den
ERSTE SCHRITTE
Alarm für den aktuellen Tag zu beenden.
GERÄT EINSCHALTEN (NUR BEI ERSTMALIGER
INBETRIEBNAHME)
HINWEIS Die Alarmuhr ist nach wie vor aktiv und wird am
Drücken Sie 2 Sekunden lang auf eine beliebige Taste, um
darauffolgenden Tag erneut ausgelöst.
die LCD-Anzeige zu aktivieren.
HINTERGRUNDBELEUCHTUNG UND
BATTERIEWECHSEL
TASTENSPERRE
Die RA121 benötigt 1 Batterie des Typs CR2032, 3V, die
So aktivieren Sie die Hintergrundbeleuchtung:
bereits im Gerät installiert ist. Die Batteriewarnanzeigen
Drücken Sie auf
/
, um die Hintergrundbeleuchtung
werden nachstehend erläutert.
5 Sekunden lang einzuschalten.
ANZEIGE
BESCHREIBUNG
HINWEIS Die Hintergrundbeleuchtung funktioniert nicht,
Die Ladung der Batterie ist niedrig.
wenn "
" oder "
" angezeigt wird.
Die Ladung der Batterie ist für den
Betrieb zu niedrig. Das Wettersymbol
So schalten Sie die Tastensperre ein oder aus:
ist gelöscht.
Halten Sie
/
2 Sekunden lang gedrückt.
dass die Tasten gesperrt sind.
HINWEIS Während das Symbol für die schwache
Batterie angezeigt wird, sind die Wettervorhersage, die
WETTERVORHERSAGE
Alarmsignalisierung
und
die
Hintergrundbeleuchtung
Diese Uhr erstellt eine Wettervorhersage der nächsten 12
deaktiviert. Das Gerät nimmt den regulären Betrieb wieder
auf, wenn die Batterie ersetzt wurde.
bis 24 Stunden.
HINWEIS Wenn Sie die Batterie austauschen müssen,
empfehlen wir dringend, sich an Ihren Fachhändler oder
unsere Kundendienststelle zu wenden.
Teilweise
Sonnig
Bewölkt
bewölkt
So wechseln Sie die Batterie:
VERWENDUNG IM WASSER
Die RA121 ist bis zu 30 m (98 Fuß) wasserfest.
REGENS
DUSCHEN
LEICHTES
TAUCHEN IN
PRITZER
(NUR
SCHWIMMEN /
FLACHEM
USW.
WARMES /
FLACHEM
WASSER /
KALTES
SURFEN/
WASSER
WASSER-
WASSER)
1.
Öffnen Sie den Batteriefachdeckel mit einem kleinen
SPORT
Kreuzschraubenzieher. Bewahren Sie die Schrauben
anschließend an einem sicheren Ort auf, damit sie nicht
OK
NEIN
NEIN
NEIN
30M
verloren gehen.
2.
Entnehmen Sie die alte Batterie, legen Sie die neue ein und
HINWEIS Stellen Sie die Uhr ein, bevor Sie sie im Wasser
achten Sie auf die Übereinstimmung der Polaritäten.
tragen. Wenn die Tasten im Wasser oder bei heftigem Regen
3.
Bringen Sie den Deckel mit dem Kreuzschraubenzieher
gedrückt werden, kann Wasser in die Uhr gelangen.
wieder an.
BETRIEBSMODI
Drücken Sie auf MODE, um zwischen folgenden Modi
umzuschalten:
•
Uhrzeitmodus
•
Datumsmodus
•
Chronomodus (Stoppuhr)
•
Alarmmodus
TECHNISCHE DATEN
12-/24-Stundenformat mit Stunde /
Echtzeituhr
Minute / Sekunde
Stoppuhr
00:00:00 bis 99:59:59 (Std:Min:Sek)
Stromversorgung
1 Batterie CR2032 3V
Betriebstemperatur
0 °C bis 40 °C (32 °F bis 104 °F)
Lagertemperatur
-20 °C bis 60 °C (-4 °F bis 140 °F)
VORSICHTSMASSNAHMEN
Um sicherzustellen, dass Sie Ihr Produkt richtig und sicher
verwenden, lesen Sie bitte diese Warnhinweise und die
gesamte Bedienungsanleitung vor Inbetriebnahme des
Geräts durch:
•
Verwenden Sie ein weiches, leicht feuchtes Tuch.
Nehmen Sie keine scheuernden oder ätzenden
Reinigungsmittel, da diese das Gerät beschädigen
können. Verwenden Sie das Produkt niemals in heißem
Wasser und lagern Sie es nicht in feuchtem Zustand.
•
Setzen
Sie
das
Gerät
keiner
übermäßigen
Gewalteinwirkung und keinen Stößen aus, und halten
Sie es von Staub, Temperaturschwankungen oder
Feuchtigkeit sowie längerer, direkter Sonnenbestrahlung
fern, da dies zu Funktionsstörungen führen kann.
•
Nehmen Sie keine Änderungen an den internen
Komponenten des Geräts vor. Dies kann zu einem
Verlust der Garantie führen und eine Beschädigung des
Geräts verursachen. Das Hauptgerät enthält keine Teile,
die vom Benutzer selbst repariert werden dürfen.
•
Kratzen Sie nicht mit harten Gegenständen an der LCD-
Anzeige, da diese beschädigt werden könnte.
Wiederholen
•
Seien
Sie
vorsichtig
beim
Umgang
mit
allen
Batterietypen.
•
Entfernen Sie alle Batterien, wenn Sie das Produkt über
einen längeren Zeitraum lagern möchten.
•
Verwenden Sie beim Batteriewechsel nur neue Batterien,
wie in dieser Bedienungsanleitung angegeben.
•
Dieses Produkt ist ein Präzisionsgerät. Versuchen Sie
niemals, das Gerät zu zerlegen. Wenden Sie sich bitte
an Ihren Händler oder unsere Kundendienststelle, falls
das Produkt eine Wartung erfordert.
•
Berühren Sie keine ungeschützten, elektronischen
Schaltungen, da sonst die Gefahr eines elektrischen
Schlags besteht.
•
Überprüfen Sie alle Hauptfunktionen des Geräts, wenn
dieses längere Zeit nicht benutzt wurde. Sorgen Sie für
eine regelmäßige Kontrolle und Reinigung Ihres Geräts.
Lassen Sie Ihre Uhr jährlich bei einer zugelassenen
Service-Zentrale warten.
•
Entsorgen Sie das Produkt nicht im allgemeinen
Hausmüll,
sondern
ausschließlich
in
den
dafür
vorgesehenen kommunalen Sammelstellen, die Sie bei
Ihrer Gemeinde erfragen können.
•
Aufgrund
der
technischen
Druckeinschränkungen
können sich die in dieser Anleitung dargestellten
Abbildungen vom Original unterscheiden.
•
Der Inhalt dieser Anleitung darf nicht ohne Genehmigung
des Herstellers vervielfältigt werden.
HINWEIS
Die technischen Daten für dieses Produkt
und der Inhalt der Bedienungsanleitung können ohne
Benachrichtigung geändert werden.
ÜBER OREGON SCIENTIFIC
Besuchen Sie unsere Website www.oregonscientific.de und
erfahren Sie mehr über unsere Oregon Scientific-Produkte.
Auf der Website finden Sie auch Informationen, wie Sie
im Bedarfsfall unseren Kundendienst erreichen und Daten
herunterladen können.
Für internationale Anfragen besuchen Sie bitte unsere
Website:
www2.oregonscientific.com/about/international.asp.
EU-KONFORMITÄTSERKLÄRUNG
Hiermit
erklärt
Oregon
Scientific,
dass
METEO
Wettervorhersage-Uhr (Modell: RA121) mit der EMC Richtlinie
89/336/CE übereinstimmt. Eine Kopie der unterschriebenen
und
mit
Datum
versehenen
Konformitätserklärung
erhalten Sie auf Anfrage über unseren Oregon Scientific
Kundendienst.
gibt an,
Regnerisch
SCHNORC
HELN
IN TIEFEM
WASSER
TAUCHE
NEIN
1/2/08 3:06:00 PM
Advertisement

Subscribe to Our Youtube Channel
Related Manuals for Oregon Scientific RA121


Summary of Contents for Oregon Scientific RA121
- Page 1 ACCENSIONE DEL DISPOSITIVO (SOLO LA PRIMA sono visualizzate le icone “ ”o “ ”. le rétro-éclairage. HINTERGRUNDBELEUCHTUNG UND VOLTA) The RA121 uses a CR2032 3V battery, which has already Partially Attivazione / disattivazione del blocco dei tasti: REMPLACER LA PILE Sunny Cloudy Rainy...
- Page 2 Toetsblokkering Aan of Uit zetten: VATTEN) horloge zit. Zie de hieronder voor batterijwaarschuwingen. El RA121 funciona con 1 pila CR2032 de 3V que ya lleva Para activar / desactivar el bloqueo de botones: O RA121 usa uma bateria CR2032 de 3V, já instalada.
Need help?
Do you have a question about the RA121 and is the answer not in the manual?
Questions and answers