Oregon Scientific METEO RA121 User Manual
Meteo weather forecast watch
Hide thumbs
Also See for METEO RA121:
- User manual (2 pages) ,
- User manual (2 pages) ,
- User manual (11 pages)
Advertisement
Available languages
Available languages
Quick Links
METEO
Weather Forecast Watch
Model: RA121
USER MANUAL
EN
INTRODUCTION
Thank you for selecting the Oregon Scientific™ METEO
Weather Forecast Watch (RA121). Equipped with real-
time clock, stopwatch, alarm, backlight and keypad lock
functions, this watch can also be used for providing daily
weather forecast.
IMPORTANT
•
The measurement functions built into the RA121 are
not meant to substitute professional measurement
or industrial precision devices. Values produced
by this device should be considered as reasonable
representations only.
•
Oregon Scientific™ assumes no responsibility for
any loss, or any claims by third parties that may arise
through the use of this device.
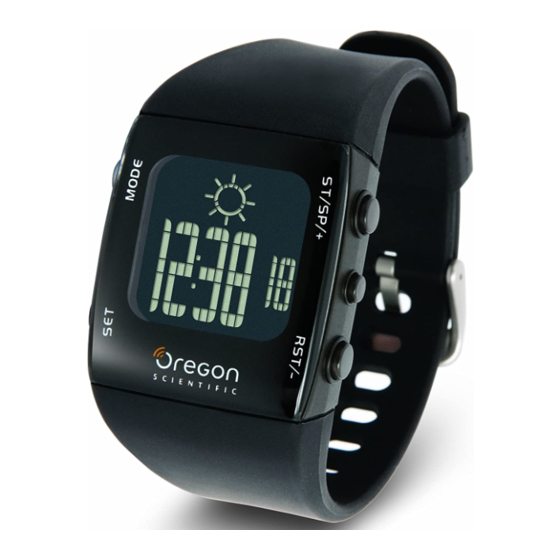
CONTROL BUTTONS
1
3
4
2
5
1.
MODE: Switch to another display; quick exit during any
setting mode
2.
SET: Enter setting mode; confirm setting value
3.
ST / SP / + : Increase value of the setting; start / stop
stopwatch
4.
/
: Activate backlight; lock keypad
5.
RST / -: Decrease value of the setting; reset stopwatch
LCD
1
2
3
4
1.
Displays weather forecast
2.
: Indicates keypad is locked
3.
: Indicates beep tone is turned Off
4.
Displays clock, calendar, stop watch, alarm time or
mode banners
5.
: Indicates alarm is On
6.
: Indicates stopwatch is displayed or running
7.
: 12 hour clock
8.
or
: Indicates battery power is low
GETTING STARTED
TURN ON DEVICE (FIRST-TIME USE ONLY)
Press any key for 2 seconds to activate the LCD display.
BATTERY REPLACEMENT
The RA121 uses a CR2032 3V battery, which has already
been installed. See below for battery warnings.
INDICATION
DESCRIPTION
The battery is low.
The battery is too low to operate.
The weather icon is cleared.
NOTE While the low battery icon is displayed, weather
forecast, alarm beeping and backlight are disabled. It will
return to normal once battery has been replaced.
NOTE If you need to replace the battery, we highly
recommend you to contact the retailer or our customer
service department.
To replace the battery:
1.
Use a small Phillips screwdriver to remove battery
compartment lid. Once opened, please keep the screws
in a safe place to avoid losing them.
2.
Remove the old battery and insert the new one, matching
the polarities.
3.
Replace the lid by screwing it back into place using a
Phillips screwdriver.
OPERATING MODES
Press MODE to switch between:
•
Time Mode
•
Date Mode
•
Chrono (Stopwatch) Mode
•
Alarm Mode
TIME MODE
This mode is used for viewing the current time and weather
forecast, and for setting the time and date.
TO SET TIME AND DATE
1.
Press MODE to navigate to Time Mode.
2.
Press and hold SET to enter settings.
3.
Press ST/SP/+ or RST/- to change values of the setting.
Press and hold ST/SP/+ or RST/- to rapidly change
values.
4.
Press SET to confirm and move to the next setting.
Repeat steps 3-4 for each setting option. The setting
options are as follows: 12 / 24-hour time; hour; minute;
year; month-day / day-month; month; day; beep on/off.
5.
Press MODE anytime to confirm and exit settings.
DATE MODE
This mode is used for viewing the current date and weather
forecast. Press MODE to navigate to Date Mode.
STOPWATCH MODE (CHRONO)
TO START / STOP STOPWATCH
1.
Press MODE to navigate to Chrono Mode.
2.
Press ST/SP/+ to start / stop stopwatch.
TO RESET STOPWATCH
Press RST/- to reset stopwatch.
NOTE Stopwatch can be reset to 00:00:00 only if it has been
stopped or paused.
ALARM MODE
TO SET ALARM
1.
Press MODE to navigate to Alarm Mode.
2.
Press and hold SET to enter settings.
3.
Press ST/SP/+ or RST/- to change values of the setting.
Press and hold ST/SP/+ or RST/- to rapidly change
values.
4.
Press SET to confirm and move to the next setting.
Repeat steps 3-4 for each setting option. The setting
options are as follows: hour; minute.
5.
Press MODE anytime to confirm and exit settings.
TO ACTIVATE / DEACTIVATE ALARM
1.
Press MODE to navigate to Alarm Mode.
2.
Press ST/SP/+ or RST/- to activate / deactivate alarm.
indicates that the alarm has been activated.
5
3.
Press MODE to confirm and exit.
6
TO SILENCE ALARM
When the alarm clock is activated, it will sound at the set time
every day. Press any button to stop the alarm for that day.
7
8
NOTE The alarm clock is still active and will set off again the
following day.
BACKLIGHT AND KEYPAD LOCK
To activate backlight:
Press
/
to turn backlight On for 5 seconds.
NOTE The backlight function will not operate if "
"
" is displayed.
To toggle keypad lock On or Off:
Press and hold
/
for 2 seconds.
is locked.
WEATHER FORECAST
This watch forecasts the next 12 to 24 hours of weather.
Partially
Sunny
Cloudy
Cloudy
USE IN THE WATER
The RA121 is water-resistant up to 30 meters (98 feet).
RAIN
SHOWERING
LIGHT
SPLASHES
(WARM /
SWIMMING /
ETC
COOL
SHALLOW
WATER
WATER
ONLY)
30M /
OK
NO
NO
98 FEET
NOTE Set the watch before exposing it to excessive water.
Pressing the keys while in the water or during heavy
rainstorms may cause water to enter the watch.
SPECIFICATIONS
12/24 format with hour / minute /
Real time clock
second
Stopwatch
00:00:00 to 99:59:59 (hr:min:sec)
Power
1 x CR2032 3V battery
Operating temperature
0°C to 40°C (32°F to 104°F)
Storage temperature
-20°C to 60°C (-4°F to 140°F)
PRECAUTIONS
To ensure you use your product correctly and safely, read
these warnings and the entire user manual before using the
product:
•
Use a soft, slightly moistened cloth. Do not use abrasive
or corrosive cleaning agents, as these may cause
damage. Use lukewarm water and mild soap to clean
the watch. Never use the products in hot water or store
them when wet.
•
Do not subject the product to excessive force, shock,
dust, temperature changes, or humidity. Never expose
the product to direct sunlight for extended periods. Such
treatment may result in malfunction.
•
Do not tamper with the internal components. Doing
so will terminate the product warranty and may cause
damage. The main unit contains no user-serviceable
parts.
•
Do not scratch hard objects against the LCD display as
this may cause damage.
•
Take precautions when handling all battery types.
•
Remove the batteries whenever you are planning to
store the product for a long period of time.
•
When replacing batteries, use new batteries as specified
in this user manual.
•
The product is a precision instrument. Never attempt
to take this device apart. Contact the retailer or our
customer service department if the product requires
servicing.
•
Do not touch the exposed electronic circuitry, as there is
a danger of electric shock.
•
Check all major functions if the device has not been
used for a long time. Maintain regular internal testing
and cleaning of your device. Have your watch serviced
by an approved service center annually.
•
When disposing of this product, ensure it is collected
separately for special treatment and not as normal
household waste.
•
Due to printing limitations, the displays shown in this
manual may differ from the actual display.
•
The contents of this manual may not be reproduced
without the permission of the manufacturer.
NOTE The technical specifications for this product and the
contents of the user manual are subject to change without
notice.
ABOUT OREGON SCIENTIFIC
Visit our website (www.oregonscientific.com) to learn more
about Oregon Scientific products. If you're in the US and
would like to contact our Customer Care department directly,
please visit: www2.oregonscientific.com/service/support
OR
Call 1-800-853-8883.
For international inquiries, please visit:
www2.oregonscientific.com/about/international
EU-DECLARATION OF CONFORMITY
Hereby, Oregon Scientific, declares that this METEO
Weather Forecast Watch (Model RA121) is in compliance
with EMC directive 89/336/CE. A copy of the signed and
dated Declaration of Conformity is available on request via
our Oregon Scientific Customer Service.
" or
indicates keypad
Rainy
SHALLOW
SNORKELING/
DIVING /
DEEP
SURFING /
WATER
WATER
DIVING
SPORTS
NO
NO
METEO
Orologio con pr
meteorologi
MODELLO: R
MANUALE PER L'
IT
INTRODUZIONE
Grazie per aver scelto l'orologio l
previsioni meteorologiche di Orego
Questo apparecchio è dotato di orolog
retroilluminazione e blocco dei tasti,
avere costantemente previsoni del te
IMPORTANTE
•
Le funzioni di rilevazione d
sostituiscono quelle di dispo
industriali di misurazione o di pre
visualizzate da questo dispo
considerate puramente indicative
•
Oregon Scientific™ declina q
per qualsiasi perdita o per even
da parti di terzi che possono sor
dispositivo.
PULSANTI DI CONTROLLO
1
2
1.
MODE: consente di passare ad
e di abbandonare rapidame
impostazione
2.
SET: consente di accedere alla m
e di confermare le impostazioni
3.
ST / SP/ + : consente di
dell'impostazione
e
di
av
cronometro.
4.
/
: consente di attivare la
blocco dei tasti
5.
RST / -: consente di diminuire il v
e di azzerare il cronometro
LCD
1
2
3
4
1.
Visualizza le previsioni meteorol
2.
: indica che il blocco dei tasti
3.
: indica che il segnale acustic
4.
Visualizza orologio, calendario,
sveglia o banner delle modalità
5.
: indica che la sveglia è attiva
6.
: indica che il cronometro vie
in funzione
7.
: orologio in formato 12 ore
8.
oppure
: indica
esaurimento
OPERAZIONI PRELIMINARI
ACCENSIONE DEL DISPOSITIVO (
VOLTA)
Per attivare il display LCD, premere
2 secondi.
SOSTITUZIONE DELLE BATTER
L'unità RA121 funziona con una ba
già inserita. Fate riferimento alla tab
informazioni relative alla batteria.
INDICAZIONE
DESCRIZION
La batteria è in
La carica è
mettere in fun
delle prevision
NOTA Mentre viene visualizzata l'
esaurimento, la funzione delle previ
segnale acustico della sveglia e la
disattivati. La visualizzazione ritorne
aver sostituito la batteria.
NOTA Se è necessario sostituire l
di contattare il proprio rivenditore
assistenza clienti.
Sostituzione delle batterie:
1.
Con un piccolo cacciavite Phillip
del vano batterie. Una volta ape
luogo sicuro per evitare di perde
2.
Togliere la batteria vecchia ed
rispettando le polarità.
3.
Riavvitare la copertura con il cac
MODALITÀ DI FUNZIONAMENT
Premere MODE per scorrere tra:
•
Modalità ora
•
Modalità data
•
Modalità Chrono (cronometro)
•
Modalità Sveglia
Advertisement

Subscribe to Our Youtube Channel
Related Manuals for Oregon Scientific METEO RA121


Summary of Contents for Oregon Scientific METEO RA121
- Page 1 GETTING STARTED WEATHER FORECAST TURN ON DEVICE (FIRST-TIME USE ONLY) This watch forecasts the next 12 to 24 hours of weather. Press any key for 2 seconds to activate the LCD display. BATTERY REPLACEMENT The RA121 uses a CR2032 3V battery, which has already Sunny been installed.
- Page 2 Los contenidos de este manual no pueden reproducirse sin permiso del fabricante. NOTA este manual de usuario pueden cambiarse sin aviso. SOBRE OREGON SCIENTIFIC Visite nuestra página web (www.oregonscientific.com) para conocer más sobre los productos de Oregon Scientific. Si está en EE.UU y quiere contactar directamente con Pulse MODE para navegar por el Modo de Alarma.
- Page 3 Herstellers vervielfältigt werden. HINWEIS und der Inhalt der Bedienungsanleitung können ohne Benachrichtigung geändert werden. ÜBER OREGON SCIENTIFIC Besuchen Sie unsere Website www.oregonscientific.de und erfahren Sie mehr über unsere Oregon Scientific-Produkte. Auf der Website finden Sie auch Informationen, wie Sie im Bedarfsfall unseren Kundendienst erreichen und Daten herunterladen können.
- Page 4 être soumis à Vous pouvez seulement réinitialiser le chronomètre modifications sans préavis. À PROPOS D’OREGON SCIENTIFIC Pour plus d‘informations sur les produits Oregon Scientific France, rendez-vous sur notre site:www.oregonscientific.fr. Appuyez sur MODE pour naviguer dans le Mode Si vous êtes aux Etats-Unis, vous pouvez contacter notre...
- Page 5 Lo smaltimento abusivo del prodotto da parte dell’utente comporta l’applicazione delle sanzioni amministrative previste dalla normativa vigente INFORMAZIONI SU OREGON SCIENTIFIC Per avere maggiori informazioni sui nuovi prodotti Oregon Scientific visita il nostro sito internet www.oregonscientific.it, dove potrai trovare tutte le informazioni di cui hai bisogno.
- Page 6 De technische specificaties van dit product en de inhoud van de handleiding zijn zonder voorafgaande waarschuwing aan veranderingen onderhevig. OVER OREGON SCIENTIFIC Bezoek onze website (www.oregonscientific.com) om meer Druk MODE om naar de chronometermodus te gaan. te weten over uw nieuwe product en andere Oregon Scientific Druk ST/SP/+ om de chronometer te starten / stoppen.
-
Page 7: Manual Do Usuário
NOTA As especificações técnicas deste produto e o conteúdo do manual do usuário estão sujeitos a alteração sem aviso prévio. SOBRE A OREGON SCIENTIFIC MODE: Wisselen van scherm; verlaten Visite nosso site (www.oregonscientific.com.br) para saber SET: Instellingsmodus openen;... - Page 8 Oregon Scientific intygar härmed att denna METEO väderprognosklocka med EMC direktivet 89/336/CE. En signerad kopia av “DECLARATION OF CONFORMITY” kan erhållas vid hänvändelse till OREGON SCIENTIFIC servicecenter. indikerar att alarmet aktiverats. för att tända belysningen i 5 sek. ” ” visas.
- Page 9 Contact the retailer or our customer service department if the product requires 簡介 servicing. 感謝閣下選用 Oregon Scientific 的METEO 氣象預報手錶 • Do not touch the exposed electronic circuitry, as there is (RA121)。手錶附設即時時間、碼錶、鬧鐘、背光燈和按鍵 a danger of electric shock.
-
Page 10: 關於 Oregon Scientific (歐西亞)
• 不要用硬物刮劃液晶顯示幕,否則可能會損壞顯示屏。 • 更換電池時,使用本說明書指定的新電池。不要混合使 用新、舊電池或不同類型的電池。 注 本產品的技術規格和本使用說明書的內容如有變, 恕不 另行通知。 關於 OREGON SCIENTIFIC (歐西亞) 如要獲取更多 Oregon Scientific (歐西亞) 產品如數碼相机、 MP3播放机、 儿童電子學習產品、 投影時間顯示器、 健康 和健体產品、 天气預報儀和會議電話的資料, 請瀏覽我們 的网址 (www.oregonscientific.com)。Oregon Scientific (歐 西亞) 的网址亦包括于我們客戶服務部的聯絡方法、 常見問 題和客戶下載資料。 我們希望您能在 Oregon Scientific (歐西亞) 的网址找到需要 的資料,如您想直接與客戶服務部聯絡,請瀏覽我們的网址 www.oregonscientific.com/service/default.asp或致電美國電...
Need help?
Do you have a question about the METEO RA121 and is the answer not in the manual?
Questions and answers