
Related Manuals for MPMan MP77HD


Summary of Contents for MPMan MP77HD
- Page 1 For Model No.: MP77HD Portable HD Video Player with Touchscreen Instruction Manual Please read this instruction carefully before the ...
-
Page 2: Table Of Contents
Table of Contents THANK YOU ...................................... 3 GETTING TO KNOW YOUR PLAYER ..............................5 GETTING STARTED ................................... 11 PLAYING MEDIA FILES ..................................15 LISTENING TO FM RADIO ................................24 CONNECTING TO A COMPUTER ..............................26 CONNECTING TO A TV ................................... 28 MPMANAGER .................................... -
Page 3: Thank You
Thank You Congratulations on your purchase of the Video & MP3 player. This guide is provided to help you get started quickly with your player; please read it carefully and save it for future reference. Package Contents Please make sure that the items shown below are included in the package. Should an item be missing, please contact the local retailer from which you purchased this product. - Page 4 Features Experience video, music, photos, and text on a high-resolution Touchscreen Advanced processor supports a wide range of popular media formats Connect and enjoy 1080p HD video at home on your TV* Expandable memory with optional microSD card Rechargeable lithium-polymer battery provides 3 hours of video playback ** FM radio and calendar app included Integrated stereo speakers and 3.5 mm headphone jack USB 2.0 Hi-speed for fast file transfers...
-
Page 5: Getting To Know Your Player
Getting to Know Your Player Controls at a Glance Name Icon Action Description Power/Play [POW Press & Turn the player on or off. button hold [PLA Press Start, pause, or resume media playback. Escape button [ESC] Press Return to the previous screen. Press &... - Page 6 Name Icon Action Description Video Output Connect to a TV or other display. This connector connection carries video only; a separate connection is necessary for audio. An optional 3.5mm video output cable is required to make this connection. Headphone Connect a pair of headphones or earphones Output for private listening.
- Page 7 Remote Control at a Glance Acti Name Description 1 [HDM Pres Turn HDMI output on or off. OUT] 2 [PLA Pres Start, pause, or resume media playback. 3 [VOL Pres Decrease the volume level. –] [VOL Pres Increase the volume level. 5 [MEN Pres Display an option menu, if...
- Page 8 Acti Name Description Pres Forward: Scan forward s & quickly through the current hold track. 9 [DOW Pres Browse menu items.
- Page 9 Using the Remote Control Point the remote at the remote sensor of the photo frame at a distance of no more than 10ft and at an angle no greater than 45 degrees. Do not spill water on the remote control. Do not use the remote control for other equipment at the same time.
- Page 10 About the Touchscreen Your player comes equipped with an easy-to-use touchscreen which allows access to the player’s functions. Use your finger tip (or a stylus) to tap the area of the screen where a control icon is displayed. If you tap and hold an icon, it will register as a continuous button press.
-
Page 11: Getting Started
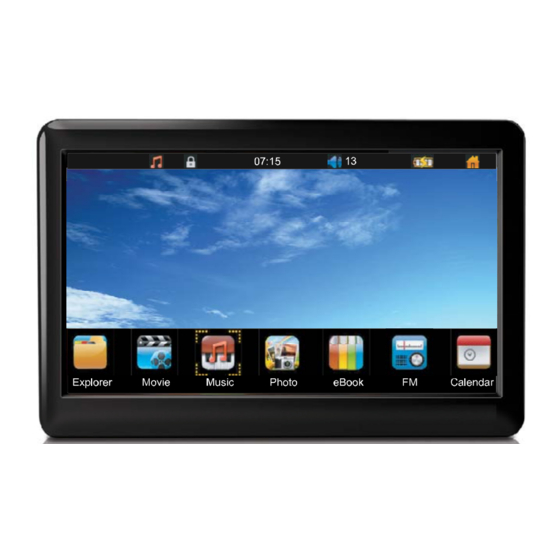
Getting Started Charging the Player The player comes with a built-in rechargeable lithium-polymer battery. Charge the battery fully before using it for the first time. If the player has not been used in a while, the battery may need to be recharged overnight (about 8 hours). - Page 12 few seconds, then turn the player on again. Home Screen at a Glance When you turn the player on, you will see the Home screen. 1. Music Indicate that a music is playing. playing indicator 2. Lock Tap the unlock icon < > to lock the player, the icon will change to < >, press and hold the [ESC] button to unlock the player.
- Page 13 screen 7. Function Press [PREV] or[NEXT] to browse the function mode list. modes Press [MENU] or tap the icon to launch the selected function mode. About the Function Modes Select a function mode from the Home screen to launch it. Press [PREV] or[NEXT] to browse the function mode list.
- Page 14 This guide will briefly describe the Movie, Music, Photo, and FM modes. For a description of all of the player’s function modes, please refer to the instruction manual.
-
Page 15: Playing Media Files
Playing Media Files Your player supports playback of movie, music, photo and text files stored on the player’s internal memory or on a microSD card. To learn how to transfer files onto your player, please refer to the section Connecting to a Computer. Movie Mode Select “Movie”... - Page 16 To browse files: Press [PREV] or [NEXT] to browse through the list. Press [MENU] or tap the selection to select an item. Select a folder to view its contents. (If the selected folder does not contain any movie files or folders, you will not be able to open it.) Select a movie file to play the file.
- Page 17 Press [NEXT] or tap < > to skip to the next file; press [PREV] or tap < > to skip to the previous file. Press and hold [PREV] or [NEXT], or tap < > or < > to quickly scan through the file. Some files may not allow scanning. Or you can hold the orange block on the progress bar and slide it left or right to skip the playback to a desired position.
- Page 18 Option Description Change the subtitle track. The file must support subtitle tracks. Adjust the screen brightness. Change the video display format. Or you can tap the icon < > directly on the video playing screen to change the setting. Change the repeat mode. Adjust the stereo balance.
- Page 19 Music Mode Select “Music” from the Home screen to find and play music files. The player will launch a file browser. Only music files will be displayed. Select “medialib” to find music stored on the player’s internal memory by category (e.g., Artist, Album, Genre, Star, Year, or All music).
- Page 20 If a memory card has been installed, select “SD card” to browse music files stored on the card. To browse files: Press [PREV] or [NEXT] to browse through the list. Press [MENU] or tap the selection to select an item. Select a folder to view its contents.
- Page 21 Press [NEXT] or tap < > to skip to the next file; press [PREV] or tap < > to skip to the previous file. Press and hold [PREV] or [NEXT], or hold < > or < > to quickly scan through the file. Or you can hold the orange block on the progress bar and slide it left or right to skip the playback to a desired position.
- Page 22 Option Description Or you can tap the < > icon directly on the muisc playing screen to change the setting. Change the visualize mode. (Lyric mode requires a file that supports lyrics. If a lyric track is not found, the player will default to spectrum mode.) Adjust the screen brightness.
- Page 23 If a memory card has been installed, select “SD card” to browse photo files stored on the card. To browse files: Press [PREV] or [NEXT] to browse through the list. Press [MENU] or tap the selection to select an item. Select a folder to view its contents.
- Page 24 Press [ESC] or tap the screen once again to exit the menu and return to the photo display screen. Option Description Stop playback and return to the file browser. Start slideshow mode. View transform options (zoom, rotate). View detailed file information. View photo thumbnails.
-
Page 25: Listening To Fm Radio
Listening to FM Radio Select “FM” from the Home screen to listen to FM radio broadcasts. In order to receive FM stations, a pair of headphones or earphones must be connected to the player’s headphone jack. To get started listening to the radio quickly: 1. - Page 26 Option Description Add the current station to the preset station list. Press [PREV] or [NEXT] to browse through the position list. Press [MENU] or tap the selection to save the station. Adjust the screen brightness.
-
Page 27: Connecting To A Computer
Connecting to a Computer Connect the player to a computer to transfer files to the player. The player’s battery will be charged when it is connected to a computer. The computer must be powered on and not in sleep mode in order to charge the battery. The player will not charge if it is connected to a low-power USB port. -
Page 28: Connecting To A Tv
Connecting to a TV Connect the player to a TV to enjoy your player in the comfort of your living room. Use the included HDMI cable to connect the player to a For component and composite video connections, additional cables are required. Before connecting your player to the TV, you will have to adjust a few display settings on the player. -
Page 29: Mpmanager
Mpmanager For Video and music synchronisation and conversion, please use MPMANAGER software supplied in the CD ROM. This software can be used also for UPDATE of your player MPMANAGER manual is included in your CDROM. ... -
Page 30: Specifications
Specifications Please visit www.cobyusa.com for the latest product information. Design, specifications, and manual are subject to change without notice. Memory Internal flash memory microSD card slot (max. 16GB supported) Display 7.0” Touchscreen (800 x 480) Play Modes Video Music Photo Text Video Output Mini HDMI, type C (1080p max) - Page 31 Power Rechargeable Li-poly battery Composite or component video output requires optional cables.
-
Page 32: Troubleshooting & Support
Troubleshooting & Support If you have a problem with this device, please check the troubleshooting instruction below. The player does not turn on. Ensure that the player is fully charged. Try charging the player overnight (8 hours). Reset the player. Press and hold [POWER] for several seconds to turn it off. Wait a few seconds, then turn the player on again. The buttons do not work. - Page 33 The file may be copy-protected and you no longer have authorization to play this file. If you feel this is in error, please contact the service from which you downloaded the file. The LCD characters are corrupted or something is wrong with the display. Ensure that the correct menu language has been set.
Need help?
Do you have a question about the MP77HD and is the answer not in the manual?
Questions and answers