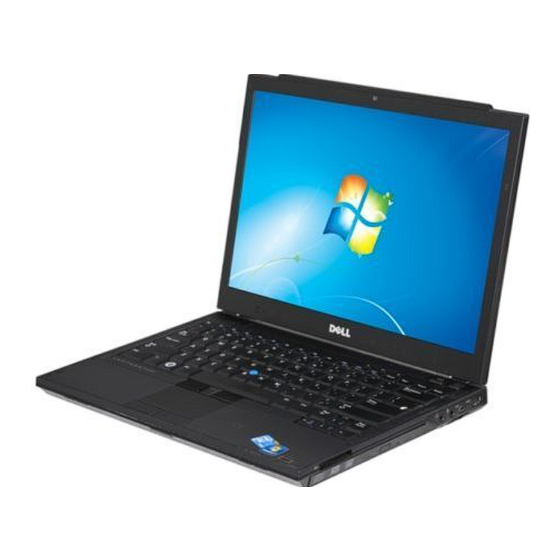
Page 1
For more information about your operating system, devices, and technologies, see the Dell Technology Guide at support.dell.com. Model PP13S w w w . d e l l . c o m | s u p p o r t . d e l l . c o m...
Page 2
ExpressCharge are trademarks of Dell Inc.; Bluetooth is a registered trademark owned by Bluetooth SIG, Inc., and is used by Dell under license; Core is a trademark and Intel, and iAMT are registered trademarks of Intel Corporation in the U.S. and other countries; Blu-ray Disc is a trademark of the Blu-ray Disc Association;...
Contents About Your Computer Front View Back View Battery Removal Wireless Switch and Dell™ Wi-Fi Catcher™ Network Locator Setting Up Your Computer Quick Setup Connecting to the Internet Setting Up Your Internet Connection Transferring Information to a New Computer Microsoft...
Page 4
Reinstalling Drivers and Utilities Restoring Your Operating System Using Microsoft Using Dell™ Factory Image Restore Using the Operating System Media Contents ....
Page 5
Returning Items for Warranty Repair or Credit Before You Call Contacting Dell Index .......
About Your Computer Front View camera (optional) keyboard status lights display keyboard About Your Computer...
Page 8
19 track stick buttons/touch pad buttons 21 ambient light sensor and microphone About Your Computer Dell™ Latitude ON™ button (optional) USB connector wireless switch and Dell Wi-Fi Catcher™ Network Locator button optical drive fingerprint reader (optional) track stick touch pad device status lights...
Do not block, push objects into, or allow dust to accumulate in the cooling vents. Do not store your Dell computer in a low-airflow environment, such as a closed briefcase, while it is running. Restricting the airflow can damage the computer or cause a fire.
Using an incompatible battery may increase the risk of fire or explosion. Replace the battery only with a compatible battery purchased from Dell. The battery is designed to work with your Dell™ computer. Do not use a battery from other computers with your computer.
Wireless Switch and Dell™ Wi-Fi Catcher™ Network Locator Use the wireless switch to enable or disable wireless network devices and the Wi-Fi Catcher Network Locator to locate networks. For information about connecting to the Internet, see "Connecting to the Internet" on page 16.
Before you begin any of the procedures in this section, read the safety information that shipped with your computer. For additional safety best practices information, see the Regulatory Compliance Homepage at www.dell.com/regulatory_compliance. CAUTION: The AC adapter works with electrical outlets worldwide. However, power connectors and power strips vary among countries.
Page 14
2 Connect the network cable. 3 Connect USB devices, such as a mouse or keyboard. 4 Connect IEEE 1394 devices, such as a DVD player. 5 Open the computer display and press the power button to turn on the computer. Setting Up Your Computer...
Page 15
6 Connect to the Internet. See "Connecting to the Internet" on page 16 for more information. Internet service wireless router laptop with wireless connection cable or DSL modem laptop with wired connection Setting Up Your Computer...
NOTE: If you cannot connect to the Internet, see the Dell Technology Guide. If you have successfully connected in the past, the ISP might have a service outage. Contact your ISP to check the service status, or try connecting again later.
NOTE: If you do not know which type of connection to select, click Help me choose or contact your ISP. 5 Follow the instructions on the screen and use the setup information provided by your ISP to complete the setup. ®...
Microsoft Windows Windows XP provides the Files and Settings Transfer Wizard to move data from a source computer to a new computer. You can transfer the data to the new computer over a network or serial connection, or you can store it on removable media, such as a writable CD, for transfer to the new computer.
Page 19
4 On the Which computer is this? screen, click Old Computer→ Next. 5 On the Select a transfer method screen, click the transfer method you prefer. 6 On the What do you want to transfer? screen, select the items you want to transfer and click Next.
Page 20
3 Click Finished and restart the new computer. NOTE: For more information about this procedure, search support.dell.com for document #154781 (What Are The Different Methods To Transfer Files From My Old Computer To My New Dell™ Computer Using the Microsoft Operating System?).
Specifications NOTE: Offerings may vary by region. For more information regarding the configuration of your computer, click Start→ Help and Support and select the option to view information about your computer. Processor Processor type L1 cache L2 cache Front-side bus frequency System Information Chipset Data bus width...
Page 22
Smart Card Read/write capabilities Cards supported Program technology supported Interface speed EMV level WHQL certification Compatibility Insert/eject cycles Secure Digital (SD) Memory Card Reader Cards supported Memory Memory module connector Memory module capacities Memory type Specifications reads and writes to all ISO 7816 1/2/3/4 microprocessor cards (T=0, T=1) 3 V and 5 V Java cards...
Page 23
® NOTE: To enable Intel Active Management Technology (iAMT DIMM in the memory connector labeled A. For more information, see your Service Manual at support.dell.com. Ports and Connectors Audio IEEE 1394 Mini-Card support (internal expansion slots)
Page 24
Communications (continued) Mobile Broadband Video Video type Data bus Video controller Video memory Video output Audio Audio type Audio controller Stereo conversion Interfaces: Internal External Speakers Internal speaker amplifier Internal microphone Volume controls Specifications full Mini-Card supported by Mobile Broadband full Mini- Card integrated on system board, hardware accelerated...
Page 25
Display Type (active-matrix TFT) Dimensions: Height Width Diagonal Maximum resolution Refresh rate Operating angle Viewing angles: Horizontal Vertical Pixel pitch Typical power consumption (panel with backlight) Keyboard Number of keys Layout Size Touch Pad X/Y position resolution Size: Width Height WXGA 178.8 mm (7.039 inches) 289.7 mm (11.41 inches)
Page 26
Battery Types Depth Height Width Weight Voltage Charge time (approximate): Computer off Operating time Life span (approximate) Specifications 3-cell (2.6Ahr) 28Whr/11.1VDC 3-cell (2.8Ahr) 30Whr/11.1VDC 6-cell (2.6Ahr) 56Whr/11.1VDC 6-cell (2.8Ahr) 60Whr/11.1VDC 6-cell (2.15Ahr) 48Whr/11.1VDC battery slice 28.8 mm (1.13 inches) (3 cell) 51.1 mm (2.01 inches) (6 cell) 200.3 mm (7.89 inches) (battery slice) 21.85 mm (0.86 inch) (3 cell and 6 cell)
Page 27
Battery (continued) Temperature range: Operating Storage Coin-cell battery AC Adapter Input voltage Input current (maximum) Input frequency Temperature range: Operating Storage PA-12 65 W Travel AC adapter: Output voltage Output current Height Width Depth Weight PA-3E 90 E-Series AC adapter: Output voltage Output current Height...
Page 28
Physical Height Width Depth Weight Environmental Temperature range: Operating Storage Relative humidity (maximum): Operating Storage Maximum vibration (using a random vibration spectrum that simulates user environment): Operating Storage Maximum shock (measured with hard drive in operating status and a 2-ms half-sine pulse for operating specification;...
Before you begin any of the procedures in this section, read the safety information that shipped with your computer. For additional safety best practices information, see the Regulatory Compliance Homepage at www.dell.com/regulatory_compliance. Tools Power Lights The two-color power-button light located on the front of the computer turns on and blinks or remains solid to indicate different states: •...
Page 30
If your computer beeps during start-up: 1 Write down the beep code. 2 Run the Dell Diagnostics to identify a more serious cause (see "Dell Diagnostics" on page 38). Code Description (repetitive short beeps) BIOS checksum failure. Possible system board failure.
A C H E D I S A B L E D D U E T O F A I L U R E microprocessor has failed. Contact Dell (see "Contacting Dell" on page 65). D R I V E C O N T R O L L E R F A I L U R E commands from the computer.
Page 32
F A I L E D I N I T I A L I Z A T I O N hard drive tests in the Dell Diagnostics (see "Dell Diagnostics" on page 38). The operation requires a hard drive in the bay before it R I V E N O T R E A D Y —...
Page 33
E Y B O A R D S T U C K K E Y F A I L U R E cable connection. Restart the computer, and avoid touching the keyboard or keys during the boot routine. Run the Stuck Key test in the Dell Diagnostics (see "Dell Diagnostics" on page 38).
Page 34
Contact Dell (see "Contacting Dell" on page 65). O T I M E R T I C K I N T E R R U P T malfunctioning. Run the System Set tests in the Dell Diagnostics (see "Dell Diagnostics" on page 38).
Page 35
H U T D O W N F A I L U R E — Run the System Set tests in the Dell Diagnostics (see "Dell Diagnostics" on page 38). I M E D A Y C L O C K L O S T P O W E R corrupted.
D A Y C L O C K S T O P P E D configuration settings may require recharging. Connect your computer to an electrical outlet to charge the battery. If the problem persists, contact Dell (see "Contacting Dell" on page 65).
Service Manual at support.dell.com. A R D D I S K D R I V E F A I L U R E POST. Check cables, swap hard disks, or see "Contacting Dell" on page 65 for assistance. A R D D I S K D R I V E R E A D F A I L U R E drive start test (see "Contacting Dell"...
NOTICE: The Dell Diagnostics works only on Dell computers. NOTE: The Dell Drivers and Utilities media is optional and may not ship with your computer. See your Service Manual at support.dell.com to review your computer’s configuration information, and ensure that the device that you want to test displays in the system setup program and is active.
Page 39
If you see a message stating that no diagnostics utility partition has been found, run the Dell Diagnostics from the Drivers and Utilities media. 4 Press any key to start the Dell Diagnostics from the diagnostics utility partition on your hard drive, and follow the instructions on the screen.
If an error message occurs in a program, see the program documentation. NOTE: The procedures in this document were written for the Windows default view, so they may not apply if you set your Dell computer to the Windows Classic view. Power Problems...
• Ensure that the processor power cable is securely connected to the system board power connector (see your Service Manual at support.dell.com). • Ensure that the main power cable and the front panel cable are securely connected to the system board connector (see your Service Manual at support.dell.com).
• Run the Dell Diagnostics (see "Dell Diagnostics" on page 38). F Y O U E X P E R I E N C E O T H E R M E M O R Y P R O B L E M S Reseat the memory modules (see your Service Manual at •...
Page 43
U R N T H E C O M P U T E R O F F key on your keyboard or moving your mouse, press and hold the power button for at least 8 to 10 seconds (until the computer turns off), and then restart your computer.
Start menu Dell Technical Update Service The Dell Technical Update service provides proactive e-mail notification of software and hardware updates for your computer. The service is free and can be customized for content, format, and how frequently you receive notifications.
2 Ensure that the Show icon on the taskbar option is checked. NOTE: If the Dell Support Utility is not available from the Start menu, go to support.dell.com and download the software. The Dell Support Utility is customized for your computing environment.
Reinstalling Software Drivers Identifying Drivers If you experience a problem with any device, identify whether the driver is the source of your problem and, if necessary, update the driver. ® Microsoft Windows Vista 1 Click the Windows Vista Start button 2 Click Properties→...
NOTICE: The Dell Support website at support.dell.com and your Drivers and Utilities media provide approved drivers for Dell™ computers. If you install drivers obtained from other sources, your computer might not work correctly. Returning to a Previous Device Driver Version...
Page 49
Drivers and Utilities media and click Finish to restart the computer. 4 When you see the Windows desktop, reinsert the Drivers and Utilities media. 5 At the Welcome Dell System Owner screen, click Next. NOTE: The Drivers and Utilities program displays drivers only for hardware that came installed in your computer.
• Dell Factory Image Restore (available in Windows Vista) returns your hard drive to the operating state it was in when you purchased the computer. The program permanently deletes all data on the hard drive and removes any programs installed after you received the computer.
Page 51
NOTE: The procedures in this document were written for the Windows default view, so they may not apply if you set your Dell™ computer to the Windows Classic view. NOTE: Set your Dell™ computer to the Windows Classic view.
Using Dell Factory Image Restore permanently deletes all data on the hard drive and removes any programs or drivers installed after you received your computer. If possible, back up the data before using these options. Use Dell Factory Image Restore only if System Restore did not resolve your operating system problem.
Dell Factory Image Restore (Windows Vista Only) 1 Turn on the computer. When the Dell logo appears, press <F8> several times to access the Vista Advanced Boot Options Window. 2 Select Repair Your Computer. The System Recovery Options window appears.
Page 54
Before performing the installation, back up all data files on your primary hard drive. For conventional hard drive configurations, the primary hard drive is the first drive detected by the computer. To reinstall Windows, you need the Dell™ Operating System media and the Dell Drivers and Utilities media. NOTE:...
Code is located on your computer. • A diagnostic program for your computer • Drivers for your computer NOTE: Drivers and documentation updates can be found at support.dell.com. • Notebook System Software (NSS) • Readme files NOTE: Readme files may be included on...
Page 56
NOTE: Dell Latitude ON is an optional feature. Dell Latitude ON™ Reader Help File The Dell Latitude ON Reader Help file is available on your hard drive. Dell™ Systems Management Administrator's Guide The Dell Systems Management Administrator's Guide is available at support.dell.com.
Page 57
Document/Media/Label Contents ® ® Microsoft Windows License Label • Provides your operating system product key. Your Microsoft Windows License is located on your computer. Finding Information...
1 See "Troubleshooting Tips" on page 40 for information and procedures that pertain to the problem your computer is experiencing. 2 See "Dell Diagnostics" on page 38 for procedures on how to run Dell Diagnostics. 3 Fill out the "Diagnostics Checklist" on page 64.
Dell's support service is available to answer your questions about Dell™ hardware. Our support staff uses computer-based diagnostics to provide fast, accurate answers. To contact Dell's support service, see "Before You Call" on page 63, and then see the contact information for your region or go to support.dell.com. DellConnect™...
"Contacting Dell" on page 65. Automated Order-Status Service To check on the status of any Dell products that you have ordered, you can go to support.dell.com, or you can call the automated order-status service. A recording prompts you for the information needed to locate and report on your order.
If you need information about additional products available from Dell, or if you would like to place an order, visit the Dell website at www.dell.com. For the telephone number to call for your region or to speak to a sales specialist, see "Contacting Dell"...
Service Tag (located on the back or bottom of your computer). Remember to fill out the Diagnostics Checklist (see "Diagnostics Checklist" on page 64). If possible, turn on your computer before you call Dell for assistance and call from a telephone at or near the computer. You may be...
Page 64
Address: Phone number: Service Tag (bar code on the back or bottom of the computer): Express Service Code: Return Material Authorization Number (if provided by Dell support technician): Operating system and version: Devices: Expansion cards: Are you connected to a network? Yes No...
To contact Dell for sales, technical support, or customer service issues: 1 Visit support.dell.com, and verify your country or region in the Choose A Country/Region drop-down menu at the bottom of the page. 2 Click Contact Us on the left side of the page, and select the appropriate service or support link based on your need.
Technical Update Service, 44 Dell Diagnostics, 38 starting from the Drivers and Utilities media, 39 starting from your hard drive, 39 Dell Factory Image Restore, 53 Dell Latitude ON guide, 56 Dell Latitude ON Reader Help, 56 Dell Technology Guide, 56...
Page 68
15 overview, 15 Wi-Fi Catcher Network Locator, 11 wireless switch, 11 Notebook System Software, 55 operating system Dell Factory Image Restore, 52 media, 53 reinstalling, 55 System Restore, 50 Operating System media, 55 operating system product key, 57...
Page 69
43 reinstalling, 47 troubleshooting, 43-44 updates, 44 specifications, 21 smart card, 22 support, 59 contacting Dell, 65 DellConnect, 60 online services, 60 regional, 60 technical support and customer service, 60 support information, 56 System Restore, 50 enabling, 52...
Page 70
9 front, 7 warranty information, 56 Wi-Fi Catcher Network Locator, 11 Windows License label, 57 Windows Vista Dell Factory Image Restore, 52-53 Device Driver Rollback, 48 Program Compatibility wizard, 43 reinstalling, 55 returning to a previous device driver version, 48...