Advertisement
WARNING
DO BE cautious that the rigid items and plastic parts of the enhanced child restraint system shall be so located and installed that they are not liable to become trapped by a movable seat or in the door of the vehicle.
DO NOT use the rearward facing enhanced child restraint systems in seating positions where there is an active frontal airbag installed.
To use this enhanced child restraint according to the UN Regulation No.129, your child must meet the following requirements.
Rearward Facing:
Child height 40cm-105cm/child weight max. 22 kg;
Forward Facing:
Child height 100cm-145cm

DO NOT USE FORWARD FACING BEFORE THE CHILD'S AGE EXCEEDS 15 MONTHS (Refer to instructions).
When used for stature heights between 135cm and 145cm (Booster seat) might not fit in all vehicles, due to a low position of the vehicle roof at the side.
The enhanced child restraint may not fit in all approved vehicles when used in one of these positions.
Any straps holding the enhanced child restraint to the vehicle should be tight. Any straps restraining the child should be adjusted to the child's body, and straps should not be twisted.
DO NOT use any load bearing contact points other than those described in the instructions and marked on the enhanced child restraint.
After your child is placed in this enhanced child restraint, the safety belt must be used correctly.
Ensure that any lap strap is worn low down, so that the pelvis is firmly engaged, shall be stressed.
This enhanced child restraint should be replaced when it has been subject to violent stresses in an accident. An accident can cause damage to it that you cannot see.
Consider the danger of making any alterations or additions to the device without approval of the adequate authority, and the danger of not following closely to the installation instructions provided by the enhanced child restraint manufacturer.
Please keep this enhanced child restraint away from sunlight, otherwise it may be too hot for child's skin. Always touch the enhanced child restraint before placing child in it.
DO NOT leave your child unattended in the enhanced child restraint system.
Any luggage or other objects liable to cause injuries in the event of a collision shall be properly secured.
The enhanced child restraint system shall NOT BE USED without the soft goods.
The soft goods should not be replaced with any other than the one recommended by the manufacturer, because the soft goods constitutes an integral part of the restraint performance.
Please check if this enhanced child restraint can be installed properly in your vehicle before you purchase it.
NO enhanced child restraint can guarantee full protection from injury in an accident. However, proper use of this enhanced child restraint will reduce the risk of serious injury or death to your child.
DO NOT install this enhanced child restraint without following the instructions in this manual or you may put your child at serious risk of injury or death.
DO NOT use this enhanced child restraint if it has damaged or missing parts.
DO NOT have your child in large/oversized clothes because this may prevent your child from being, properly and securely fastened by the shoulder harness straps and the crotch strap between the legs.
Product Registration
Please record the model number and the manufactured date. You can find them on the back of the TRES lx.
To register your product please visit:
www.nunababy.com
Click the "Register Gear" link on the homepage.
Child Usage Requirements
This product is suitable for use with children who meet the following requirements:
DO NOT USE FORWARD FACING BEFORE THE CHILD'S AGE EXCEEDS 15 MONTHS
(Refer to instructions)
| Child's Size | Installation Mode | Figure for Installation | Reference Age | Seat Position | Infant Insert Instructions |
| 40cm-105cm/ ≤22kg | Rearward Facing Mode |  | <4 years | Position 5-6 | We recommend using the full infant insert while the baby is under 60cm and can be used until they outgrow the insert. The infant insert increases side impact protection. |
| 100cm-145cm/ 15-36kg | Forward Facing Mode |  | 3 years to 12 years | Position 1-4 | Remove infant insert and store harness in proper storage locations |
Rearward Facing Mode
For installation with 3-point-belt
- This is an Universal Belted Enhanced Child Restraint System. It is approved according to UN Regulation No. 129, for use primarily in "Universal seating positions" as indicated by vehicle manufacturers in the vehicle user's manual.
- If in doubt, consult either the Enhanced Child Restraint System manufacturer or the retailer.
Forward Facing Mode
For installation with 3-point-belt or 3-point-belt and ISO Connector
- This is an i-Size booster seat Enhanced Child Restraint System. It is approved according to UN Regulation No.129, for use primarily in "i-Size seating positions" as indicated by vehicle manufacturers in the vehicle user's manual.
- If in doubt, consult either the Enhanced Child Restraint System manufacturer or the retailer.
- When the applicable height is 135cm-145cm, it belongs "Specific vehicle booster seat".
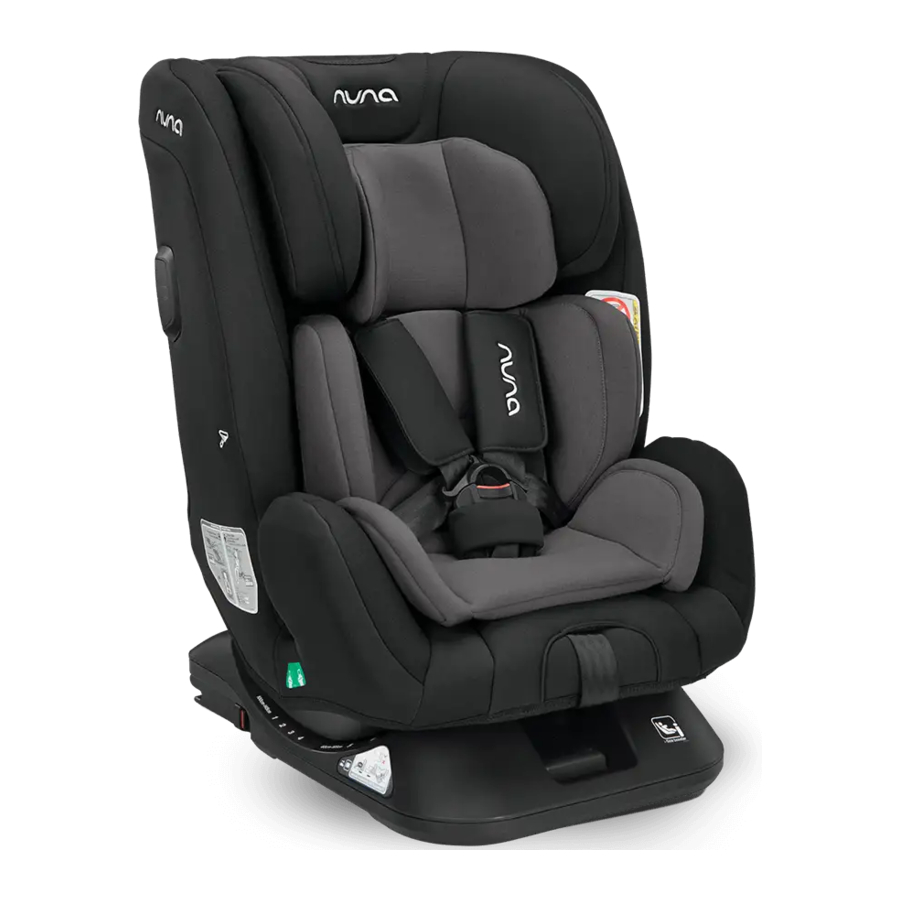
Parts List

- Head Support
- Seat Pad
- Buckle
- Webbing Adjuster
- ISO Connector Adjuster Button
- Recline Adjustment Handle
- Crotch Harness Cover
- Infant Insert
- Shoulder Harness Covers
- Head Support Adjustment Lever
- Lock-off
- Instruction Manual Storage Compartment
- Base
- ISOFIX attachment (ISO Connector)
- Vehicle Lap Belt Slots
- ISO Connector Guides
- Side Impact Shield
Installation Concerns
DO NOT install this enhanced child restraint on vehicle seats with lap belts only. (1)

This enhanced child restraint is suitable for vehicle seats with a 3-point retractor safety belt. (2) If your vehicle has ISOFIX anchor points, we recommend that you connect the ISO Connector attachment to the ISOFIX anchor points (Forward Facing Mode). (3)


DO NOT use the rearward facing system on the passenger seat with activated frontal airbag. (4) Death or serious injury may occur. Please reference vehicle owner's manual for more information.
DO NOT install this enhanced child restraint on vehicle seats that face sideways or rearward with respect to the moving direction of the vehicle.
Please refer to your vehicle owner's manual for recommended or suggested installation positions. This enhanced child restraint must be installed in the rear vehicle seat. (4)

DO NOT install this on movable vehicle seats during installation.
Product Use
Use Side Impact Shield
- The enhanced child restraint is delivered with detachable side impact shield. This side impact shield must be used on the door side of the vehicle for best protection. It must be connected on the outside of the enhanced child restraint. Installation shown in fig (5).

- Press the release button to remove side impact shield. (6)


Recline Adjustment
- Press the recline adjustment handle, and adjust the enhanced child restraint to the proper position. (7)

- The recline angles are shown as (8).


! There are two recline angles 5-6 for rearward facing mode.
! There are four recline angles 1-4 for forward facing mode.
Align the top reclining indicator with the bottom numbers for the desired recline position.
Height Adjustment for Head Support and Shoulder Harnesses
Please adjust the head support and shoulder harnesses to proper height according to the child's height.
! When used in rearward facing mode, the shoulder harness slots must be even with or just below the child's shoulders. (9)-1
If the shoulder harnesses are not at proper height, the child may be thrown from the enhanced child restraint in case of an accident.
! When used in forward facing mode, the shoulder belt guides must be even with or just above the child's shoulders. (9)-2


Squeeze the head support adjustment lever (10)-1, meanwhile pull up or push down the head support until it clicks into one of the 10 positions.
The head support positions are shown as (10)-2.
! As the headrest is adjusted up (from 6th-9th position), the sides of the child restraint automatically move outward to provide more shoulder room.
Rearward Facing Mode
(Child height 40cm-105cm/ Child weight ≤ 22kg)
! Please install the enhanced child restraint on the rear vehicle seat, and then put the child in the enhanced child restraint.
Installation for Rearward Facing Mode
! Please adjust the enhanced child restraint to the desired recline position (2 positions for rearward facing mode). Align the top reclining indicator with one of the bottom white numbers.
! Make sure the shoulder harness is adjusted to proper height before installing this enhanced child restraint.
! When installing and adjusting the safety belts, make sure that both the shoulder belt and the lap belt are not twisted and will not stop the safety belts from functioning properly.
- Pass the vehicle lap belt through the vehicle lap belt slots, then engage the vehicle buckle tongue into the buckle. (11)(12)


! Vehicle lap belt must pass underneath infant insert.
- Pass the vehicle shoulder belt through the two rear-facing vehicle belt slots at the back of the enhanced child restraint. (13)


! Open the belt lock off and insert the shoulder belt through it. (14)
! Ensure the belt lock off is completely closed when not in use to prevent injury, or damage to vehicle upholstery.
- Press the enhanced child restraint down firmly and pull the vehicle shoulder belt to fasten the enhanced child restraint securely. (15)-1(15)-2


! Ensure to close the lock-off after checking the enhanced child restraint is securely fastened. (15)-3(15)-4
! Keep your fingers off when closing the lock-off clips to avoid injury.
! The enhanced child restraint can not be used if the vehicle safety belt buckle (female buckle end) is too long to anchor the enhanced child restraint securely.
! Double check that the enhanced child restraint is securely installed and does not move on the vehicle seat.

Correctly assembled vehicle belt is shown as (16)
! Ensure that the vehicle lap belt passes through the vehicle lap belt slot. (16)-1
! Ensure that the vehicle shoulder belt passes through the rear-facing vehicle belt slot. (16)-2
! The vehicle buckle tongue is engaged with the buckle correctly, as (16)-3.
Securing your child using infant insert
 We recommend using the full infant insert while the baby is under 60cm and can be used until they outgrow the infant insert. The infant insert increases side impact protection. |  Detach the snaps on the head support to remove the head portion of the infant insert. |  Remove the head support portion of the infant insert when the child's head no longer fits comfortably. |
 Remove the body portion of the infant insert when the infant's shoulders no longer fit comfortably. | ||
 |  Remove the infant insert cushion by detaching the snaps to allow more space when the infant does not fit comfortably. The cushion can be used separately without being attached to the infant insert to bolster the infant's back for more comfort. |
- While pressing the harness adjustment button, pull completely the two shoulder harnesses of the enhanced child restraint. (17)

- Press the button to disengage the buckle. (18)

- Place the buckle tongues against the magnetic area on the outer side of the child restraint so that the tongues are held in place.(19)

- Engage the buckle.
The green indicator shows that it has been buckled in place. (20)

- Pull the adjustment webbing toward you to adjust it to the proper length and make sure your child is snugly secured. (21)


! After the child is seated, recheck whether the shoulder harnesses are at the proper height.
! Always keep child secured in harness and properly tightened by removing any slack.
Forward Facing Mode
(Child height 100cm-145cm)
Installation for Forward Facing Mode
! When using in the forward facing mode, please remove the infant insert, and place the shoulder harness straps, buckle and buckle tongues in the harness hideaway storage compartments.
! Please adjust the shoulder harnesses to proper length before storing the shoulder straps and buckle in their storage compartments.
! Please adjust the enhanced child restraint to the desired recline position. (4 positions for forward facing mode). Align the top reclining indicator with one of the bottom white numbers.
! While using and adjusting the vehicle seat belt, check that there are no twists in the vehicle seat belt that could cause your child fastened incorrectly.
- Press the button to disengage the buckle as (18).
- Remove Crotch Strap as shown in (37) and then the infant insert.


! When installing the enhanced child restraint in the forward facing mode, do not use the infant insert.
- Detach the snaps. (22)-1

- Lift the upper flap upward and pull the lower flap forward, and then store the shoulder straps in their storage compartments. (22)-2
- Pull the buckle to the back of the seat pad, and then store the buckle and buckle tongues in respective storage compartments. (22)-3 (22)-4
- Reattach the snaps to recover the seat pad. The recovered seat pad is shown as (23).


Installing ISO Connector attachments
- Insert ISO Connector attachment guides to assist with installation. The ISO Connector attachment guides can protect the surface of the vehicle seat from being torn. (24)

- Extend the ISO Connector attachments by pressing the adjustment button (25) and pulling out the attachments. (26)


! Make sure that both ISO Connector attachments are securely attached to their ISOFIX anchor points. The colors of the indicators on both ISO Connector attachments should be completely green. (27) The ISO Connector attachments must be attached and locked onto the ISOFIX anchor points.
! Check to make sure the enhanced child restraint is securely installed by pulling on the both ISO Connector attachments.

- Press the ISO Connector adjustment button and push the enhanced child restraint back against the vehicle seat until tight. (28)


Removing and storing ISO Connector attachments
- To remove from the vehicle, press the ISO Connector adjustment button (29)-1 and pull the base away from the seat. (29)-2

- To release the ISO connectors from the vehicle's ISOFIX anchor points, press and hold the front button (30-1), while you press the back one (30-2).

- To retract the ISO Connector attachments into the base press the ISO Connector adjustment button. (31)


Securing the child
- Please check whether the vehicle shoulder belt guides are at proper height when the child is in the enhanced child restraint.
- Position the shoulder belt through the shoulder belt guide and pass the lap belt through the vehicle lap belt slots. Engage the vehicle buckle and pull the vehicle belt to make sure it is tightened. (32)(33)


! Shoulder belt must pass through shoulder belt guide.
! Lap belt must pass through lap belt slots.
! NEVER use a 2-point vehicle belt (lap-belt only) to secure your child.
! DO NOT use shoulder belt loose or positioned under arm.
! DO NOT use shoulder belt behind child's back.
! DO NOT allow child to slide down in the enhanced child restraint in case of strangulation.
With vehicle 3-point belt and ISO Connector
- Installing ISO Connector attachments is showing in fig (24) - (28).
- Place the child in the enhanced child restraint and check whether the shoulder belt guides are at proper height.
- Position the shoulder belt through the shoulder belt guide and pass the lap belt through the vehicle lap belt slots. Engage the vehicle buckle and pull the vehicle belt to make sure it is tightened. (32)(33)
- Correctly assembled 3-point-belt and ISO Connector attachment is shown as (34).


! Make sure that both ISO Connector attachments are securely attached to the vehicle's ISOFIX anchor points. The colors of the indicators on both ISO Connector attachments should be completely green. (34)-1
! Check to make sure the enhanced child restraint is securely installed by pulling on both ISO Connector attachments.
! Shoulder belt must pass through shoulder belt guide. (34)-3
! Lap belt must pass through lap belt guides.
! The enhanced child restraint can not be used if the vehicle safety belt buckle (female buckle end) is too long to anchor the enhanced child restraint securely. (34)-2
! NEVER use a 2-point vehicle belt (lap-belt only) to secure your child.
! DO NOT use shoulder belt loose or positioned under arm.
! DO NOT use shoulder belt behind child's back.
! DO NOT allow child to slide down in the enhanced child restraint in case of strangulation.
Detach and Assemble Soft Goods
See images (35) - (43)
To assemble soft goods, reverse the steps above.


Cleaning and Maintenance
Please store it somewhere that the child can not access it.
Please wash the soft goods with cold water under 30°C.
DO NOT iron the soft goods.
DO NOT bleach or dry clean the soft goods.
DO NOT use undiluted neutral detergent, gasoline or other organic solvent to wash the enhanced child restraint. It may cause damage to the enhanced child restraint.
DO NOT twist the soft goods to dry with great force. It may leave the soft goods with wrinkles.
Please hang dry the soft goods in the shade.
Please remove the enhanced child restraint from the vehicle seat if not in use for a long period of time.
Contact
For replacement parts, service, or additional warranty questions, please contact our customer service department.
info@nunababy.com
www.nunababy.com
In the United Kingdom:
infouk@nunababy.com
www.nunababy.com
NUNA International B.V.
Van der Valk Boumanweg 178 C
2352JD Leiderdorp
The Netherlands
Documents / Resources
References
Download manual
Here you can download full pdf version of manual, it may contain additional safety instructions, warranty information, FCC rules, etc.
Advertisement


Need help?
Do you have a question about the TRES LX and is the answer not in the manual?
Questions and answers