Table of Contents
Advertisement
Quick Links
TRUE
Congratulations!
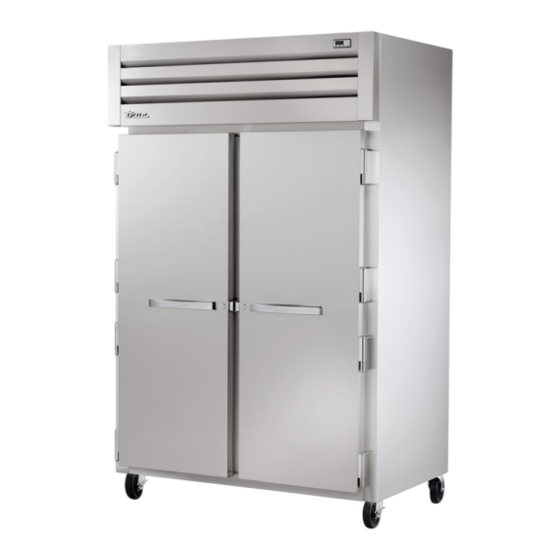
You have just purchased the finest commercial refrigerator
available. You can expect many years of trouble-free operation.
Table of Contents
Safety Precautions & Proper Disposal ......................................................3
Ownership .........................................................................................................4
Cabinet Specification & Location ..............................................................4
Notice to Customer ........................................................................................4
Wire Gauge Chart ............................................................................................4
Uncrating ............................................................................................................5
Leveling Leg, 6" Leveling Leg & Castor Installation ............................6
Leveling & Sealing the Cabinet to the Floor .........................................7
Electrical Installation & Safety ....................................................................8
Shelf Installation ..............................................................................................9
Heated Drain Pan Installation (Previous Design) .............................. 14
Heated Drain Pan Installation (Current Design) ................................ 15
Startup, Temperature Control & Light Switch Location ................. 16
General Sequence of Operation .............................................................17
Condenser Coil Cleaning ........................................................................... 18
Servicing & Replacing Components...................................................... 21
Warranty
Warranty ..........................................................................................................23
TRUE MANUFACTURING CO., INC.
2001 East Terra Lane • O'Fallon, Missouri 63366-4434
(636)-240-2400 • FAX (636)-272-2408 • International FAX (636)272-7546 • (800)-325-6152
Parts Department (800)-424- TRUE • Parts Department FAX# (636)-272-9471
North America - Canada
and Caribbean
Warranty Phone: +1 855 878 9277
Warranty Fax: +1 636 980 8510
Technical Phone: +1 855 372 1368
Warranty Email:
warrantyinquiries@truemfg.com
Technical Email:
service@truemfg.com
7:00 - 7:00 CST Monday - Thursday.
7:00 - 6:00 Friday. 8:00 - 12:00 Saturday.
TEC_TM_141 | REV. A | EN
MANUFACTURING CO., INC.
Mexico
Phone: +52 555 804 6343/44
Toll Free in Mexico: 01 800 202 0687
service-mexicocity@truemfg.com
9:00 am - 5:30 pm M-F
Latin America
Phone: +56 232 13 3600
servicelatam@truemfg.com
9:00 am - 5:30 pm M-F
INSTALLATION MANUAL
STA1R-1G-HC
INSTALLATION MANUAL
UK, Ireland, Middle East,
European Union and
Africa and India
Commonwealth of
Independent States
Phone: +44 (0) 800 783 2049
service-emea@truemfg.com
Phone: +49 (0) 7622 6883 0
8:30 am - 5:00 pm M-F
service-emea@truemfg.com
8:00 am - 5:00 pm M-F
06/30/2022
SPEC SERIES
STR2R-2S-HC
STG2R-2G
SPEC SERIES
Original Instructions
Australia
Phone: +61 2 9618 9999
service-aus@truemfg.com
8:30 am - 5:00 pm M-F
*991338 *
Page 1 of 24
Advertisement
Table of Contents

Related Manuals for True STR2R-2S-HC


Summary of Contents for True STR2R-2S-HC
-
Page 1: Table Of Contents
TRUE MANUFACTURING CO., INC. 2001 East Terra Lane • O’Fallon, Missouri 63366-4434 Original Instructions (636)-240-2400 • FAX (636)-272-2408 • International FAX (636)272-7546 • (800)-325-6152 Parts Department (800)-424- TRUE • Parts Department FAX# (636)-272-9471 North America – Canada Mexico UK, Ireland, Middle East,... - Page 2 SPEC SERIES www.truemfg.com T HAN K YO U F O R YO U R PU R C H A S E Page 2 of 24 06/30/2022 TEC_TM_141 | REV. A | EN...
-
Page 3: Risk Of Child Entrapment
You have selected one of the finest commercial refrigeration units made. It is manufactured under strict quality controls with only the best quality materials available. Your TRUE cooler, when properly maintained, will give you many years of trouble-free service. WARNING –... -
Page 4: Prior To Installation Ownership
TRUE equipment. The cost of AMPS a professional installation is money well spent. Before you start to install your TRUE unit, carefully inspect it for freight damage. If damage is discovered, immediately file a claim with the delivery freight carrier. -
Page 5: Installation
SPEC SERIES www.truemfg.com Installation Uncrating Tools Required • Adjustable wrench • Phillips screwdriver • Level The following procedure is recommended for uncrating the unit: 1. Remove the outer packaging (cardboard and bubble wrap or Styrofoam corner and clear plastic). See fig. 1. Inspect for concealed damage. -
Page 6: Installing Leveling Legs
SPEC SERIES www.truemfg.com Installation (cont.) Cabinet Location Installing 6" Leveling Legs or Castors 1. Ensure that the drain hose or hoses are positioned in the pan. Adjustable legs will provide 6" (152 mm) of clearance under the cabinet. Castors provide cabinet mobility. 2. -
Page 7: Leveling & Sealing The Cabinet To The Floor
Position the level at the inside rear of the cabinet (the level Leveling should be placed parallel to the cabinet back). Level the Proper leveling of your TRUE cooler is critical to operating success cabinet. (for non-mobile models). Leveling impacts effective condensate c. -
Page 8: Electrical Installation & Safety
60 HZ USE ONLY! rating, correct immediately. Refer to cabinet data plate for this TRUE uses these types of NEMA plugs shown. If you DO NOT have voltage requirement. the proper outlet, have a licensed electrician verify and install the •... -
Page 9: Cabinet Setup
SPEC SERIES www.truemfg.com Cabinet Setup Shelf Installation True STR/STA/STG cabinets have four shelving/tray options. Kit #1 -- Angle Tray Slides Kit #2 -- Rod Tray Slides Kit #3 -- Universal Tray Slides Kit #4 -- Shelf Standards (shelf clips) Kit #1 -- Angle Tray Slides... - Page 10 SPEC SERIES www.truemfg.com Cabinet Setup (cont.) Angle/Rod/Universal Tray Installation (Kits #1, # 2 & #3) Required Tools • Flat Blade Screwdriver • Rubber/Plastic Mallet • Tape Measure Installation 1. Thread the provided hardware into the holes on the cabinet sidewall. Fig.
- Page 11 SPEC SERIES www.truemfg.com Cabinet Setup (cont.) Universal Tray Slides Angle & Rod Tray Slides Universal Tray Slides Kit #3 Angle & Rod Tray Slides Kits #1 & #2 Kit #3 Kits #1 & #2 18-1/8" (460 mm) 21-1/4" (540 mm) 18-1/8”...
- Page 12 SPEC SERIES www.truemfg.com Cabinet Setup (cont.) Fig. 7a. Installing kit #1 angle tray sides. Fig. 7b. Installing kit #2 rod tray sides. Fig. 7c. Installing kit #3 universal tray sides. Page 12 of 24 06/30/2022 TEC_TM_141 | REV. A | EN...
- Page 13 SPEC SERIES www.truemfg.com Cabinet Setup (cont.) Shelf Standard Installation (Kit #4) 1. With the provided hardware, secure the shelf standards to the cabinet side walls. Hook the shelf clips into the shelf standards. See fig. 1. 2. Push up on the bottom of the clip. See fig. 2. NOTE: You may need to squeeze or twist the bottom of the shelf clip for proper installation.
-
Page 14: Heated Drain Pan Installation (Previous Design)
SPEC SERIES www.truemfg.com Cabinet Setup (cont.) Heated Drain Pan Installation (Previous Design) STR/STA/STG1D Required Tools • 1/4" Hex Head Driver. • Socket Set • 3/4" Socket • Drill Fig. 1. Locate the box with the heated Fig. 2. HDP and HDP bracket. drain pan (HDP) and its components. -
Page 15: Heated Drain Pan Installation (Current Design)
SPEC SERIES www.truemfg.com Cabinet Setup (cont.) Heated Drain Pan Installation (Current Design) STR/STA/STG1D Required Tools • 1/4" Hex Head Driver. • Socket Set • 3/4" Socket • Drill Fig. 1. Locate the box with the heated Fig. 2. HDP and HDP bracket. drain pan (HDP) and its components. -
Page 16: Cabinet Operation
To control the light, press the up arrow recommended service agent. • Good air flow inside your TRUE unit is critical. Take care to prevent product from pressing against the sides or back wall and coming within 4" (101.6 mm) of the evaporator housing. -
Page 17: General Sequence Of Operation
SPEC SERIES www.truemfg.com Cabinet Operation (cont.) General Sequence of Operation—Refrigerator and Freezer Cabinets When the cabinet is plugged in... • Interior lights will illuminate on glass door models (see previous page for light switch location). • An electronic control with digital display will illuminate (if installed). •... -
Page 18: Maintenance, Care & Cleaning
SPEC SERIES www.truemfg.com Maintenance, Care & Cleaning CAUTION - Take care during operation, maintenance or repairs to avoid cuts or pinching from any cabinet part/component. Condenser Coil Cleaning When using electrical appliances, basic safety precautions should be followed, including the following: WARNING –... -
Page 19: Important Warranty Information
Important Warranty Information THE CLEANING OF THE CONDENSER IS NOT COVERED BY WARRANTY! If you have any questions, please contact your local TRUE Manufacturing Service Department. See the front cover for locations and contact information. • Condenser coils accumulate dirt and require cleaning every 30 days or as needed. -
Page 20: Stainless Steel Care & Cleaning & 8 Tips To Help Prevent Rust
SPEC SERIES www.truemfg.com Maintenance, Care & Cleaning (cont.) Stainless Steel Care & Cleaning 8 Tips to Help Prevent Rust on Stainless Steel CAUTION – DO NOT use any steel wool, abrasive or chlorine- Maintain the Cleanliness of Your Equipment based products to clean stainless steel surfaces. Avoid build-up of hard stains by cleaning frequently. -
Page 21: Cabinet Adjustments, Servicing & Component Replacement
SPEC SERIES www.truemfg.com Cabinet Adjustments, Servicing & Component Replacement NOTE: Any cabinet adjustments are to be made AFTER the cabinet has been verified level and properly supported. Servicing & Replacing Components • Replace component parts with original equipment manufacturer (OEM) components. •... -
Page 22: Door Adjustment
SPEC SERIES www.truemfg.com Cabinet Adjustments & Servicing (cont.) Door Adjustment If the doors need to be aligned, adjust the hinges on the cabinet and door as described below. After adjusting the hinges, be sure to adjust the lock latch as needed. Required Tool •... -
Page 23: Warranty
FAILURE TO CLEAN AND/OR MAINTAIN PRODUCT AS SET FORTH IN THE WARRANTY PACKET PROVIDED WITH THE UNIT. RELOCATION OF CABINET FOR REPAIR. True is not responsible for the cost to move a cabinet for any reason from its position of operation on the customer’ s premises to make a warranty repair. - Page 24 www.truemfg.com TEC_TM_141 | REV. A | EN 06/30/2022 Page 24 of 24...
Need help?
Do you have a question about the STR2R-2S-HC and is the answer not in the manual?
Questions and answers